Page 545 of 4378
�z
is riveted to the front wheel spindle.
�z protects the front wheel bearings and inboard surface of the front brake disc.
The pads:
�zare housed in the front disc brake caliper anchor plate.
�z are of a non- asbestos, non- metallic composition. �K�l�j . 3 �b�a
32003 Mustang Workshop Manual
17. 11. 2011file:///C:/Ford/2000 - 2004/tsocache/SHEF_4464/S3B~us~en~ ...
Page 546 of 4378
REMOVAL AND INSTALLATION
Pads
Removal
1. Remove brake master cylinder filler cap (2162). Check brake fluid level in brake master cylinder reservoir (2K478). Remove fluid until brake master cylinder reservoir is half full.
2. Raise and support the vehicle. For additional information, refer to Section 100 - 02 .
3. Remove the wheel and tire assembly. For additional information, refer to Section 204 - 04 .
4. CAUTION: Install new pads if worn to or past the specified thickness above the
metal backing plate or rivets. Install pads in complete axle sets.
Inspect the pads for wear and contamination.
5. Remove the caliper bolts. 1. Hold the guide pins stationary.
2. Remove and discard the caliper bolts.
SECTION 206-
03: Front Disc Brake 2003 Mustang Workshop Manual �K�l�j . 1 �b�a
72003 Mustang Workshop Manual
17. 11. 2011file:///C:/Ford/2000 - 2004/tsocache/SHEF_4464/S3B~us~en~ ...
Page 547 of 4378
6.
CAUTION: Do not pry in caliper sight hole to retract pistons as this can damage the
pistons and boots.
CAUTION: When removing the disc brake caliper (2B120), never allow it to hang
from the brake hose. Provide a suitable support.
Lift the caliper off the anchor plate (2B292).
7. Remove the pads and the pad slippers. 1. Remove the pads and verify thickness.
2. Remove and discard slippers. �K�l�j . 2 �b�a
72003 Mustang Workshop Manual
17. 11. 2011file:///C:/Ford/2000 - 2004/tsocache/SHEF_4464/S3B~us~en~ ...
Page 549 of 4378
10. Inspect the front disc brake anchor plate assembly.
�zCheck the guide pin boots for damage.
�z Check the guide pins for binding and damage.
�z Worn or damaged pins should be installed new.
Installation 1. CAUTION: Do not allow grease, oil, brake fluid or other contaminants to contact the
pad lining material. Do not install contaminated pads.
NOTE: Install all hardware supplied with pad kits.
Install the pads. 1. Install the new pad slippers.
2. Install the pads. �K�l�j . 4 �b�a
72003 Mustang Workshop Manual
17. 11. 2011file:///C:/Ford/2000 - 2004/tsocache/SHEF_4464/S3B~us~en~ ...
Page 553 of 4378
REMOVAL AND INSTALLATION
Brake Pads —
Cobra
Removal 1. Remove brake fluid in the master cylinder reservoir until the reservoir is half full.
2. Raise and support the vehicle. For additional information, refer to Section 100 - 02 .
3. Remove the tire and wheel assembly. For additional information, refer to Section 204 - 04 .
4. CAUTION: Install new pads if worn to or past the specified thickness above the
metal backing plate or rivets. Install new pads in complete axle sets.
Inspect the pads for wear and contamination.
5. Remove the caliper locating pin E- clip.
6. Remove the caliper locating pin.
SECTION 206-
03: Front Disc Brake 2003 Mustang Workshop Manual �K�l�j . 1 �b�a
42003 Mustang Workshop Manual
17. 11. 2011file:///C:/Ford/2000 - 2004/tsocache/SHEF_4464/S3B~us~en~ ...
Page 554 of 4378
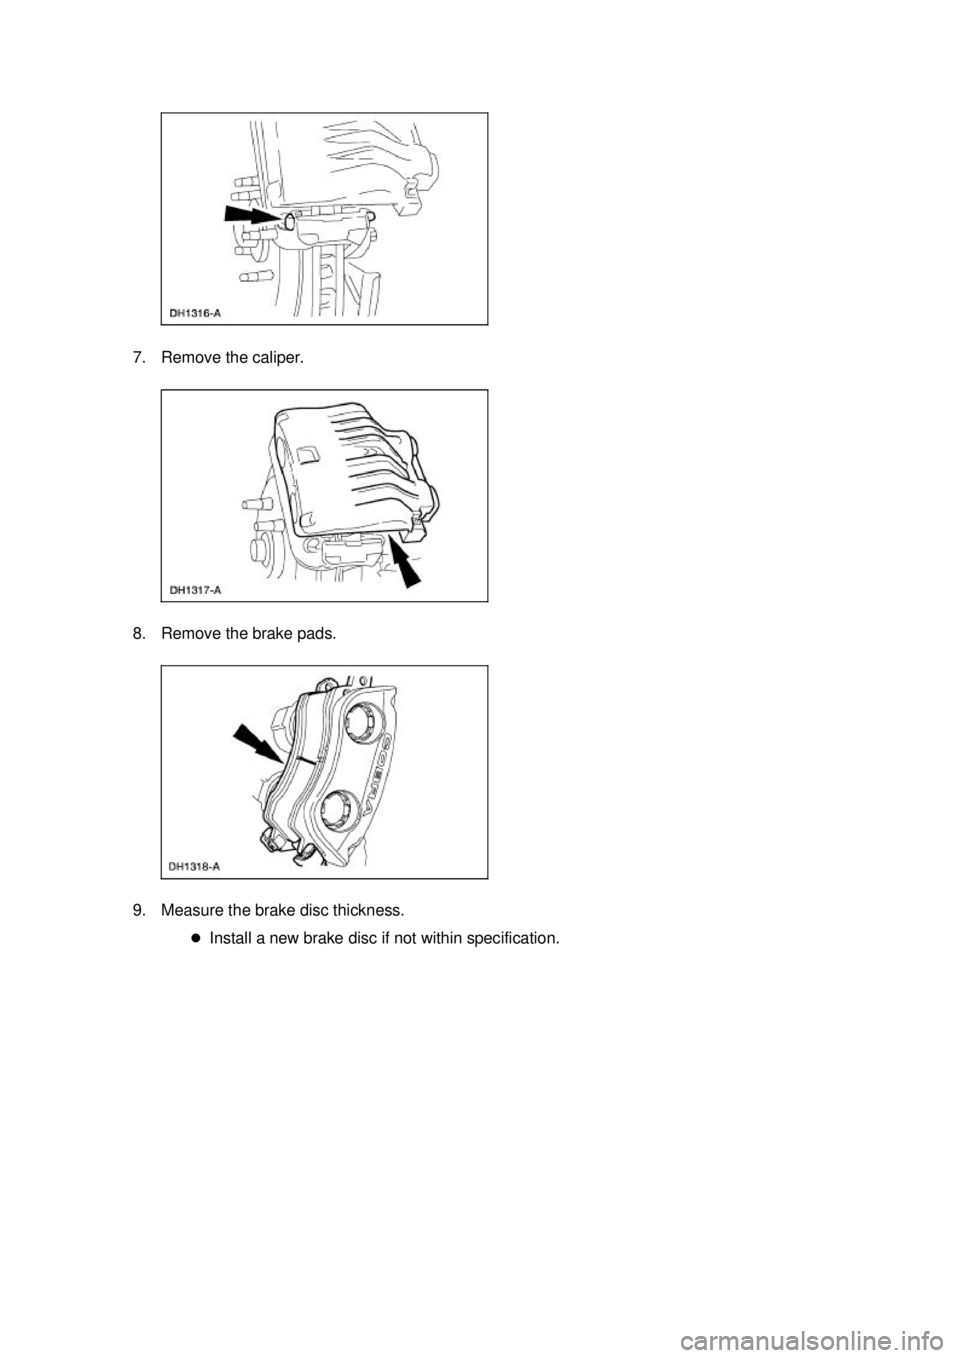
7. Remove the caliper.
8. Remove the brake pads.
9. Measure the brake disc thickness.
�zInstall a new brake disc if not within specification. �K�l�j . 2 �b�a
42003 Mustang Workshop Manual
17. 11. 2011file:///C:/Ford/2000 - 2004/tsocache/SHEF_4464/S3B~us~en~ ...
Page 562 of 4378
7. Remove the brake pads.
Installation 1. NOTE: Use new copper washers on front brake flow bolt.
Follow the removal procedure in reverse order. �zBleed the caliper. For additional information, refer to Section 206 - 00 . �K�l�j . 2 �b�a
32003 Mustang Workshop Manual
17. 11. 2011file:///C:/Ford/2000 - 2004/tsocache/SHEF_4464/S3B~us~en~ ...
Page 564 of 4378
REMOVAL AND INSTALLATION
Brake Caliper Anchor Plate —
Cobra
Removal 1. Remove the pads. For additional information, refer to Brake Pads — Cobra in this section.
2. Remove the anchor plate bolts.
Installation 1. Follow the removal procedure in reverse order.
SECTION 206-
03: Front Disc Brake 2003 Mustang Workshop Manual �K�l�j . 1 �b�a
22003 Mustang Workshop Manual
17. 11. 2011file:///C:/Ford/2000 - 2004/tsocache/SHEF_4464/S3B~us~en~ ...

. Check brake fluid level in brake master cylinder reservoir (2K478). Remove fluid until brake master cylinde")
, never allow it to hang
from the br")