Page 51 of 216
Changing the wiper blades
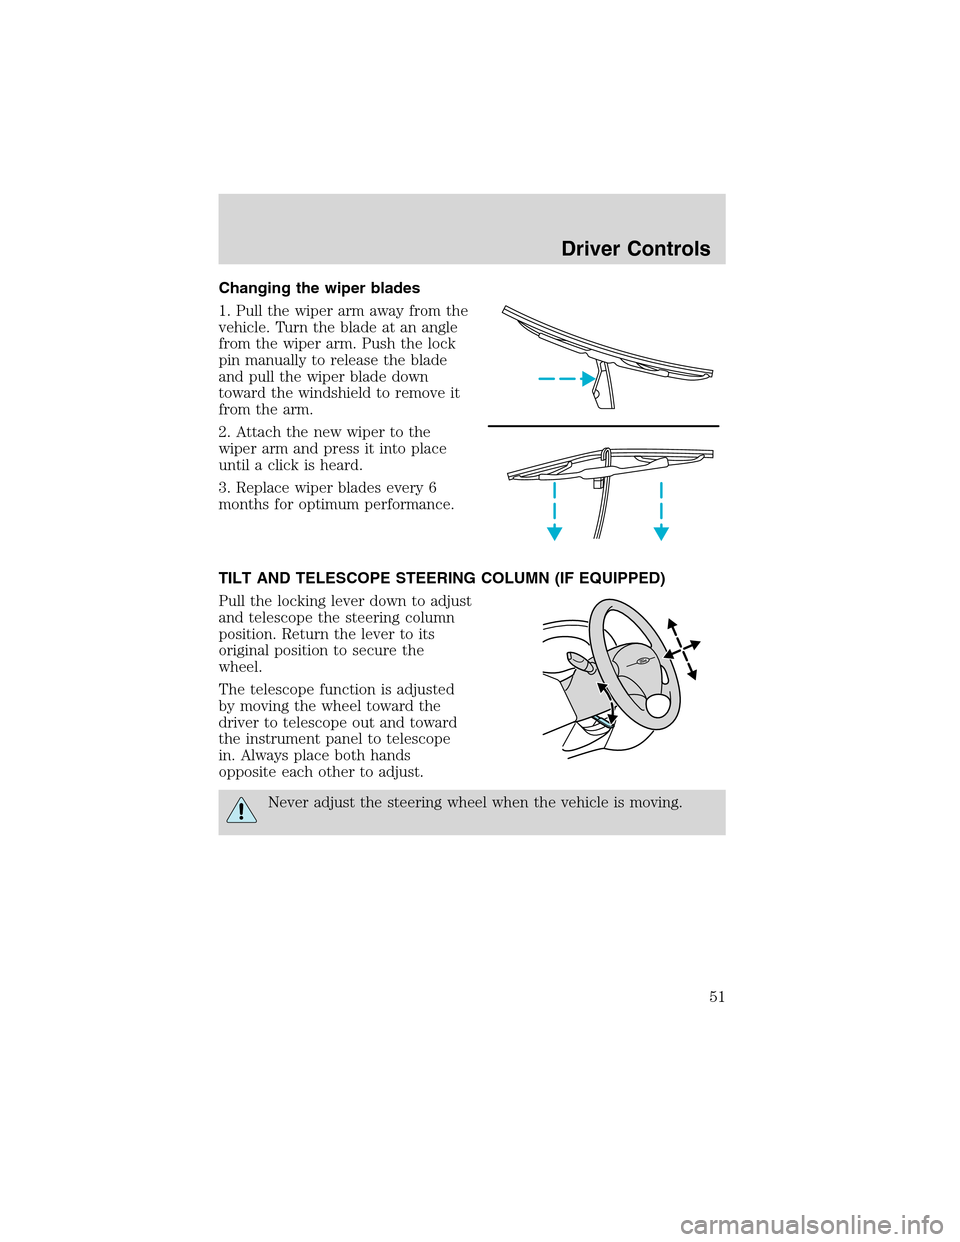
1. Pull the wiper arm away from the
vehicle. Turn the blade at an angle
from the wiper arm. Push the lock
pin manually to release the blade
and pull the wiper blade down
toward the windshield to remove it
from the arm.
2. Attach the new wiper to the
wiper arm and press it into place
until a click is heard.
3. Replace wiper blades every 6
months for optimum performance.
TILT AND TELESCOPE STEERING COLUMN (IF EQUIPPED)
Pull the locking lever down to adjust
and telescope the steering column
position. Return the lever to its
original position to secure the
wheel.
The telescope function is adjusted
by moving the wheel toward the
driver to telescope out and toward
the instrument panel to telescope
in. Always place both hands
opposite each other to adjust.
Never adjust the steering wheel when the vehicle is moving.
Driver Controls
51
Page 62 of 216
Locks and SecurityKEYS
The key operates all locks on your vehicle. In case of loss, replacement
keys are available from your dealer.
You should always carry a second key with you in a safe place in case
you require it in an emergency.
POWER DOOR LOCKS
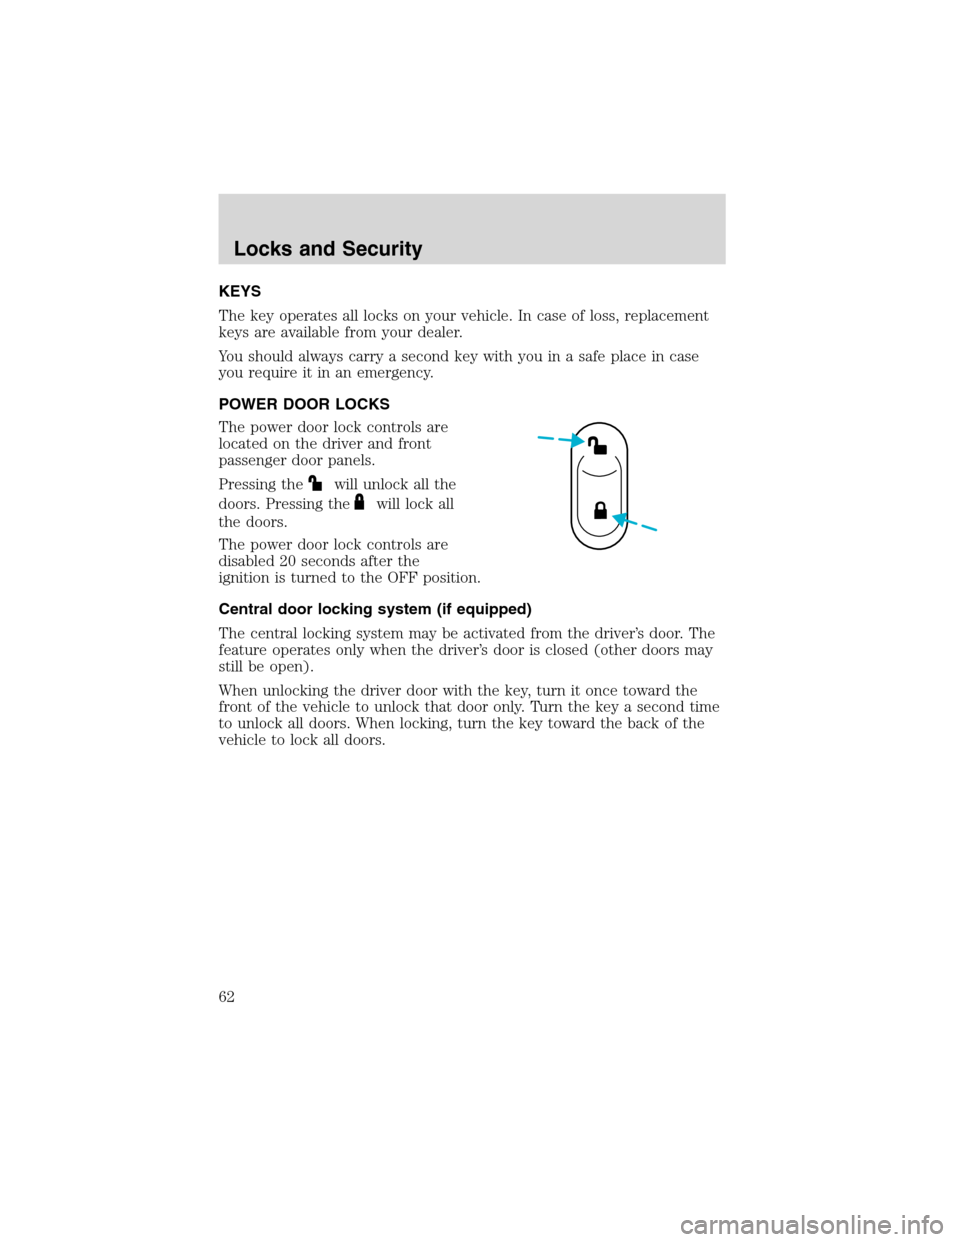
The power door lock controls are
located on the driver and front
passenger door panels.
Pressing the
will unlock all the
doors. Pressing the
will lock all
the doors.
The power door lock controls are
disabled 20 seconds after the
ignition is turned to the OFF position.
Central door locking system (if equipped)
The central locking system may be activated from the driver’s door. The
feature operates only when the driver’s door is closed (other doors may
still be open).
When unlocking the driver door with the key, turn it once toward the
front of the vehicle to unlock that door only. Turn the key a second time
to unlock all doors. When locking, turn the key toward the back of the
vehicle to lock all doors.
Locks and Security
62
Page 66 of 216
Locking the doors
•Pressand release to lock all the doors.Note:the parking lamps
will flash once.
If any of the doors are not properly closed the horn will make two quick
chirps.
This process will also activate the vehicle’s anti-theft system (if
equipped). For more information on arming the anti-theft system, refer
toSecurilock passive anti-theft systemin this chapter.
Opening the luggage compartment
Pressonce to open the luggage compartment.Note:This feature
will only operate with the ignition in the OFF or ACC positions.
•Ensure that the trunk is closed and latched before driving your
vehicle. Failure to properly latch the trunk may cause objects to fall
out or block the driver’s rear view.
Sounding a panic alarm
Press
to activate the alarm. Press again or turn the ignition to ACC
or ON to deactivate.
Note:The panic alarm will only operate when the ignition is in the OFF
position.
Replacing the battery
The remote entry transmitter uses one coin type three-volt lithium
battery CR2032 or equivalent. The typical operating range for your
remote entry transmitter is approximately 10 meters (33 feet). A
decrease in the operating range could be caused by:
•weather conditions,
•nearby radio towers,
•structures around the vehicle and
•other vehicles parked next to the vehicle.
Locks and Security
66
Page 69 of 216
•When the ignition is in the ON position, the indicator will glow for 3
seconds, then turn off, to indicate normal system functionality.
If a problem occurs with the SecuriLock�system, the indicator will flash
rapidly or glow steadily when the ignition is in the ON position. If this
occurs, the vehicle should be taken to an authorized dealer for service.
Replacement keys
If your keys are lost or stolen and you don’t have an extra coded key,
you will need to have your vehicle towed to a dealership. The key codes
need to be erased from your vehicle and new coded keys will need to be
programmed.
Replacing coded keys can be very costly. Store an extra programmed key
away from the vehicle in a safe place to help prevent any
inconveniences. Please visit an authorized dealer to purchase additional
spare or replacement keys.
Programming spare keys
You can program your own coded keys to your vehicle. Please read and
understand the entire procedure before you begin.
Tips:
•A maximum of eight keys can be coded to your vehicle.
•Only use Securilock�keys.
•You must have two previously programmed coded keys (keys that
already operate your vehicle’s engine) and the new unprogrammed
key(s) readily accessible.
•If two previously programmed coded keys are not available, you must
take your vehicle to your dealer to have the spare key(s)
programmed.
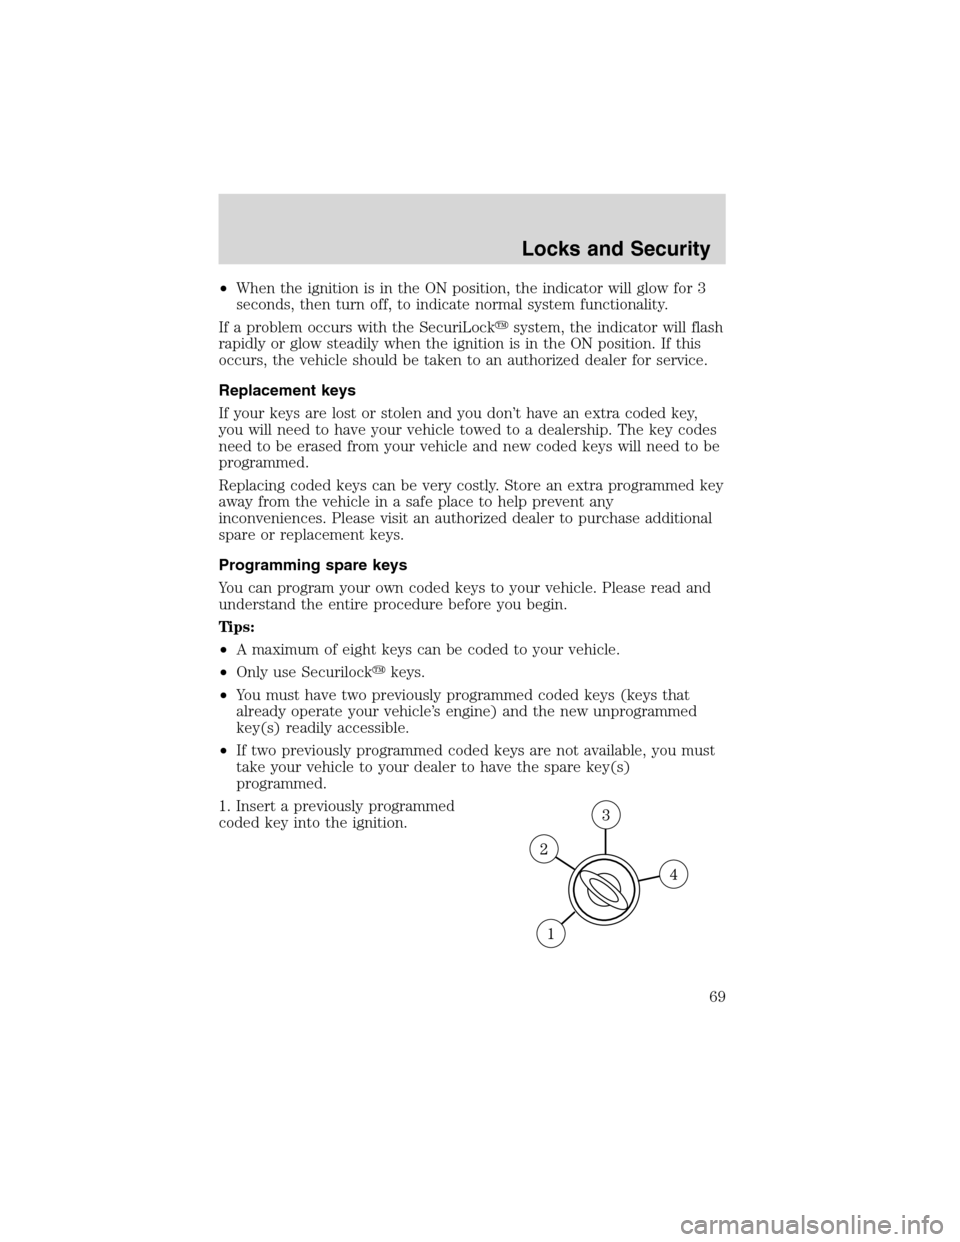
1. Insert a previously programmed
coded key into the ignition.
Locks and Security
69
Page 71 of 216
PERIMETER ALARM SYSTEM (IF EQUIPPED)
The perimeter anti-theft system will help prevent your vehicle from
unauthorized entry.
If there is any potential perimeter anti-theft problem with your vehicle,
ensureALL remote entry transmittersare taken to the dealership to
aid in troubleshooting.
Arming the system
When armed, this system will respond if unauthorized entry is
attempted. When unauthorized entry occurs, the system will flash the
parking lamps and will sound the horn.
The system is ready to arm whenever key is removed from the ignition.
Either of the following actions will prearm the alarm system:
•Press the
control on the remote entry transmitter.
•Lock the doors with the key in the key cylinder.
•Open a door and press the power door lock control to lock all the
doors, and then close the door.
Disarming the system
You can disarm the system by any of the following actions:
•Unlock the doors by pressing the
control on your remote entry
transmitter.
•Unlock the doors with a key. Turn the key full travel (toward the front
of the vehicle) to ensure the alarm disarms.
Triggering the anti-theft system
The armed system will be triggered if any door, liftgate/trunk or the hood
is opened without using the key or the remote entry transmitter.
Locks and Security
71
Page 75 of 216
REAR SEATS
Folding rear seat cushion forward
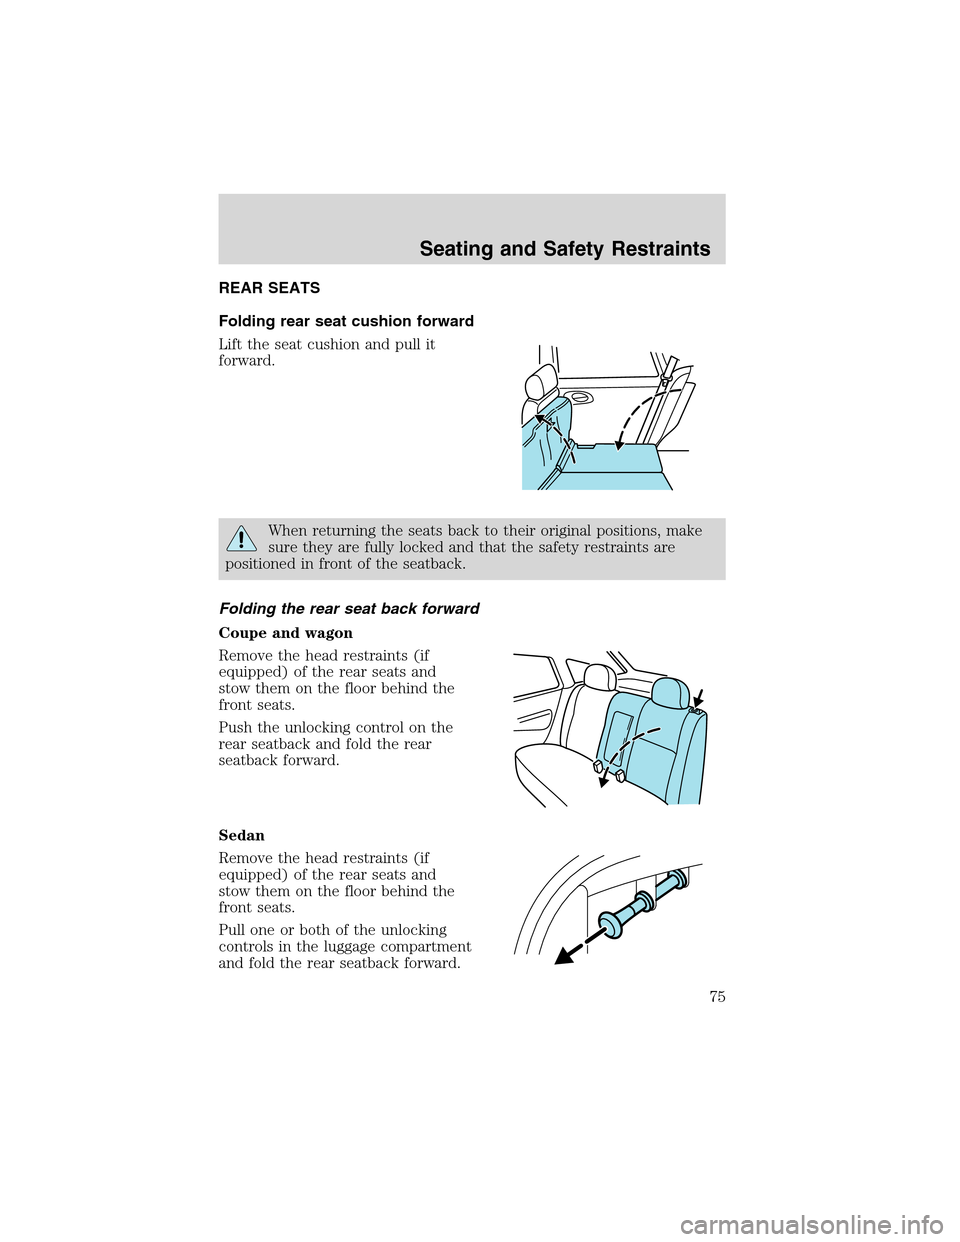
Lift the seat cushion and pull it
forward.
When returning the seats back to their original positions, make
sure they are fully locked and that the safety restraints are
positioned in front of the seatback.
Folding the rear seat back forward
Coupe and wagon
Remove the head restraints (if
equipped) of the rear seats and
stow them on the floor behind the
front seats.
Push the unlocking control on the
rear seatback and fold the rear
seatback forward.
Sedan
Remove the head restraints (if
equipped) of the rear seats and
stow them on the floor behind the
front seats.
Pull one or both of the unlocking
controls in the luggage compartment
and fold the rear seatback forward.
Seating and Safety Restraints
75
Page 76 of 216
Returning the seatback to the upright position
Fold back the seatback until it locks with a distinct“click.”Do not place
any objects behind the seat which could prevent the seat from locking.
When returning the seats back to their original positions, make
sure they are fully locked and that the safety restraints are
positioned in front of the seatback. Reinstall head restraints (if
equipped).
Note that the center rear seat belt cannot be pulled out until the
seatback has latched completely.
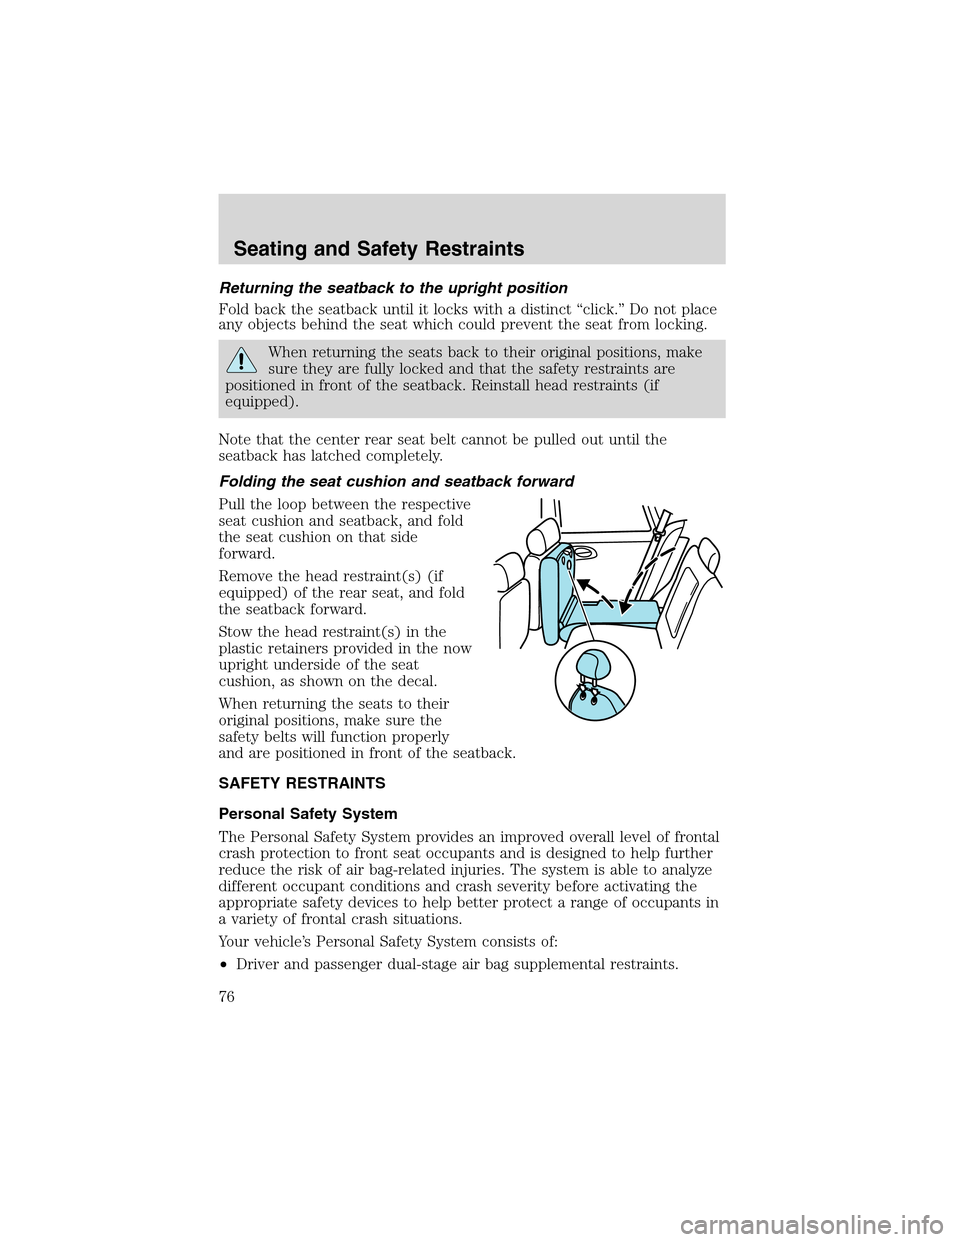
Folding the seat cushion and seatback forward
Pull the loop between the respective
seat cushion and seatback, and fold
the seat cushion on that side
forward.
Remove the head restraint(s) (if
equipped) of the rear seat, and fold
the seatback forward.
Stow the head restraint(s) in the
plastic retainers provided in the now
upright underside of the seat
cushion, as shown on the decal.
When returning the seats to their
original positions, make sure the
safety belts will function properly
and are positioned in front of the seatback.
SAFETY RESTRAINTS
Personal Safety System
The Personal Safety System provides an improved overall level of frontal
crash protection to front seat occupants and is designed to help further
reduce the risk of air bag-related injuries. The system is able to analyze
different occupant conditions and crash severity before activating the
appropriate safety devices to help better protect a range of occupants in
a variety of frontal crash situations.
Your vehicle’s Personal Safety System consists of:
•Driver and passenger dual-stage air bag supplemental restraints.
Seating and Safety Restraints
76
Page 99 of 216
The importance of shoulder belts
Using a booster without a shoulder belt increases the risk of a child’s
head hitting a hard surface in a collision. For this reason, you should
never use a booster seat with a lap belt only. It is best to use a booster
seat with lap/shoulder belts in the back seat- the safest place for children
to ride.
Follow all instructions provided by the manufacturer of the
booster seat.
Never put the shoulder belt under a child’s arm or behind the
back because it eliminates the protection for the upper part of
the body and may increase the risk of injury or death in a collision.
Never use pillows, books, or towels to boost a child. They can
slide around and increase the likelihood of injury or death in a
collision.
SAFETY SEATS FOR CHILDREN
Child and infant or child safety seats
Use a safety seat that is recommended for the size and weight of the
child. Carefully follow all of the manufacturer’s instructions with the
safety seat you put in your vehicle. If you do not install and use the
safety seat properly, the child may be injured in a sudden stop or
collision.
Seating and Safety Restraints
99