Page 23 of 320
These stations are temporarily stored in the memory preset controls
(until deactivated) and are accessed in the same manner as your original
presets.
To deactivate autoset and return to your audio system’s manually set
memory stations, press the AUTO control again.
Setting the clock
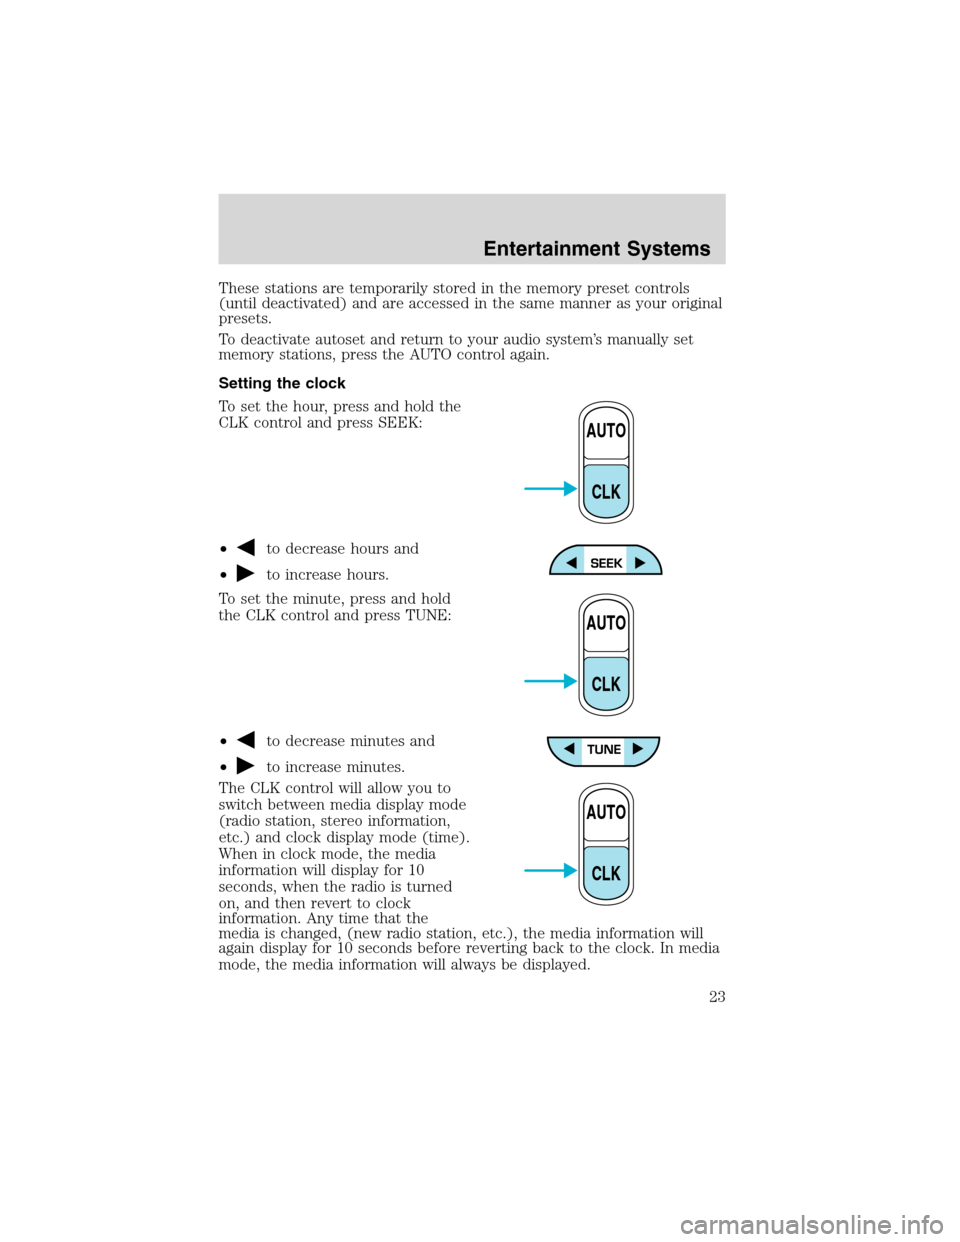
To set the hour, press and hold the
CLK control and press SEEK:
•
to decrease hours and
•
to increase hours.
To set the minute, press and hold
the CLK control and press TUNE:
•
to decrease minutes and
•
to increase minutes.
The CLK control will allow you to
switch between media display mode
(radio station, stereo information,
etc.) and clock display mode (time).
When in clock mode, the media
information will display for 10
seconds, when the radio is turned
on, and then revert to clock
information. Any time that the
media is changed, (new radio station, etc.), the media information will
again display for 10 seconds before reverting back to the clock. In media
mode, the media information will always be displayed.
AUTO
CLK
AUTO
CLK
AUTO
CLK
Entertainment Systems
23
Page 34 of 320
Dolby�noise reduction
Dolby�noise reduction operates in
tape mode. Dolby�noise reduction
reduces the amount of hiss and
static during tape playback.
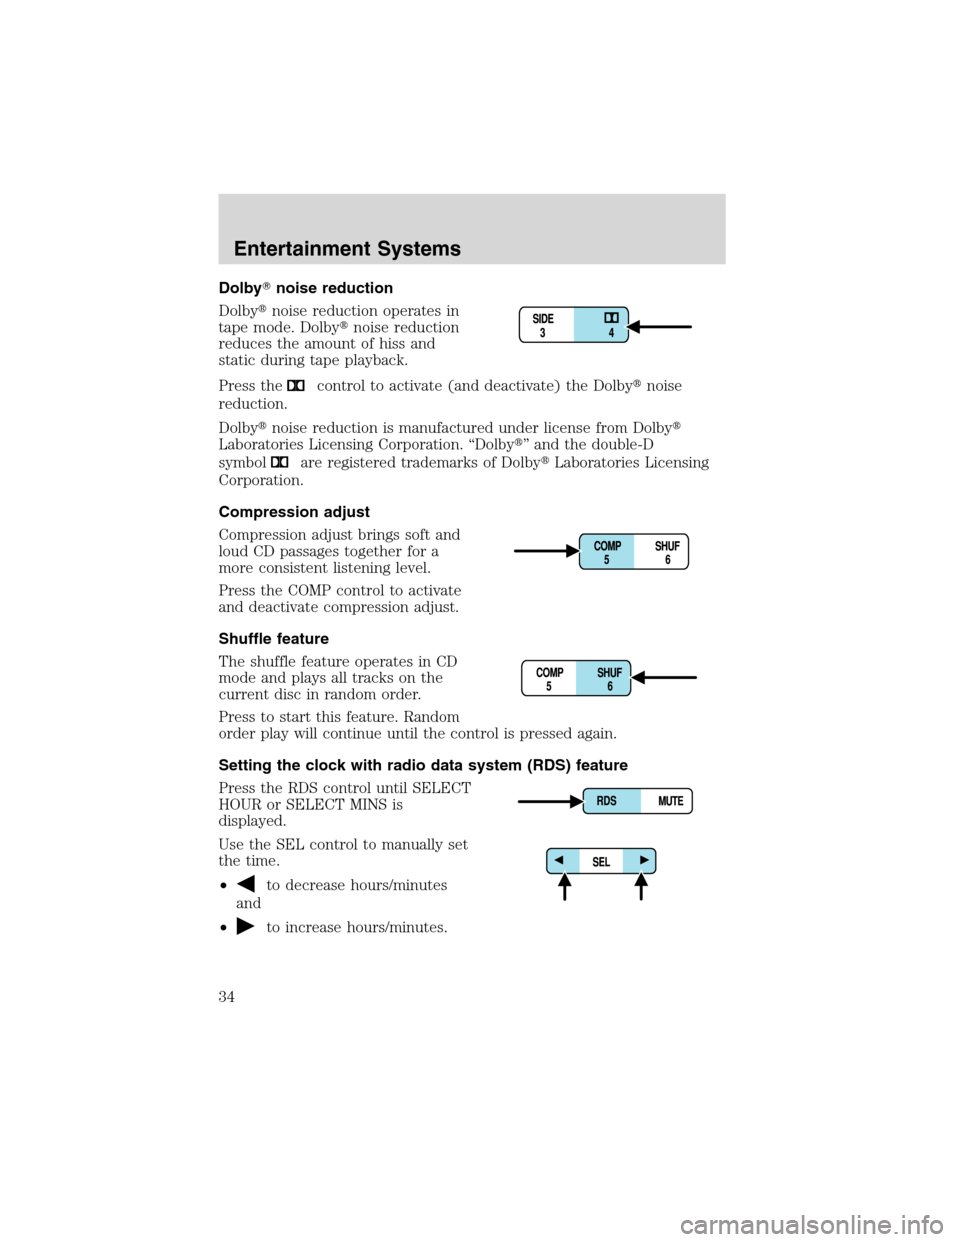
Press the
control to activate (and deactivate) the Dolby�noise
reduction.
Dolby�noise reduction is manufactured under license from Dolby�
Laboratories Licensing Corporation.“Dolby�”and the double-D
symbol
are registered trademarks of Dolby�Laboratories Licensing
Corporation.
Compression adjust
Compression adjust brings soft and
loud CD passages together for a
more consistent listening level.
Press the COMP control to activate
and deactivate compression adjust.
Shuffle feature
The shuffle feature operates in CD
mode and plays all tracks on the
current disc in random order.
Press to start this feature. Random
order play will continue until the control is pressed again.
Setting the clock with radio data system (RDS) feature
Press the RDS control until SELECT
HOUR or SELECT MINS is
displayed.
Use the SEL control to manually set
the time.
•
to decrease hours/minutes
and
•
to increase hours/minutes.
Entertainment Systems
34
Page 43 of 320
Setting the clock
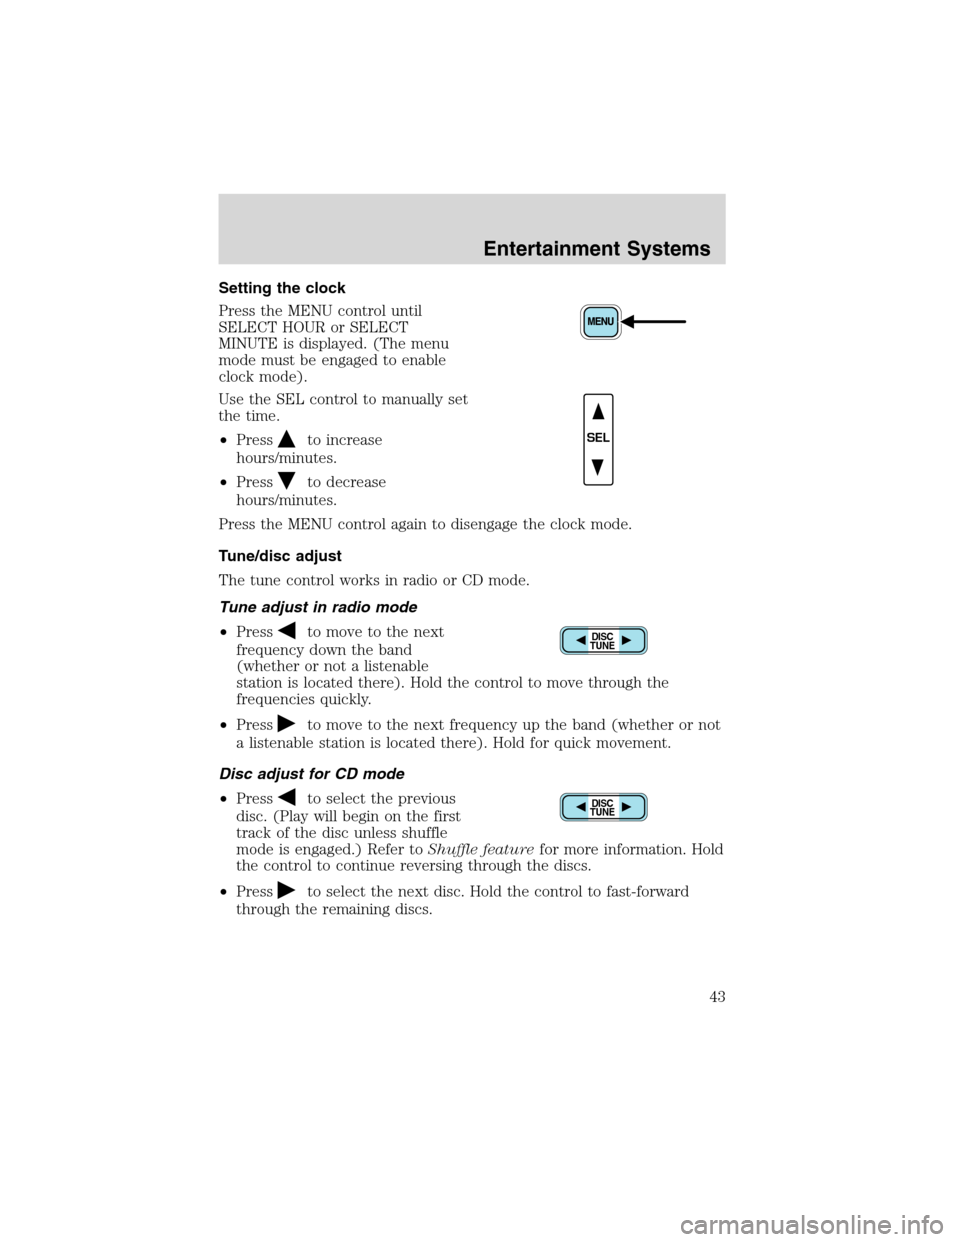
Press the MENU control until
SELECT HOUR or SELECT
MINUTE is displayed. (The menu
mode must be engaged to enable
clock mode).
Use the SEL control to manually set
the time.
•Press
to increase
hours/minutes.
•Press
to decrease
hours/minutes.
Press the MENU control again to disengage the clock mode.
Tune/disc adjust
The tune control works in radio or CD mode.
Tune adjust in radio mode
•Press
to move to the next
frequency down the band
(whether or not a listenable
station is located there). Hold the control to move through the
frequencies quickly.
•Press
to move to the next frequency up the band (whether or not
a listenable station is located there). Hold for quick movement.
Disc adjust for CD mode
•Press
to select the previous
disc. (Play will begin on the first
track of the disc unless shuffle
mode is engaged.) Refer toShuffle featurefor more information. Hold
the control to continue reversing through the discs.
•Press
to select the next disc. Hold the control to fast-forward
through the remaining discs.
SEL
DISC
TUNE
DISC
TUNE
Entertainment Systems
43
Page 47 of 320
Menu mode
The MENU control allows you to
access many different features
within your audio system. There are
three sets of menus available
depending upon which mode or feature is activated.
While in FM mode, two menus are available.If RDS is turned OFF, you
can access the following:
•SELECT HOURS—Refer toSetting the clock.
•SELECT MINUTES—Refer toSetting the clock.
•RDS OFF—Refer toRadio data system feature.
If RDS is turned ON, you can access the following:
•TRAFFIC ON/OFF-Refer toTraffic announcements.
•FIND type-Refer toProgram type.
•SHOW (NAME, TYPE, NONE)- Refer toRadio data system feature.
•RDS ON—Refer toRadio data system feature.
•SELECT HOURS—Refer toSetting the clock.
•SELECT MINUTES—Refer toSetting the clock.
When in CD mode, you can access: SELECT HOURS, SELECT MINUTES
or COMP ON/OFF.
SELECT HOURS, SELECT MINUTES—Allows you to adjust the hours
and minutes. Refer toSetting the clock.
TRAFFIC ON/OFF—Traffic announcements can be programmed as local
or distant. Refer toTraffic announcements.
RDS ON/OFF—This feature allows your audio system to receive text
information from RDS-equipped FM radio stations. Refer toRadio Data
System feature.
FIND type—Allows you to select your desired FM program type and
search for that selection.
SHOW—Allows you to select from NAME (displays the name of the
radio station), TYPE (displays the RDS program type: rock, jazz, etc.), or
NONE (deactivates the RDS display).
Entertainment Systems
47
Page 81 of 320
HEADLAMP CONTROL
Rotate the headlamp control to the
first position
to turn on the
parking lamps. Rotate to the second
position
to turn on the
headlamps.
Foglamp control (if equipped)
The headlamp control also operates
the foglamps. The foglamps can be
turned on when the headlamp
control is in the
,or
positions and the high beams are
not turned on.
Pull headlamp control towards you
to turn foglamps on. The foglamp
indicator light
will illuminate.
Autolamp control
The autolamp system provides light
sensitive automatic on-off control of
the exterior lights normally
controlled by the headlamp control.
The autolamp system also keeps the
lights on for approximately 20
seconds after the ignition switch is
turned to OFF.
•To turn autolamps on, rotate the control counterclockwise.
•To turn autolamps off, rotate the control clockwise to OFF.
A
A
Lights
81
Page 84 of 320
5. Locate the vertical adjuster on
each headlamp, then use a 10 mm
socket/wrench to turn the adjuster
either counterclockwise (to adjust
down) or clockwise (to adjust up)
aligning the upper edge of the light
pattern up to the horizontal line.
6. HORIZONTAL AIM IS NOT
REQUIRED FOR THIS VEHICLE
AND IS NON-ADJUSTABLE.
7. Repeat step 3–5 for the other headlamp.
8. Close the hood and turn off the lamps.
TURN SIGNAL CONTROL
•Push down to activate the left
turn signal.
•Push up to activate the right turn
signal.
INTERIOR LAMPS
Front row map lights (if equipped)
To turn on the map lights, press the
rear edge of the light.
Lights
84
Page 88 of 320
7. Once the bulb covers are
removed, the bulbs can be removed
by turning them counterclockwise
and then pulling the bulbs straight
out.
Handle a halogen headlamp bulb carefully and keep out of
children’s reach. Grasp the bulb only by its plastic base and do
not touch the glass. The oil from your hand could cause the bulb to
break the next time the headlamps are operated.
8. Insert the glass end of the new bulb into the headlamp assembly.
When the grooves in the plastic base are aligned, turn the new bulb
clockwise to install.
9. Reinstall the bulb covers.
10. Replace the headlamp assembly and tighten all three retainer bolts to
secure.
Replacing front parking lamp/turn/sidemarker signal bulbs
1. Make sure that the headlamp control is in the OFF position.
2. Open the hood.
3. Remove the two headlamp
assembly retainer bolts and lamp
assembly from the vehicle.
4. Loosen the vertical bolt on the
backside of the headlamp assembly.
Do not remove it.
Lights
88
Page 89 of 320
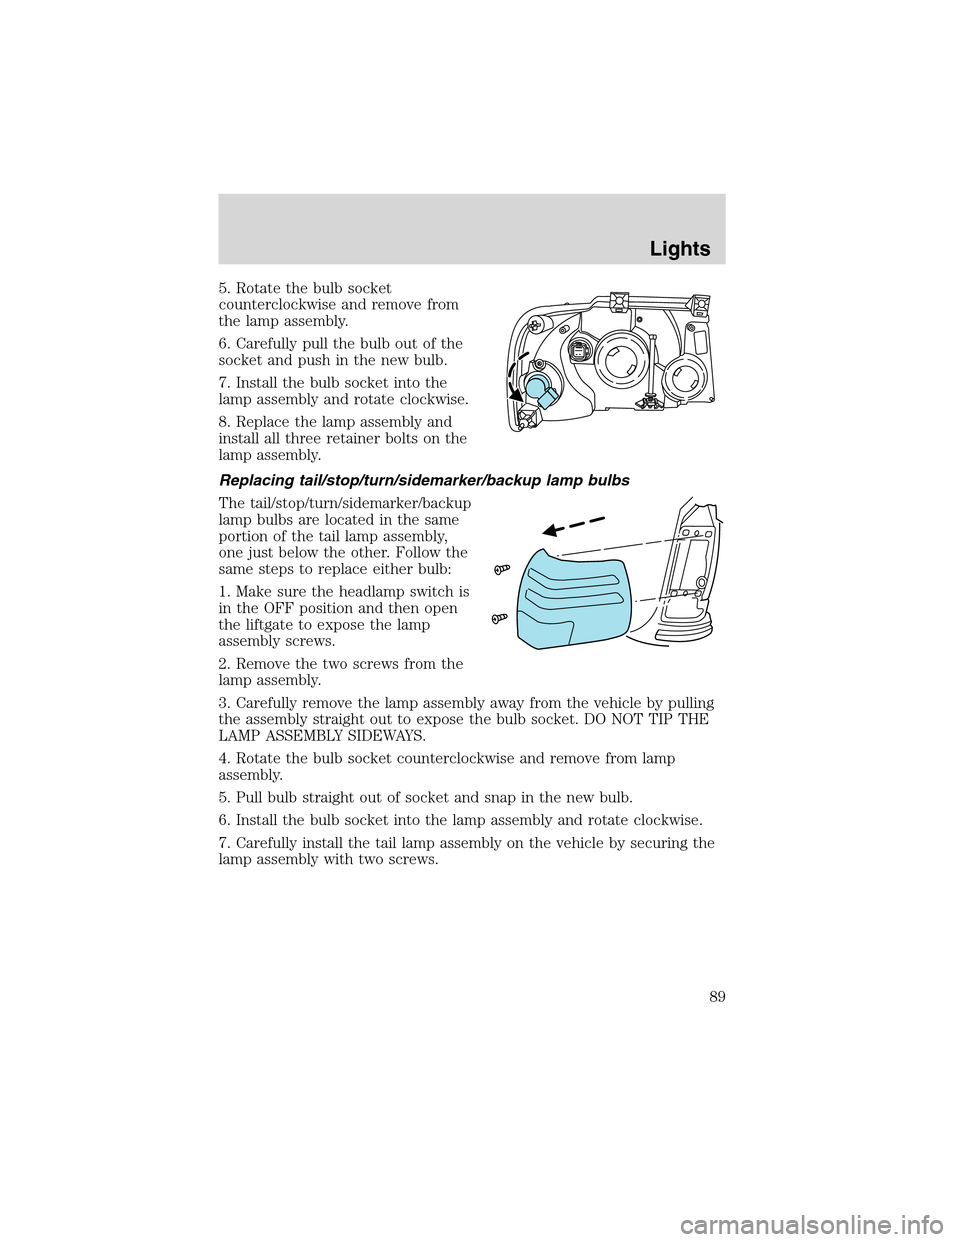
5. Rotate the bulb socket
counterclockwise and remove from
the lamp assembly.
6. Carefully pull the bulb out of the
socket and push in the new bulb.
7. Install the bulb socket into the
lamp assembly and rotate clockwise.
8. Replace the lamp assembly and
install all three retainer bolts on the
lamp assembly.
Replacing tail/stop/turn/sidemarker/backup lamp bulbs
The tail/stop/turn/sidemarker/backup
lamp bulbs are located in the same
portion of the tail lamp assembly,
one just below the other. Follow the
same steps to replace either bulb:
1. Make sure the headlamp switch is
in the OFF position and then open
the liftgate to expose the lamp
assembly screws.
2. Remove the two screws from the
lamp assembly.
3. Carefully remove the lamp assembly away from the vehicle by pulling
the assembly straight out to expose the bulb socket. DO NOT TIP THE
LAMP ASSEMBLY SIDEWAYS.
4. Rotate the bulb socket counterclockwise and remove from lamp
assembly.
5. Pull bulb straight out of socket and snap in the new bulb.
6. Install the bulb socket into the lamp assembly and rotate clockwise.
7. Carefully install the tail lamp assembly on the vehicle by securing the
lamp assembly with two screws.
Lights
89