Page 92 of 320
WINDSHIELD WIPER/WASHER CONTROLS
Rotate the windshield wiper control
to the desired interval, low or high
speed position.
The bars of varying length are for
intermittent wipers. When in this
position rotate the control upward
for fast intervals and downward for
slow intervals.
Push (tap) the end of the stalk
briefly for a single swipe (no wash).
Push and hold for three swipes with
wash. Push and hold for a longer
wash (up to ten seconds).
Rear window wiper/washer controls
For rear wiper operation, rotate the
rear window wiper and washer
control to the desired position.
Select:
INT 2—Normal speed operation of
rear wiper.
INT 1—Intermittent operation of
rear wiper.
OFF—Rear wiper and washer off.
For rear wash cycle, rotate (and
hold as desired) the rear wiper/washer control to either
position.
From either position, the control will automatically return to the INT 2
or OFF position.
Driver Controls
92
Page 93 of 320

Speed dependent wipers
When the windshield wiper control is set on the intermittent settings,
speed-sensitive front wipers automatically adjust as the vehicle’s speed
changes.
Windshield wiper blades
Check the wiper blades for wear at least twice a year or when they seem
less effective. Substances such as tree sap and some hot wax treatments
used by commercial car washes reduce the effectiveness of wiper blades.
Checking the wiper blades
If the wiper blades do not wipe properly, clean both the windshield and
wiper blades using undiluted windshield wiper solution or a mild
detergent. Rinse thoroughly with clean water. To avoid damaging the
blades, do not use fuel, kerosene, paint thinner or other solvents.
Changing the wiper blades
It is recommended that wiper blades are renewed before winter.
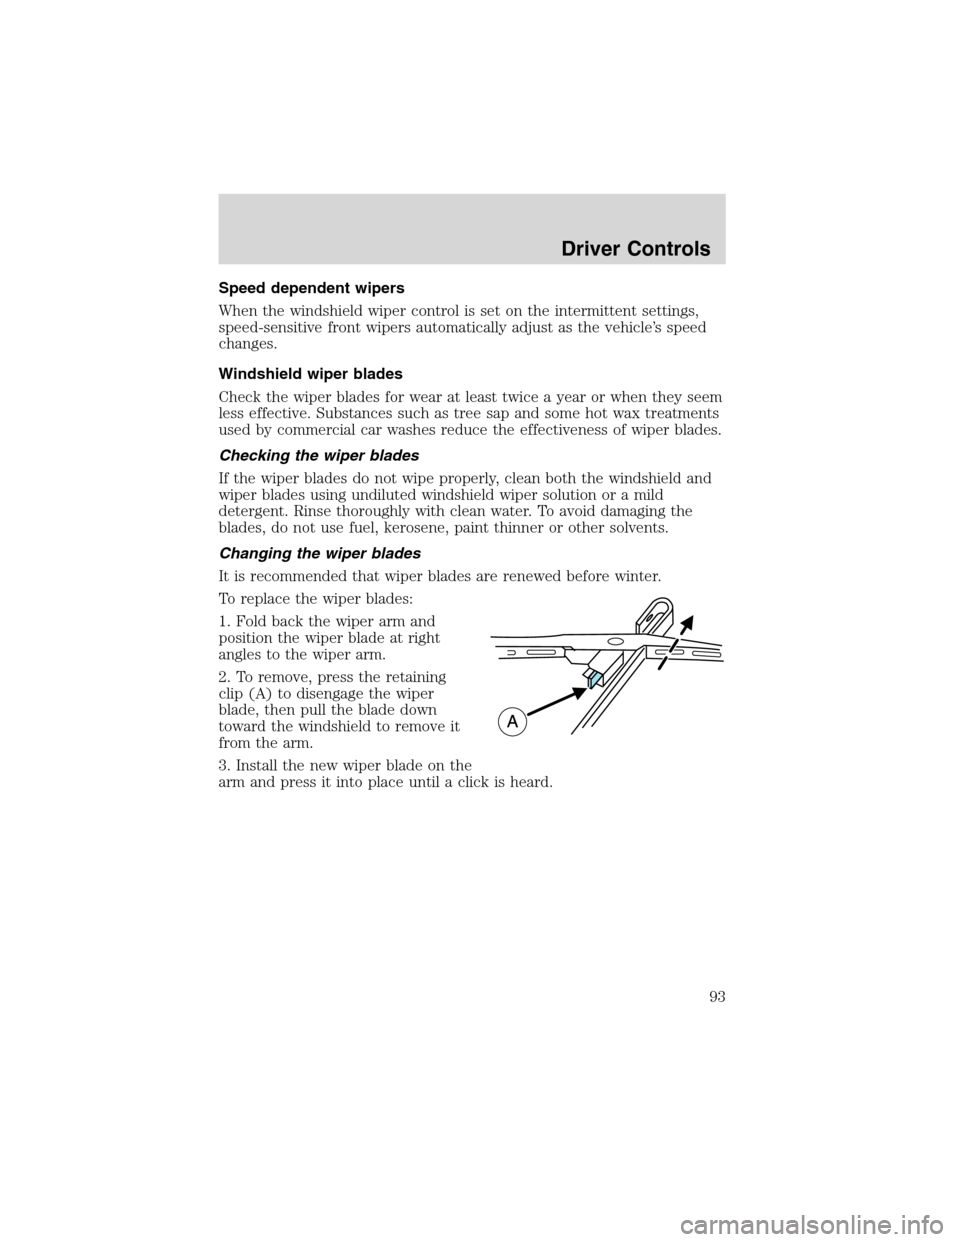
To replace the wiper blades:
1. Fold back the wiper arm and
position the wiper blade at right
angles to the wiper arm.
2. To remove, press the retaining
clip (A) to disengage the wiper
blade, then pull the blade down
toward the windshield to remove it
from the arm.
3. Install the new wiper blade on the
arm and press it into place until a click is heard.
Driver Controls
93
Page 113 of 320

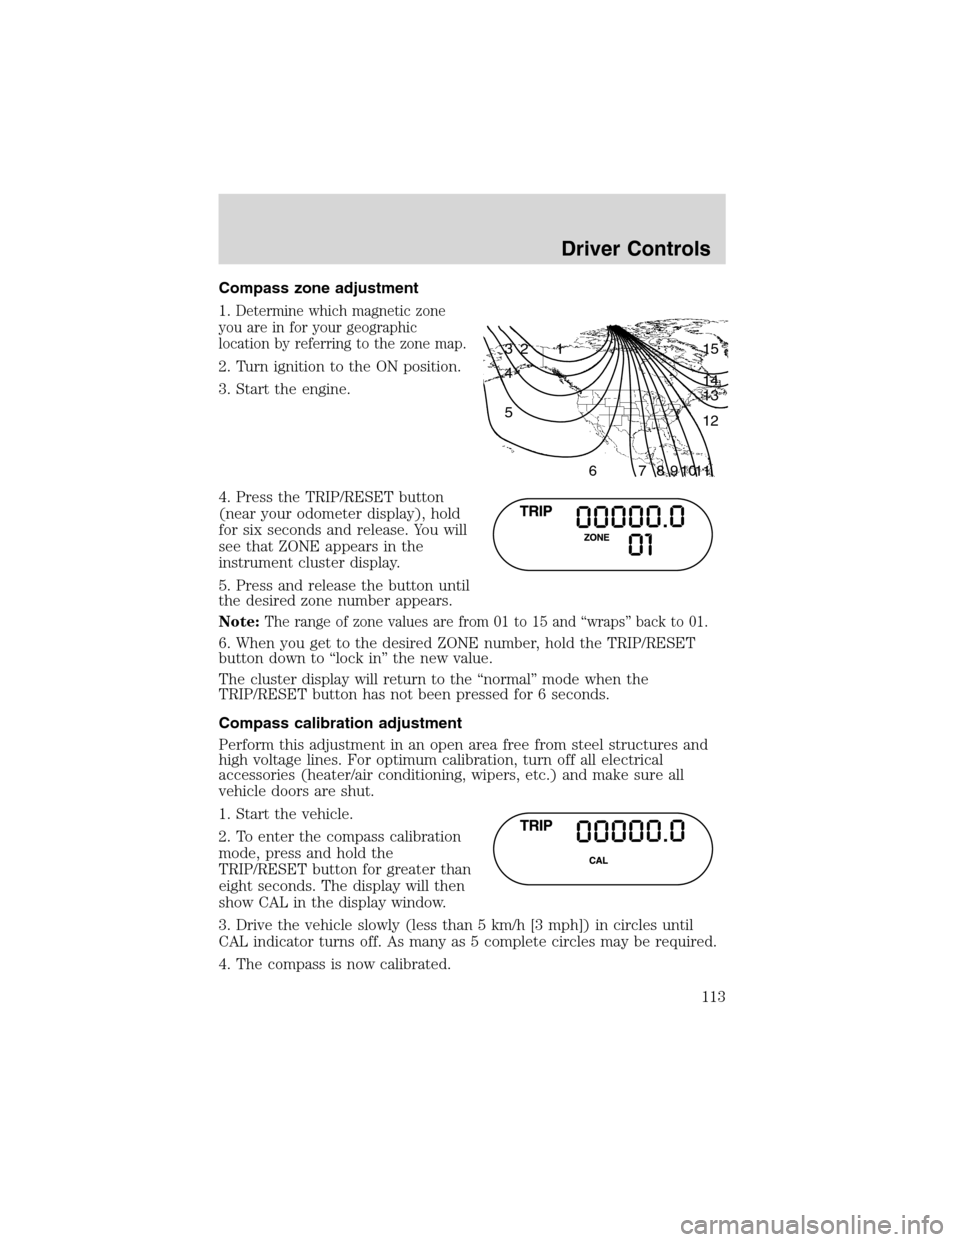
Compass zone adjustment
1.
Determine which magnetic zone
you are in for your geographic
location by referring to the zone map.
2. Turn ignition to the ON position.
3. Start the engine.
4. Press the TRIP/RESET button
(near your odometer display), hold
for six seconds and release. You will
see that ZONE appears in the
instrument cluster display.
5. Press and release the button until
the desired zone number appears.
Note:
The range of zone values are from 01 to 15 and“wraps”back to 01.
6. When you get to the desired ZONE number, hold the TRIP/RESET
button down to“lock in”the new value.
The cluster display will return to the“normal”mode when the
TRIP/RESET button has not been pressed for 6 seconds.
Compass calibration adjustment
Perform this adjustment in an open area free from steel structures and
high voltage lines. For optimum calibration, turn off all electrical
accessories (heater/air conditioning, wipers, etc.) and make sure all
vehicle doors are shut.
1. Start the vehicle.
2. To enter the compass calibration
mode, press and hold the
TRIP/RESET button for greater than
eight seconds. The display will then
show CAL in the display window.
3. Drive the vehicle slowly (less than 5 km/h [3 mph]) in circles until
CAL indicator turns off. As many as 5 complete circles may be required.
4. The compass is now calibrated.
1 2 3
4
5
6 7 8 9 101112 13 14 15
Driver Controls
113
Page 115 of 320

Usually, when something affects the compass readings, the compass will
correct itself after a few days of operating your vehicle in normal
conditions. If the compass still appears to be inaccurate, a manual
calibration may be necessary. Refer toCompass zone/calibration
adjustment.
Most geographic areas (zones) have a magnetic north compass point that
varies slightly from the northerly direction on maps. This variation is four
degrees between adjacent zones and will become noticeable as the
vehicle crosses multiple zones. A correct zone setting will eliminate this
error. Refer toCompass zone/calibration adjustment.
Compass zone/calibration adjustment
For optimum calibration, turn off all electrical accessories (heater/air
conditioning, wipers, etc.) and make sure all vehicle doors are shut.
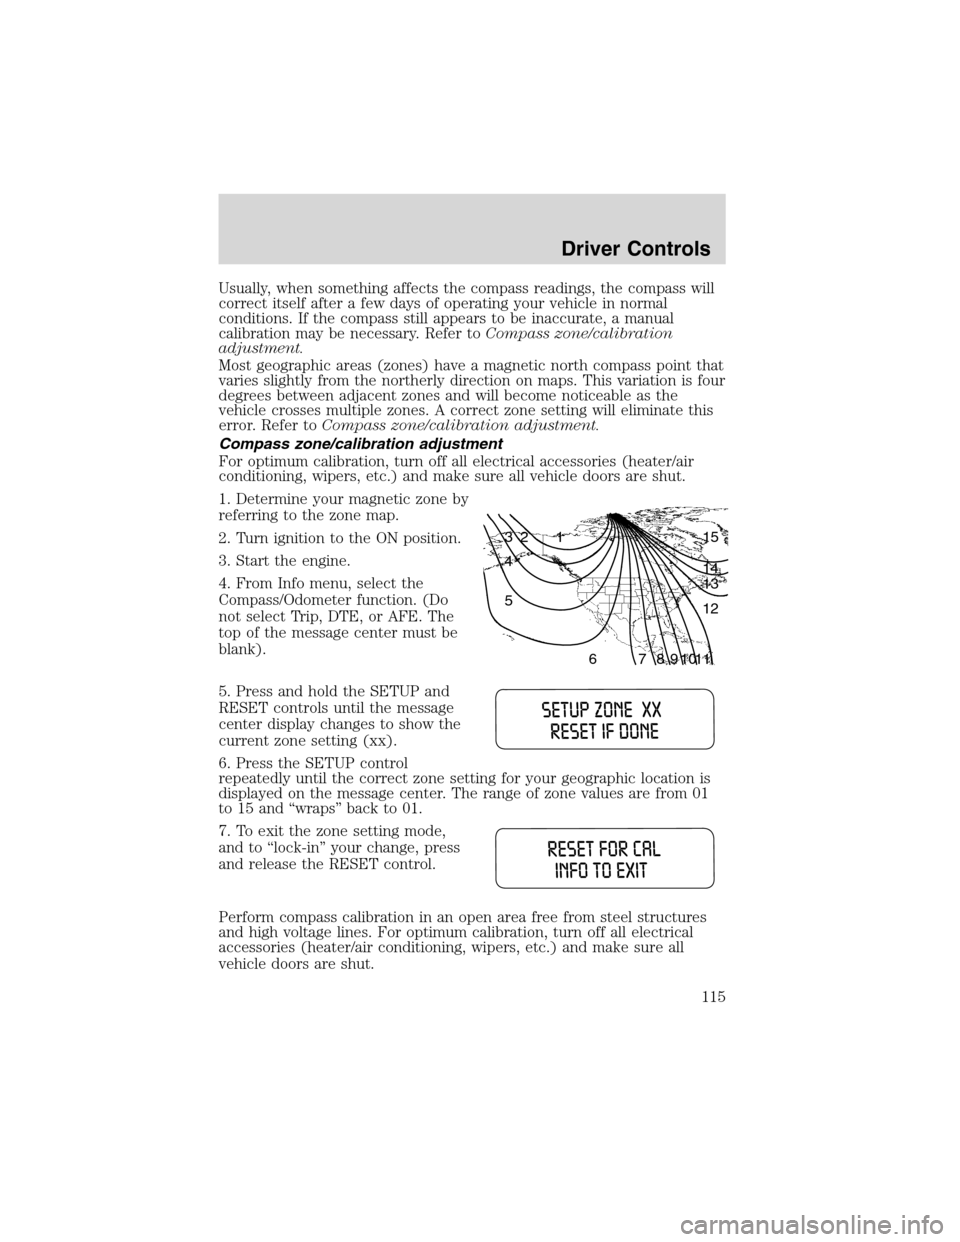
1. Determine your magnetic zone by
referring to the zone map.
2. Turn ignition to the ON position.
3. Start the engine.
4. From Info menu, select the
Compass/Odometer function. (Do
not select Trip, DTE, or AFE. The
top of the message center must be
blank).
5. Press and hold the SETUP and
RESET controls until the message
center display changes to show the
current zone setting (xx).
6. Press the SETUP control
repeatedly until the correct zone setting for your geographic location is
displayed on the message center. The range of zone values are from 01
to 15 and“wraps”back to 01.
7. To exit the zone setting mode,
and to‘‘lock-in’’your change, press
and release the RESET control.
Perform compass calibration in an open area free from steel structures
and high voltage lines. For optimum calibration, turn off all electrical
accessories (heater/air conditioning, wipers, etc.) and make sure all
vehicle doors are shut.
1 2 3
4
5
6 7 8 9 101112 13 14 15
Driver Controls
115
Page 319 of 320
lubricant
specifications ..................303, 305
Trip odometer .............................18
Trunk .........................................130
Turn signal ............................13, 84
V
Vehicle dimensions ...................305
Vehicle Identification Number
(VIN) ..........................................308
Vehicle loading ..........................219
Ventilating your vehicle ...........194
W
Warning chimes .....................14–15Warning lights (see Lights)
.......10
Washer fluid
..............................269
Water, Driving through
.............219
Windows
power
.........................................99
rear wiper/washer
.....................93
Windshield washer fluid
and wipers
checking and adding fluid
.....269
checking and cleaning
..............93
liftgate reservoir
.....................269
operation
...................................92
replacing wiper blades
.......93–94
Wrecker towing
.........................247
Index
319