Page 1 of 184
Introduction 4
Instrument Cluster 10
Warning and control lights 10
Gauges 12
Entertainment Systems 14
AM/FM stereo cassette 14
AM/FM stereo with CD 19
Climate Controls 28
Heater only 28
Manual heating and air conditioning 29
Lights 33
Headlamps 33
Turn signal control 36
Bulb replacement 37
Driver Controls 43
Windshield wiper/washer control 43
Steering wheel adjustment 44
Power windows 44
Mirrors 45
Speed control 45
Locks and Security 51
Keys 51
Locks 51
Anti-theft system53
Table of Contents
1
Page 44 of 184
Changing the wiper blades
1. Pull the wiper armaway fromthe
vehicle. Turn the blade at an angle
fromthe wiper arm. Push the lock
pin manually to release the blade
and pull the wiper blade down
toward the windshield to remove it
fromthe arm.
2. Attach the new wiper to the
wiper armand press it into place
until a click is heard.
3. Replace wiper blades every 6
months for optimum performance.
TILT STEERING (IF EQUIPPED)
Pull the tilt steering control down to
move the steering wheel up or
down. Hold the control while
adjusting the wheel to the desired
position, then push the control back
up to lock the steering wheel in
position.
Never adjust the steering
wheel when the vehicle is
moving.
POWER WINDOWS (IF EQUIPPED)
When closing the power
windows, you should verify
they are free of obstructions and
ensure that children and/or pets
are not in the proximity of the
window openings.
Driver Controls
44
Page 46 of 184
Setting speed control
The controls for using your speed
control are located on the steering
wheel for your convenience.
1. Press the ON control and release
it.
2. Accelerate to the desired speed.
3. Press the SET ACC control and
release it.
4. Take your foot off the accelerator
pedal.
Note:
•Vehicle speed may vary momentarily when driving up and down a
steep hill.
•If the vehicle speed increases above the set speed on a downhill, you
may want to apply the brakes to reduce the speed.
•If the vehicle speed decreases more than 16 km/h (10 mph) below
your set speed on an uphill, your speed control will disengage.
ON
OFF
RSM
CST
SET
ACC
Driver Controls
46
Page 84 of 184

STARTING
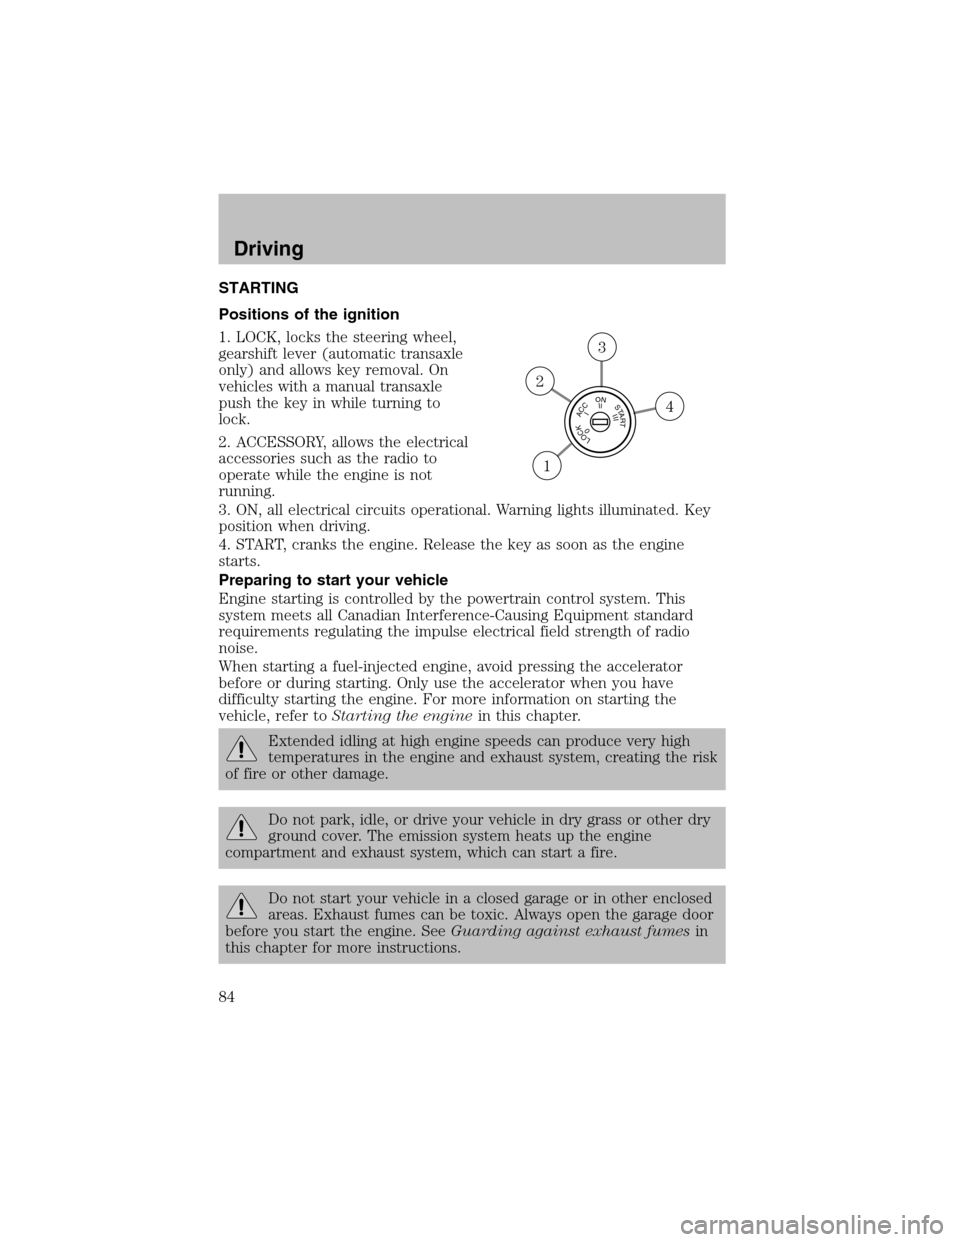
Positions of the ignition
1. LOCK, locks the steering wheel,
gearshift lever (automatic transaxle
only) and allows key removal. On
vehicles with a manual transaxle
push the key in while turning to
lock.
2. ACCESSORY, allows the electrical
accessories such as the radio to
operate while the engine is not
running.
3. ON, all electrical circuits operational. Warning lights illuminated. Key
position when driving.
4. START, cranks the engine. Release the key as soon as the engine
starts.
Preparing to start your vehicle
Engine starting is controlled by the powertrain control system. This
system meets all Canadian Interference-Causing Equipment standard
requirements regulating the impulse electrical field strength of radio
noise.
When starting a fuel-injected engine, avoid pressing the accelerator
before or during starting. Only use the accelerator when you have
difficulty starting the engine. For more information on starting the
vehicle, refer toStarting the enginein this chapter.
Extended idling at high engine speeds can produce very high
temperatures in the engine and exhaust system, creating the risk
of fire or other damage.
Do not park, idle, or drive your vehicle in dry grass or other dry
ground cover. The emission system heats up the engine
compartment and exhaust system, which can start a fire.
Do not start your vehicle in a closed garage or in other enclosed
areas. Exhaust fumes can be toxic. Always open the garage door
before you start the engine. SeeGuarding against exhaust fumesin
this chapter for more instructions.
LOCKACCONSTART0IIIIII4
3
2
1
Driving
84
Page 87 of 184

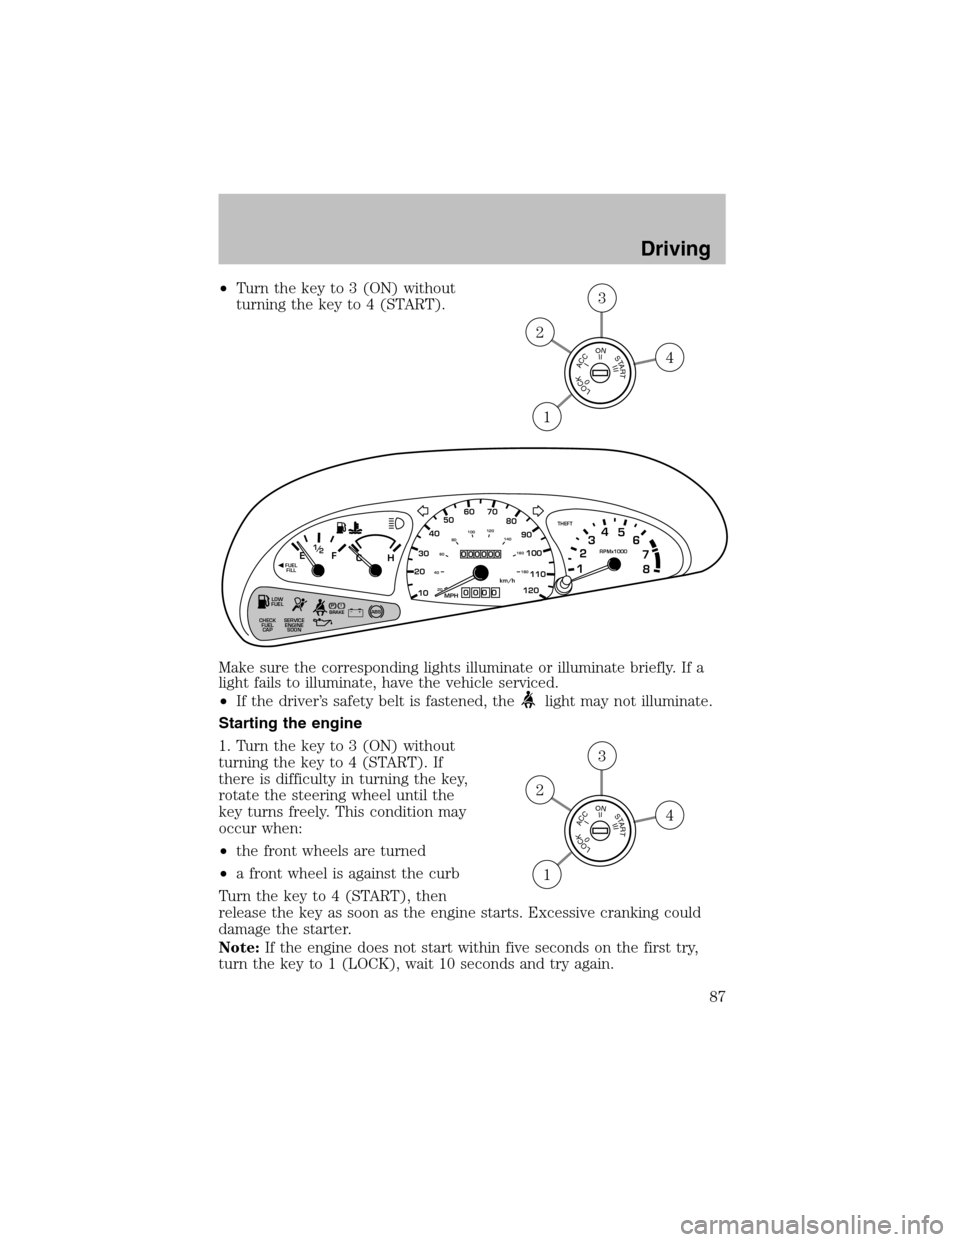
•Turn the key to 3 (ON) without
turning the key to 4 (START).
Make sure the corresponding lights illuminate or illuminate briefly. If a
light fails to illuminate, have the vehicle serviced.
•If the driver’s safety belt is fastened, the
light may not illuminate.
Starting the engine
1. Turn the key to 3 (ON) without
turning the key to 4 (START). If
there is difficulty in turning the key,
rotate the steering wheel until the
key turns freely. This condition may
occur when:
•the front wheels are turned
•a front wheel is against the curb
Turn the key to 4 (START), then
release the key as soon as the engine starts. Excessive cranking could
damage the starter.
Note:If the engine does not start within five seconds on the first try,
turn the key to 1 (LOCK), wait 10 seconds and try again.
LOCKACCONSTART0IIIIII4
3
2
1
!
THEFT
LOW
FUEL
SERVICE
ENGINE
SOON CHECK
FUEL
CAP
PBRAKEABS+ –MPH
205060 70FUEL
FILLEF
CH1
2 /RPMx1000
1234
5
6
7
8
304080
90
100
110
120
10
20 406080100120
140
160
180km/h
0
000000
00 0
LOCKACCONSTART0IIIIII4
3
2
1
Driving
87
Page 89 of 184

If you are driving down a long or steep hill, shift to a lower gear.
Do not apply your brakes continuously, as they may overheat
and become less effective.
Under normal operating conditions, brake dust may accumulate on the
wheels. Some brake dust is inevitable as brakes wear and does not
contribute to brake noise. The use of modern friction materials with
emphasis on improved performance and environmental considerations
can lead to more dust than in the past. Brake dust can be cleaned by
weekly washing with soapy water and a soft sponge. Heavier deposits can
be removed with Motorcraft Wheel and Tire Cleaner (ZC-37–A).
Anti-lock brake system (ABS) (if equipped)
On vehicles equipped with an anti-lock braking system(ABS), a noise
from the hydraulic pump motor and pulsation in the pedal may be
observed during ABS braking events. Pedal pulsation coupled with noise
while braking under panic conditions or on loose gravel, bumps, wet or
snowy roads is normal and indicates proper functioning of the vehicle’s
anti-lock brake system. The ABS performs a self-check after you start
the engine and begin to drive away. A brief mechanical noise may be
heard during this test. This is normal. If a malfunction is found, the ABS
warning light will come on. If the vehicle has continuous vibration or
shudder in the steering wheel while braking, the vehicle should be
inspected by a qualified service technician.
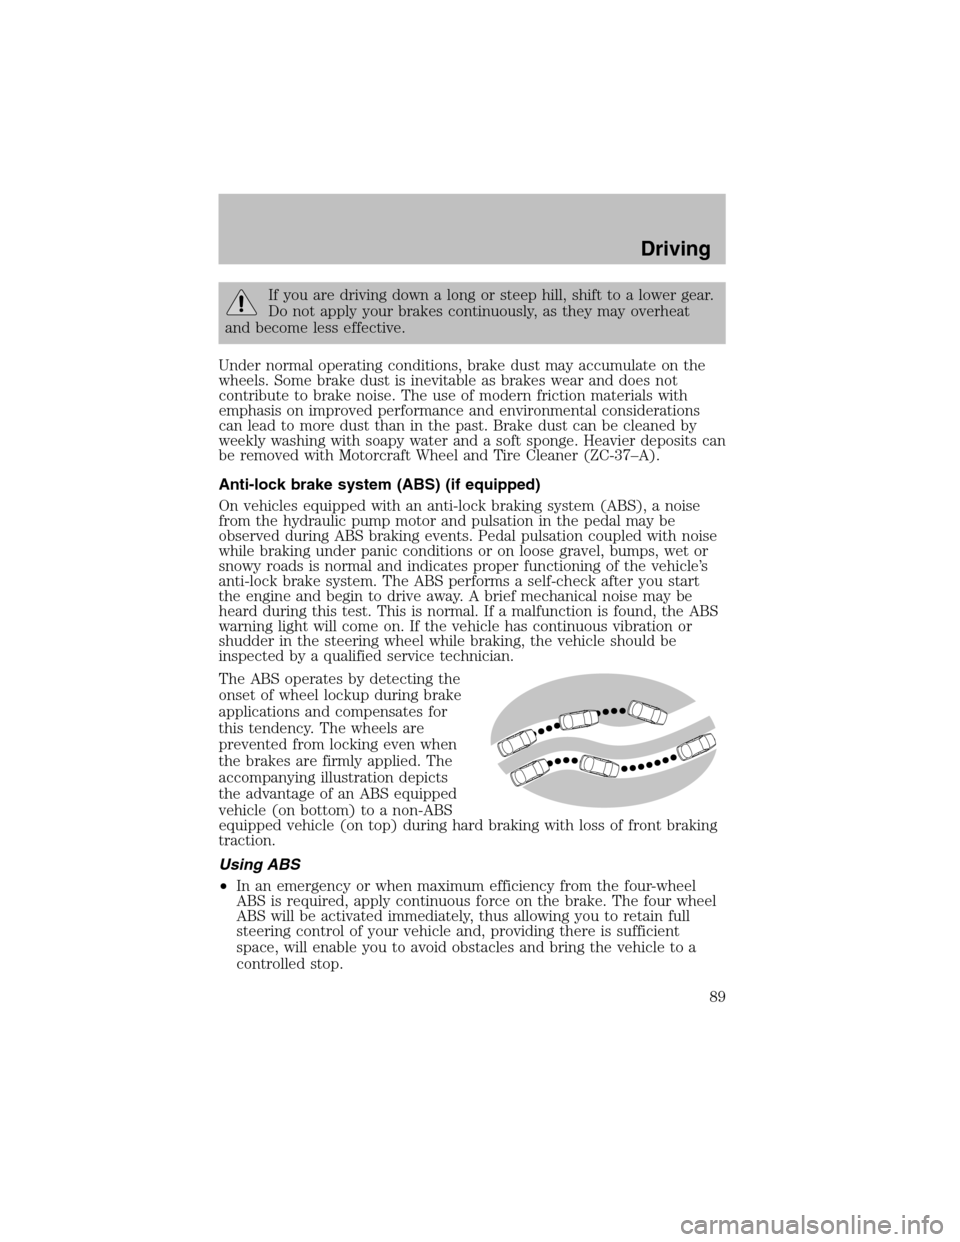
The ABS operates by detecting the
onset of wheel lockup during brake
applications and compensates for
this tendency. The wheels are
prevented fromlocking even when
the brakes are firmly applied. The
accompanying illustration depicts
the advantage of an ABS equipped
vehicle (on bottom) to a non-ABS
equipped vehicle (on top) during hard braking with loss of front braking
traction.
Using ABS
•In an emergency or when maximum efficiency from the four-wheel
ABS is required, apply continuous force on the brake. The four wheel
ABS will be activated immediately, thus allowing you to retain full
steering control of your vehicle and, providing there is sufficient
space, will enable you to avoid obstacles and bring the vehicle to a
controlled stop.
Driving
89
Page 91 of 184

Always set the parking brake fully and make sure that the
gearshift is securely latched in P (Park) (automatic transaxle) or
in 1 (First) (manual transaxle).
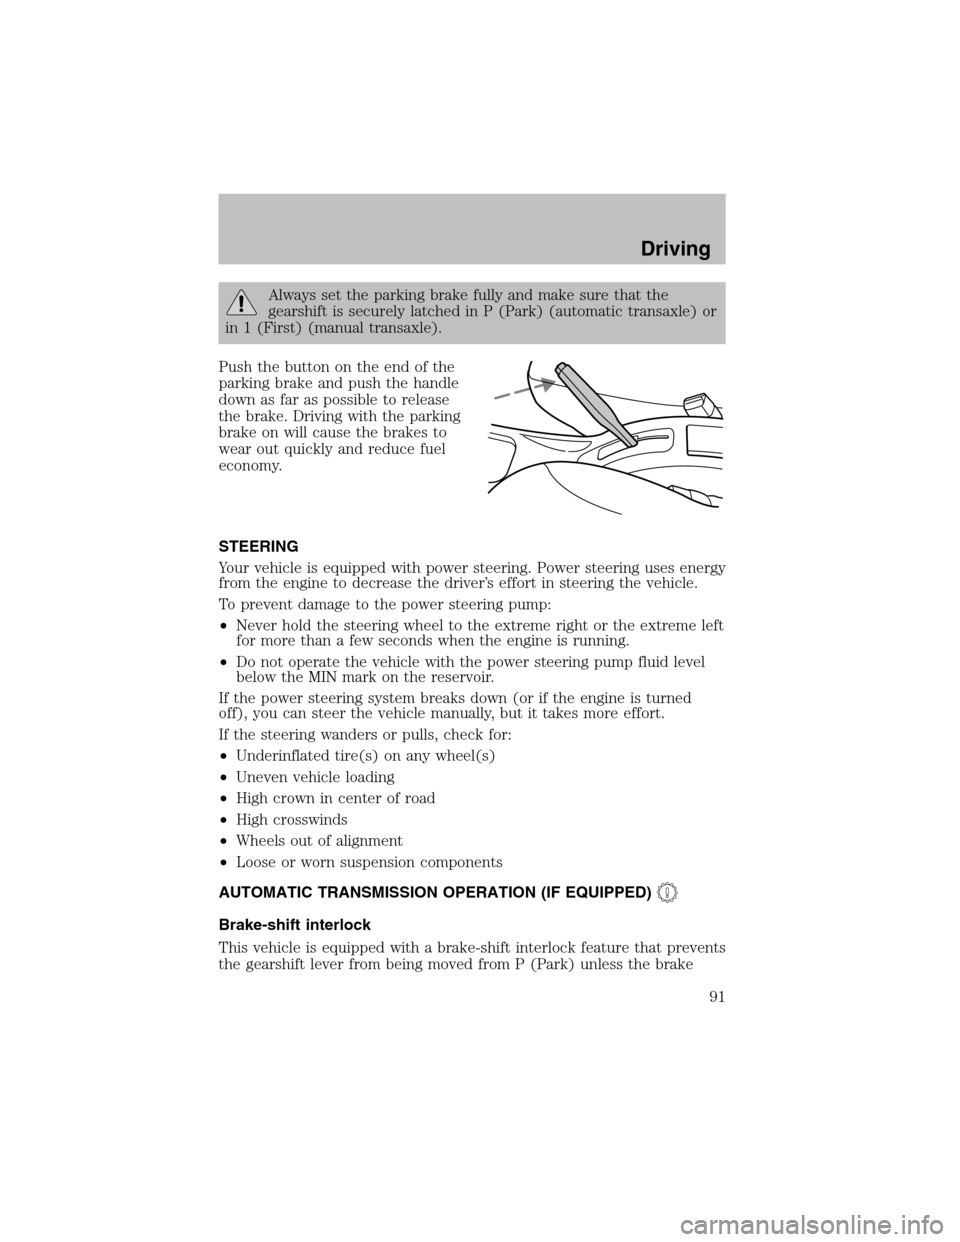
Push the button on the end of the
parking brake and push the handle
down as far as possible to release
the brake. Driving with the parking
brake on will cause the brakes to
wear out quickly and reduce fuel
economy.
STEERING
Your vehicle is equipped with power steering. Power steering uses energy
fromthe engine to decrease the driver’s effort in steering the vehicle.
To prevent damage to the power steering pump:
•Never hold the steering wheel to the extreme right or the extreme left
for more than a few seconds when the engine is running.
•Do not operate the vehicle with the power steering pump fluid level
below the MIN mark on the reservoir.
If the power steering systembreaks down (or if the engine is turned
off), you can steer the vehicle manually, but it takes more effort.
If the steering wanders or pulls, check for:
•Underinflated tire(s) on any wheel(s)
•Uneven vehicle loading
•High crown in center of road
•High crosswinds
•Wheels out of alignment
•Loose or worn suspension components
AUTOMATIC TRANSMISSION OPERATION (IF EQUIPPED)
Brake-shift interlock
This vehicle is equipped with a brake-shift interlock feature that prevents
the gearshift lever frombeing moved fromP (Park) unless the brake
Driving
91
Page 110 of 184

Relays
Relays are located in the power distribution box and should be replaced
by qualified technicians.
CHANGING THE TIRES
If you get a flat tire while driving, do not apply the brake heavily.
Instead, gradually decrease your speed. Hold the steering wheel firmly
and slowly move to a safe place on the side of the road.
The use of tire sealants is not recommended and may
compromise the integrity of your tires.
Temporary spare tire information
The temporary spare tire for your vehicle is labeled as such. It is smaller
than a regular tire and is designed for emergency use only. Replace the
temporary spare tire with a full-size tire as soon as possible.
If you use the temporary spare tire continuously or do not follow
these precautions, the tire could fail, causing you to lose control
of the vehicle, possibly injuring yourself or others.
When driving with the temporary spare tiredo not:
•use more than one temporary spare tire at a time
•exceed 80 km/h (50 mph)
•load the vehicle beyond maximum vehicle load rating listed on the
Safety Compliance Label
•tow a trailer
•use tire chains
•drive through an automatic car wash, because of the vehicle’s reduced
ground clearance
•try to repair the temporary spare tire or remove it from its wheel
•use the wheel for any other type of vehicle
Use of a temporary spare tire at any one wheel location can lead to
impairment of the following:
•handling, stability and braking performance
•comfort and noise
•ground clearance and parking at curbs
•Winter driving capability
Roadside Emergencies
110