Page 3 of 240
Maintenance and Specifications 183
Engine compartment 185
Engine oil 188
Battery 192
Fuel information 199
Air filter(s) 212
Part numbers 218
Refill capacities 218
Lubricant specifications 221
Accessories 227
Index 231
All rights reserved. Reproduction by any means, electronic or mechanical
including photocopying, recording or by any information storage and retrieval
system or translation in whole or part is not permitted without written
authorization from Ford Motor Company. Ford may change the contents without
notice and without incurring obligation.
Copyright © 2002 Ford Motor Company
Table of Contents
3
Page 9 of 240
Vehicle Symbol Glossary
Power Windows
Front/Rear
Power Window Lockout
Child Safety Door
Lock/UnlockInterior Luggage
Compartment Release
Symbol
Panic AlarmEngine Oil
Engine CoolantEngine Coolant
Temperature
Do Not Open When HotBattery
Avoid Smoking, Flames,
or SparksBattery Acid
Explosive GasFan Warning
Power Steering FluidMaintain Correct Fluid
LevelMAX
MIN
Emission SystemEngine Air Filter
Passenger Compartment
Air FilterJack
Check fuel capLow tire warning
Introduction
9
Page 11 of 240

Driving a vehicle with the brake system warning light on is
dangerous. A significant decrease in braking performance may
occur. It will take you longer to stop the vehicle. Have the vehicle
checked by your dealer immediately.
Anti-lock brake system:
Illuminates indicating an ABS fault.
If the lamp stays on for more than a
few seconds, then an ABS fault is
indicated, have the system serviced
immediately. Normal braking is still functional unless the brake warning
light also is illuminated.
Air bag readiness:If this light fails
to illuminate when ignition is turned
to ON, continues to flash or remains
on, have the system serviced
immediately. A chime will also
sound when a malfunction in the supplemental restraint system has been
detected.
Safety belt:Reminds you to fasten
your safety belt. A chime will also
sound to remind you to fasten your
safety belt.
Charging system:Illuminates when
the battery is not charging properly.
Engine oil pressure:Illuminates
when the oil pressure falls below the
normal range, refer toEngine oilin
theMaintenance and
specificationschapter.
Low coolant (if equipped):
Illuminates when the coolant level in
the coolant reservoir is low and
more needs to be added, refer to
Engine coolantin theMaintenance and specificationschapter.
ABS
Instrument Cluster
11
Page 33 of 240

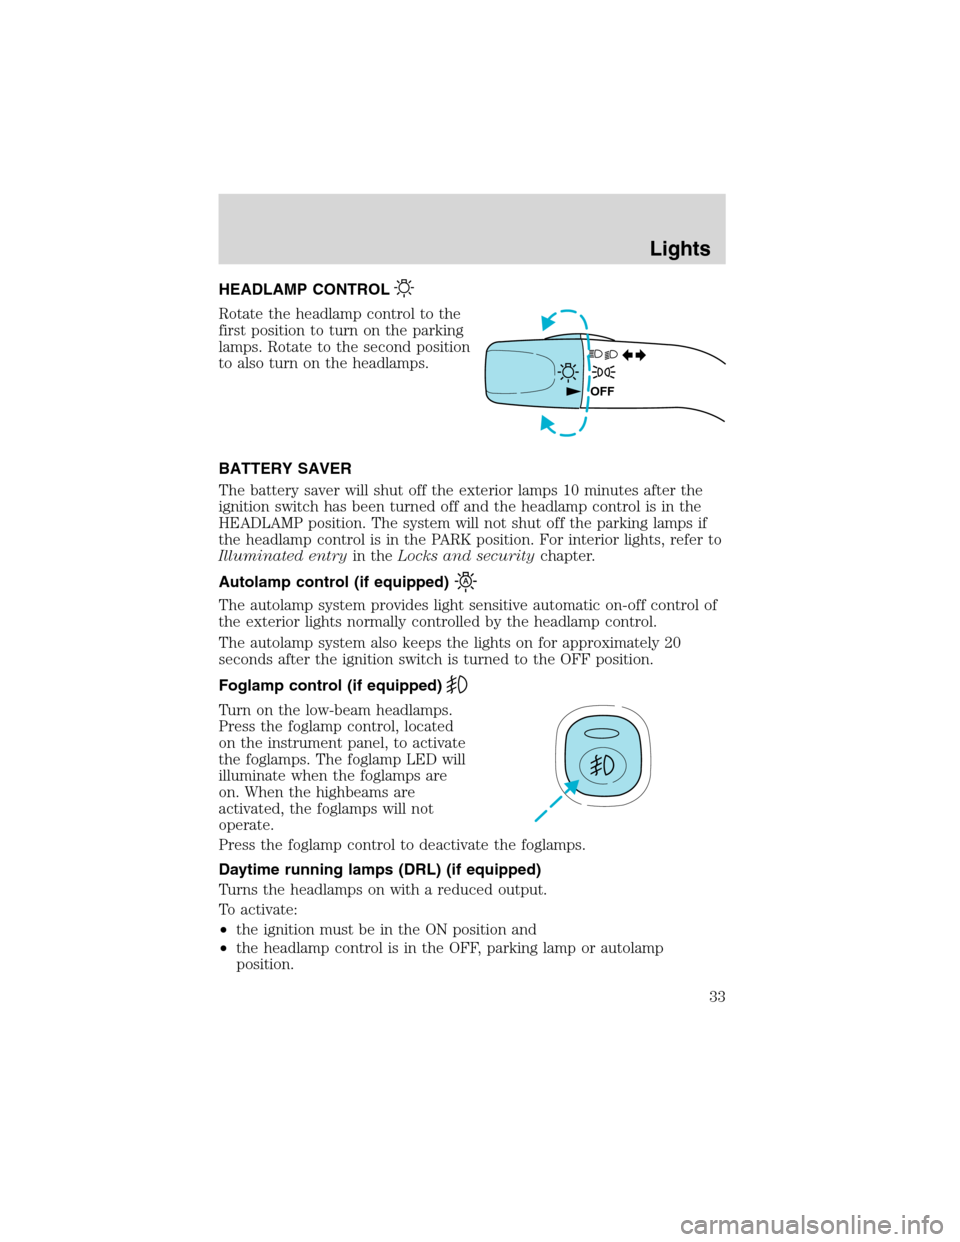
HEADLAMP CONTROL
Rotate the headlamp control to the
first position to turn on the parking
lamps. Rotate to the second position
to also turn on the headlamps.
BATTERY SAVER
The battery saver will shut off the exterior lamps 10 minutes after the
ignition switch has been turned off and the headlamp control is in the
HEADLAMP position. The system will not shut off the parking lamps if
the headlamp control is in the PARK position. For interior lights, refer to
Illuminated entryin theLocks and securitychapter.
Autolamp control (if equipped)
The autolamp system provides light sensitive automatic on-off control of
the exterior lights normally controlled by the headlamp control.
The autolamp system also keeps the lights on for approximately 20
seconds after the ignition switch is turned to the OFF position.
Foglamp control (if equipped)
Turn on the low-beam headlamps.
Press the foglamp control, located
on the instrument panel, to activate
the foglamps. The foglamp LED will
illuminate when the foglamps are
on. When the highbeams are
activated, the foglamps will not
operate.
Press the foglamp control to deactivate the foglamps.
Daytime running lamps (DRL) (if equipped)
Turns the headlamps on with a reduced output.
To activate:
•the ignition must be in the ON position and
•the headlamp control is in the OFF, parking lamp or autolamp
position.
OFF
Lights
33
Page 53 of 240

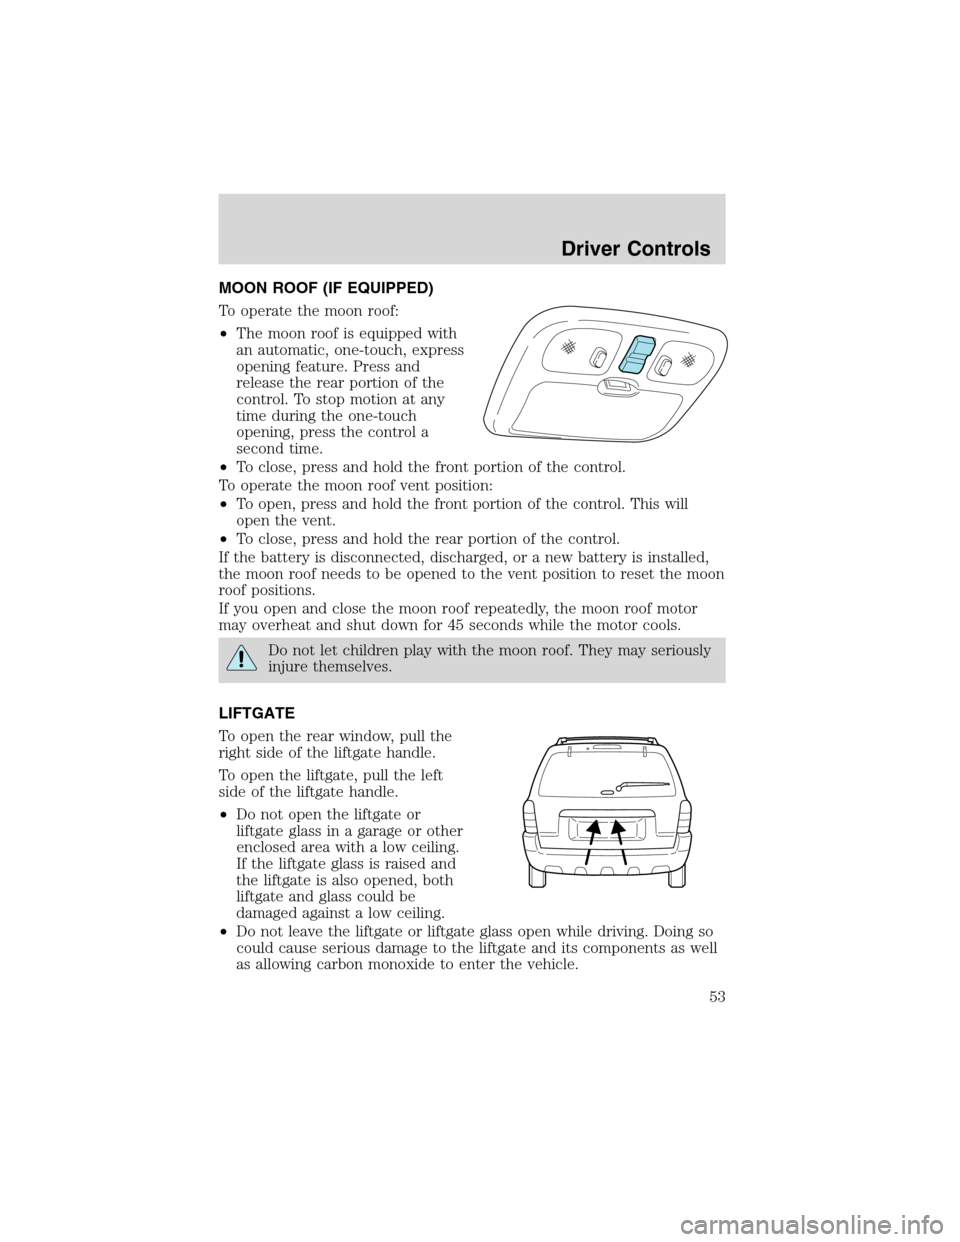
MOON ROOF (IF EQUIPPED)
To operate the moon roof:
•The moon roof is equipped with
an automatic, one-touch, express
opening feature. Press and
release the rear portion of the
control. To stop motion at any
time during the one-touch
opening, press the control a
second time.
•To close, press and hold the front portion of the control.
To operate the moon roof vent position:
•To open, press and hold the front portion of the control. This will
open the vent.
•To close, press and hold the rear portion of the control.
If the battery is disconnected, discharged, or a new battery is installed,
the moon roof needs to be opened to the vent position to reset the moon
roof positions.
If you open and close the moon roof repeatedly, the moon roof motor
may overheat and shut down for 45 seconds while the motor cools.
Do not let children play with the moon roof. They may seriously
injure themselves.
LIFTGATE
To open the rear window, pull the
right side of the liftgate handle.
To open the liftgate, pull the left
side of the liftgate handle.
•Do not open the liftgate or
liftgate glass in a garage or other
enclosed area with a low ceiling.
If the liftgate glass is raised and
the liftgate is also opened, both
liftgate and glass could be
damaged against a low ceiling.
•Do not leave the liftgate or liftgate glass open while driving. Doing so
could cause serious damage to the liftgate and its components as well
as allowing carbon monoxide to enter the vehicle.
Driver Controls
53
Page 63 of 240

KEYS
The key operates all locks on your vehicle. In case of loss, replacement
keys are available from your dealer.
You should always carry a second key with you in a safe place in case
you require it in an emergency.
Refer toSecuriLock�Passive Anti-Theft Systemfor more information.
POWER DOOR LOCKS (IF EQUIPPED)
Press control to unlock all doors.
Press control to lock all doors.
Door key unlocking/locking
Unlocking the doors
1. Turn the key in the door cylinder to unlock the driver’s door.Note:
The interior lamps will illuminate, if the control on the overhead lamp is
in the DOOR position, the flashers will flash twice, and the perimeter
alarm system (if equipped) will deactivate.
2. Turn the key in the door cylinder again within three seconds to unlock
the passenger doors, the liftgate and liftgate glass. The park lamps will
flash twice to confirm all doors are unlocked.
This two step unlocking feature activates the illuminated entry feature. This
feature turns on all the interior lamps for 30 seconds or until the ignition is
turned to the RUN position. If the dome lamp control (if equipped) is in the
offposition, the illuminated entry feature will not work.
The inside lights will not turn off if:
•they have been turned on using the dome lamp control or
•any door is open.
The battery saver feature will turn off the interior lamps 30 minutes after
the ignition is turned to the OFF position.
Locks and Security
63
Page 66 of 240

The remote entry system allows you
to lock or unlock all vehicle doors
without a key. The remote feature
will only operate when the ignition
is in the OFF or ACC position.
If there is a problem with the
remote entry system make sure to
takeALL remote entry
transmitterswith you to the
dealership, this will aid in
troubleshooting the problem.
Unlocking the doors
1. Pressand release to unlock the driver’s door.Note:The interior
lamps will illuminate, if the control on the overhead lamp is in the DOOR
position, the flashers will flash twice, and the perimeter alarm system (if
equipped) will deactivate.
2. Press
and release again within three seconds to unlock the
passenger doors, the liftgate and liftgate glass.
The remote entry system activates the illuminated entry feature. This
feature turns on all the interior lamps for 30 seconds or until the ignition
is turned to the RUN position. If the dome lamp control (if equipped) is
in theoffposition, the illuminated entry feature will not work.
The inside lights will not turn off if:
•they have been turned on using the dome lamp control or
•any door is open.
The battery saver feature will turn off the interior lamps 40 minutes after
the ignition is turned to the OFF position.
Locks and Security
66
Page 67 of 240

Locking the doors
1. Pressand release to lock all the doors. The park lamps will flash
once and the perimeter alarm (if equipped) will start the arming process.
For more information concerning the perimeter alarm, refer to
Perimeter alarm system (if equipped)later in this chapter.
2. Press
and release again within three seconds to confirm that all the
doors are closed and locked.Note:the doors will lock again, the horn
will chirp once, and the park lamps will flash.
If any of the doors or the hood are not properly closed the horn will not
sound and the park lamps will not flash.
Sounding a panic alarm
Press
to activate the alarm. To deactivate the feature, press the
control again or wait for the alarm to time out in approximately 3
minutes.
Note:The panic alarm will only operate when the ignition is in the OFF
or ACC position.
Replacing the battery
The remote entry transmitter uses one coin type three-volt lithium
battery CR2032 or equivalent. The typical operating range for your
remote entry transmitter is approximately 10 meters (33 feet). A
decrease in the operating range could be caused by:
•weather conditions,
•nearby radio towers,
•structures around the vehicle and
•other vehicles parked next to the vehicle.
To replace the battery:
1. Twist a thin coin between the two
halves of the remote entry
transmitter near the key ring. DO
NOT TAKE THE FRONT PART OF
THE REMOTE ENTRY
TRANSMITTER APART.
2. Remove the old battery.
Locks and Security
67