Page 146 of 248
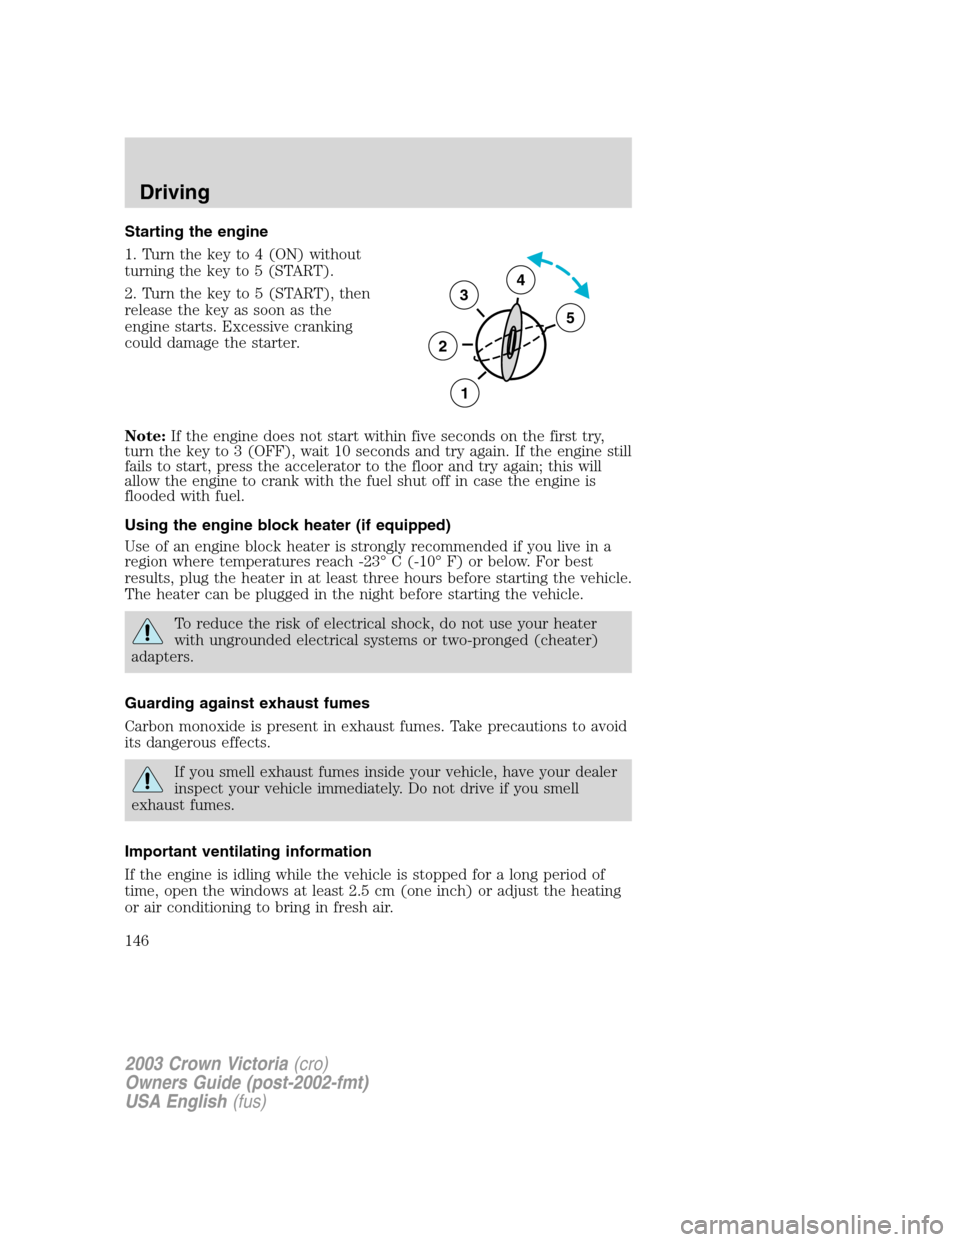
Starting the engine
1. Turn the key to 4 (ON) without
turning the key to 5 (START).
2. Turn the key to 5 (START), then
release the key as soon as the
engine starts. Excessive cranking
could damage the starter.
Note:If the engine does not start within five seconds on the first try,
turn the key to 3 (OFF), wait 10 seconds and try again. If the engine still
fails to start, press the accelerator to the floor and try again; this will
allow the engine to crank with the fuel shut off in case the engine is
flooded with fuel.
Using the engine block heater (if equipped)
Use of an engine block heater is strongly recommended if you live in a
region where temperatures reach -23°C (-10°F) or below. For best
results, plug the heater in at least three hours before starting the vehicle.
The heater can be plugged in the night before starting the vehicle.
To reduce the risk of electrical shock, do not use your heater
with ungrounded electrical systems or two-pronged (cheater)
adapters.
Guarding against exhaust fumes
Carbon monoxide is present in exhaust fumes. Take precautions to avoid
its dangerous effects.
If you smell exhaust fumes inside your vehicle, have your dealer
inspect your vehicle immediately. Do not drive if you smell
exhaust fumes.
Important ventilating information
If the engine is idling while the vehicle is stopped for a long period of
time, open the windows at least 2.5 cm (one inch) or adjust the heating
or air conditioning to bring in fresh air.
3
2
1
5
4
2003 Crown Victoria(cro)
Owners Guide (post-2002-fmt)
USA English(fus)
Driving
146
Page 149 of 248
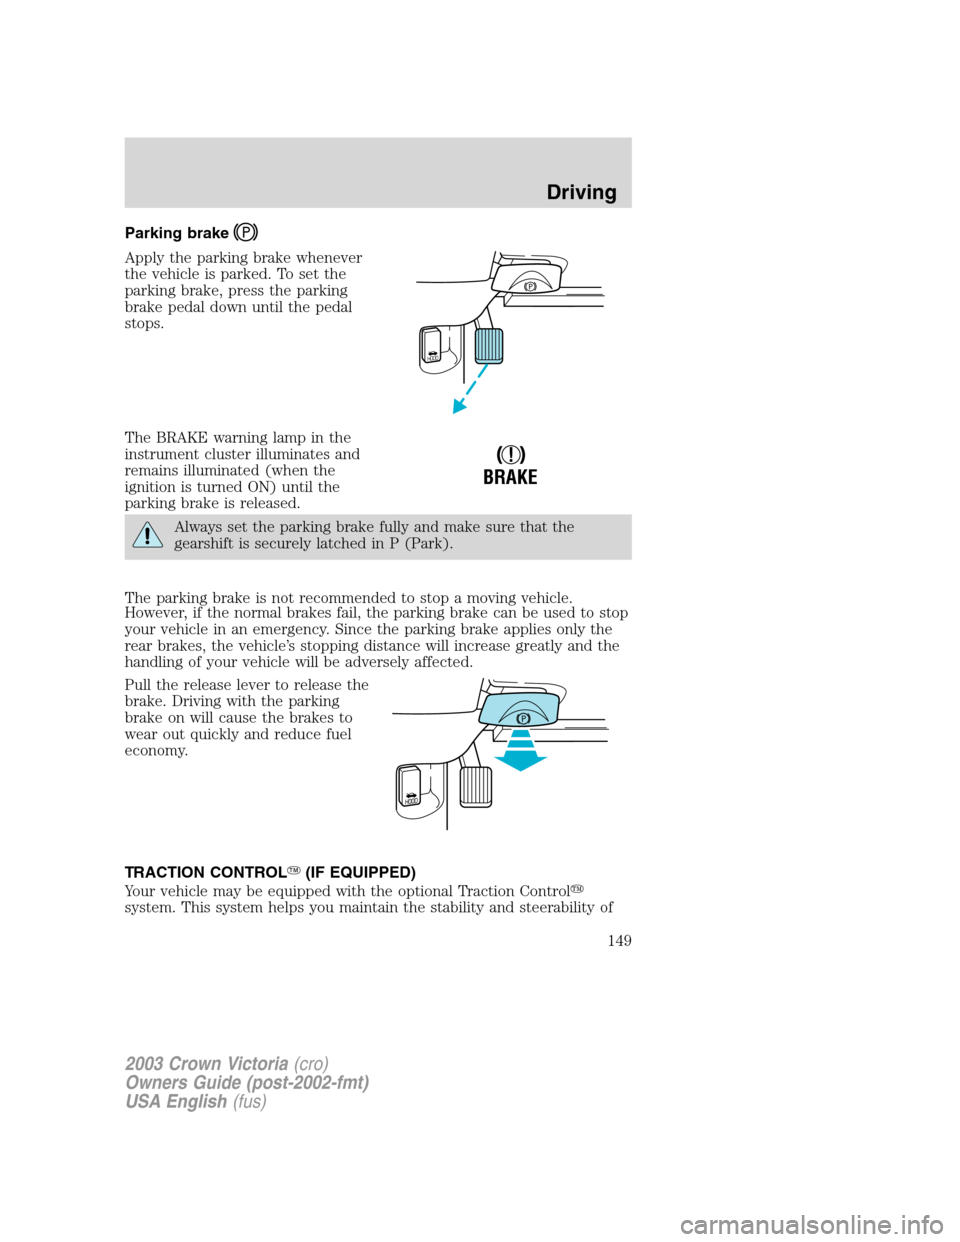
Parking brake
Apply the parking brake whenever
the vehicle is parked. To set the
parking brake, press the parking
brake pedal down until the pedal
stops.
The BRAKE warning lamp in the
instrument cluster illuminates and
remains illuminated (when the
ignition is turned ON) until the
parking brake is released.
Always set the parking brake fully and make sure that the
gearshift is securely latched in P (Park).
The parking brake is not recommended to stop a moving vehicle.
However, if the normal brakes fail, the parking brake can be used to stop
your vehicle in an emergency. Since the parking brake applies only the
rear brakes, the vehicle’s stopping distance will increase greatly and the
handling of your vehicle will be adversely affected.
Pull the release lever to release the
brake. Driving with the parking
brake on will cause the brakes to
wear out quickly and reduce fuel
economy.
TRACTION CONTROL�(IF EQUIPPED)
Your vehicle may be equipped with the optional Traction Control�
system. This system helps you maintain the stability and steerability of
HOOD
!
BRAKE
2003 Crown Victoria(cro)
Owners Guide (post-2002-fmt)
USA English(fus)
Driving
149
Page 150 of 248
your vehicle. It is especially useful on slippery and/or hilly road surfaces.
The system operates by detecting and controlling wheel spin. The system
borrows many of the electronic and mechanical elements already present
in the anti-lock braking system (ABS).
Wheel-speed sensors allow excess rear wheel spin to be detected by the
Traction Control�portion of the ABS computer. Any excessive wheel
spin is controlled by automatically applying and releasing the rear brakes
in conjunction with engine torque reductions. Engine torque reduction is
realized via the fully electronic spark and fuel injection systems. This
process is very sensitive to driving conditions and very fast acting. The
rear wheels“search”for optimum traction several times a second and
adjustments are made accordingly.
The Traction Control�system will allow your vehicle to make better use
of available traction on slippery surfaces while you are trying to
accelerate or while your foot is on the accelerator pedal. The system is a
driver aid which makes your vehicle easier to handle primarily on snow
and ice covered roads.
During Traction Control�operation you may hear an electric motor type
of sound coming from the engine compartment and the engine will not
“rev-up”when you push further on the accelerator. This is normal
system behavior.
If you should become stuck in snow
or ice or on a very slippery road
surface, try switching the Traction
Control�system off. This may allow
excess wheel spin to“dig”the
vehicle out and enable a successful
“rocking”maneuver.
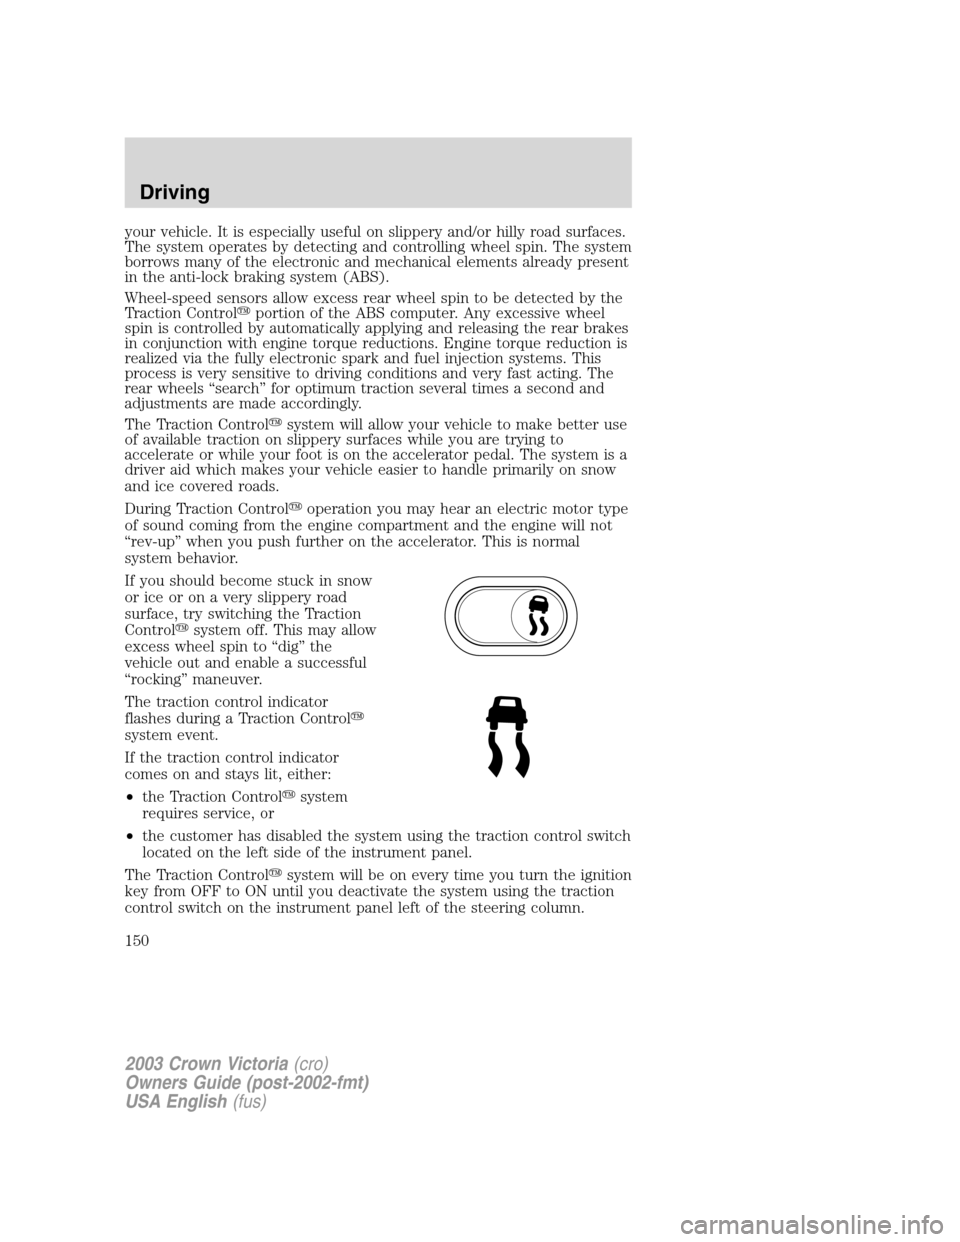
The traction control indicator
flashes during a Traction Control�
system event.
If the traction control indicator
comes on and stays lit, either:
•the Traction Control�system
requires service, or
•the customer has disabled the system using the traction control switch
located on the left side of the instrument panel.
The Traction Control�system will be on every time you turn the ignition
key from OFF to ON until you deactivate the system using the traction
control switch on the instrument panel left of the steering column.
2003 Crown Victoria(cro)
Owners Guide (post-2002-fmt)
USA English(fus)
Driving
150
Page 154 of 248
R (Reverse)
With the gearshift lever in R
(Reverse), the vehicle will move
backward. Always come to a
complete stop before shifting into
and out of R (Reverse).
N (Neutral)
With the gearshift lever in N
(Neutral), the vehicle can be started
and is free to roll. Hold the brake
pedal down while in this gear.
Overdrive
The normal driving position for the
best fuel economy. Transmission
operates in gears one through four.
If your vehicle is equipped with a
column-shift transmission, overdrive
can be deactivated by pressing the
transmission control switch on the
gearshift lever.
If your vehicle is equipped with a
floor-shift transmission, overdrive
can be deactivated by pressing the
transmission control switch on the
gearshift handle.
The transmission control indicator
light (TCIL) will illuminate on the
instrument cluster.
O/D
OFF
O/ D
OFF
2003 Crown Victoria(cro)
Owners Guide (post-2002-fmt)
USA English(fus)
Driving
154
Page 162 of 248
GETTING ROADSIDE ASSISTANCE
To fully assist you should you have a vehicle concern, Ford Motor
Company offers a complimentary roadside assistance program. This
program is separate from the New Vehicle Limited Warranty. The service
is available:
•24–hours, seven days a week
•for the New Vehicle Limited Warranty period of three years or 60,000
km (36,000 miles), whichever occurs first on Ford and Mercury
vehicles, and four years or 80,000 km (50,000 miles) on Lincoln
vehicles.
Roadside assistance will cover:
•changing a flat tire
•jump-starts
•lock-out assistance
•limited fuel delivery
•towing of your disabled vehicle to the nearest Ford Motor Company
dealership, or your selling dealer if within 56.3 km (35 miles) of the
nearest Ford Motor Company dealership (one tow per disablement).
Even non-warranty related tows, like accidents or getting stuck in the
mud or snow, are covered (some exclusions apply, such as impound
towing or repossession).
Canadian customers refer to your Owner Information Guide for
information on:
•coverage period
•exact fuel amounts
•towing of your disabled vehicle
•emergency travel expense reimbursement
•travel planning benefits
USING ROADSIDE ASSISTANCE
Complete the roadside assistance identification card and place it in your
wallet for quick reference. In the United States, this card is found in the
Owner Guide portfolio in the glove compartment in Ford vehicles and is
mailed to you if you own a Mercury or Lincoln. In Canada, the card is
found in the Owner Information Guide in the glove compartment.
U.S. Ford or Mercury vehicle customers who require roadside assistance,
call 1–800–241–3673; Lincoln vehicle customers call 1–800–521–4140.
2003 Crown Victoria(cro)
Owners Guide (post-2002-fmt)
USA English(fus)
Roadside Emergencies
Roadside Emergencies
162
Page 163 of 248
Canadian customers who require roadside assistance, call
1–800–665–2006.
If you need to arrange roadside assistance for yourself, Ford Motor
Company will reimburse a reasonable amount. To obtain reimbursement
information, U.S. Ford or Mercury vehicles customers call
1-800-241-3673; Lincoln vehicle customers call 1–800–521–4140.
Canadian customers who need to obtain reimbursement information, call
1–800–665–2006.
ROADSIDE COVERAGE BEYOND BASIC WARRANTY
In the United States, you may purchase additional roadside assistance
coverage beyond this period through the Ford Auto Club by contacting
your Ford or Lincoln Mercury dealer.
Similarly in Canada, for uninterrupted Roadside Assistance coverage, you
may purchase extended coverage prior to your Basic Warranty’s Roadside
Assistance expiring. For more information and enrollment, contact
1–877–294–2582 or visit our website at www.ford.ca.
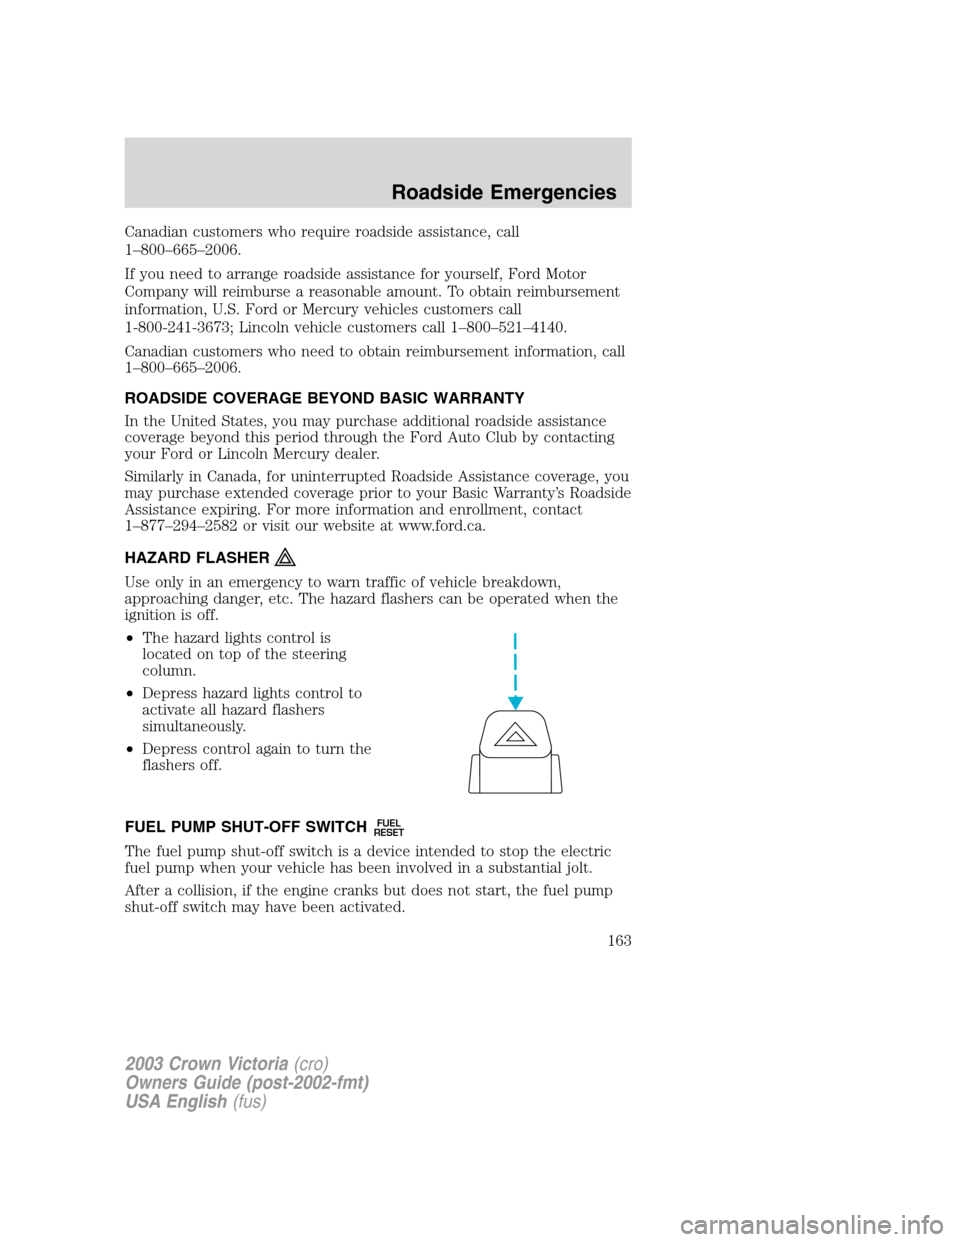
HAZARD FLASHER
Use only in an emergency to warn traffic of vehicle breakdown,
approaching danger, etc. The hazard flashers can be operated when the
ignition is off.
•The hazard lights control is
located on top of the steering
column.
•Depress hazard lights control to
activate all hazard flashers
simultaneously.
•Depress control again to turn the
flashers off.
FUEL PUMP SHUT-OFF SWITCH
FUEL
RESET
The fuel pump shut-off switch is a device intended to stop the electric
fuel pump when your vehicle has been involved in a substantial jolt.
After a collision, if the engine cranks but does not start, the fuel pump
shut-off switch may have been activated.
2003 Crown Victoria(cro)
Owners Guide (post-2002-fmt)
USA English(fus)
Roadside Emergencies
163
Page 164 of 248
The fuel pump shut-off switch is
located on the left side of the trunk
behind the left rear tail light and the
trunk liner.
Use the following procedure to reset the fuel pump shut-off switch.
1. Turn the ignition to the OFF position.
2. Check the fuel system for leaks.
3. If no fuel leak is apparent, reset the fuel pump shut-off switch by
pushing in on the reset button.
4. Turn the ignition to the ON position. Pause for a few seconds and
return the key to the OFF position.
5. Make a further check for leaks in the fuel system.
FUSES AND RELAYS
Fuses
If electrical components in the
vehicle are not working, a fuse may
have blown. Blown fuses are
identified by a broken wire within
the fuse. Check the appropriate
fuses before replacing any electrical
components.
15
2003 Crown Victoria(cro)
Owners Guide (post-2002-fmt)
USA English(fus)
Roadside Emergencies
164
Page 169 of 248
The high-current fuses are coded as follows.
Fuse/Relay
LocationFuse Amp
RatingPower Distribution Box Description
1 25A* Audio
2 20A* Power point
3 25A* Heated seats
4 15A* Horns
5 20A* Fuel pump
6—Not used
7 25A* Moonroof
8 20A* Driver’s Door Module (DDM)
9—Not used
10—Not used
11 20A* Daytime Running Lamps (DRL)
12—Not used
13—Not used
14—Not used
15—Not used
503
502
501
24
23401
20
19 22
21RELAY
302 RELAY
304 RELAY
303
RELAY
301 207
201 202 203204
209
206
208
205602
601118
114
110
106
102
117
113
109
105
101
116
112
108
104
115
111
107
103
18
16
14
1210
8
6
4
2
17
15
13
119
7
5
3
1
2003 Crown Victoria(cro)
Owners Guide (post-2002-fmt)
USA English(fus)
Roadside Emergencies
169