2003 CHEVROLET VENTURE bulb
[x] Cancel search: bulbPage 1 of 486

Seats and Restraint Systems........................... 1-1
Front Seats
............................................... 1-3
Rear Seats
............................................... 1-7
Safety Belts
.............................................1-30
Child Restraints
.......................................1-55
Air Bag Systems
......................................1-93
Restraint System Check
..........................1-103
Features and Controls..................................... 2-1
Keys
........................................................ 2-3
Doors and Locks
....................................... 2-9
Windows
.................................................2-24
Theft-Deterrent Systems
............................2-27
Starting and Operating Your Vehicle
...........2-31
Mirrors
....................................................2-44
OnStar
žSystem
......................................2-45
HomeLinkžTransmitter
.............................2-47
Storage Areas
.........................................2-51
Vehicle Personalization
.............................2-61
Instrument Panel............................................. 3-1
Instrument Panel Overview
.......................... 3-4
Climate Controls
......................................3-25
Warning Lights, Gages and Indicators
.........3-35
Message Center
.......................................3-50
Driver Information Center (DIC)
..................3-58
Audio System(s)
.......................................3-61Driving Your Vehicle....................................... 4-1
Your Driving, the Road, and Your Vehicle
..... 4-2
Towing
...................................................4-32
Service and Appearance Care.......................... 5-1
Service
..................................................... 5-3
Fuel
......................................................... 5-4
Checking Things Under the Hood
...............5-10
All-Wheel Drive
........................................5-50
Bulb Replacement
....................................5-52
Windshield Wiper Blade Replacement
.........5-58
Tires
......................................................5-60
Appearance Care
.....................................5-87
Vehicle Identi®cation
.................................5-95
Electrical System
......................................5-96
Capacities and Speci®cations
...................5-103
Normal Maintenance Replacement Parts
....5-104
Maintenance Schedule..................................... 6-1
Maintenance Schedule
................................ 6-2
Customer Assistance Information.................... 7-1
Customer Assistance Information
.................. 7-2
Reporting Safety Defects
............................ 7-9
Index.................................................................1
2003 Chevrolet Venture Owner ManualM
Page 188 of 486

Turn and Lane-Change Signals
The turn signal has two upward (for right) and two
downward (for left) positions. These positions allow you
to signal a turn or a lane change.
To signal a turn, move the lever all the way up or down.
When the turn is ®nished, the lever will return
automatically.
An arrow on the instrument
panel cluster will ¯ash in
the direction of the
turn or lane change.
To signal a lane change, just raise or lower the lever
until the arrow starts to ¯ash. Hold it there until you
complete your lane change. The lever will return by itself
when you release it.
As you signal a turn or a lane change, if the arrow
¯ashes faster than normal, a signal bulb may be burned
out and other drivers won't see your turn signal.
If a bulb is burned out, replace it to help avoid an
accident. If the arrows don't go on at all when you signal
a turn, check for burned-out bulbs and check the
fuse. See
Bulb Replacement on page 5-52andFuses
and Circuit Breakers on page 5-96.If you have a trailer towing option with added wiring for
the trailer lamps, the signal indicator will ¯ash at a
normal rate even if a turn signal bulb is burned
out. Check the front and rear turn signal lamps regularly
to make sure they are working.
Turn Signal On Chime
If either turn signal is left on for more than 3/4 mile
(1.2 km), a chime will sound to let the driver know to turn
it off.
If you need to leave the signal on for more than 3/4 mile
(1.2 km), turn off the signal and then turn it back on.
Headlamp High/Low-Beam Changer
To change the headlamps from high to low beam, or
low to high, simply pull the turn signal lever all the way
toward you. Then release it.
When the high beams are
on, this light on the
instrument panel cluster
will also be on.
Your fog lamps will turn off when you switch to high
beams. Using your high beams in fog is not
recommended.
3-8
Page 327 of 486

Following Distance
Stay at least twice as far behind the vehicle ahead as
you would when driving your vehicle without a trailer.
This can help you avoid situations that require
heavy braking and sudden turns.
Passing
You'll need more passing distance up ahead when
you're towing a trailer. And, because you're a good deal
longer, you'll need to go much farther beyond the
passed vehicle before you can return to your lane.
Backing Up
Hold the bottom of the steering wheel with one hand.
Then, to move the trailer to the left, just move that hand
to the left. To move the trailer to the right, move your
hand to the right. Always back up slowly and, if possible,
have someone guide you.
Making Turns
Notice:Making very sharp turns while trailering
could cause the trailer to come in contact with the
vehicle. Your vehicle could be damaged. Avoid
making very sharp turns while trailering.
When you're turning with a trailer, make wider turns
than normal. Do this so your trailer won't strike
soft shoulders, curbs, road signs, trees or other objects.
Avoid jerky or sudden maneuvers. Signal well in
advance.
Turn Signals When Towing a Trailer
When you tow a trailer, your vehicle has to have extra
wiring.
The arrows on your instrument panel will ¯ash whenever
you signal a turn or lane change. Properly hooked up,
the trailer lamps will also ¯ash, telling other drivers
you're about to turn, change lanes or stop.
When towing a trailer, the arrows on your instrument
panel will ¯ash for turns even if the bulbs on the trailer
are burned out. Thus, you may think drivers behind
you are seeing your signal when they are not. It's
important to check occasionally to be sure the trailer
bulbs are still working.
4-41
Page 331 of 486

Service............................................................5-3
Doing Your Own Service Work.........................5-3
Adding Equipment to the Outside of
Your Vehicle..............................................5-4
Fuel................................................................5-4
Gasoline Octane............................................5-4
Gasoline Speci®cations....................................5-5
California Fuel...............................................5-5
Additives.......................................................5-6
Fuels in Foreign Countries...............................5-6
Filling Your Tank............................................5-7
Filling a Portable Fuel Container.......................5-9
Checking Things Under the Hood....................5-10
Hood Release..............................................5-10
Engine Compartment Overview.......................5-12
Engine Oil...................................................5-13
Engine Air Cleaner/Filter................................5-18
Automatic Transaxle Fluid..............................5-20
Engine Coolant.............................................5-23
Radiator Pressure Cap..................................5-26
Engine Overheating.......................................5-26
Cooling System............................................5-29
Power Steering Fluid.....................................5-37
Windshield Washer Fluid................................5-38
Brakes........................................................5-40Battery........................................................5-43
Jump Starting...............................................5-44
All-Wheel Drive..............................................5-50
Bulb Replacement..........................................5-52
Halogen Bulbs..............................................5-52
Headlamps..................................................5-52
Front Turn Signal, Sidemarker and
Parking Lamps..........................................5-54
Taillamps, Turn Signal, Stoplamps and
Back-up Lamps.........................................5-56
Replacement Bulbs.......................................5-57
Windshield Wiper Blade Replacement..............5-58
Tires..............................................................5-60
In¯ation - Tire Pressure.................................5-61
Tire Inspection and Rotation...........................5-62
When It Is Time for New Tires.......................5-63
Buying New Tires.........................................5-64
Uniform Tire Quality Grading..........................5-65
Wheel Alignment and Tire Balance..................5-66
Wheel Replacement......................................5-66
Tire Chains..................................................5-67
Accessory In¯ator.........................................5-68
If a Tire Goes Flat........................................5-70
Changing a Flat Tire.....................................5-71
Compact Spare Tire......................................5-86
Section 5 Service and Appearance Care
5-1
Page 382 of 486

Bulb Replacement
For the type of bulbs, seeReplacement Bulbs on
page 5-57.
For any bulb changing procedure not listed in this
section, contact your dealer.
Halogen Bulbs
{CAUTION:
Halogen bulbs have pressurized gas inside
and can burst if you drop or scratch the bulb.
You or others could be injured. Be sure to read
and follow the instructions on the bulb
package.
Headlamps
1. Open the hood.
2. Remove the front turn signal/parking lamp
assembly. See
Front Turn Signal, Sidemarker and
Parking Lamps on page 5-54.
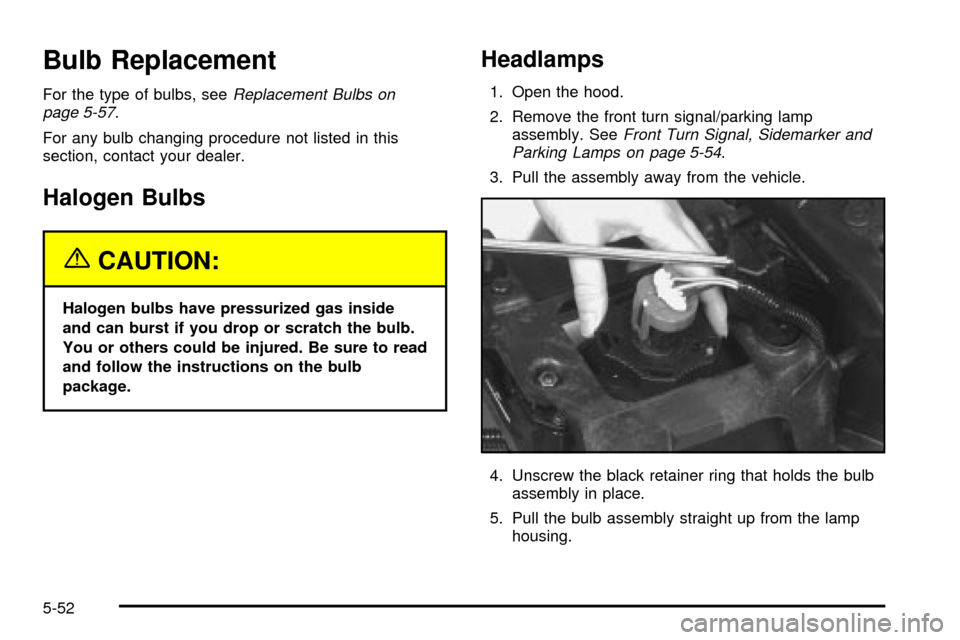
3. Pull the assembly away from the vehicle.
4. Unscrew the black retainer ring that holds the bulb
assembly in place.
5. Pull the bulb assembly straight up from the lamp
housing.
5-52
Page 383 of 486

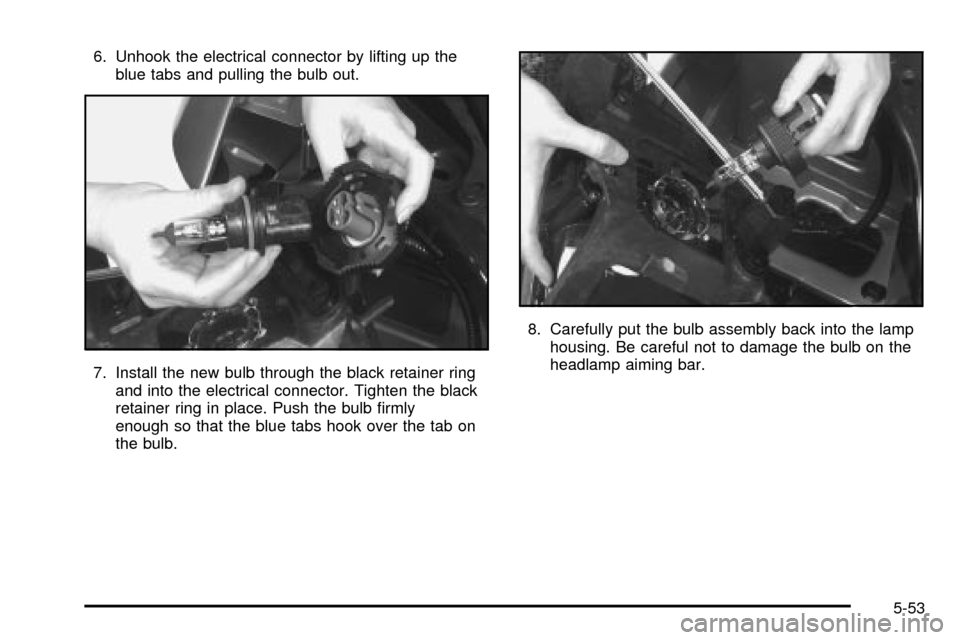
6. Unhook the electrical connector by lifting up the
blue tabs and pulling the bulb out.
7. Install the new bulb through the black retainer ring
and into the electrical connector. Tighten the black
retainer ring in place. Push the bulb ®rmly
enough so that the blue tabs hook over the tab on
the bulb.8. Carefully put the bulb assembly back into the lamp
housing. Be careful not to damage the bulb on the
headlamp aiming bar.
5-53
Page 385 of 486

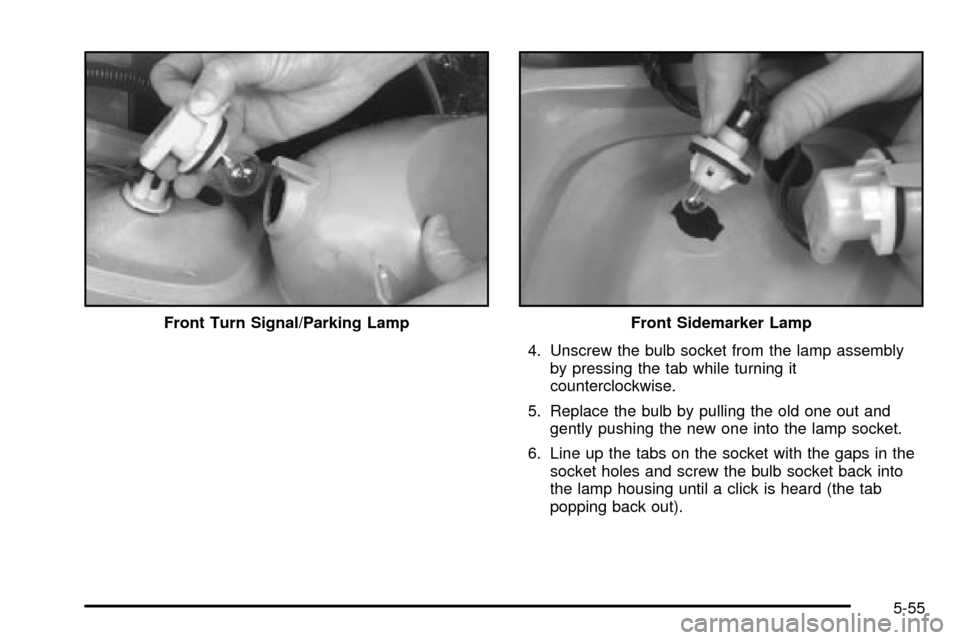
4. Unscrew the bulb socket from the lamp assembly
by pressing the tab while turning it
counterclockwise.
5. Replace the bulb by pulling the old one out and
gently pushing the new one into the lamp socket.
6. Line up the tabs on the socket with the gaps in the
socket holes and screw the bulb socket back into
the lamp housing until a click is heard (the tab
popping back out). Front Turn Signal/Parking Lamp
Front Sidemarker Lamp
5-55
Page 386 of 486

7. To reinstall the lamp assembly, line up and insert
the tabs on the back of the assembly in the slots in
the fender. Engage the lower clip on the back of
the lamp assembly into the fender, keeping
the upper tab on the front turn signal/parking lamp
assembly inboard of the headlamp bracket tab.
8. To align the front turn signal/parking lamp assembly
with the headlamp assembly, lift up the front turn
signal/parking lamp assembly until the upper edge is
contacting the fender.
9. Fasten the front turn signal/parking lamp assembly
to the headlamp assembly with the thumbscrew
removed in Step 2.
Taillamps, Turn Signal, Stoplamps
and Back-up Lamps
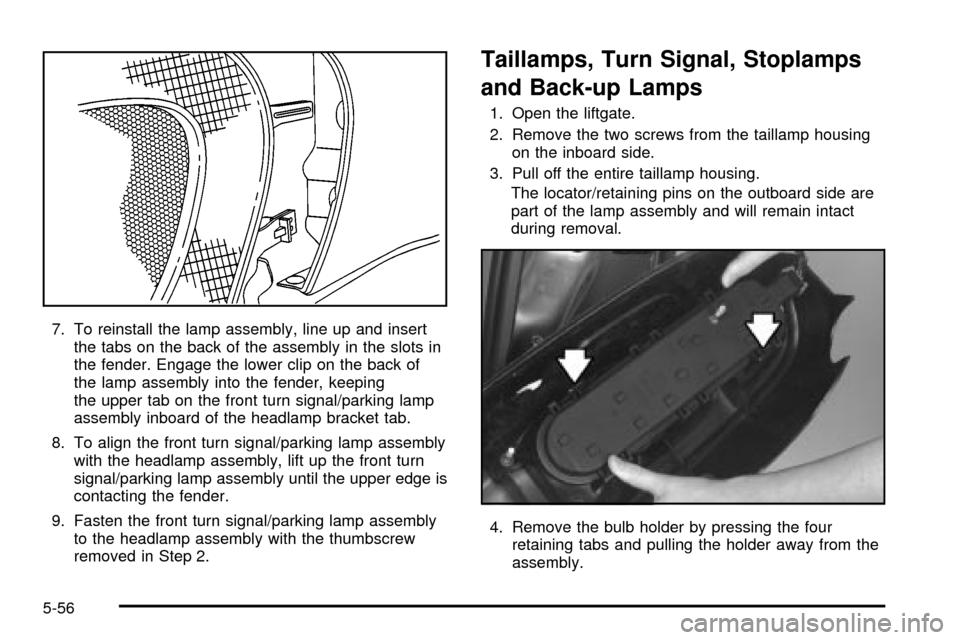
1. Open the liftgate.
2. Remove the two screws from the taillamp housing
on the inboard side.
3. Pull off the entire taillamp housing.
The locator/retaining pins on the outboard side are
part of the lamp assembly and will remain intact
during removal.
4. Remove the bulb holder by pressing the four
retaining tabs and pulling the holder away from the
assembly.
5-56