2003 CHEVROLET TRAIL BLAZER door lock
[x] Cancel search: door lockPage 1 of 436

Seats and Restraint Systems........................... 1-1
Front Seats
............................................... 1-2
Rear Seats
............................................... 1-6
Safety Belts
.............................................. 1-8
Child Restraints
.......................................1-28
Air Bag Systems
......................................1-49
Restraint System Check
............................1-59
Features and Controls..................................... 2-1
Keys
........................................................ 2-3
Doors and Locks
....................................... 2-8
Windows
.................................................2-14
Theft-Deterrent Systems
............................2-16
Starting and Operating Your Vehicle
...........2-18
Mirrors
....................................................2-34
OnStar
žSystem
......................................2-38
HomeLinkžTransmitter
.............................2-39
Storage Areas
.........................................2-43
Sunroof
..................................................2-50
Vehicle Personalization
.............................2-50
Instrument Panel............................................. 3-1
Instrument Panel Overview
.......................... 3-4
Climate Controls
......................................3-21
Warning Lights, Gages and Indicators
.........3-35
Driver Information Center (DIC)
..................3-51Audio System(s)
.......................................3-64
Driving Your Vehicle....................................... 4-1
Your Driving, the Road, and Your Vehicle
..... 4-2
Towing
...................................................4-44
Service and Appearance Care.......................... 5-1
Service
..................................................... 5-3
Fuel
......................................................... 5-4
Checking Things Under the Hood
...............5-10
Rear Axle
...............................................5-47
Four-Wheel Drive
.....................................5-48
Bulb Replacement
....................................5-50
Windshield Wiper Blade Replacement
.........5-51
Tires
......................................................5-54
Appearance Care
.....................................5-79
Vehicle Identi®cation
.................................5-87
Electrical System
......................................5-88
Capacities and Speci®cations
...................5-100
Normal Maintenance Replacement Parts
....5-102
Maintenance Schedule..................................... 6-1
Maintenance Schedule
................................ 6-2
Customer Assistance Information.................... 7-1
Customer Assistance Information
.................. 7-2
Reporting Safety Defects
............................ 7-8
Index................................................................ 1
2003 Chevrolet TrailBlazerM
Page 9 of 436

Manual Lumbar
Your vehicle may have this feature. This control is
located on the outboard side of the seat.
Turn the knob counterclockwise to increase lumbar
support and clockwise to decrease lumbar support.
Power Lumbar
Your vehicle may have this feature. The driver's and
passenger's seatback lumbar support can be adjusted
by moving a single control located on the outboard
side of the seat cushions. To increase or decrease
support, hold the control forward or rearward.
Keep in mind that as your seating position changes, as
it may during long trips, so should the position of
your lumbar support. Adjust the seat as needed.
Heated Seats
Your vehicle may have
heated front seats. The
buttons used to control this
feature are located on
the front door armrests.
The engine must be
running for the heated seat
feature to work.
To heat the entire seat, press the horizontal button with
the heated seat symbol. Press the button repeatedly
to cycle through the temperature settings of high,
medium, low and off. The indicator lights will glow to
designate the level of heat selected: three for high,
two for medium and one for low. The low setting warms
the seatback and cushion until the seat temperature
is near body temperature. The medium and high settings
heat the seatback and seat cushion to a slightly
higher temperature. You will be able to feel heat in
about two minutes.
1-3
Page 20 of 436

How to Wear Safety Belts Properly
This part is only for people of adult size.
Be aware that there are special things to know about
safety belts and children. And there are different
rules for smaller children and babies. If a child will be
riding in your vehicle, see
Older Children on page 1-28orInfants and Young Children on page 1-31. Follow
those rules for everyone's protection.
First, you'll want to know which restraint systems your
vehicle has.
We'll start with the driver position.
Driver Position
This part describes the driver's restraint system.
Lap-Shoulder Belt
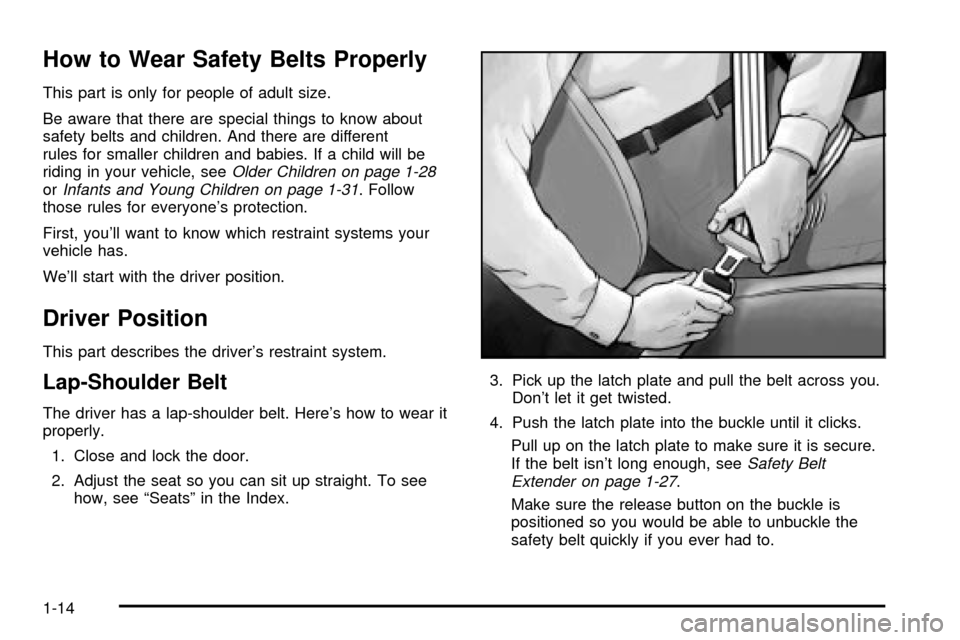
The driver has a lap-shoulder belt. Here's how to wear it
properly.
1. Close and lock the door.
2. Adjust the seat so you can sit up straight. To see
how, see ªSeatsº in the Index.3. Pick up the latch plate and pull the belt across you.
Don't let it get twisted.
4. Push the latch plate into the buckle until it clicks.
Pull up on the latch plate to make sure it is secure.
If the belt isn't long enough, see
Safety Belt
Extender on page 1-27.
Make sure the release button on the buckle is
positioned so you would be able to unbuckle the
safety belt quickly if you ever had to.
1-14
Page 60 of 436

If your vehicle has one, the right front passenger's side
impact air bag is in the side of the passenger's
seatback closest to the door.
{CAUTION:
If something is between an occupant and an
air bag, the bag might not in¯ate properly or it
might force the object into that person causing
severe injury or even death. The path of an
in¯ating air bag must be kept clear. Don't put
anything between an occupant and an air bag,
and don't attach or put anything on the
steering wheel hub or on or near any other air
bag covering. Don't let seat covers block the
in¯ation path of a side impact air bag.
1-54
Page 63 of 436

What Will You See After an Air Bag
In¯ates?
After the air bag in¯ates, it quickly de¯ates, so quickly
that some people may not even realize the air bag
in¯ated. Some components of the air bag module will be
hot for a short time. These components include the
steering wheel hub for the driver's frontal air bag and the
instrument panel for the right front passenger's frontal
air bag. For vehicles with side impact air bags, the side
of the seatback closest to the driver's and/or right
front passenger's door will be hot. The parts of the bag
that come into contact with you may be warm, but
not too hot to touch. There will be some smoke and dust
coming from the vents in the de¯ated air bags. Air
bag in¯ation doesn't prevent the driver from seeing or
being able to steer the vehicle, nor does it stop
people from leaving the vehicle.
{CAUTION:
When an air bag in¯ates, there is dust in the
air. This dust could cause breathing problems
for people with a history of asthma or other
breathing trouble. To avoid this, everyone in
the vehicle should get out as soon as it is safe
to do so. If you have breathing problems but
can't get out of the vehicle after an air bag
in¯ates, then get fresh air by opening a
window or a door. If you experience breathing
problems following an air bag deployment, you
should seek medical attention.
Your vehicle has a feature that will automatically unlock
the doors and turn the interior lamps on when the air
bags in¯ate (if battery power is available). You can lock
the doors again and turn the interior lamps off by
using the door lock and interior lamp controls.
1-57
Page 67 of 436

Keys...............................................................2-3
Remote Keyless Entry System.........................2-5
Remote Keyless Entry System Operation...........2-6
Doors and Locks.............................................2-8
Door Locks....................................................2-8
Power Door Locks..........................................2-9
Delayed Locking.............................................2-9
Programmable Automatic Door Locks..............2-10
Rear Door Security Locks..............................2-12
Lockout Protection........................................2-12
Leaving Your Vehicle....................................2-12
Liftgate/Liftglass............................................2-13
Windows........................................................2-14
Power Windows............................................2-15
Sun Visors...................................................2-15Theft-Deterrent Systems..................................2-16
Content Theft-Deterrent.................................2-16
Passlock
ž....................................................2-18
Starting and Operating Your Vehicle................2-18
New Vehicle Break-In....................................2-18
Ignition Positions..........................................2-19
Starting Your Engine.....................................2-20
Engine Coolant Heater..................................2-21
Automatic Transmission Operation...................2-22
Four-Wheel Drive..........................................2-24
Parking Brake..............................................2-28
Shifting Into Park (P).....................................2-29
Shifting Out of Park (P).................................2-31
Parking Over Things That Burn.......................2-31
Engine Exhaust............................................2-32
Running Your Engine While You Are
Parked.....................................................2-32
Section 2 Features and Controls
2-1
Page 70 of 436

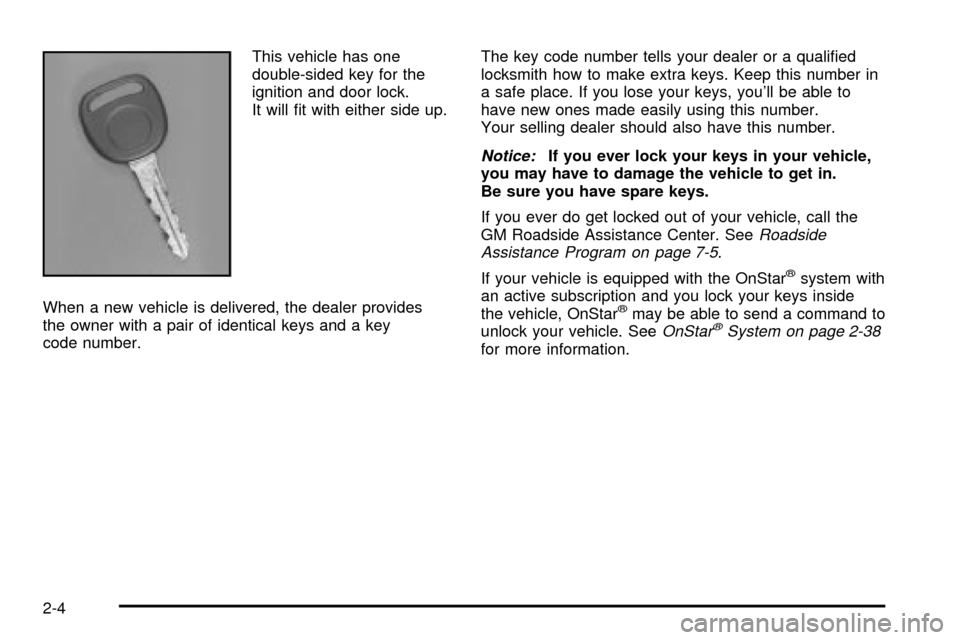
This vehicle has one
double-sided key for the
ignition and door lock.
It will ®t with either side up.
When a new vehicle is delivered, the dealer provides
the owner with a pair of identical keys and a key
code number.The key code number tells your dealer or a quali®ed
locksmith how to make extra keys. Keep this number in
a safe place. If you lose your keys, you'll be able to
have new ones made easily using this number.
Your selling dealer should also have this number.
Notice:If you ever lock your keys in your vehicle,
you may have to damage the vehicle to get in.
Be sure you have spare keys.
If you ever do get locked out of your vehicle, call the
GM Roadside Assistance Center. See
Roadside
Assistance Program on page 7-5.
If your vehicle is equipped with the OnStar
žsystem with
an active subscription and you lock your keys inside
the vehicle, OnStar
žmay be able to send a command to
unlock your vehicle. SeeOnStaržSystem on page 2-38for more information.
2-4
Page 72 of 436

Remote Keyless Entry System
Operation
If your vehicle has this feature, you can lock and unlock
your doors from about 3 feet (1 m) up to 30 feet
(9 m) away using the remote keyless entry transmitter
supplied with your vehicle.
K(Unlock):Press unlock
for the driver's door to
unlock automatically, the
parking lamps to ¯ash
and the interior lights to go
on. Press the unlock
button a second time within
three seconds to unlock
all the doors.
You can program different feedback settings through the
Driver Information Center (DIC). For more information
see
Driver Information Center (DIC) on page 3-51.
Q(Lock):Press lock to lock all the doors. Press lock
again within three seconds and the horn will chirp.
L(Panic):Press the horn symbol to make the horn
sound. The headlamps and taillamps will ¯ash for up to
30 seconds. This can be turned off by pressing the
horn button again, by waiting for 30 seconds, or
by starting the vehicle.
Matching Transmitter(s) to Your
Vehicle
Each remote keyless entry transmitter is coded to
prevent another transmitter from unlocking your vehicle.
If a transmitter is lost or stolen, a replacement can
be purchased through your dealer. Remember to bring
any remaining transmitters with you when you go to
your dealer. When the dealer matches the replacement
transmitter to your vehicle, any remaining transmitters
must also be matched. Once your dealer has coded the
new transmitter, the lost transmitter will not unlock
your vehicle. Each vehicle can have a maximum of four
transmitters matched to it.
2-6