2003 CHEVROLET TRAIL BLAZER roof
[x] Cancel search: roofPage 1 of 436

Seats and Restraint Systems........................... 1-1
Front Seats
............................................... 1-2
Rear Seats
............................................... 1-6
Safety Belts
.............................................. 1-8
Child Restraints
.......................................1-28
Air Bag Systems
......................................1-49
Restraint System Check
............................1-59
Features and Controls..................................... 2-1
Keys
........................................................ 2-3
Doors and Locks
....................................... 2-8
Windows
.................................................2-14
Theft-Deterrent Systems
............................2-16
Starting and Operating Your Vehicle
...........2-18
Mirrors
....................................................2-34
OnStar
žSystem
......................................2-38
HomeLinkžTransmitter
.............................2-39
Storage Areas
.........................................2-43
Sunroof
..................................................2-50
Vehicle Personalization
.............................2-50
Instrument Panel............................................. 3-1
Instrument Panel Overview
.......................... 3-4
Climate Controls
......................................3-21
Warning Lights, Gages and Indicators
.........3-35
Driver Information Center (DIC)
..................3-51Audio System(s)
.......................................3-64
Driving Your Vehicle....................................... 4-1
Your Driving, the Road, and Your Vehicle
..... 4-2
Towing
...................................................4-44
Service and Appearance Care.......................... 5-1
Service
..................................................... 5-3
Fuel
......................................................... 5-4
Checking Things Under the Hood
...............5-10
Rear Axle
...............................................5-47
Four-Wheel Drive
.....................................5-48
Bulb Replacement
....................................5-50
Windshield Wiper Blade Replacement
.........5-51
Tires
......................................................5-54
Appearance Care
.....................................5-79
Vehicle Identi®cation
.................................5-87
Electrical System
......................................5-88
Capacities and Speci®cations
...................5-100
Normal Maintenance Replacement Parts
....5-102
Maintenance Schedule..................................... 6-1
Maintenance Schedule
................................ 6-2
Customer Assistance Information.................... 7-1
Customer Assistance Information
.................. 7-2
Reporting Safety Defects
............................ 7-8
Index................................................................ 1
2003 Chevrolet TrailBlazerM
Page 68 of 436

Mirrors...........................................................2-34
Automatic Dimming Rearview Mirror with
OnStar
žand Compass...............................2-34
Outside Manual Mirrors..................................2-36
Outside Power Mirrors...................................2-36
Outside Curb View Assist Mirror.....................2-36
Outside Convex Mirror...................................2-37
Outside Heated Mirrors..................................2-37
OnStar
žSystem.............................................2-38
HomeLinkžTransmitter...................................2-39
Programming the HomeLinkžTransmitter.........2-40Storage Areas................................................2-43
Glove Box...................................................2-43
Overhead Console........................................2-43
Front Storage Area.......................................2-44
Table..........................................................2-47
Luggage Carrier...........................................2-47
Rear Floor Storage Lid..................................2-48
Convenience Net..........................................2-49
Cargo Cover................................................2-49
Sunroof.........................................................2-50
Vehicle Personalization...................................2-50
Memory Seat...............................................2-50
Section 2 Features and Controls
2-2
Page 85 of 436

Ignition Positions
Use the key to turn the ignition switch to four different
positions.
A (LOCK):This position locks the ignition and
transmission. It's a theft-deterrent feature. You will only
be able to remove the key when the ignition is turned
to LOCK.
Notice:If your key seems stuck in LOCK and you
can't turn it, be sure you are using the correct key;
if so, is it all the way in? Turn the key only with
your hand.Using a tool to force it could break the key or the
ignition switch. If none of these works, then
your vehicle needs service.
B (ACCESSORY):This position lets you use things like
the radio and the windshield wipers when the engine
is off.
Notice:Lengthy operation of features such as the
radio in the accessory ignition position may
drain the battery and prevent your vehicle from
starting. Do not operate your vehicle in the
accessory ignition position for a long period
of time.
C (RUN):This is the position for driving.
D (START):This position starts the engine.
Retained Accessory Power (RAP)
Your vehicle is equipped with a Retained Accessory
Power (RAP) feature which will allow certain features of
your vehicle to continue to work up to 20 minutes
after the ignition key is turned to LOCK.
Your radio, power windows, sunroof (option) and
overhead console will work when the ignition key is in
RUN or ACCESSORY. Once the key is turned from
RUN to LOCK, these features will continue to work for
up to 20 minutes or until a door is opened.
2-19
Page 109 of 436
Resetting Defaults
To reset HomeLinkžto default settings do the following:
1. Hold down the two outside buttons for about
20 seconds until the indicator light begins to ¯ash.
2. Continue to hold both buttons until the HomeLink
ž
indicator light turns off.
3. Release both buttons.
For questions or comments, contact HomeLink
žat
1-800-355-3515, or on the internet at
www.homelink.com.
Storage Areas
Glove Box
To open your glove box, pull the handle on the front of
the glove box and lower the door.
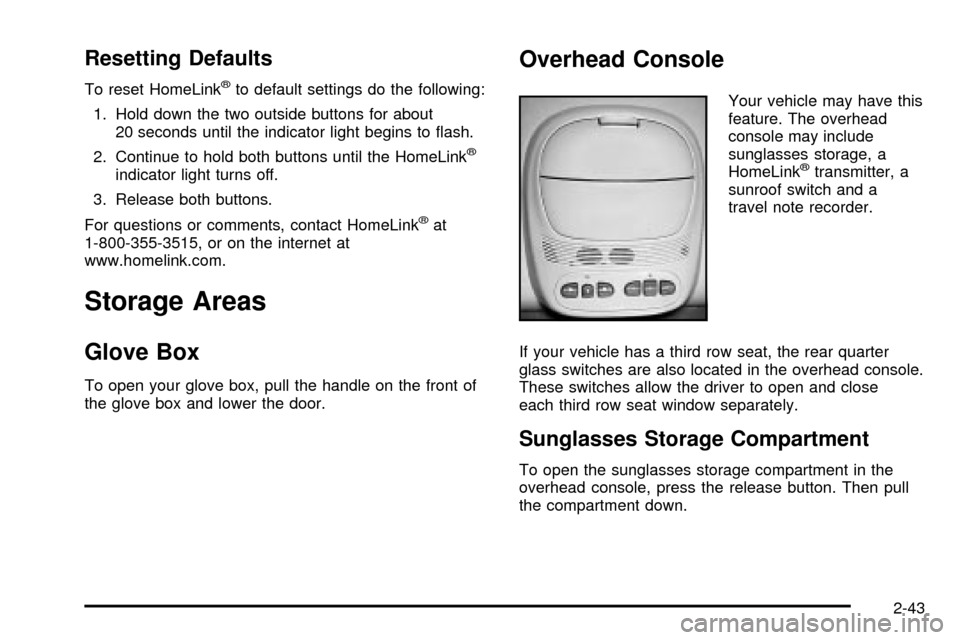
Overhead Console
Your vehicle may have this
feature. The overhead
console may include
sunglasses storage, a
HomeLink
žtransmitter, a
sunroof switch and a
travel note recorder.
If your vehicle has a third row seat, the rear quarter
glass switches are also located in the overhead console.
These switches allow the driver to open and close
each third row seat window separately.
Sunglasses Storage Compartment
To open the sunglasses storage compartment in the
overhead console, press the release button. Then pull
the compartment down.
2-43
Page 113 of 436
Table
Your vehicle may be equipped with a table. The
maximum load for the table is 200 lbs. (90 kg).
To set up the table, do the following:
1. Remove the table from its stowed location in the
rear of the vehicle.
2. Remove the cover.
3. Open the four legs on the underside of the table
base. A leg is fully extended when the leg latch
snaps into place.
Use the table base on level ground only.
To take down the table, do the following:
1. Press in the latch to disengage it from each leg.
Completely fold each leg under the base.
2. Reinstall the cover.
3. Return the table to its stowed location.
Luggage Carrier
{CAUTION:
If you try to carry something on top of your
vehicle that is longer or wider than the luggage
carrier Ð like paneling, plywood, a mattress
and so forth Ð the wind can catch it as you
drive along. This can cause you to lose
control. What you are carrying could be
violently torn off, and this could cause you or
other drivers to have a collision, and of course
damage your vehicle. You may be able to carry
something like this inside. But, never carry
something longer or wider than the luggage
carrier on top of your vehicle.
A luggage carrier allows you to load things on top of
your vehicle. The luggage carrier has side rails attached
to the roof, sliding crossrails (if equipped) and places
to use for tying things down. These let you load
some other things on top of your vehicle, as long as
they are not wider or longer than the luggage carrier.
2-47
Page 116 of 436
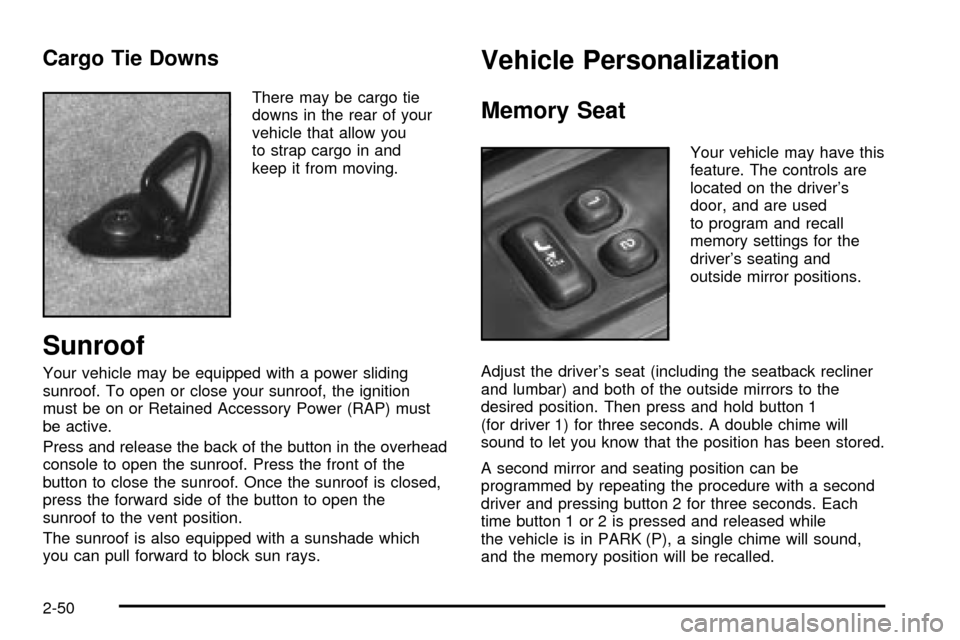
Cargo Tie Downs
There may be cargo tie
downs in the rear of your
vehicle that allow you
to strap cargo in and
keep it from moving.
Sunroof
Your vehicle may be equipped with a power sliding
sunroof. To open or close your sunroof, the ignition
must be on or Retained Accessory Power (RAP) must
be active.
Press and release the back of the button in the overhead
console to open the sunroof. Press the front of the
button to close the sunroof. Once the sunroof is closed,
press the forward side of the button to open the
sunroof to the vent position.
The sunroof is also equipped with a sunshade which
you can pull forward to block sun rays.
Vehicle Personalization
Memory Seat
Your vehicle may have this
feature. The controls are
located on the driver's
door, and are used
to program and recall
memory settings for the
driver's seating and
outside mirror positions.
Adjust the driver's seat (including the seatback recliner
and lumbar) and both of the outside mirrors to the
desired position. Then press and hold button 1
(for driver 1) for three seconds. A double chime will
sound to let you know that the position has been stored.
A second mirror and seating position can be
programmed by repeating the procedure with a second
driver and pressing button 2 for three seconds. Each
time button 1 or 2 is pressed and released while
the vehicle is in PARK (P), a single chime will sound,
and the memory position will be recalled.
2-50
Page 242 of 436
Before You Go Off-Roading
There are some things to do before you go out. For
example, be sure to have all necessary maintenance
and service work done. Check to make sure all
underbody shields (if so equipped) are properly
attached.
Be sure you read all the information about your
four-wheel-drive vehicle in this manual.
Is there enough fuel? Is the spare tire fully in¯ated?
Are the ¯uid levels up where they should be? What
are the local laws that apply to off-roading where you will
be driving? If you do not know, you should check with
law enforcement people in the area. Will you be on
someone's private land? If so, be sure to get the
necessary permission.
Loading Your Vehicle for Off-Road
Driving
There are some important things to remember about
how to load your vehicle.
·The heaviest things should be on the load ¯oor and
forward of your rear axle. Put heavier items as far
forward as you can.
·Be sure the load is secured properly, so driving on
the off-road terrain does not toss things around.
{CAUTION:
·Cargo on the load ¯oor piled higher than
the seatbacks can be thrown forward
during a sudden stop. You or your
passengers could be injured. Keep cargo
below the top of the seatbacks.
·Unsecured cargo on the load ¯oor can be
tossed about when driving over rough
terrain. You or your passengers can be
struck by ¯ying objects. Secure the cargo
properly.
·Heavy loads on the roof raise the vehicle's
center of gravity, making it more likely to
roll over. You can be seriously or fatally
injured if the vehicle rolls over. Put heavy
loads inside the cargo area, not on the
roof. Keep cargo in the cargo area as far
forward and low as possible.
You will ®nd other important information in this manual.
See
Loading Your Vehicle on page 4-48,Luggage
Carrier on page 2-47andTires on page 5-54.
4-16
Page 382 of 436
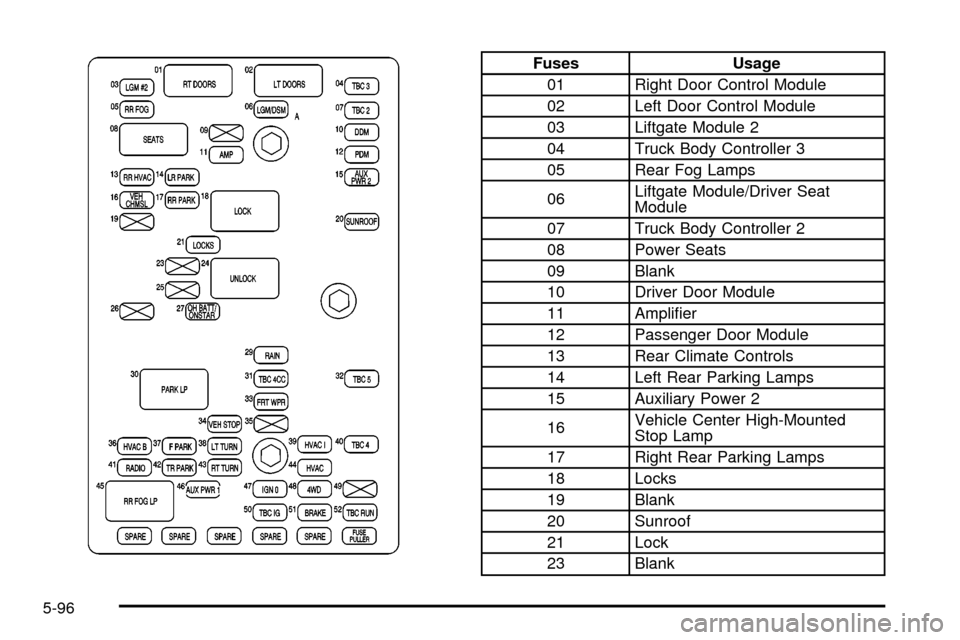
Fuses Usage
01 Right Door Control Module
02 Left Door Control Module
03 Liftgate Module 2
04 Truck Body Controller 3
05 Rear Fog Lamps
06Liftgate Module/Driver Seat
Module
07 Truck Body Controller 2
08 Power Seats
09 Blank
10 Driver Door Module
11 Ampli®er
12 Passenger Door Module
13 Rear Climate Controls
14 Left Rear Parking Lamps
15 Auxiliary Power 2
16Vehicle Center High-Mounted
Stop Lamp
17 Right Rear Parking Lamps
18 Locks
19 Blank
20 Sunroof
21 Lock
23 Blank
5-96