2003 CHEVROLET CORVETTE instrument cluster
[x] Cancel search: instrument clusterPage 76 of 368

Ignition Positions
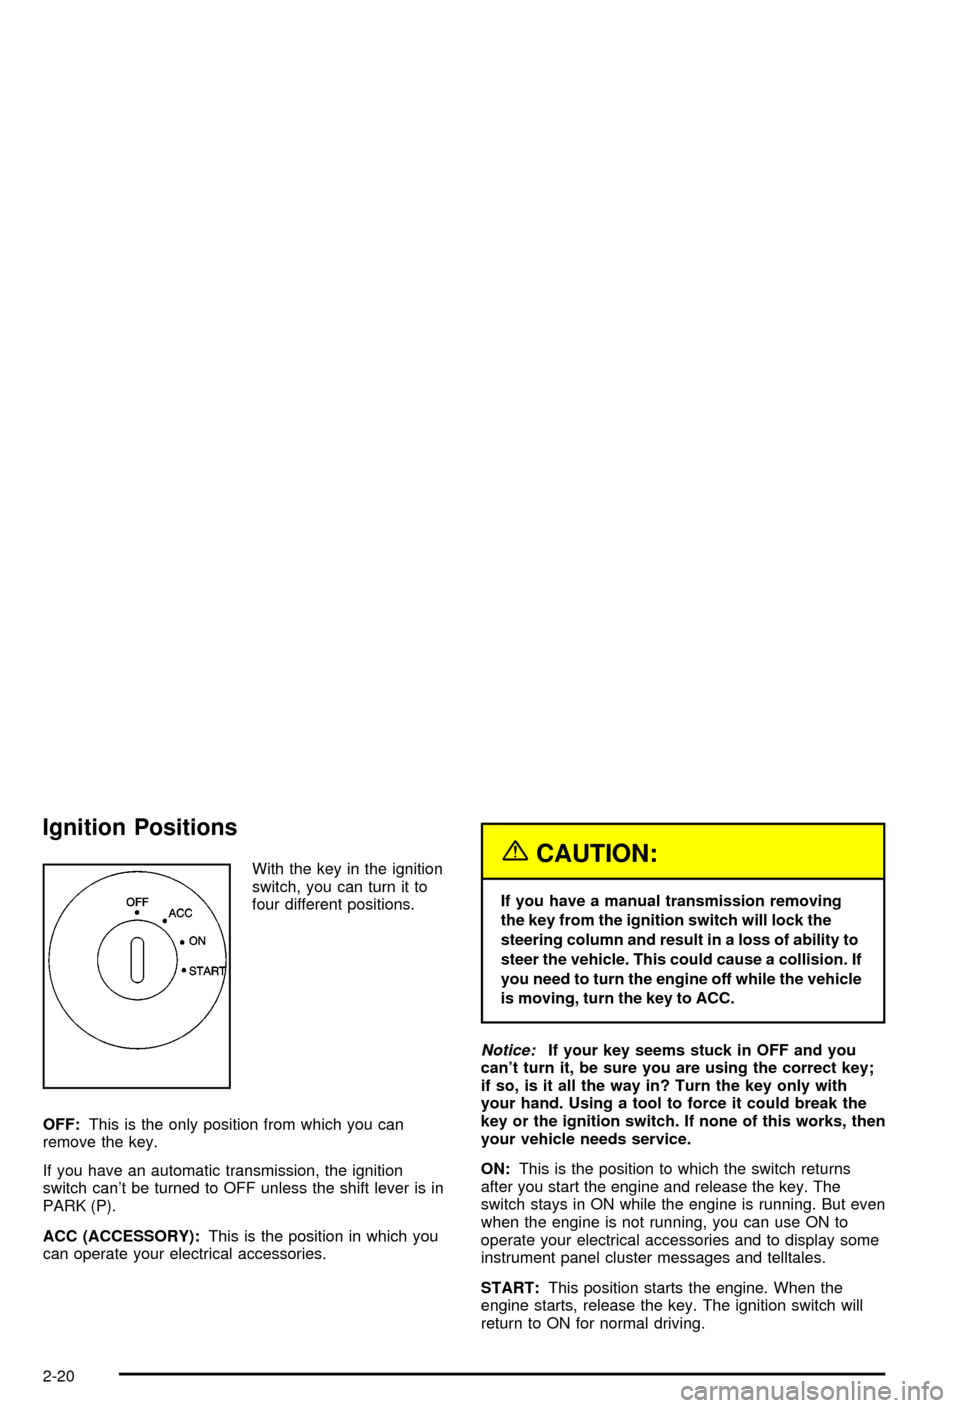
With the key in the ignition
switch, you can turn it to
four different positions.
OFF:This is the only position from which you can
remove the key.
If you have an automatic transmission, the ignition
switch can't be turned to OFF unless the shift lever is in
PARK (P).
ACC (ACCESSORY):This is the position in which you
can operate your electrical accessories.{CAUTION:
If you have a manual transmission removing
the key from the ignition switch will lock the
steering column and result in a loss of ability to
steer the vehicle. This could cause a collision. If
you need to turn the engine off while the vehicle
is moving, turn the key to ACC.
Notice:If your key seems stuck in OFF and you
can't turn it, be sure you are using the correct key;
if so, is it all the way in? Turn the key only with
your hand. Using a tool to force it could break the
key or the ignition switch. If none of this works, then
your vehicle needs service.
ON:This is the position to which the switch returns
after you start the engine and release the key. The
switch stays in ON while the engine is running. But even
when the engine is not running, you can use ON to
operate your electrical accessories and to display some
instrument panel cluster messages and telltales.
START:This position starts the engine. When the
engine starts, release the key. The ignition switch will
return to ON for normal driving.
2-20
Page 113 of 368

Instrument Panel Overview...............................3-2
Hazard Warning Flashers................................3-4
Other Warning Devices...................................3-4
Horn.............................................................3-5
Tilt Wheel.....................................................3-5
Turn Signal/Multifunction Lever.........................3-6
Exterior Lamps.............................................3-12
Interior Lamps..............................................3-15
Head-Up Display (HUD).................................3-17
Accessory Power Outlets...............................3-20
Ashtrays and Cigarette Lighter........................3-21
Climate Controls............................................3-22
Dual Automatic Climate Control System...........3-22
Outlet Adjustment.........................................3-28
Warning Lights, Gages and Indicators.............3-29
Instrument Panel Cluster................................3-30
Speedometer and Odometer...........................3-31
Tachometer.................................................3-31
Safety Belt Reminder Light.............................3-31
Air Bag Readiness Light................................3-32
Air Bag Off Light..........................................3-33
Voltmeter Gage............................................3-34
Brake System Warning Light..........................3-35
Anti-Lock Brake System Warning Light.............3-36
Traction Control System (TCS) Warning Light . . .3-36Active Handling System Light.........................3-37
Engine Coolant Temperature Gage..................3-38
Malfunction Indicator Lamp.............................3-38
Engine Oil Pressure Gage.............................3-41
Security Light...............................................3-42
Check Gages Warning Light...........................3-42
Fuel Gage...................................................3-42
Driver Information Center (DIC).......................3-44
DIC Controls and Displays.............................3-45
DIC Warnings and Messages.........................3-53
Other Messages...........................................3-61
Audio System(s).............................................3-62
Setting the Time...........................................3-62
Radio with Cassette......................................3-63
Radio with CD..............................................3-67
Trunk-Mounted CD Changer...........................3-71
Theft-Deterrent Feature..................................3-75
Understanding Radio Reception......................3-77
Care of Your Cassette Tape Player.................3-78
Care of Your CDs.........................................3-79
Care of Your CD Player................................3-79
Fixed Mast Antenna (Z06)..............................3-79
Power Antenna Mast Care (Convertible)...........3-79
Integrated Windshield and Rear Window
Antennas (Coupe).....................................3-80
Section 3 Instrument Panel
3-1
Page 115 of 368

The main components of your instrument panel are the
following:
A. Instrument Panel Brightness Control
B. Head-Up Display Controls
C. Turn Signal/Multifunction Lever
D. Driver Information Center (DIC) (Located in the
Instrument Cluster)
E. Instrument Panel Cluster
F. Windshield Wiper/Washer Lever
G. Driver Information Center (DIC) Buttons
H. Hazard Warning Flasher Button
I. Center Air Outlets
J. Audio System
K. Climate Controls
L. Fog Lamp Button
M. Remote Hatch Release Button (Coupe) or Remote
Trunk Release Button (Convertible/Z06)N. Ignition Switch
O. Shift Lever (Automatic Shown)
P. Active Handling Button
Q. Accessory Power Outlet (Located in the Center
Console)
R. Selective Ride Control Switch
S. Air Bag Off Light
T. Instrument Panel Cupholder
U. Remote Fuel Door Release Button (Located in the
Center Console)
V. Ashtray and Cigarette Lighter
W. Parking Brake
X. Glove Box
Y. Instrument Panel Fuse Block (Located Behind the
Toe-Board)
Z. Air Bag Off Switch (Located in Glove Box)
3-3
Page 118 of 368

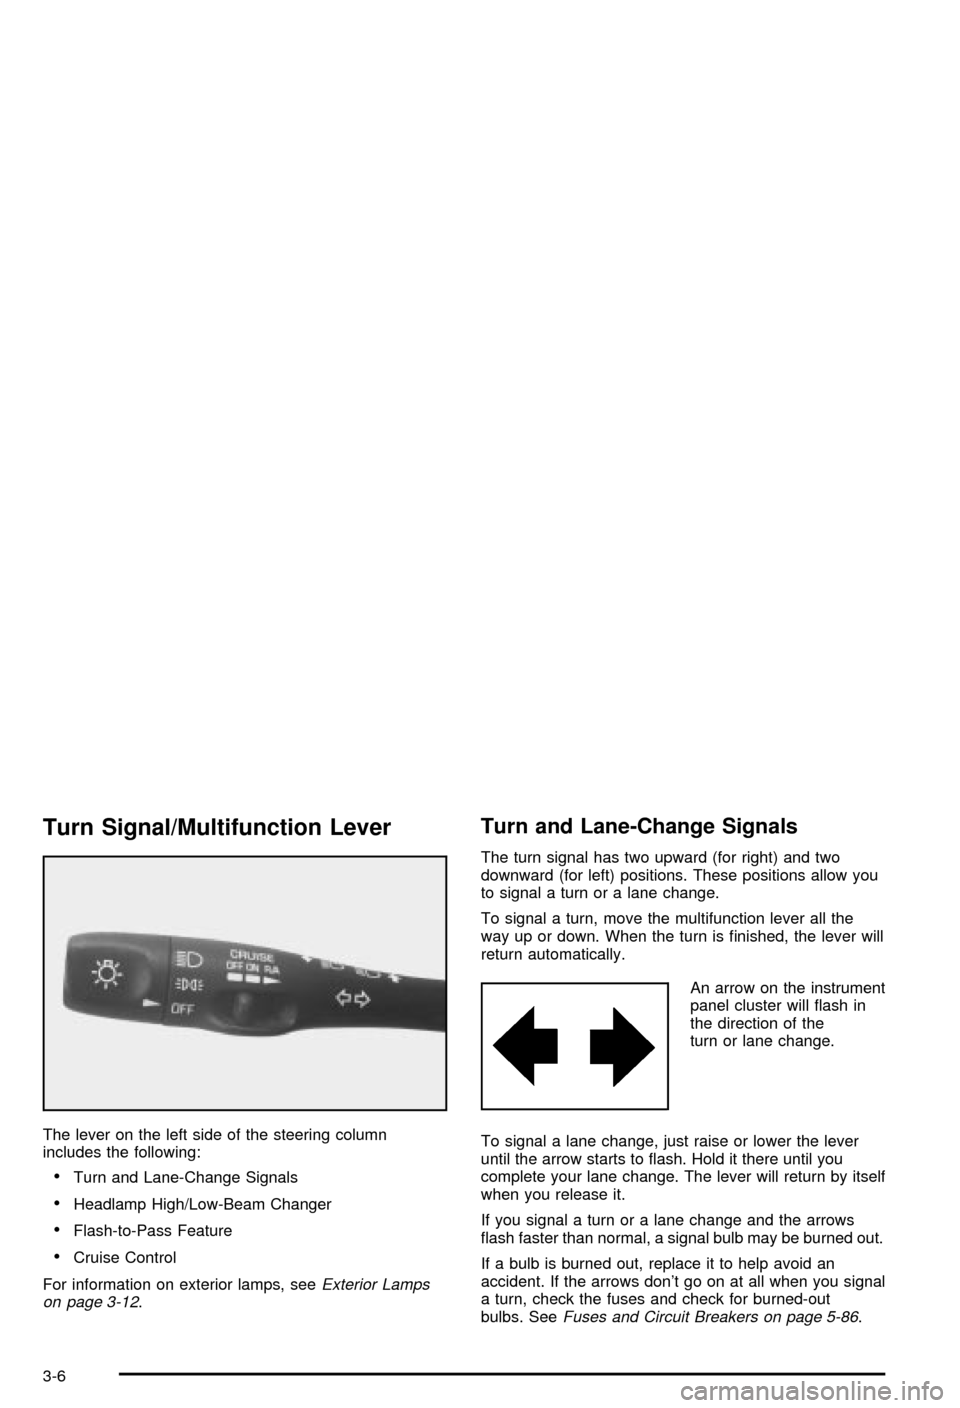
Turn Signal/Multifunction Lever
The lever on the left side of the steering column
includes the following:
·Turn and Lane-Change Signals
·Headlamp High/Low-Beam Changer
·Flash-to-Pass Feature
·Cruise Control
For information on exterior lamps, see
Exterior Lamps
on page 3-12.
Turn and Lane-Change Signals
The turn signal has two upward (for right) and two
downward (for left) positions. These positions allow you
to signal a turn or a lane change.
To signal a turn, move the multifunction lever all the
way up or down. When the turn is ®nished, the lever will
return automatically.
An arrow on the instrument
panel cluster will ¯ash in
the direction of the
turn or lane change.
To signal a lane change, just raise or lower the lever
until the arrow starts to ¯ash. Hold it there until you
complete your lane change. The lever will return by itself
when you release it.
If you signal a turn or a lane change and the arrows
¯ash faster than normal, a signal bulb may be burned out.
If a bulb is burned out, replace it to help avoid an
accident. If the arrows don't go on at all when you signal
a turn, check the fuses and check for burned-out
bulbs. See
Fuses and Circuit Breakers on page 5-86.
3-6
Page 119 of 368

Turn Signal on Chime
A chime will remind you if you leave the turn signal on
for more than 3/4 mile (1.2 km) of driving.
If you need to leave the turn signal on for more than
3/4 mile (1.2 km), turn off the signal and then turn it
back on.
Headlamp High/Low-Beam Changer
To change the headlamps from low beam to high or high
to low, push the turn signal lever all the way forward.
When the high beams are
on, this light on the
instrument panel cluster
also will be on. To change
the headlamps from
high to low, pull the lever
rearward.
Headlamps on Reminder
If you turn the ignition off and leave the headlamps or
parking lamps on and open a door, you will hear a chime
reminding you to turn off the lamps.
Flash-to-Pass
To use the ¯ash-to-pass feature, momentarily pull the
turn signal lever toward you. The high-beam indicator
will ¯ash to indicate to the other driver that you intend to
pass. If the low-beam headlamps are off and you
have the optional fog lamps on, the fog lamps will ¯ash.
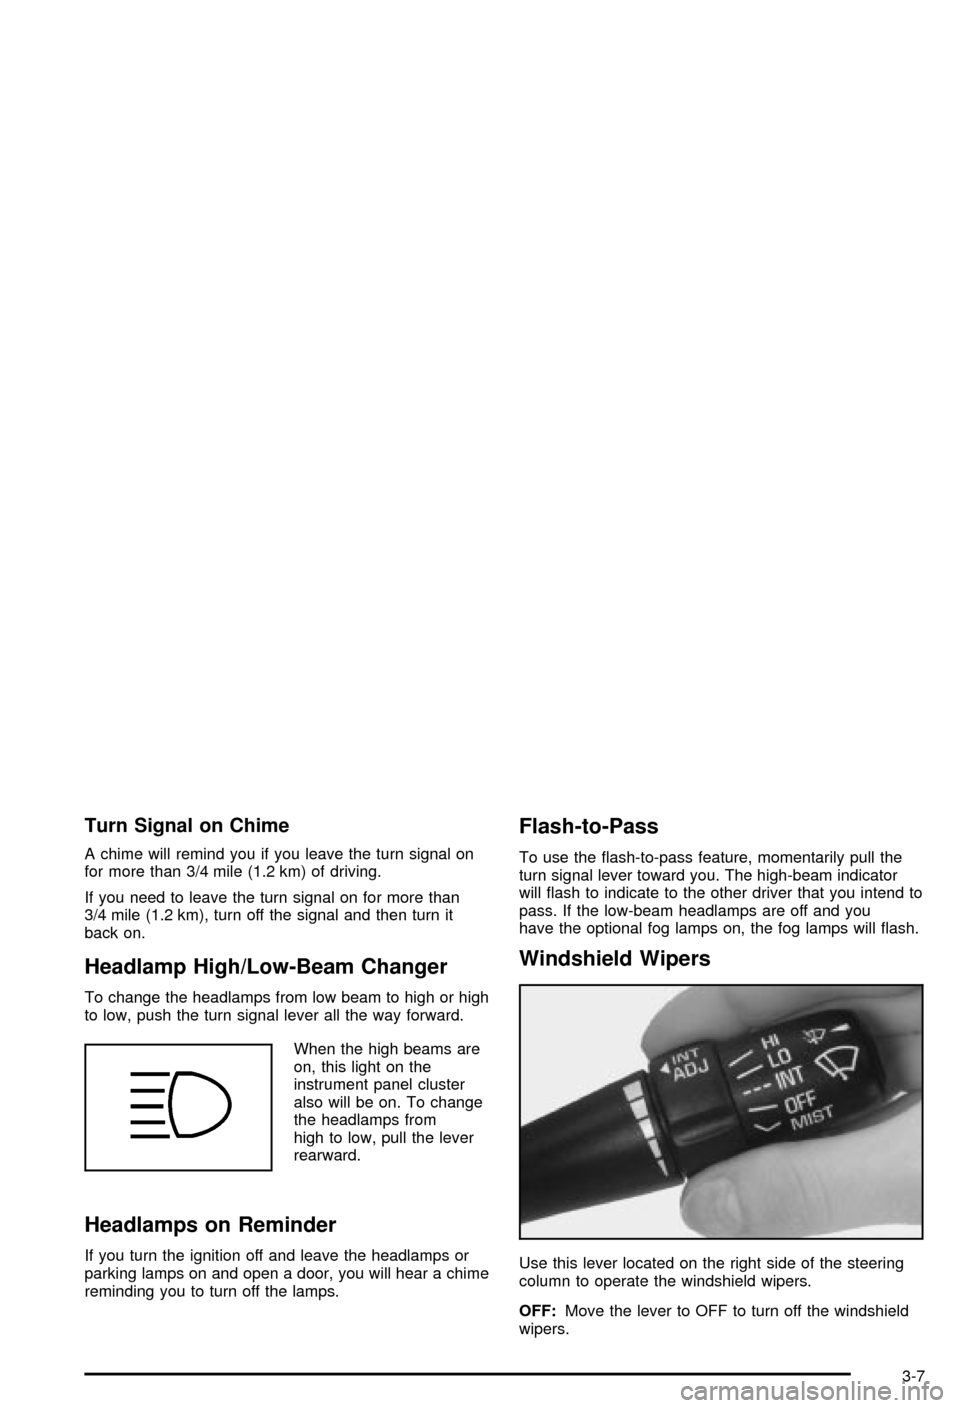
Windshield Wipers
Use this lever located on the right side of the steering
column to operate the windshield wipers.
OFF:Move the lever to OFF to turn off the windshield
wipers.
3-7
Page 126 of 368

Fog Lamps
Your vehicle may have this feature. Use the fog lamps
for better vision in foggy or misty conditions. Your
parking lamps or low-beam headlamps must be on or
the fog lamps won't work.
To turn the fog lamps on, press the button located on
the instrument panel, to the left of the steering column. A
light in the button will come on when the fog lamps
are on. Press the button again to turn the fog lamps off.
Twilight Sentinelž(Optional in United
States, Standard in Canada)
Twilight Sentinelžcan turn your lamps on and off for
you. A light sensor on top of the instrument panel makes
the Twilight Sentinel
žwork, so be sure it isn't covered.
You can customize your vehicle to turn Twilight
Sentinel
žon or off (except for vehicles ®rst sold in
Canada). SeeDriver Information Center (DIC) on
page 3-44to turn this feature on or off.
When Twilight Sentinel
žis turned on, you will see the
following happen:
·When it's dark enough outside, the front turn signal
lamps (DRL) will go off, and the headlamps and
parking lamps will come on. The other lamps
that come on with headlamps will also come on.
·When it's bright enough outside, the headlamps will
go off, and the front turn signal lamps (DRL) will
come on, as long as the exterior lamp switch is in
the OFF position.
If you start your vehicle in a dark garage, the automatic
headlamp system will come on immediately. Once you
leave the garage, it will take approximately one minute for
the automatic headlamp system to change to DRL if it is
light outside. During that delay, your instrument panel
cluster may not be as bright as usual.
3-14
Page 129 of 368

Battery Run-Down Protection
Your vehicle has a feature to help prevent you from
draining the battery in case the underhood lamp, vanity
mirror lamps, cargo lamps, reading lamps, console
or glove box lamps are accidentally left on. If you leave
any of these lamps on, they will automatically timeout
after about 15 minutes. To reset it, all of the above
lamps must be turned off or the ignition key must be
in ON.
Head-Up Display (HUD)
{CAUTION:
If the HUD image is too bright, or too high in
your ®eld of view, it may take you more time to
see things you need to see when it's dark
outside. Be sure to keep the HUD image dim
and placed low in your ®eld of view.
If your vehicle is equipped with the Head-Up Display
(HUD), you can see some of the driver information that
appears on your instrument panel cluster.The information may be displayed in English or metric
units and appears as an image focused out toward
the front of your vehicle. The HUD consists of the
following information:
·Speedometer
·Turn Signal Indicators
·High-Beam Indicator Symbol
·Tachometer
·Oil, Temperature and Fuel Gages
·Shift Light (Performance SHIFT Light)
This light is used for performance driving to indicate
that the vehicle's best performance level has
been reached to shift the transmission into the next
higher gear. The SHIFT light will display at an
engine speed of about 5,750 rpm (6,250 rpm on
Z06), just prior to reaching the engine fuel
cut-off mode.
·Check Gages Icon
3-17
Page 130 of 368

There are ®ve HUD selections that you can choose to
view in the HUD display. By pressing and holding
the PAGE button, you can scroll through these pages in
the following order:
·Speed Only
·Speed and Gage
·Speed, Tachometer and Gage
·Speed and Tachometer
·Tachometer Only
When you have chosen the desired HUD display,
release the PAGE button.
Gages can be scrolled through by tapping the PAGE
button (only when a gage is displayed). The gages
shown are the following:
·Oil Pressure
·Coolant Temperature
·Fuel LevelThe selections that you choose will remain in the HUD
display until they are changed.
Be sure to continue scanning your displays, controls
and driving environment just as you would in a vehicle
without HUD. If you never look at your instrument
panel cluster, you may not see something important,
such as a warning light. Under important warning
conditions, the CHECK GAGES icon will illuminate in
the HUD. View your Driver Information Center (DIC) for
more information.
3-18