Page 118 of 368

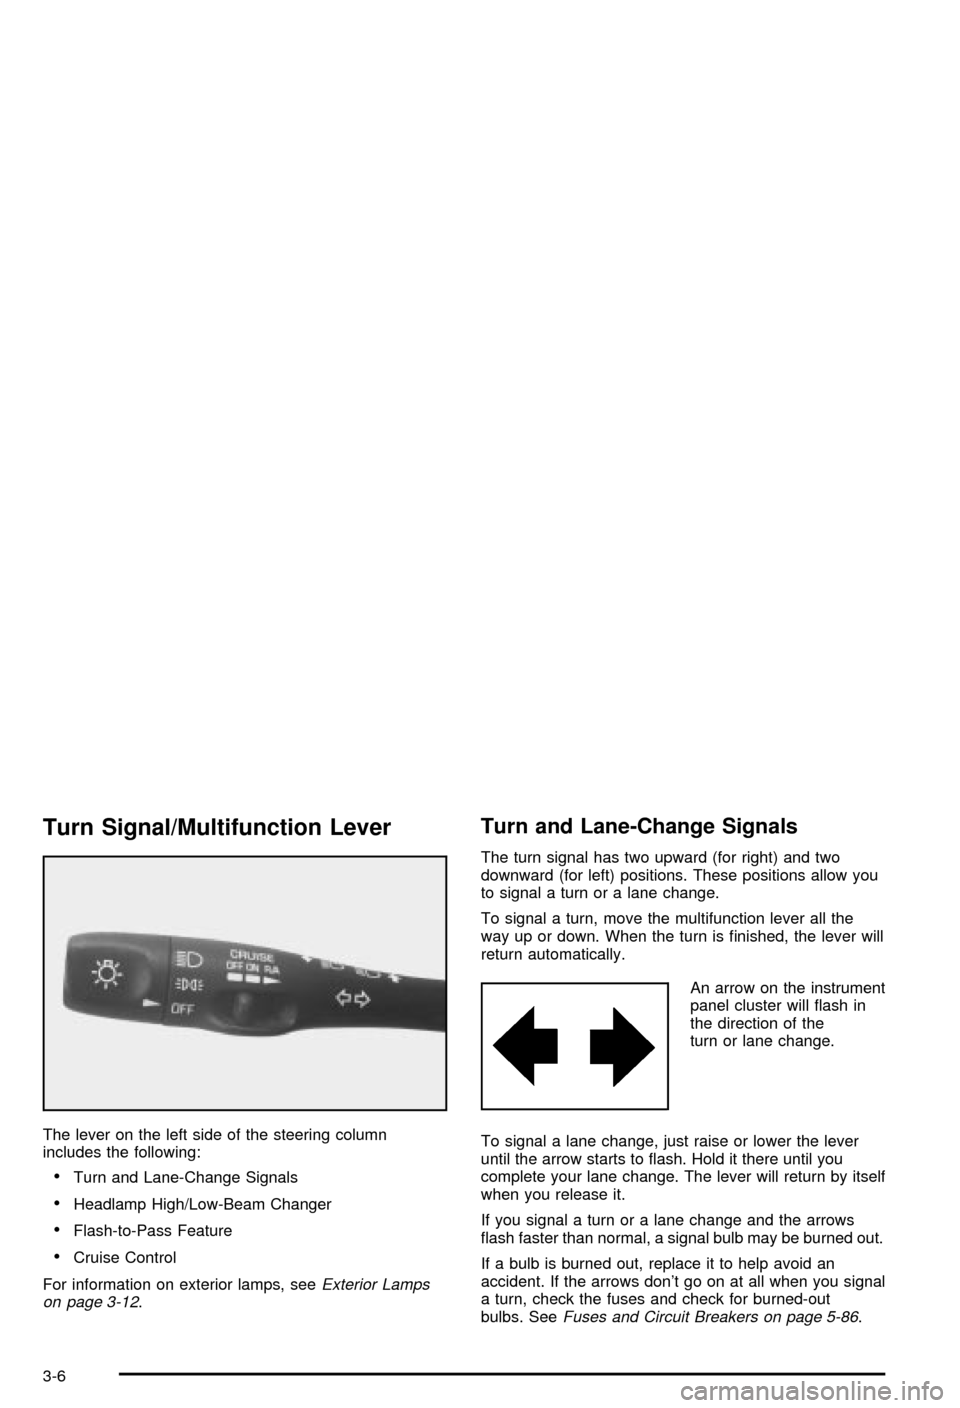
Turn Signal/Multifunction Lever
The lever on the left side of the steering column
includes the following:
·Turn and Lane-Change Signals
·Headlamp High/Low-Beam Changer
·Flash-to-Pass Feature
·Cruise Control
For information on exterior lamps, see
Exterior Lamps
on page 3-12.
Turn and Lane-Change Signals
The turn signal has two upward (for right) and two
downward (for left) positions. These positions allow you
to signal a turn or a lane change.
To signal a turn, move the multifunction lever all the
way up or down. When the turn is ®nished, the lever will
return automatically.
An arrow on the instrument
panel cluster will ¯ash in
the direction of the
turn or lane change.
To signal a lane change, just raise or lower the lever
until the arrow starts to ¯ash. Hold it there until you
complete your lane change. The lever will return by itself
when you release it.
If you signal a turn or a lane change and the arrows
¯ash faster than normal, a signal bulb may be burned out.
If a bulb is burned out, replace it to help avoid an
accident. If the arrows don't go on at all when you signal
a turn, check the fuses and check for burned-out
bulbs. See
Fuses and Circuit Breakers on page 5-86.
3-6
Page 119 of 368

Turn Signal on Chime
A chime will remind you if you leave the turn signal on
for more than 3/4 mile (1.2 km) of driving.
If you need to leave the turn signal on for more than
3/4 mile (1.2 km), turn off the signal and then turn it
back on.
Headlamp High/Low-Beam Changer
To change the headlamps from low beam to high or high
to low, push the turn signal lever all the way forward.
When the high beams are
on, this light on the
instrument panel cluster
also will be on. To change
the headlamps from
high to low, pull the lever
rearward.
Headlamps on Reminder
If you turn the ignition off and leave the headlamps or
parking lamps on and open a door, you will hear a chime
reminding you to turn off the lamps.
Flash-to-Pass
To use the ¯ash-to-pass feature, momentarily pull the
turn signal lever toward you. The high-beam indicator
will ¯ash to indicate to the other driver that you intend to
pass. If the low-beam headlamps are off and you
have the optional fog lamps on, the fog lamps will ¯ash.
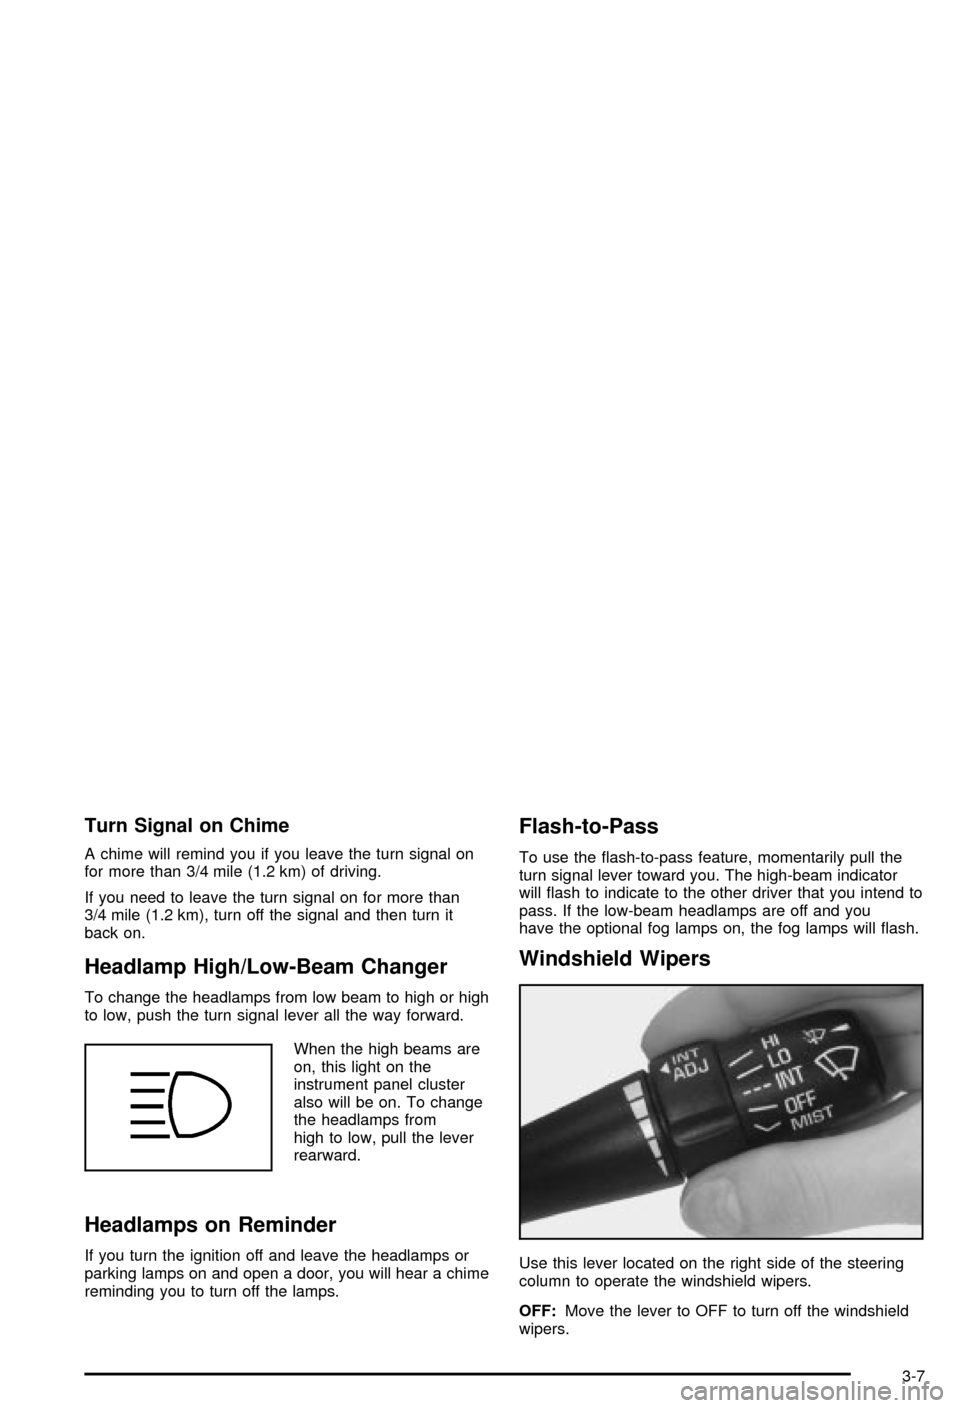
Windshield Wipers
Use this lever located on the right side of the steering
column to operate the windshield wipers.
OFF:Move the lever to OFF to turn off the windshield
wipers.
3-7
Page 126 of 368

Fog Lamps
Your vehicle may have this feature. Use the fog lamps
for better vision in foggy or misty conditions. Your
parking lamps or low-beam headlamps must be on or
the fog lamps won't work.
To turn the fog lamps on, press the button located on
the instrument panel, to the left of the steering column. A
light in the button will come on when the fog lamps
are on. Press the button again to turn the fog lamps off.
Twilight Sentinelž(Optional in United
States, Standard in Canada)
Twilight Sentinelžcan turn your lamps on and off for
you. A light sensor on top of the instrument panel makes
the Twilight Sentinel
žwork, so be sure it isn't covered.
You can customize your vehicle to turn Twilight
Sentinel
žon or off (except for vehicles ®rst sold in
Canada). SeeDriver Information Center (DIC) on
page 3-44to turn this feature on or off.
When Twilight Sentinel
žis turned on, you will see the
following happen:
·When it's dark enough outside, the front turn signal
lamps (DRL) will go off, and the headlamps and
parking lamps will come on. The other lamps
that come on with headlamps will also come on.
·When it's bright enough outside, the headlamps will
go off, and the front turn signal lamps (DRL) will
come on, as long as the exterior lamp switch is in
the OFF position.
If you start your vehicle in a dark garage, the automatic
headlamp system will come on immediately. Once you
leave the garage, it will take approximately one minute for
the automatic headlamp system to change to DRL if it is
light outside. During that delay, your instrument panel
cluster may not be as bright as usual.
3-14
Page 129 of 368

Battery Run-Down Protection
Your vehicle has a feature to help prevent you from
draining the battery in case the underhood lamp, vanity
mirror lamps, cargo lamps, reading lamps, console
or glove box lamps are accidentally left on. If you leave
any of these lamps on, they will automatically timeout
after about 15 minutes. To reset it, all of the above
lamps must be turned off or the ignition key must be
in ON.
Head-Up Display (HUD)
{CAUTION:
If the HUD image is too bright, or too high in
your ®eld of view, it may take you more time to
see things you need to see when it's dark
outside. Be sure to keep the HUD image dim
and placed low in your ®eld of view.
If your vehicle is equipped with the Head-Up Display
(HUD), you can see some of the driver information that
appears on your instrument panel cluster.The information may be displayed in English or metric
units and appears as an image focused out toward
the front of your vehicle. The HUD consists of the
following information:
·Speedometer
·Turn Signal Indicators
·High-Beam Indicator Symbol
·Tachometer
·Oil, Temperature and Fuel Gages
·Shift Light (Performance SHIFT Light)
This light is used for performance driving to indicate
that the vehicle's best performance level has
been reached to shift the transmission into the next
higher gear. The SHIFT light will display at an
engine speed of about 5,750 rpm (6,250 rpm on
Z06), just prior to reaching the engine fuel
cut-off mode.
·Check Gages Icon
3-17
Page 211 of 368

You can be temporarily blinded by approaching
headlamps. It can take a second or two, or even several
seconds, for your eyes to readjust to the dark. When
you are faced with severe glare (as from a driver
who doesn't lower the high beams, or a vehicle with
misaimed headlamps), slow down a little. Avoid staring
directly into the approaching headlamps.
Keep your windshield and all the glass on your vehicle
clean Ð inside and out. Glare at night is made much
worse by dirt on the glass. Even the inside of the glass
can build up a ®lm caused by dust. Dirty glass makes
lights dazzle and ¯ash more than clean glass would,
making the pupils of your eyes contract repeatedly.
Remember that your headlamps light up far less of a
roadway when you are in a turn or curve. Keep
your eyes moving; that way, it's easier to pick out dimly
lighted objects. Just as your headlamps should be
checked regularly for proper aim, so should your eyes
be examined regularly. Some drivers suffer from
night blindness Ð the inability to see in dim light Ð and
aren't even aware of it.Driving in Rain and on Wet Roads
Rain and wet roads can mean driving trouble. On a wet
road, you can't stop, accelerate or turn as well
because your tire-to-road traction isn't as good as on
dry roads. And, if your tires don't have much tread left,
you'll get even less traction. It's always wise to go
slower and be cautious if rain starts to fall while you are
driving. The surface may get wet suddenly when your
re¯exes are tuned for driving on dry pavement.
4-19
Page 276 of 368
2. Remove the screws on each side of the
headlamp bezel.
3. Open the hood.
4. To remove the bezel, pull the sides slightly outward
and tilt the bezel forward. Pull the clip centered
above the lens outward. Be careful not to scratch
the paint on the vehicle.5. Reach behind the lamp and turn the bulb
counterclockwise to remove it. Don't touch the
halogen bulbs. The inner bulb is the high beam and
the outer bulb is the low beam.
6. Disconnect the desired bulb from the wiring
harness.
7. Reverse the steps listed previously with a new bulb.
5-48
Page 279 of 368

Back-Up Lamps
You can access the back-up lamps through the inboard
taillamp opening. SeeTaillamps and Turn Signal
Lamps on page 5-49.
1. Squeeze the tab on the socket while turning it
counterclockwise to remove it from the assembly.
2. Remove the bulb from the socket.
3. Reverse the steps listed previously with a new bulb.
Replacement Bulbs
Exterior Lamp Bulb Number
High-Beam Headlamp 9005
Low-Beam Headlamp 9006
Back-Up 2057
Rear Stop/Tail and Turn Signal 3057
For any bulb replacements or procedures not listed
here, please consult your dealer.
Windshield Wiper Blade
Replacement
Windshield wiper blades should be inspected at least
twice a year for wear or cracking. See ªWiper Blade
Checkº under
Part B: Owner Checks and Services on
page 6-8for more information.
Replacement blades come in different types and are
removed in different ways. For the proper type and
length, see
Normal Maintenance Replacement Parts on
page 5-94.
It's a good idea to clean or replace the wiper blade
assembly every six months.
Notice:Use care when removing or installing a
blade assembly. Accidental bumping can cause the
arm to fall back and strike the windshield.
To remove the wiper blade assembly, do the following:
1. Open the hood to gain access to the windshield
wipers.
2. Lift the wiper arm until it locks into a vertical
position.
5-51
Page 318 of 368
Fuse Usage
5Anti-Lock Brakes, Selective Ride
Control
6 Fog Lamp
7 Blank
8 Headlamp Low-Beam Right
9 Headlamp High-Beam Right
10 Headlamp Low-Beam Left
11 Horn
12 Headlamp High-Beam Left
13 Fuel Pump
14 Cooling Fan ± Ignition 3
15 Oxygen Sensor
16 Powertrain Control Module
17 Throttle Control
18 Injector 2
19 Engine IgnitionFuse Usage
20 Blank
21 Blank
22 Injector 1
23 Powertrain Control Module
24 Air Conditioning
25 Blank
26 Blank
27 Spare
28 Spare
29 Spare
30 Spare
31 Spare
32 Spare
46 Cooling Fan 2
47 Blank
5-90