2003 CHEVROLET BLAZER change wheel
[x] Cancel search: change wheelPage 213 of 420

If your vehicle starts to slide, ease your foot off the
accelerator pedal and quickly steer the way you want
the vehicle to go. If you start steering quickly enough,
your vehicle may straighten out. Always be ready
for a second skid if it occurs.
Of course, traction is reduced when water, snow, ice,
gravel or other material is on the road. For safety, you'll
want to slow down and adjust your driving to these
conditions. It is important to slow down on slippery
surfaces because stopping distance will be longer and
vehicle control more limited.
While driving on a surface with reduced traction, try
your best to avoid sudden steering, acceleration
or braking (including engine braking by shifting to a
lower gear). Any sudden changes could cause the tires
to slide. You may not realize the surface is slippery
until your vehicle is skidding. Learn to recognize warning
clues Ð such as enough water, ice or packed snow
on the road to make a ªmirrored surfaceº Ð and slow
down when you have any doubt.
Remember: Any anti-lock brake system (ABS) helps
avoid only the braking skid.Off-Road Driving with Your
Four-Wheel-Drive Vehicle
This off-road guide is for vehicles that have four-wheel
drive. Also, seeBraking on page 4-8. If your vehicle
doesn't have four-wheel drive, you shouldn't drive
off-road unless you're on a level, solid surface.
Off-road driving can be great fun. But it does have
some de®nite hazards. The greatest of these is
the terrain itself.
ªOff-roadingº means you've left the great North American
road system behind. Traffic lanes aren't marked.
Curves aren't banked. There are no road signs.
Surfaces can be slippery, rough, uphill or downhill. In
short, you've gone right back to nature.
Off-road driving involves some new skills. And that's
why it's very important that you read this guide.
You'll ®nd many driving tips and suggestions. These will
help make your off-road driving safer and more
enjoyable.
4-15
Page 216 of 420
Controlling your vehicle is the key to successful off-road
driving. One of the best ways to control your vehicle
is to control your speed. Here are some things to keep
in mind. At higher speeds:
·you approach things faster and you have less time
to scan the terrain for obstacles.
·you have less time to react.
·you have more vehicle bounce when you drive over
obstacles.
·you'll need more distance for braking, especially
since you're on an unpaved surface.
{CAUTION:
When you're driving off-road, bouncing and
quick changes in direction can easily throw
you out of position. This could cause you to
lose control and crash. So, whether you're
driving on or off the road, you and your
passengers should wear safety belts.
Scanning the Terrain
Off-road driving can take you over many different kinds
of terrain. You need to be familiar with the terrain
and its many different features. Here are some things to
consider.
Surface Conditions:Off-roading can take you over
hard-packed dirt, gravel, rocks, grass, sand, mud, snow
or ice. Each of these surfaces affects the steering,
acceleration and braking of your vehicle in different
ways. Depending upon the kind of surface you are on,
you may experience slipping, sliding, wheel spinning,
delayed acceleration, poor traction and longer braking
distances.
Surface Obstacles:Unseen or hidden obstacles can
be hazardous. A rock, log, hole, rut or bump can startle
you if you're not prepared for them. Often these
obstacles are hidden by grass, bushes, snow or even
the rise and fall of the terrain itself. Here are some
things to consider:
·Is the path ahead clear?
·Will the surface texture change abruptly up ahead?
·Does the travel take you uphill or downhill?
(There's more discussion of these subjects later.)
·Will you have to stop suddenly or change direction
quickly?
4-18
Page 218 of 420
Approaching a Hill
When you approach a hill, you need to decide if it's one
of those hills that's just too steep to climb, descend
or cross. Steepness can be hard to judge. On a very
small hill, for example, there may be a smooth, constant
incline with only a small change in elevation where
you can easily see all the way to the top. On a large hill,
the incline may get steeper as you near the top, but
you may not see this because the crest of the hill
is hidden by bushes, grass or shrubs.
Here are some other things to consider as you approach
a hill.
·Is there a constant incline, or does the hill get
sharply steeper in places?
·Is there good traction on the hillside, or will the
surface cause tire slipping?
·Is there a straight path up or down the hill so you
won't have to make turning maneuvers?
·Are there obstructions on the hill that can block
your path (boulders, trees, logs or ruts)?
·What's beyond the hill? Is there a cliff, an
embankment, a drop-off, a fence? Get out and walk
the hill if you don't know. It's the smart way to
®nd out.
·Is the hill simply too rough? Steep hills often have
ruts, gullies, troughs and exposed rocks because
they are more susceptible to the effects of erosion.
Driving Uphill
Once you decide you can safely drive up the hill, you
need to take some special steps.
·Use a low gear and get a ®rm grip on the steering
wheel.
·Get a smooth start up the hill and try to maintain
your speed. Don't use more power than you
need, because you don't want your wheels to start
spinning or sliding.
·Try to drive straight up the hill if at all possible. If
the path twists and turns, you might want to ®nd
another route.
{CAUTION:
Turning or driving across steep hills can be
dangerous. You could lose traction, slide
sideways, and possibly roll over. You could be
seriously injured or killed. When driving up
hills, always try to go straight up.
4-20
Page 224 of 420
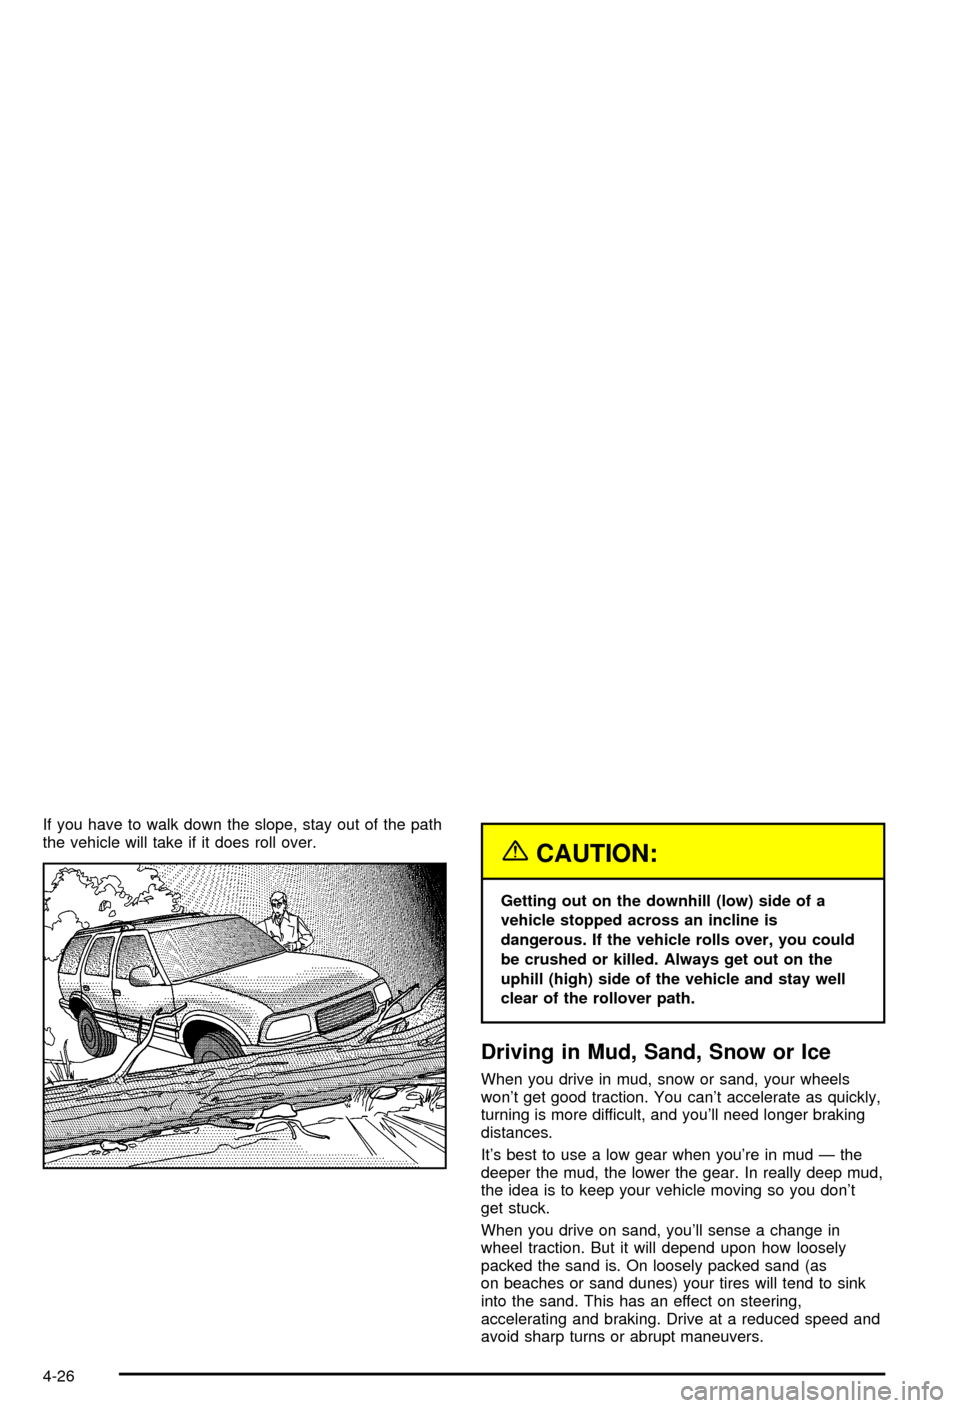
If you have to walk down the slope, stay out of the path
the vehicle will take if it does roll over.
{CAUTION:
Getting out on the downhill (low) side of a
vehicle stopped across an incline is
dangerous. If the vehicle rolls over, you could
be crushed or killed. Always get out on the
uphill (high) side of the vehicle and stay well
clear of the rollover path.
Driving in Mud, Sand, Snow or Ice
When you drive in mud, snow or sand, your wheels
won't get good traction. You can't accelerate as quickly,
turning is more difficult, and you'll need longer braking
distances.
It's best to use a low gear when you're in mud Ð the
deeper the mud, the lower the gear. In really deep mud,
the idea is to keep your vehicle moving so you don't
get stuck.
When you drive on sand, you'll sense a change in
wheel traction. But it will depend upon how loosely
packed the sand is. On loosely packed sand (as
on beaches or sand dunes) your tires will tend to sink
into the sand. This has an effect on steering,
accelerating and braking. Drive at a reduced speed and
avoid sharp turns or abrupt maneuvers.
4-26
Page 251 of 420
{CAUTION:
Do not load your vehicle any heavier than the
GVWR, or either the maximum front or rear
GAWR. If you do, parts on your vehicle can
break, and it can change the way your vehicle
handles. These could cause you to lose
control and crash. Also, overloading can
shorten the life of your vehicle.
Using heavier suspension components to get added
durability might not change your weight ratings. Ask your
dealer to help you load your vehicle the right way.
Notice:Your warranty does not cover parts
or components that fail because of overloading.
If you put things inside your vehicle±like suitcases, tools,
packages, or anything else±they will go as fast as the
vehicle goes. If you have to stop or turn quickly, or
if there is a crash, they'll keep going.
{CAUTION:
Things you put inside your vehicle can strike
and injure people in a sudden stop or turn, or
in a crash.
·Put things in the cargo area of your
vehicle. Try to spread the weight evenly.
·Never stack heavier things, like suitcases,
inside the vehicle so that some of them
are above the tops of the seats.
·Don't leave an unsecured child restraint in
your vehicle.
·When you carry something inside the
vehicle, secure it whenever you can.
·Don't leave a seat folded down unless you
need to.
There's also important loading information for off-road
driving in this manual. See
ªLoading Your Vehicle
for Off-Road DrivingºunderOff-Road Driving with Your
Four-Wheel-Drive Vehicle on page 4-15.
4-53
Page 279 of 420
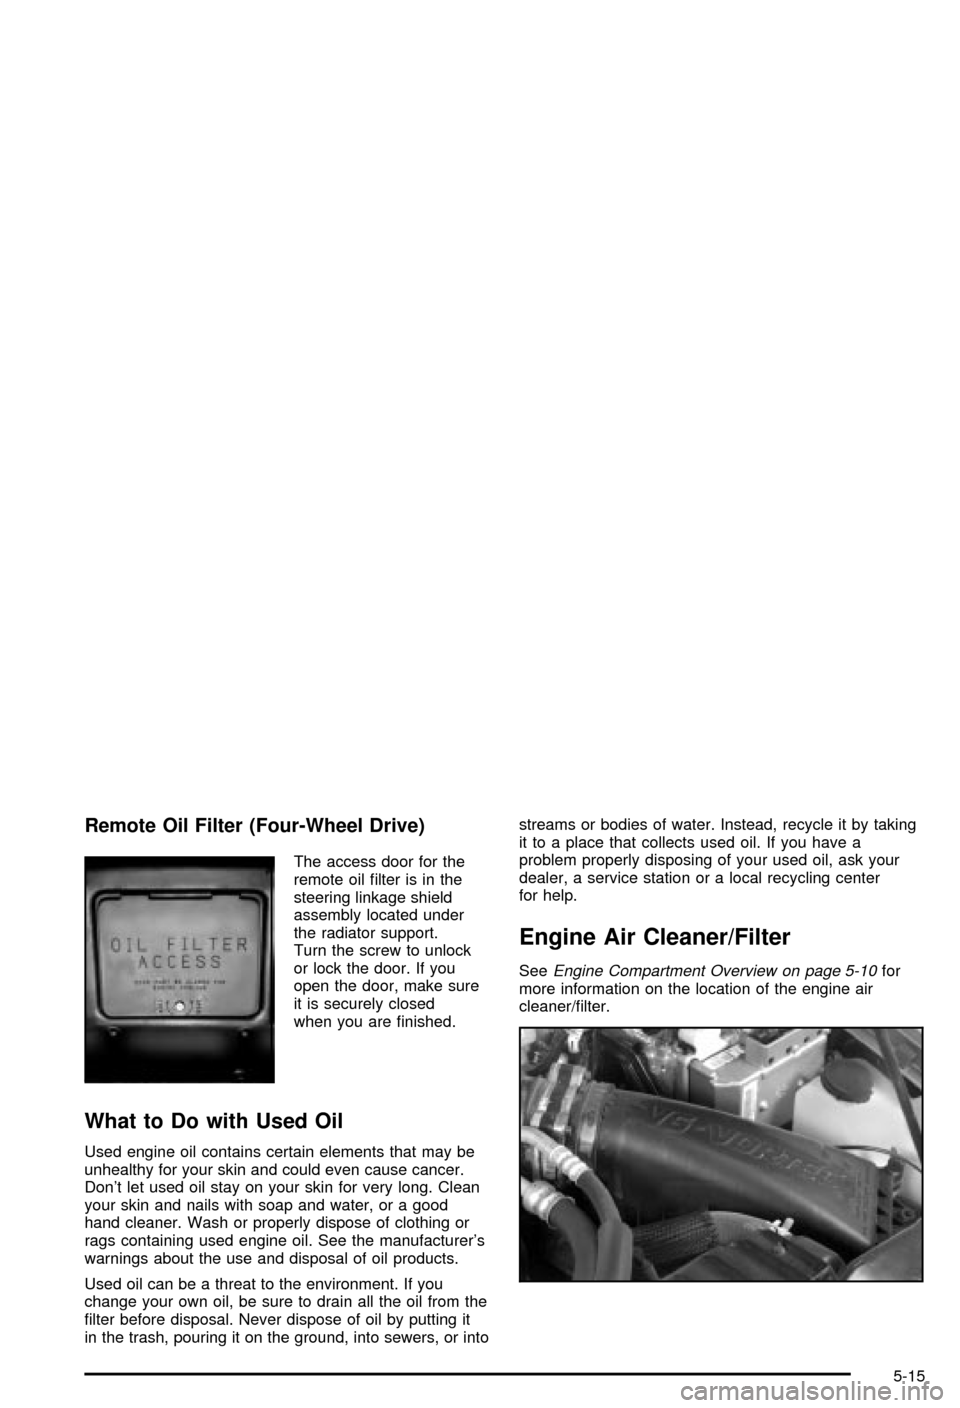
Remote Oil Filter (Four-Wheel Drive)
The access door for the
remote oil ®lter is in the
steering linkage shield
assembly located under
the radiator support.
Turn the screw to unlock
or lock the door. If you
open the door, make sure
it is securely closed
when you are ®nished.
What to Do with Used Oil
Used engine oil contains certain elements that may be
unhealthy for your skin and could even cause cancer.
Don't let used oil stay on your skin for very long. Clean
your skin and nails with soap and water, or a good
hand cleaner. Wash or properly dispose of clothing or
rags containing used engine oil. See the manufacturer's
warnings about the use and disposal of oil products.
Used oil can be a threat to the environment. If you
change your own oil, be sure to drain all the oil from the
®lter before disposal. Never dispose of oil by putting it
in the trash, pouring it on the ground, into sewers, or intostreams or bodies of water. Instead, recycle it by taking
it to a place that collects used oil. If you have a
problem properly disposing of your used oil, ask your
dealer, a service station or a local recycling center
for help.
Engine Air Cleaner/Filter
SeeEngine Compartment Overview on page 5-10for
more information on the location of the engine air
cleaner/®lter.
5-15
Page 309 of 420
Rear Axle
When to Check and Change Lubricant
Refer to the Maintenance Schedule to determine
how often to check the lubricant and when to change it.
See
Part A: Scheduled Maintenance Services on
page 6-4.
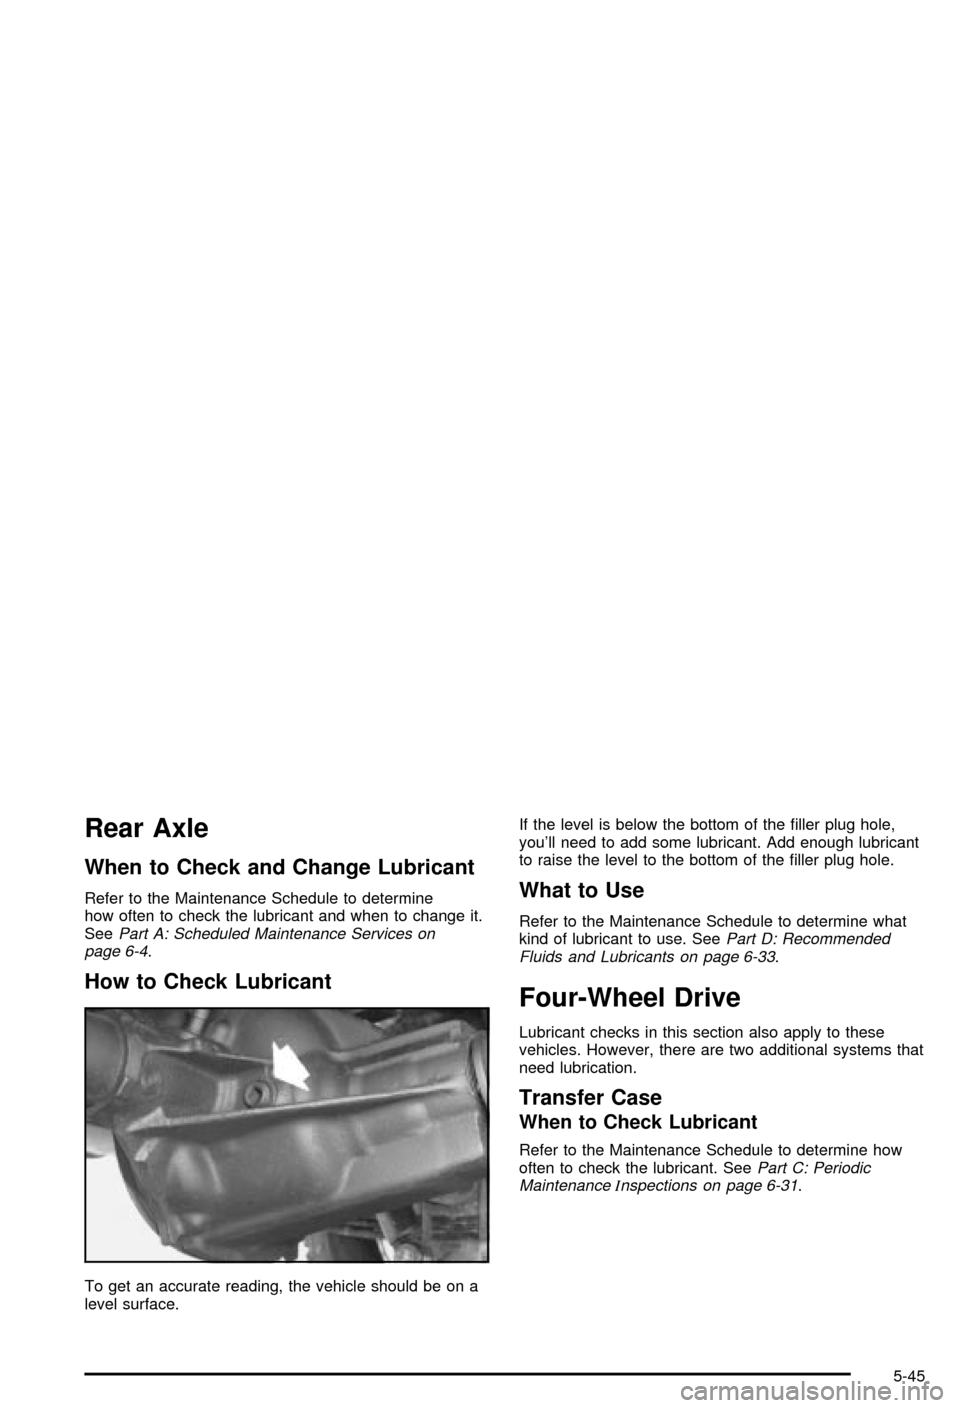
How to Check Lubricant
To get an accurate reading, the vehicle should be on a
level surface.If the level is below the bottom of the ®ller plug hole,
you'll need to add some lubricant. Add enough lubricant
to raise the level to the bottom of the ®ller plug hole.
What to Use
Refer to the Maintenance Schedule to determine what
kind of lubricant to use. SeePart D: Recommended
Fluids and Lubricants on page 6-33.
Four-Wheel Drive
Lubricant checks in this section also apply to these
vehicles. However, there are two additional systems that
need lubrication.
Transfer Case
When to Check Lubricant
Refer to the Maintenance Schedule to determine how
often to check the lubricant. SeePart C: Periodic
MaintenanceInspections on page 6-31.
5-45
Page 321 of 420
After the tires have been rotated, adjust the front and
rear in¯ation pressures as shown on the
Certi®cation/Tire label. Make certain that all wheel nuts
are properly tightened. See ªWheel Nut Torqueº
under
Capacities and Speci®cations on page 5-91.
{CAUTION:
Rust or dirt on a wheel, or on the parts to
which it is fastened, can make wheel nuts
become loose after a time. The wheel could
come off and cause an accident. When you
change a wheel, remove any rust or dirt from
places where the wheel attaches to the vehicle.
In an emergency, you can use a cloth or a
paper towel to do this; but be sure to use a
scraper or wire brush later, if you need to, to
get all the rust or dirt off. See ªChanging a Flat
Tireº in the Index.
When It Is Time for New Tires
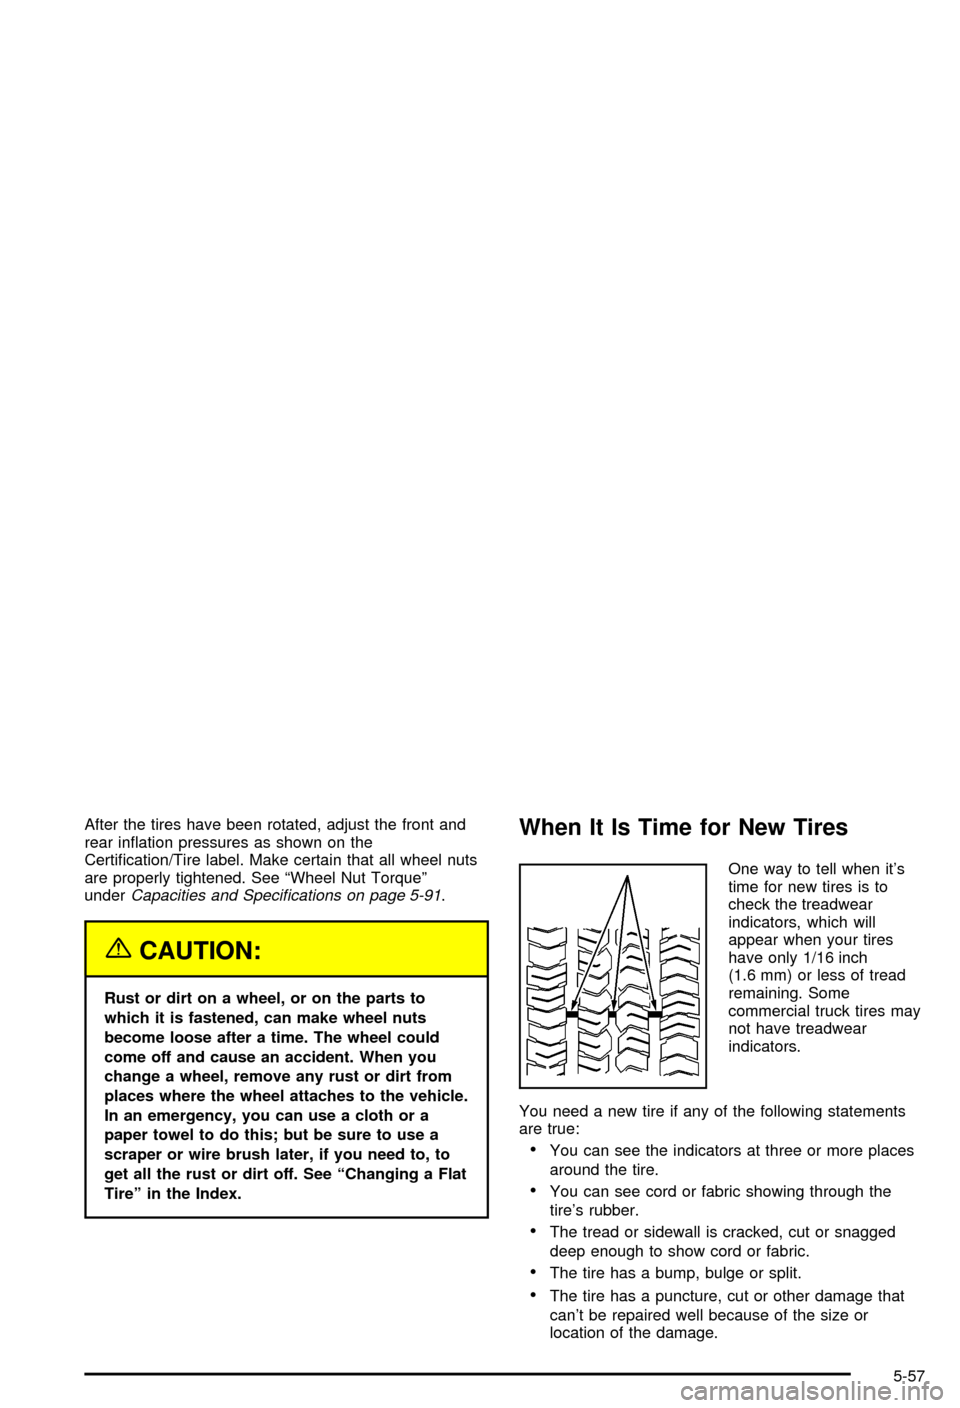
One way to tell when it's
time for new tires is to
check the treadwear
indicators, which will
appear when your tires
have only 1/16 inch
(1.6 mm) or less of tread
remaining. Some
commercial truck tires may
not have treadwear
indicators.
You need a new tire if any of the following statements
are true:
·You can see the indicators at three or more places
around the tire.
·You can see cord or fabric showing through the
tire's rubber.
·The tread or sidewall is cracked, cut or snagged
deep enough to show cord or fabric.
·The tire has a bump, bulge or split.
·The tire has a puncture, cut or other damage that
can't be repaired well because of the size or
location of the damage.
5-57