2003 CHEVROLET AVALANCHE change wheel
[x] Cancel search: change wheelPage 402 of 492

Notice:If your vehicle is a 2500 Series, use tire
chains only where legal and only when you must.
Use chains that are the proper size for your
tires. Install them on the tires of the rear axle. Don't
use chains on the tires of the front axle. Tighten
them as tightly as possible with the ends securely
fastened. Drive slowly and follow the chain
manufacturer's instructions. If you can hear the
chains contacting your vehicle, stop and retighten
them. If the contact continues, slow down until
it stops. Driving too fast or spinning the wheels with
chains on will damage your vehicle.
If a Tire Goes Flat
It's unusual for a tire to ªblowoutº while you're driving,
especially if you maintain your tires properly. If air goes
out of a tire, it's much more likely to leak out slowly.
But if you should ever have a ªblowout,º here are a few
tips about what to expect and what to do:
If a front tire fails, the ¯at tire will create a drag that
pulls the vehicle toward that side. Take your foot off the
accelerator pedal and grip the steering wheel ®rmly.
Steer to maintain lane position, and then gently brake to
a stop well out of the traffic lane.A rear blowout, particularly on a curve, acts much like a
skid and may require the same correction you'd use
in a skid. In any rear blowout, remove your foot from the
accelerator pedal. Get the vehicle under control by
steering the way you want the vehicle to go. It may be
very bumpy and noisy, but you can still steer. Gently
brake to a stop, well off the road if possible.
If a tire goes ¯at, the next part shows how to use your
jacking equipment to change a ¯at tire safely.
5-69
Page 403 of 492

Changing a Flat Tire
If a tire goes ¯at, avoid further tire and wheel damage
by driving slowly to a level place. Turn on your
hazard warning ¯ashers.
{CAUTION:
Changing a tire can cause an injury. The
vehicle can slip off the jack and roll over you
or other people. You and they could be badly
injured. Find a level place to change your tire.
To help prevent the vehicle from moving:
1. Set the parking brake ®rmly.
2. Put the shift lever in PARK (P).
3. If you have a four-wheel-drive vehicle, be
sure the transfer case is in a drive gear ±
not in NEUTRAL.
4. Turn off the engine.
5. Put the wheel blocks at the front and rear
of the tire farthest away from the one
being changed. That would be the tire on
the other side of the vehicle, at the
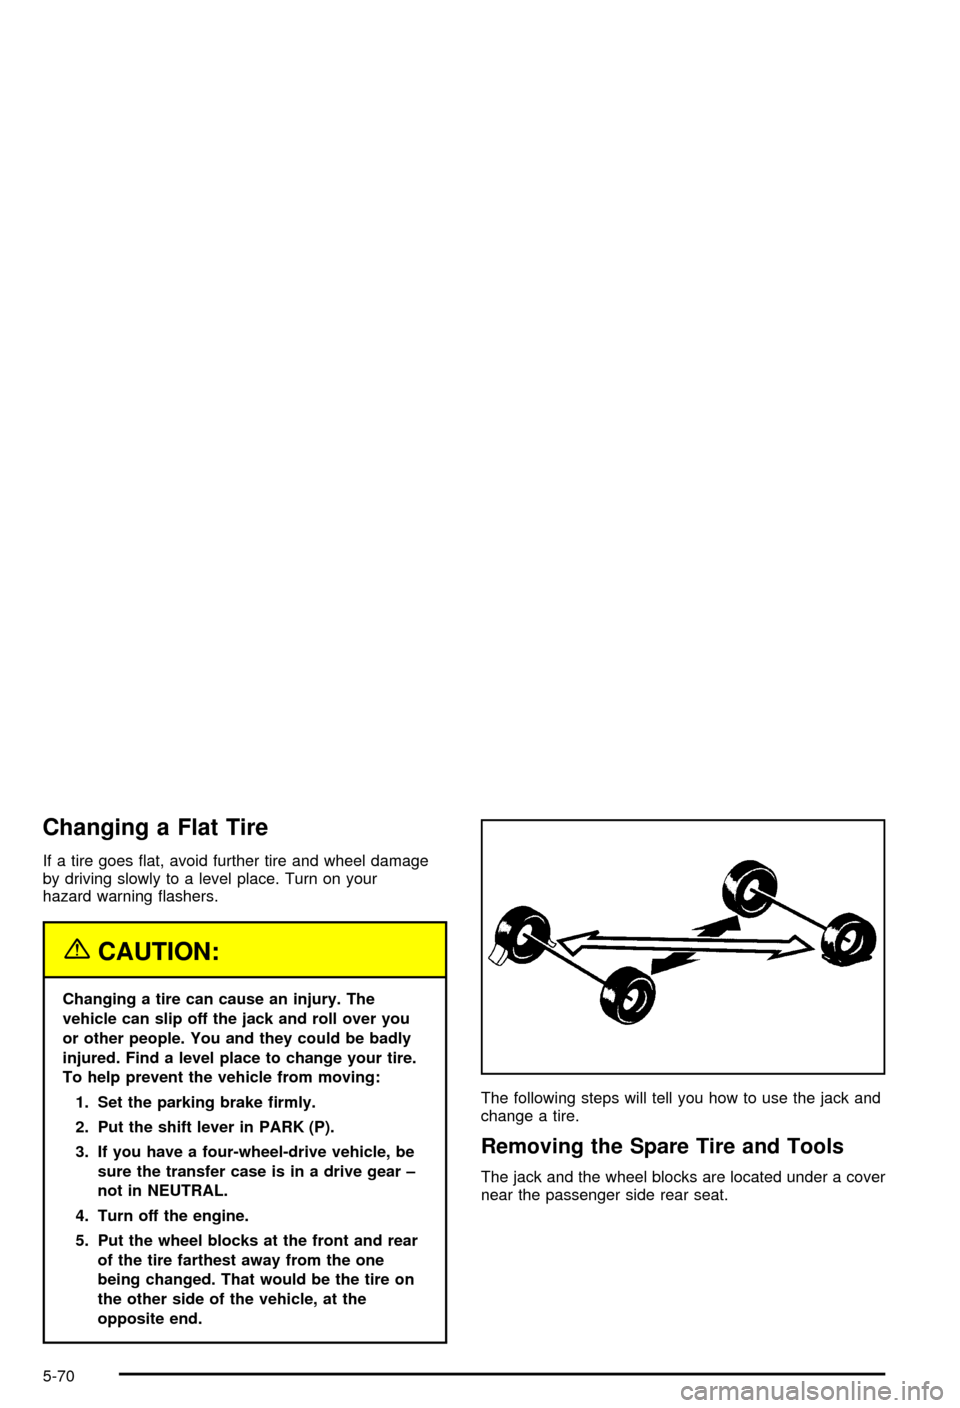
opposite end.The following steps will tell you how to use the jack and
change a tire.
Removing the Spare Tire and Tools
The jack and the wheel blocks are located under a cover
near the passenger side rear seat.
5-70
Page 405 of 492

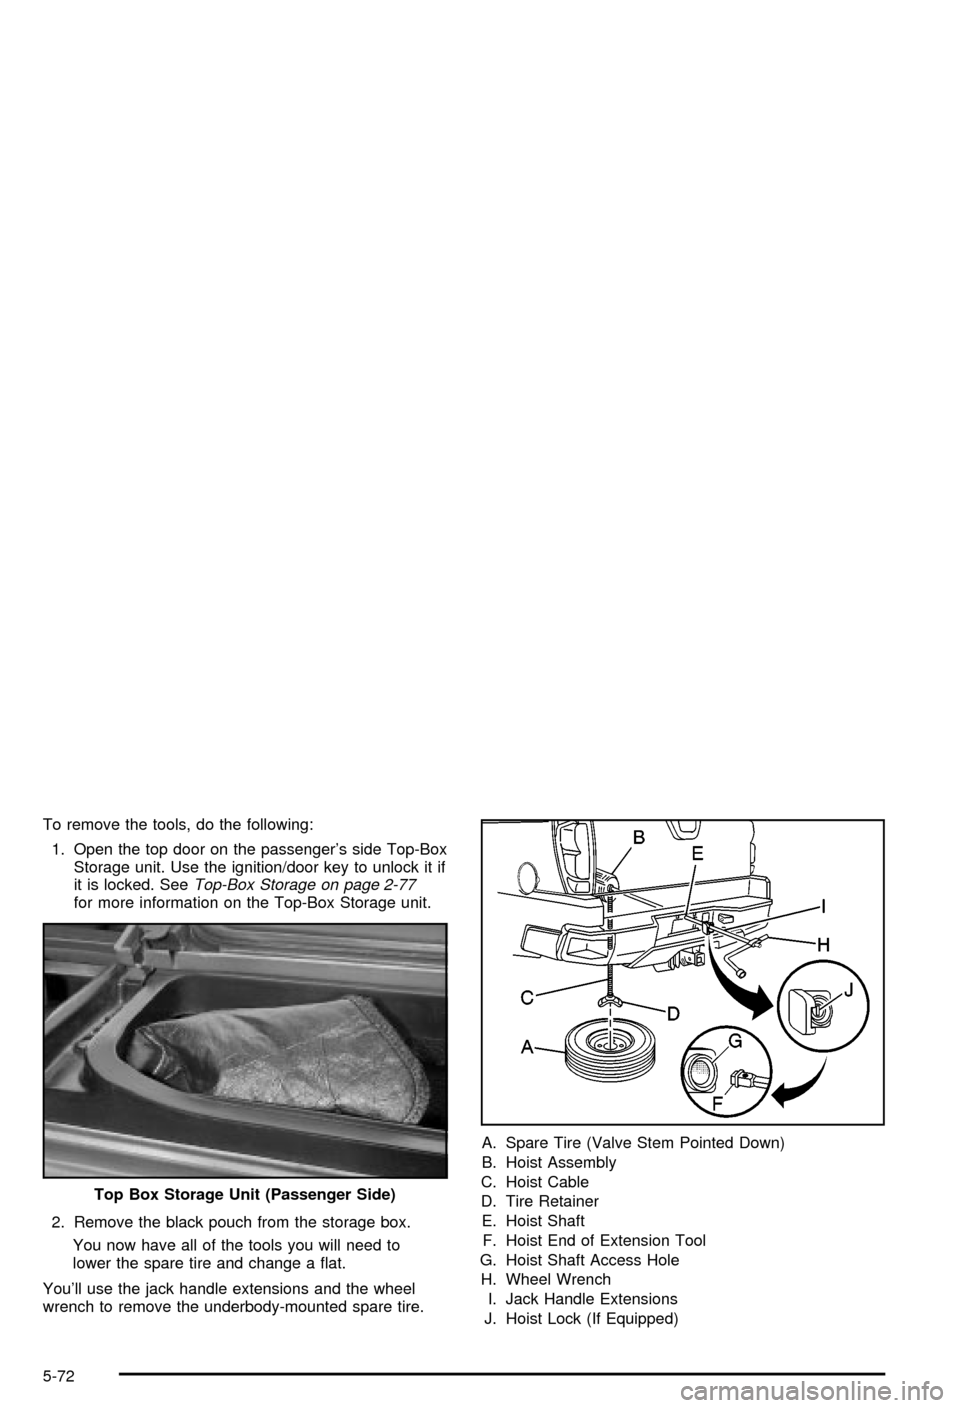
To remove the tools, do the following:
1. Open the top door on the passenger's side Top-Box
Storage unit. Use the ignition/door key to unlock it if
it is locked. See
Top-Box Storage on page 2-77for more information on the Top-Box Storage unit.
2. Remove the black pouch from the storage box.
You now have all of the tools you will need to
lower the spare tire and change a ¯at.
You'll use the jack handle extensions and the wheel
wrench to remove the underbody-mounted spare tire.A. Spare Tire (Valve Stem Pointed Down)
B. Hoist Assembly
C. Hoist Cable
D. Tire Retainer
E. Hoist Shaft
F. Hoist End of Extension Tool
G. Hoist Shaft Access Hole
H. Wheel Wrench
I. Jack Handle Extensions
J. Hoist Lock (If Equipped) Top Box Storage Unit (Passenger Side)
5-72
Page 411 of 492

{CAUTION:
Rust or dirt on the wheel, or on the parts to
which it is fastened, can make the wheel nuts
become loose after a time. The wheel could
come off and cause an accident. When you
change a wheel, remove any rust or dirt from
the places where the wheel attaches to the
vehicle. In an emergency, you can use a cloth
or a paper towel to do this; but be sure to use
a scraper or wire brush later, if you need to, to
get all the rust or dirt off.
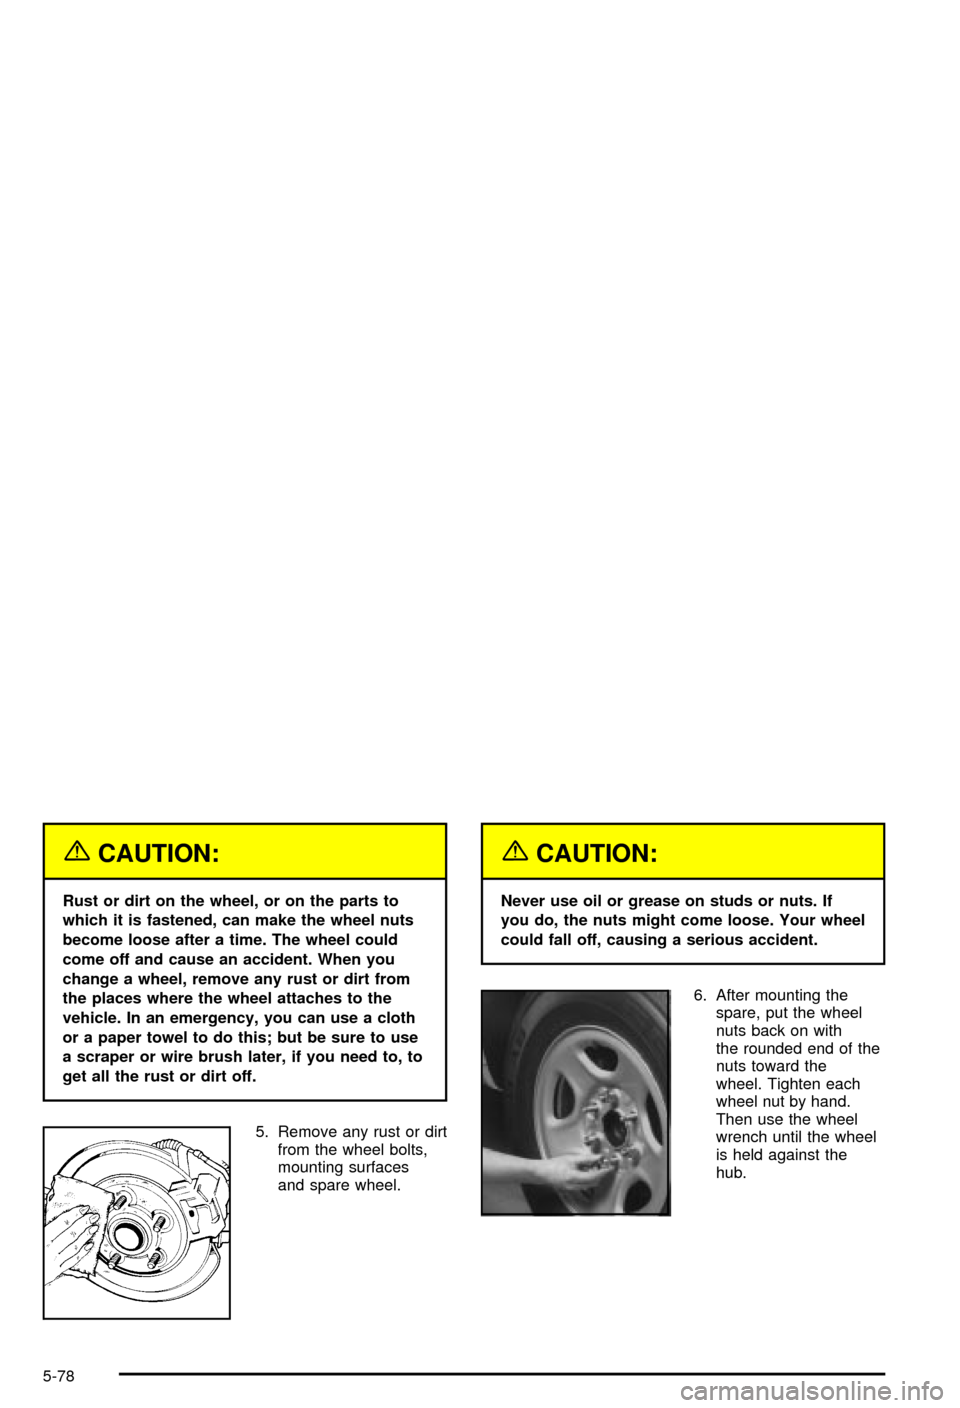
5. Remove any rust or dirt
from the wheel bolts,
mounting surfaces
and spare wheel.
{CAUTION:
Never use oil or grease on studs or nuts. If
you do, the nuts might come loose. Your wheel
could fall off, causing a serious accident.
6. After mounting the
spare, put the wheel
nuts back on with
the rounded end of the
nuts toward the
wheel. Tighten each
wheel nut by hand.
Then use the wheel
wrench until the wheel
is held against the
hub.
5-78
Page 445 of 492

Part A: Scheduled Maintenance
Services
This part contains engine oil and chassis lubrication
scheduled maintenance which explains the engine oil life
system and how it indicates when to change the
engine oil and ®lter. Lubricate chassis components with
each oil change. Also, listed are scheduled maintenance
services which are to be performed at the mileage
intervals speci®ed.
Using Your Maintenance Schedule
We at General Motors want to help you keep your
vehicle in good working condition. But we don't know
exactly how you'll drive it. You may drive very short
distances only a few times a week. Or you may drive
long distances all the time in very hot, dusty weather.
You may use your vehicle in making deliveries. Or
you may drive it to work, to do errands or in many other
ways.
Because of all the different ways people use their
vehicles, maintenance needs vary. You may need more
frequent checks and replacements. So please read
the following and note how you drive. If you have any
questions on how to keep your vehicle in good condition,
see your dealer.This part tells you the maintenance services you should
have done and when to schedule them.
When you go to your dealer for your service needs,
you'll know that GM-trained and supported service
people will perform the work using genuine GM parts.
The proper ¯uids and lubricants to use are listed in Part
D. Make sure whoever services your vehicle uses
these. All parts should be replaced and all necessary
repairs done before you or anyone else drives the
vehicle.
This schedule is for vehicles that:
·carry passengers and cargo within recommended
limits. You will ®nd these limits on your vehicle's
Certi®cation/Tire label. See
Loading Your Vehicle on
page 4-51.
·are driven on reasonable road surfaces within legal
driving limits.
·are driven off-road in the recommended manner.
See
Off-Road Driving with Your Four-Wheel-Drive
Vehicle on page 4-19.
·use the recommended fuel. SeeGasoline Octane
on page 5-5
.
6-4
Page 457 of 492

Engine Cooling System Inspection
Inspect the hoses and have them replaced if they
are cracked, swollen or deteriorated. Inspect all pipes,
®ttings and clamps; replace as needed. Clean the
outside of the radiator and air conditioning condenser.
To help ensure proper operation, a pressure test of
the cooling system and pressure cap is recommended
at least once a year.
Transfer Case and Front Axle
(Four-Wheel Drive) Inspection
Every 12 months or at engine oil change intervals,
check front axle and transfer case and add lubricant
when necessary. A ¯uid loss could indicate a problem;
check and have it repaired, if needed. On manual
shift transfer case, oil the control lever pivot point. Check
vent hose at transfer case for kinks and proper
installation. More frequent lubrication may be required
on off-road use.
Brake System Inspection
Inspect the complete system. Inspect brake lines and
hoses for proper hook-up, binding, leaks, cracks,
cha®ng, etc. Inspect disc brake pads for wear and rotors
for surface condition. Inspect other brake parts,
including calipers, parking brake, etc. You may need to
have your brakes inspected more often if your driving
habits or conditions result in frequent braking.
6-16
Page 490 of 492

Tires (cont.)
Inspection and Rotation................................5-62
Spare Tire..................................................5-87
Uniform Tire Quality Grading.........................5-65
Wheel Alignment and Tire Balance.................5-67
Wheel Replacement.....................................5-67
When It Is Time for New Tires......................5-64
To Use the Engine Coolant Heater....................2-30
Tonneau Cover...............................................2-77
Top Drain Grates ± Removal and Cleaning.........2-73
Top Strap Anchor Location...............................1-43
Top Strap......................................................1-42
Top-Box Storage.............................................2-77
Torque Lock...................................................2-42
Total Weight on Your Vehicle's Tires..................4-63
Tow/Haul Mode Light.......................................3-45
Tow/Haul Mode...............................................2-33
Towing..........................................................4-48
Recreational Vehicle.....................................4-48
Towing a Trailer..........................................4-58
Your Vehicle...............................................4-48
TRACTION ACTIVE........................................3-63
Traction Control Operation................................4-13
Traction.........................................................4-10
Assist System (TAS)....................................4-10
Off Light.....................................................3-38
Stabilitrak
žSystem......................................4-12
Trailer Brakes.................................................4-64
Trailer Wiring Harness.....................................4-68
Trailer...........................................................4-58Recommendations.......................................4-58
TRANS HOT IDLE ENGINE.............................3-61
Transfer Case and Front Axle (Four-Wheel Drive)
Inspection...................................................6-16
Transfer Case................................................5-50
TRANSMISSION HOT.....................................3-61
Transmission Operation, Automatic....................2-31
Transmission, Transaxle, Transfer Case Unit
Repair Manual............................................7-11
Transmission..................................................5-22
Fluid, Automatic...........................................5-22
Temperature Gage.......................................3-40
Transportation Options...................................... 7-8
Traveling to Remote Areas...............................4-21
Trip Information Button....................................3-47
Truck-Camper Loading Information....................4-57
Turn and Lane Change Signals.......................... 3-8
TURN SIGNAL ON.........................................3-60
Turn Signal/Multifunction Lever........................... 3-7
Turn Signals When Towing a Trailer..................4-65
U
Underbody Flushing Service.............................6-14
Underhood Fuse Block...................................5-101
Understanding Radio Reception.......................3-102
Uniform Tire Quality Grading............................5-65
United States ± Customer Assistance.................. 7-4
Used Replacement Wheels..............................5-68
15
Page 491 of 492

Using Cleaner on Fabric..................................5-89
Using HomeLinkž...........................................2-58
Using Song List Mode.....................................3-88
Using the Recovery Hooks...............................4-47
V
Vehicle Identi®cation........................................5-96
Number (VIN).............................................5-96
Service Parts Identi®cation Label...................5-96
Vehicle Personalization....................................2-85
Memory Seat..............................................2-85
Vehicle Storage..............................................5-42
Vehicle............................................................ 4-6
Control........................................................ 4-6
Damage Warnings........................................... iv
Loading......................................................4-51
Symbols......................................................... iv
Vehicles with Gray Body-Side Cladding.....5-52, 5-55
Vehicles with Gray Body-Side Cladding..............5-58
Vehicles with no Body±Side Cladding........5-54, 5-56
Ventilation Adjustment......................................3-28
Video Screen.................................................3-93
Visors...........................................................2-24
Voltmeter Gage..............................................3-36
W
Warning Lights, Gages and Indicators................3-30
Warnings.......................................................3-57
DIC Warnings and Messages........................3-57
Hazard Warning Flashers............................... 3-6
Other Warning Devices.................................. 3-6
Safety and Symbols......................................... iii
Vehicle Damage.............................................. iv
Washing Your Vehicle......................................5-91
Weatherstrip Lubrication...................................6-12
Weight of the Trailer Tongue.............................4-62
Weight of the Trailer........................................4-61
What Kind of Engine Oil to Use........................5-17
What to Add..................................................5-40
What to Do with Used Oil................................5-19
What to Use..........................5-25, 5-37, 5-38, 5-49
Wheels..........................................................5-67
Alignment and Tire Balance..........................5-67
Replacement...............................................5-67
When to Add Engine Oil..................................5-16
When to Change Engine Oil (GM Oil Life
System).....................................................5-18
When to Check and Change............................5-22
When to Check Lubricant.................................5-49
When to Check Power Steering Fluid................5-37
16