Page 94 of 386
Hatch Release
You can use your key to unlock the hatch and all of
the other doors from the outside. Insert the key into the
hatch release button and turn it counterclockwise.
All of the doors will unlock.
You may also use the keyless entry system described
earlier.
The hatch can be opened
or closed without a key if the
door lock system is unlocked.
To open the hatch, unlock it, then press the button and
lift the handle located in the center
of the door.
To lock the power lock system from the outside, insert
the key in the hatch release button and turn it clockwise.
All doors will lock.
2-1 5
Page 143 of 386

Climate Controls
Climate Control System
With this system you can control the heating, cooling
and ventilation for your vehicle.
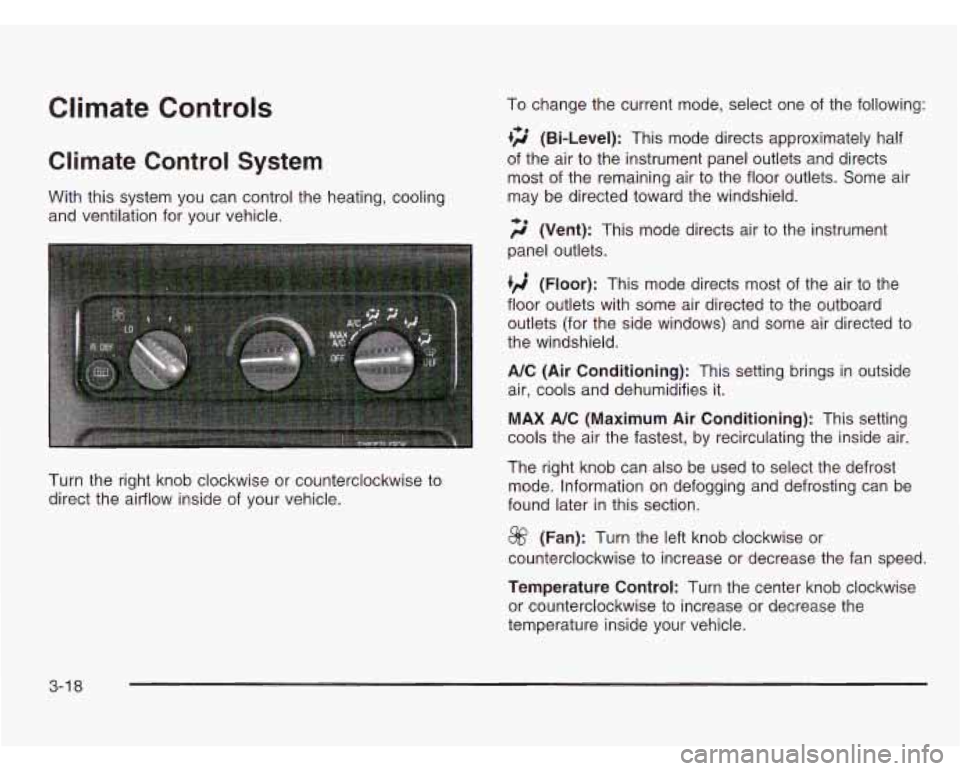
Turn the right knob clockwise or counterclockwise to
direct the airflow inside of your vehicle. To change
the current mode, select one of the following:
+2 (Bi-Level): This mode directs approximately half
of the air to the instrument panel outlets and directs
most of the remaining air to the floor outlets. Some air
may be directed toward the windshield.
;$’ (Vent): This mode directs air to the instrument
panel outlets.
(Floor): This mode directs most of the air to the
floor outlets with some air directed to the outboard
outlets (for the side windows) and some air directed to
the windshield.
A/C (Air Conditioning): This setting brings in outside
air, cools and dehumidifies it.
MAX A/C (Maximum Air Conditioning): This setting
cools the air the fastest, by recirculating the inside air.
The right knob can also be used to select the defrost
mode. Information on defogging and defrosting can be
found later in this section.
@ (Fan): Turn the left knob clockwise or
counterclockwise to increase or decrease the fan speed.
Temperature Control: Turn the center knob clockwise
or counterclockwise to increase or decrease the
temperature inside your vehicle.
3-1 8
Page 163 of 386

Audio System(s)
Notice; Before you add any sound equipment to
your vehicle
- like a tape player, CB radio, mobile
telephone or two-way radio
- be sure you can add
what you want. If you can, it’s very important to do
it
properly. Added sound equipment may interfere
with the operation of your vehicle’s engine, Delphi Electronics radio or other systems, and even damage
them. Your vehicle’s systems may interfere with the
operation
of sound equipment that has been added
improperly.
So, before adding sound equipment, check with
your dealer and be sure to check federal rules
covering mobile radio and telephone units.
Your audio system has been designed to operate easily
and to give years of listening pleasure. You will get the
most enjoyment out of it
if you acquaint yourself with it
first. Find out what your audio system can do and how to
operate all of its controls to be sure you’re getting the
most out of the advanced engineering that went into it.
Your vehicle may have a feature called Retained
Accessory Power (RAP). With RAP, you can play
your audio system even after the ignition is turned
off.
See “Retained Accessory Power (RAP)” under
Ignition Positions on page 2- 79.
Setting the Time for Radios with
the Set Button
Press SET. Within five seconds, press and hold the
right SEEK arrow until the correct minute appears on the
display. Press and hold the left SEEK arrow until the
correct hour appears on the display.
Setting the Time for Radios with
HR and MN Buttons
Press and hold HR until the correct hour appears on the
display. Press and hold
MN until the correct minute
appears on the display.
To display the time with the
ignition
off, press RECALL or HR/MN and the time will
be displayed for a few seconds. There is an initial
two-second delay before the clock goes into the
time-set mode.
3-38
Page 166 of 386

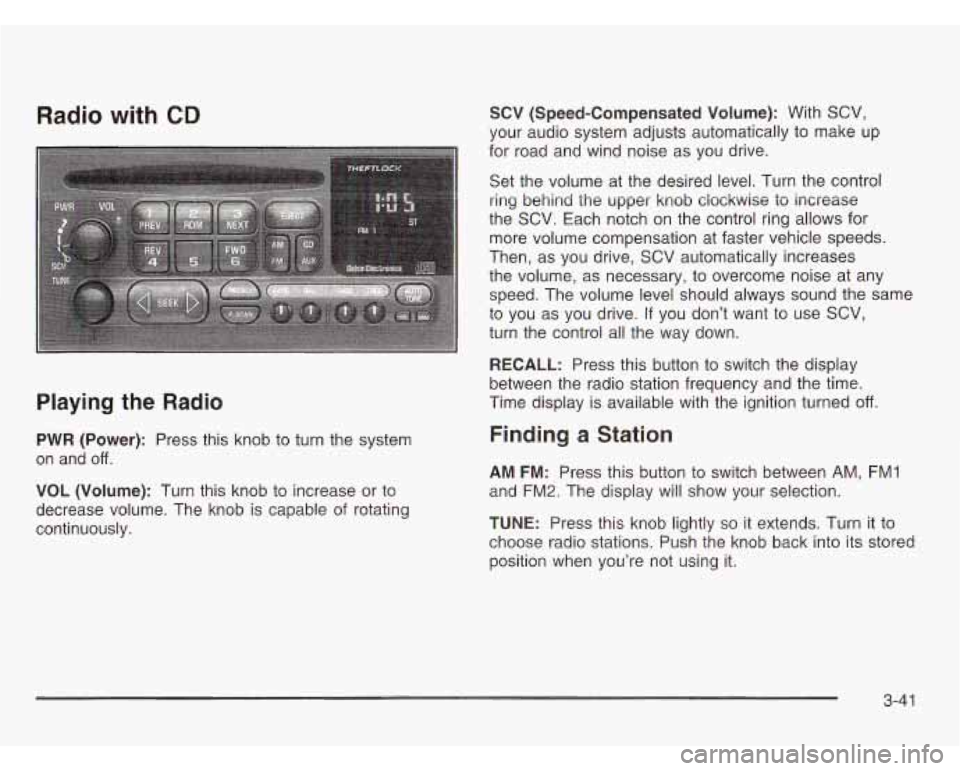
Radio with CD
Playing the Radio
PWR (Power): Press this knob to turn the system
on and
off.
VOL (Volume): Turn this knob to increase or to
decrease volume. The knob is capable of rotating
continuously.
SCV (Speed-Compensated Volume): With SCV,
your audio system adjusts automatically to make up
for road and wind noise as you drive.
Set the volume at the desired level. Turn the control
ring behind the upper knob clockwise to increase
the SCV. Each notch on the control ring allows for
more volume compensation at faster vehicle speeds.
Then, as you drive, SCV automatically increases
the volume, as necessary, to overcome noise at any
speed. The volume level should always sound the same
to you as you drive.
If you don’t want to use SCV,
turn the control all the way down.
RECALL: Press this button to switch the display
between the radio station frequency and the time.
Time display is available with the ignition turned
off.
Finding a Station
AM FM: Press this button to switch between AM, FM1
and FM2. The display will show your selection.
TUNE: Press this knob lightly so it extends. Turn it to
choose radio stations. Push the knob back into its stored
position when you’re not using it.
3-41
Page 186 of 386

An emergency like this requires close attention and a
quick decision. If you are holding the steering wheel at
the recommended
9 and 3 o’clock positions, you
can turn it a full
180 degrees very quickly without
removing either hand. But you have
to act fast, steer
quickly, and just as quickly straighten the wheel
once you have avoided the object.
The fact that such emergency situations are always
possible is a good reason to practice defensive driving
at all times and wear safety belts properly.
Off -Road Recovery
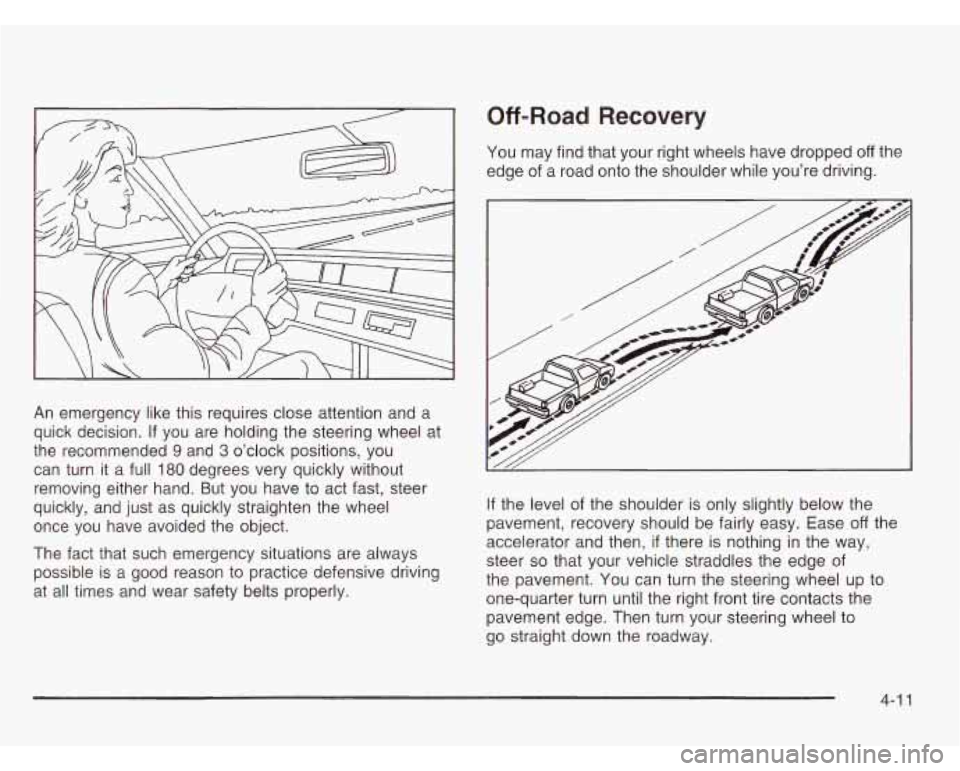
You may find that your right wheels have dropped off the
edge of a road onto the shoulder while you’re driving.
If the level of the shoulder is only slightly below the
pavement, recovery should be fairly easy. Ease
off the
accelerator and then,
if there is nothing in the way,
steer
so that your vehicle straddles the edge of
the pavement. You can turn the steering wheel up to
one-quarter turn until the right front tire contacts the
pavement edge. Then turn your steering wheel to
go straight down the roadway.
4-1 1
Page 226 of 386
While refueling, let the fuel cap hang by the tether
below the fuel
fill opening.
To remove the fuel cap, turn it slowly to the left
(counterclockwise). The fuel cap has a spring in it;
if you let go of the cap too soon, it will spring back to
the right.
d lf you get fuel on yourself and then something
ignites
it, you could be badly burned. Fuel can
spray out on you if you open the fuel cap too
quickly. This spray can happen
if your tank is
nearly full, and is more likely in hot weather.
Open the fuel cap slowly and wait for any
“hiss” noise to stop. Then unscrew the cap
all the way.
Be careful not to spill fuel. Clean fuel from painted
surfaces as soon as possible. See
Cleaning the Outside
of Your Vehicle on page 5-86. When filling the tank
do not overfill by squeezing in much more fuel after the
pump shuts off.
5-9
Page 227 of 386

When you put the fuel cap back on, turn it to the
right (clockwise) until you hear a clicking sound.
Make sure you fully install
the cap. The diagnostic
system can determine
if the fuel cap has been left off or
improperly installed. This would allow fuel to evaporate
into the atmosphere. See
Malfunction lndicator Lamp
on page 3-30.
Notice: If you need a new fuel cap, be sure to get
the right type. Your dealer can get one for you.
If you get the wrong type, it may not fit properly.
This may cause your malfunction indicator lamp to
light and may damage your fuel tank and emissions
system. See “Malfunction lndicator Lamp”
in the
Index.
Filhg a Portable Fuel Container
~
Never fill a portable fuel container while it is in
your vehicle. Static electricity discharge from
the container can ignite the gasoline vapor. You can be badly burned and your vehicle
damaged if this occurs.
To help avoid injury to
you and others:
Dispense gasoline only into approved
containers.
Do not fill a container while it is inside a
vehicle,
in a vehicle’s trunk, pickup bed or
on any surface other than the ground.
Bring the fill nozzle in contact with the
inside of the
fill opening before operating
the nozzle. Contact should be maintained until the filling is complete.
Don’t smoke while pumping gasoline.
5-1 0
Page 254 of 386
How to Add Coolant to the Radiator
You can remove the
radiator pressure cap
when the cooling system,
including the radiator
pressure cap and
upper radiator hose,
is no longer hot.
1. Turn the pressure cap slowly counterclockwise until
it first stops. (Don't press down while turning the
pressure cap.)
2. Then keep turning the pressure cap, but now
push down as you
turn it. Remove
the pressure cap.
If you hear a hiss, wait for that
to stop. A hiss
means there is still some pressure left.
5-37