2003 CHEVROLET ASTRO automatic transmission
[x] Cancel search: automatic transmissionPage 80 of 386
Section 2 Features and controls
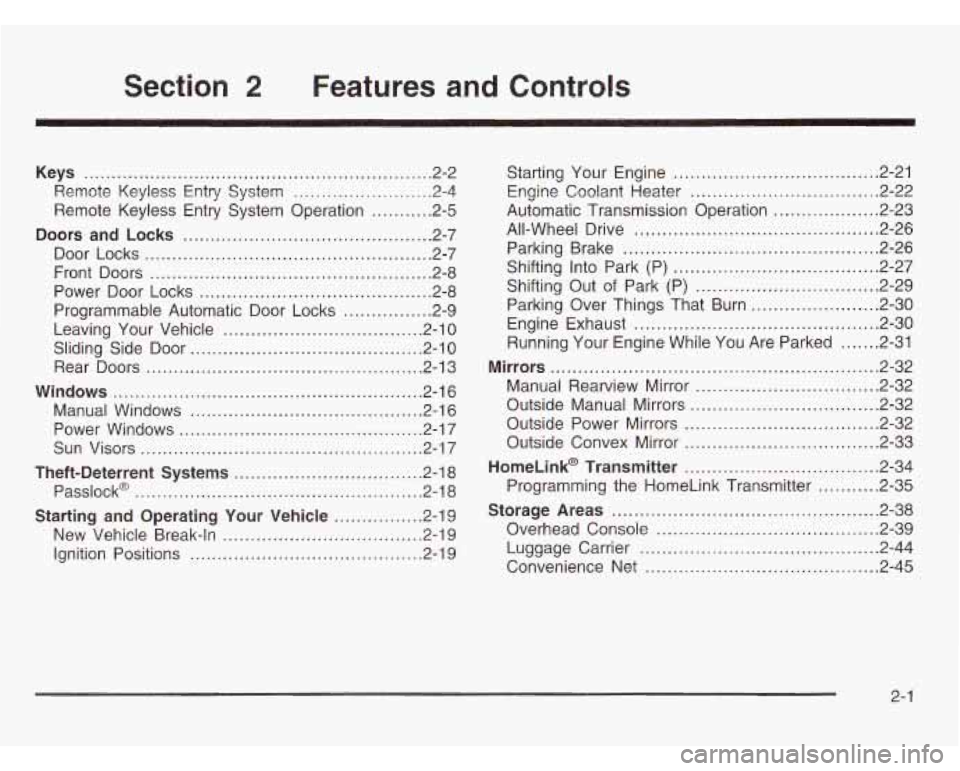
Keys ............................................................... 2.2
Remote Keyless Entry System
~ = ~ . = = = = = -2-4
Remote Keyless Entry System Operation
.......... -2-5
Doors and Locks ............................................. 2-7
Door Locks
.................................................... 2.7
Front Doors
................................................... 2.8
Power Door Locks
.......................................... 2-8
Programmable Automatic Door Locks
................ 2.9
Leaving Your Vehicle
................................... -2-10
Sliding Side Door
......................................... -2-1 0
Rear Doors ................................................. -2-1 3
Windows ........................................................ 2.16
Manual Windows
.......................................... 2.16
Power Windows
........................................... -2-1 7
Sun Visors ................................................... 2.17
Theft-Deterrent Systems .................................. 2.18
Passlock@
.................................................... 2.18
Starting and Operating Your Vehicle ................ 2.19
New Vehicle Break-In
.................................... 2.19
Ignition Positions
........ ................... 2.19 Starting
Your Engine
..................................... 2.21
Engine Coolant Heater
.................................. 2.22
Automatic Transmission Operation
................... 2.23
All-Wheel Drive
............................................ 2.26
Parking Brake
.............................................. 2.26
Shifting Into Park (P)
..................................... 2-27
Shifting Out
of Park (P) ................................. 2-29
Parking Over Things That Burn
....................... 2-30
Running Your Engine While You Are Parked
....... 2-31
Engine Exhaust
............................................ 2-30
Mirrors ........................................................... 2.32
Manual Rearview Mirror
................................ -2-32
Outside Manual Mirrors
.................................. 2.32
Outside Power Mirrors
................................... 2.32
Outside Convex Mirror
................................... 2.33
HomeLink@ Transmitter ................................... 2.34
Programming the HomeLink Transmitter
........... 2.35
Storage Areas ................................................ 2.38
Overhead Console
........................................ 2.39
Luggage Carrier
........................................... 2.44
Convenience Net
.......................................... 2.45
2-1
Page 84 of 386

Remote Keyless Entry System
Operation
If your vehicle has this feature, you can lock and unlock
your doors from about
3 feet (4 m) up to 30 feet (9 m)
away using the remote keyless entry transmitter supplied
with your vehicle.
UNLOCK: When you
press UNLOCK, the
driver’s door will unlock
automatically, the parking
lamps will flash and the
interior lights will go on.
If you press UNLOCK again within three seconds,
all doors will unlock.
LOCK: Press LOCK to lock all the doors. Press LOCK
again within three seconds and the horn will chirp.
REAR 2X: When you press the REAR button twice
within three seconds to unlock the rear hatch or cargo
doors, the parking lamps
will flash and the interior lights
will go on. If the engine is running, the automatic
transmission must be in PARK (P) or NEUTRAL (N) for
the REAR
2X button to operate.
& (Panic Alarm): When this button is pressed,
the horn will sound and the headlamps and taillamps
will flash for up to
30 seconds. This can be turned off by
pressing the panic button again, waiting for
30 seconds,
or starting the vehicle.
Matching Transmitter(s) to Your Vehicle
Each remote keyless entry transmitter is coded to
prevent another transmitter from unlocking your vehicle.
If a transmitter is lost or stolen, a replacement can
be purchased through your dealer. Remember to bring
any remaining transmitters with you when you go to
your dealer. When the dealer matches the replacement
transmitter to your vehicle, any remaining transmitters
must also be matched. Once your dealer has coded the
new transmitter, the lost transmitter will not unlock
your vehicle. Each vehicle can have a maximum of
four transmitters matched to
it.
2-5
Page 102 of 386
Automatic Transmission Operation
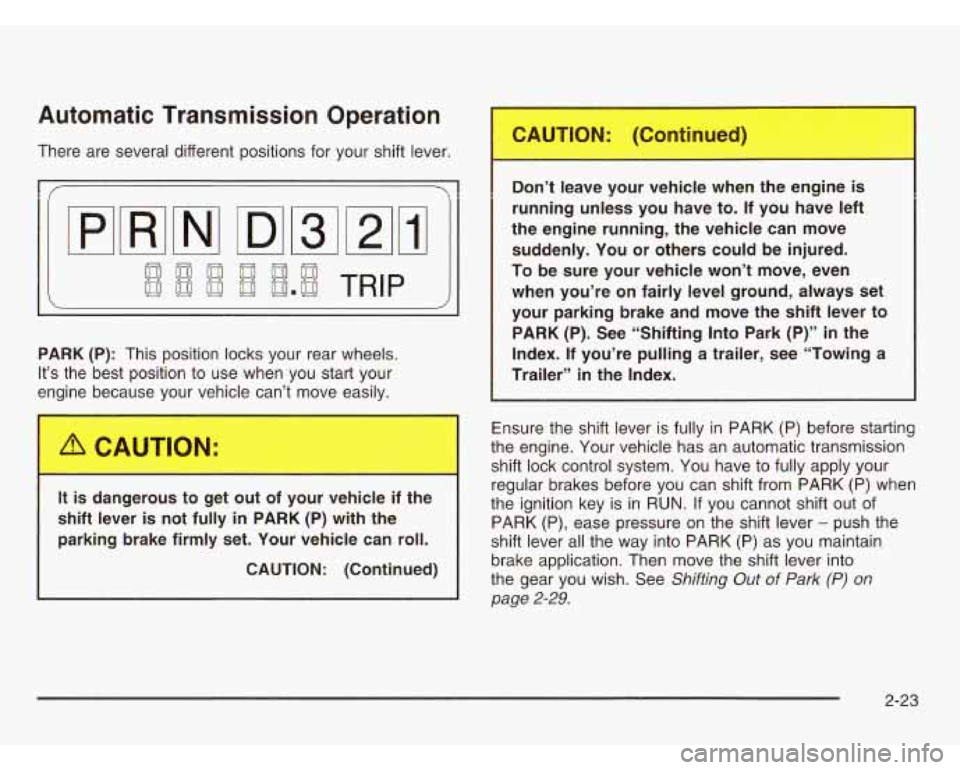
There are several different positions for your shift lever.
PARK (P): This position locks your rear wheels.
It’s the best position to use when you start your
engine because your vehicle can’t move easily.
It is dangerous to get out of your vehicle if the
shift lever is not fully in PARK (P) with the
parking brake firmly set. Your vehicle can roll.
CAUTION: (Continued) Don’t leave your vehicle when
the enL le
is
running unless you have to. If you have left
the engine running, the vehicle can move
suddenly. You or others could be injured.
To be sure your vehicle won’t move, even
when you’re on fairly level ground, always set
your parking brake and move the shift lever to
PARK (P). See “Shifting Into Park (P)” in the
Index. If you’re pulling
a trailer, see “Towing a
Trailer” in the Index.
Ensure the shift lever is fully in PARK (P) before starting
the engine. Your vehicle has an automatic transmission
shift lock control system. You have to fully apply your
regular brakes before you can shift from PARK (P) when
the ignition key is in
RUN. If you cannot shift out of
PARK (P), ease pressure on the shift lever
- push the
shift lever all the way into PARK (P) as you maintain
brake application. Then move the shift lever into
the gear you wish. See
Shifting Out of Park (P) on
page
2-29.
2-23
Page 108 of 386
Torque Lock
If you are parking on a hill and you don’t shift your
transmission into PARK (P) properly, the weight of the
vehicle may put too much force on the parking pawl
in the transmission. You may find it difficult to pull the
shift lever out of PARK (P). This is called “torque lock.”
To prevent torque lock, set the parking brake and
then shift into PARK (P) properly before you leave
the driver’s seat. To find out how, see
Shifting Into
Park
(P) on page 2-27.
When you are ready to drive, move the shift lever out of
PARK (P)
before you release the parking brake.
If torque lock does occur, you may need to have another
vehicle push yours a little uphill to take some of the
pressure from the parking pawl in the transmission,
so you can pull the shift lever out of PARK (P).
Shifting Out of Park (P)
Your vehicle has an automatic transmission shift lock
control system. You have to fully apply your regular
brakes before you can shift from PARK (P) when the
ignition is in RUN. See
Automatic Transmission
Operation on page
2-23.
If you cannot shift out of PARK (P), ease pressure on
the shift lever and push the shift lever all the way up
into PARK
(P) as you maintain brake application. Then,
move the shift lever into the gear you want.
If you ever hold the brake pedal down but still can’t shift
out of PARK (P), try this:
1. Turn the key to OFF.
2. Apply and hold the brake until the end of Step 4.
3. Shift to NEUTRAL (N).
4. Start the vehicle and then shift to the drive gear
5. Have the system fixed as soon as you can.
you
want.
2-29
Page 139 of 386
To idle your vehicle with the automatic headlamp
system
off, set the parking brake while the ignition is off.
Then start your vehicle. The automatic headlamp
system will stay
off until you release the parking brake.
You may be able to turn
off your automatic headlamp
system. See “Daytime Running Lamps (DRL)” later
in this section for more information.
As with any vehicle, you should turn on the regular
headlamps when you need them.
Lamps On Reminder
A reminder tone will sound when your headlamps or
parking lamps are manually turned on and your ignition
is
in OFF, LOCK or ACCESSORY. To disable the
tone, turn the instrument panel brightness thumbwheel
all the way down. In the automatic mode, the
headlamps turn off once the ignition key is in OFF.
Daytime Running Lamps (DRL)
Daytime Running Lamps (DRL) can make it easier
for others to see the front of your vehicle during the day.
DRL can be helpful in many different driving conditions,
but they can be especially helpful in the short periods
after dawn and before sunset. Fully functional daytime
running lamps are required on all vehicles first sold
in Canada.
The DRL system will make your headlamps come on
at a reduced brightness when the following conditions
are met:
The ignition is on,
the exterior lamp control is off.
the automatic transmission is not in PARK (P),
the light sensor determines it is daytime and
the parking brake is released.
When the DRL are on, only your DRL lamps will be on.
The taillamps, sidemarker and other lamps won’t be on.
Your instrument panel won’t be lit up either.
3-1 4
Page 140 of 386

When it begins to get dark, the automatic headlamp
system will switch from DRL to the headlamps or the
last chosen headlamp setting that was used.
To idle your vehicle with the DRL
off, put the transmission
in PARK (P). The DRL
will stay off until you shift out
of PARK (P).
The following does not apply to vehicles first sold
in Canada.
When necessary, you may turn off the automatic
headlamp system and the Daytime Running Lamps
(DRL) feature by following the steps below:
1. Turn the ignition to RUN.
2. Press the DOME OVERRIDE button four times
within six seconds. After the fourth press of the
button, a chime will sound informing you that
the system is
off.
To return to the automatic mode, push the DOME
OVERRIDE button four times within six seconds
(the chime will sound), or turn the ignition to
off and
then to RUN again.
As with any vehicle, you should turn on the regular
headlamp system when you need it.
Interior Lamps
Instrument Panel Brightness Control
The thumbwheel for this feature is located to the right of
the exterior lamps control.
(Instrument Panel Brightness): Turn the thumbwheel
up to brighten the lights or down to dim them.
Moving the thumbwheel up to the first position will
activate the interior dome lamps.
Exit Lighting
With exit lighting, the interior lamps will come on when
you remove the key from the ignition. The lights will not
come on
if the DOME OVERRIDE button is pressed in.
Entry Lighting
Your vehicle is equipped with an illuminated entry
feature.
When a door is opened, the dome lamps will come on
if the DOME OVERRIDE button is in the out position.
When all the doors are closed, the lamps will stay on
for a short period of time and will then go out.
If the
DOME OVERRIDE button is pressed in, the lamps will
not come on.
3-1 5
Page 208 of 386
Tow/Haul Mode
The tow/haul mode is a feature that assists when pulling
a heavy trailer. The purpose of the tow/haul mode is:
e to reduce the frequency of shifts when pulling a
heavy trailer.
to provide the same shift feel when pulling a heavy
trailer as when the vehicle is unloaded.
to reduce the need to change throttle position when
pulling a heavy trailer.
This feature is turned on or off by pressing a button on
the column shift lever. When the feature
is on, a
light on the instrument panel will illuminate to indicate
that the tow/haul mode has been selected.
See
Tow/Haul Mode Light on page 3-36. The tow/haul
mode is automatically turned
off each time the vehicle
is started.
The tow/haul mode is most effective when the vehicle
and trailer combined weight is at least
75% of the Gross
Vehicle Weight Rating (GVWR) and the maximum
trailer weight rating for the vehicle. The tow/haul
mode for hauling a heavy trailer is most
useful under the following conditions:
When driving through hilly terrain at speeds below
55 mph
(88 km/h).
When driving in low speed or stop and go traffic
below
55 mph (88 km/h).
When driving in parking lots.
Operating in the tow/haul mode when not pulling a
heavy trailer will not cause damage to the vehicle,
but you may experience reduced fuel economy
and undesirable petformance from the engine and
transmission. The tow/haul mode should be used only
when pulling a heavy trailer.
Weight of the Trailer
How heavy can a trailer safely be?
It depends on how you plan to use your rig. For example,
speed, altitude, road grades, outside temperature and
how much your vehicle is used to pull a trailer are all
important. And, it can also depend on any special
equipment that you have on your vehicle.
4-33
Page 214 of 386
Driving On Grades Parking on Hills
Reduce speed and shift to a lower gear before you start
down a long or steep downgrade.
If you don’t shift
down, you might have to use your brakes
so much that
they would get hot and no longer work well.
You can tow in DRIVE (D). You may want to shift the
transmission to THIRD
(3) or, if necessary, a lower gear
selection
if the transmission shifts too often (e.g., under
heavy loads and/or hilly conditions).
When towing at high altitude on steep uphill grades,
consider the following: Engine coolant will boil at a lower
temperature than at normal altitudes.
If you turn your
engine
off immediately after towing at high altitude
on steep uphill grades, your vehicle may show signs
similar to engine overheating.
To avoid this, let the
engine run while parked (preferably on level ground)
with the automatic transmission in PARK
(P) for a
few minutes before turning the engine
off. If you do get
the overheat warning, see
Engine Overheating on
page
5-3 1.
You really shoul tot park your vehicle, ith a
trailer attached, on a hill.
If something goes
wrong, your rig could start to move. People
can be injured, and both your vehicle and the
trailer can be damaged.
But if you ever have to park your rig on a hill, here’s
how to do it:
1. Apply your regular brakes, but don’t shift into
2. Have someone place chocks under the trailer
3. When the wheel chocks are in place, release the
4. Reapply the regular brakes. Then apply your PARK (P) yet.
wheels. regular brakes until the chocks absorb the load.
parking brake, and shift to PARK (P).
5. Release the regular brakes.
4-39