2003 CHEVROLET ASTRO CARGO VAN heating
[x] Cancel search: heatingPage 92 of 382
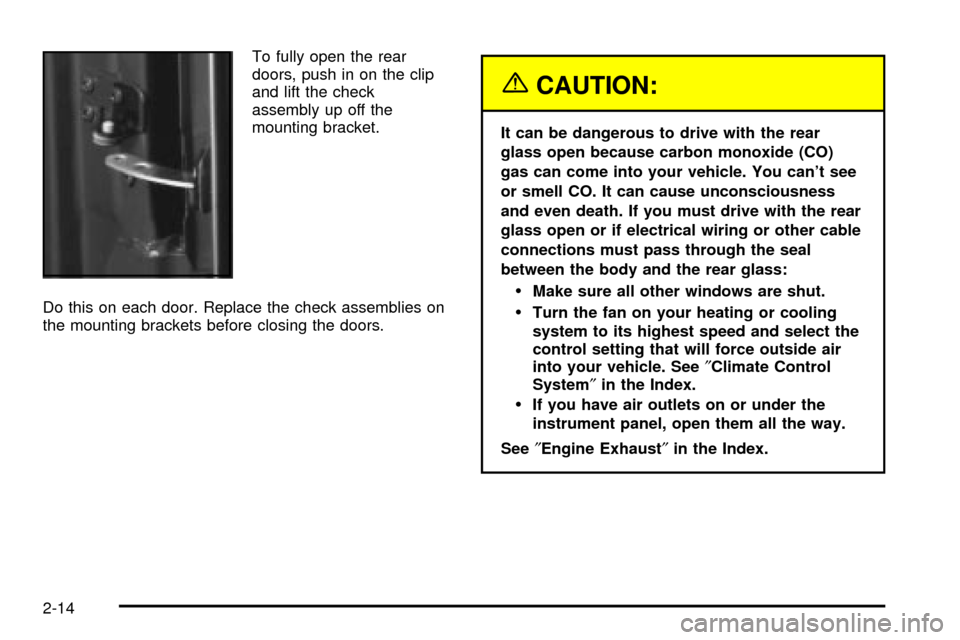
To fully open the rear
doors, push in on the clip
and lift the check
assembly up off the
mounting bracket.
Do this on each door. Replace the check assemblies on
the mounting brackets before closing the doors.
{CAUTION:
It can be dangerous to drive with the rear
glass open because carbon monoxide (CO)
gas can come into your vehicle. You can't see
or smell CO. It can cause unconsciousness
and even death. If you must drive with the rear
glass open or if electrical wiring or other cable
connections must pass through the seal
between the body and the rear glass:
·Make sure all other windows are shut.
·Turn the fan on your heating or cooling
system to its highest speed and select the
control setting that will force outside air
into your vehicle. See²Climate Control
System²in the Index.
·If you have air outlets on or under the
instrument panel, open them all the way.
See²Engine Exhaust²in the Index.
2-14
Page 125 of 382

Instrument Panel Overview...............................3-2
Hazard Warning Flashers................................3-4
Other Warning Devices...................................3-5
Horn.............................................................3-5
Tilt Wheel.....................................................3-5
Turn Signal/Multifunction Lever.........................3-6
Exterior Lamps.............................................3-12
Interior Lamps..............................................3-15
Accessory Power Outlets...............................3-16
Ashtrays and Cigarette Lighter........................3-17
Climate Controls............................................3-18
Climate Control System.................................3-18
Rear Heating System....................................3-19
Rear Air Conditioning System.........................3-20
Rear Climate Control System.........................3-21
Warning Lights, Gages and Indicators.............3-23
Instrument Panel Cluster................................3-24
Speedometer and Odometer...........................3-25
Safety Belt Reminder Light.............................3-26
Air Bag Readiness Light................................3-26
Charging System Light..................................3-27
Voltmeter Gage............................................3-28
Brake System Warning Light..........................3-28Anti-Lock Brake System Warning Light.............3-29
Engine Coolant Temperature Gage..................3-30
Malfunction Indicator Lamp.............................3-30
Oil Pressure Gage........................................3-34
Security Light...............................................3-35
Service All-Wheel Drive Light.........................3-35
Tow/Haul Mode Light....................................3-36
Check Gages Warning Light...........................3-36
Fuel Gage...................................................3-36
Low Fuel Warning Light.................................3-37
Audio System(s).............................................3-38
Setting the Time for Radios with
the Set Button..........................................3-38
Setting the Time for Radios with
HR and MN Buttons..................................3-38
AM-FM Radio...............................................3-39
Radio with CD..............................................3-41
Rear Seat Audio (RSA).................................3-46
Theft-Deterrent Feature..................................3-47
Understanding Radio Reception......................3-50
Care of Your CDs.........................................3-50
Care of Your CD Player................................3-50
Fixed Mast Antenna......................................3-50
Section 3 Instrument Panel
3-1
Page 141 of 382

Ashtrays and Cigarette Lighter
The cigarette lighter is on the left of the engine cover
console.
To use the lighter, press it in all the way and let go.
When it's done heating, it will pop back out by itself.
Notice:Don't hold a cigarette lighter in with
your hand while it is heating. If you do, it won't be
able to back away from the heating element
when it's ready. That can make it overheat,
damaging the lighter and the heating element.
Notice:When using the cigarette lighter as an
accessory power outlet, maximum electrical load
must not exceed 20 amps. Always turn off any
electrical equipment when not in use. Leaving
electrical equipment on for extended periods will
drain your battery.The front ashtray is located above the passenger's side
front cupholder. To remove the front ashtray, open it
and gently pull it slightly past its stop.
To remove the ashtray on the sliding door, open it, then
press down on the inside tab and pull it out.
You may have another ashtray on the driver's sidewall.
Press the right side to turn the ashtray around for
use. To remove the ashtray, open it and gently pull it off
the hinge.
Notice:Don't put papers or other ¯ammable items
into your ashtrays. Hot cigarettes or other smoking
materials could ignite them, causing a damaging ®re.
3-17
Page 142 of 382
Climate Controls
Climate Control System
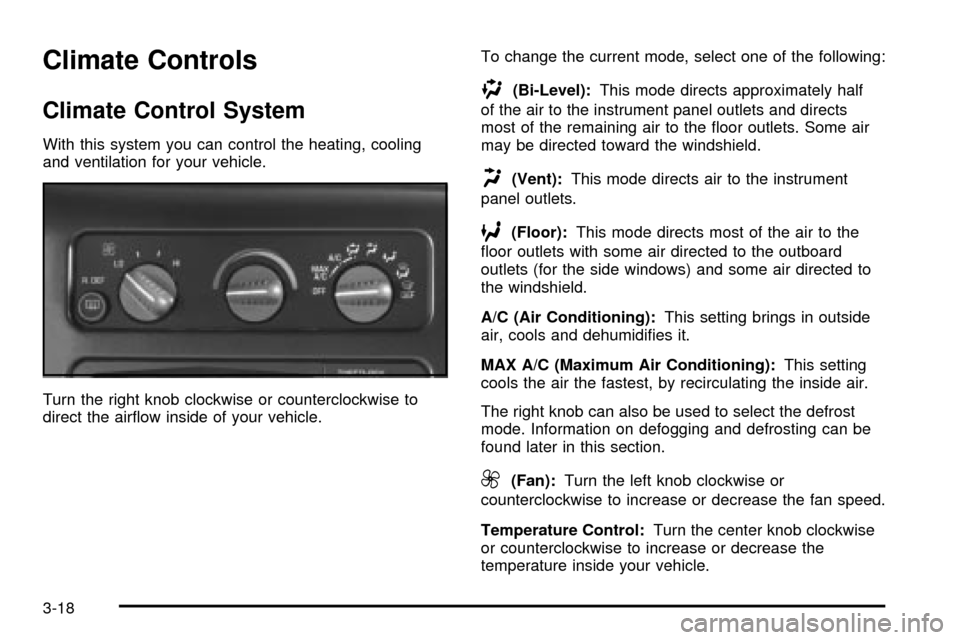
With this system you can control the heating, cooling
and ventilation for your vehicle.
Turn the right knob clockwise or counterclockwise to
direct the air¯ow inside of your vehicle.To change the current mode, select one of the following:
)(Bi-Level):This mode directs approximately half
of the air to the instrument panel outlets and directs
most of the remaining air to the ¯oor outlets. Some air
may be directed toward the windshield.
H(Vent):This mode directs air to the instrument
panel outlets.
6(Floor):This mode directs most of the air to the
¯oor outlets with some air directed to the outboard
outlets (for the side windows) and some air directed to
the windshield.
A/C (Air Conditioning):This setting brings in outside
air, cools and dehumidi®es it.
MAX A/C (Maximum Air Conditioning):This setting
cools the air the fastest, by recirculating the inside air.
The right knob can also be used to select the defrost
mode. Information on defogging and defrosting can be
found later in this section.
9(Fan):Turn the left knob clockwise or
counterclockwise to increase or decrease the fan speed.
Temperature Control:Turn the center knob clockwise
or counterclockwise to increase or decrease the
temperature inside your vehicle.
3-18
Page 143 of 382
Defogging and Defrosting
Turn the right knob to select the defog or defrost mode.
-(Blend):With this setting, the outside air comes
out of both the ¯oor and defroster outlets. Adjust
the temperature knob for warmer or cooler air. The air
conditioning compressor may operate in this setting
to dehumidfy the air.
1(Defrost):This setting operates the defroster. Most
of the air comes out near the windshield, with some
going to the ¯oor outlets and front side windows. The air
conditioning compressor may operate in this setting to
dehumidify the air.
The bi-level setting is useful for cold weather with a
large number of passengers or very humid conditions to
help keep the windshield clear. Use defrost to remove
fog or ice from the windshield quickly in extremely
cold conditions. The temperature knob should be in the
red area and the fan control toward high.
Rear Heating System
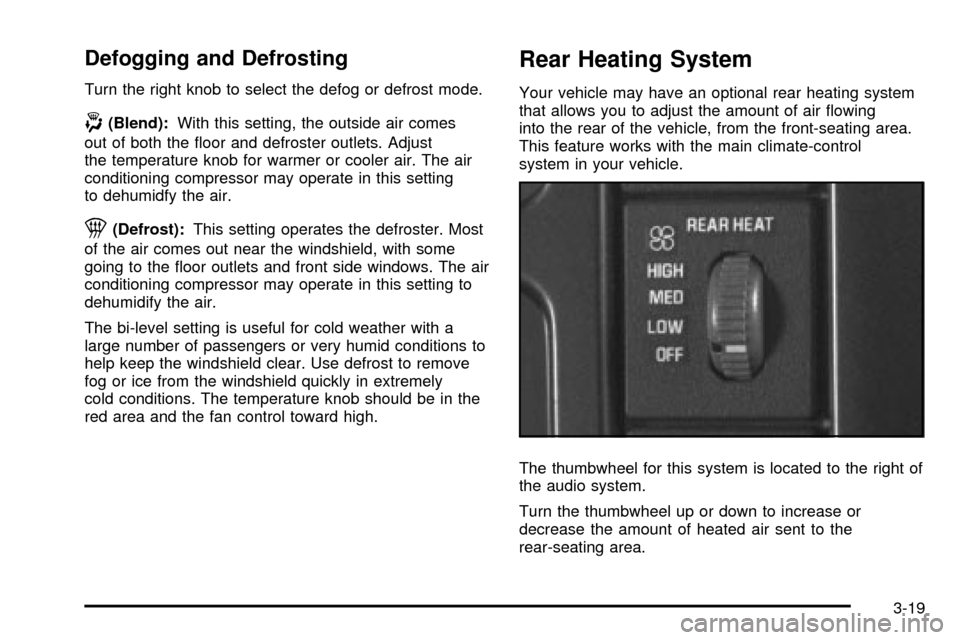
Your vehicle may have an optional rear heating system
that allows you to adjust the amount of air ¯owing
into the rear of the vehicle, from the front-seating area.
This feature works with the main climate-control
system in your vehicle.
The thumbwheel for this system is located to the right of
the audio system.
Turn the thumbwheel up or down to increase or
decrease the amount of heated air sent to the
rear-seating area.
3-19
Page 144 of 382
Rear Air Conditioning System
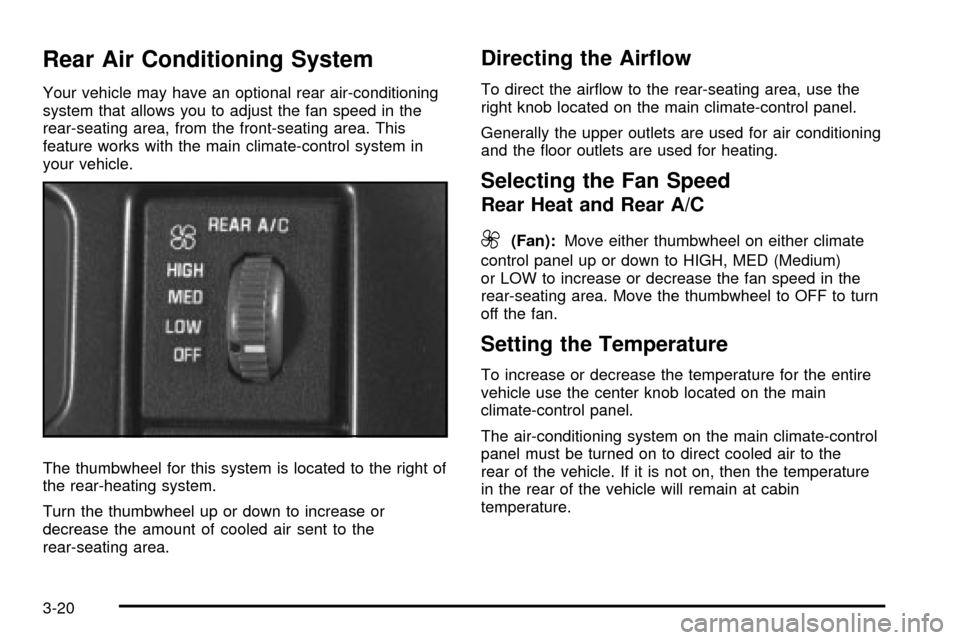
Your vehicle may have an optional rear air-conditioning
system that allows you to adjust the fan speed in the
rear-seating area, from the front-seating area. This
feature works with the main climate-control system in
your vehicle.
The thumbwheel for this system is located to the right of
the rear-heating system.
Turn the thumbwheel up or down to increase or
decrease the amount of cooled air sent to the
rear-seating area.
Directing the Air¯ow
To direct the air¯ow to the rear-seating area, use the
right knob located on the main climate-control panel.
Generally the upper outlets are used for air conditioning
and the ¯oor outlets are used for heating.
Selecting the Fan Speed
Rear Heat and Rear A/C
9(Fan):Move either thumbwheel on either climate
control panel up or down to HIGH, MED (Medium)
or LOW to increase or decrease the fan speed in the
rear-seating area. Move the thumbwheel to OFF to turn
off the fan.
Setting the Temperature
To increase or decrease the temperature for the entire
vehicle use the center knob located on the main
climate-control panel.
The air-conditioning system on the main climate-control
panel must be turned on to direct cooled air to the
rear of the vehicle. If it is not on, then the temperature
in the rear of the vehicle will remain at cabin
temperature.
3-20
Page 154 of 382

Engine Coolant Temperature Gage
This gage shows the
engine coolant
temperature. If the gage
pointer moves to the
red area, your engine is
too hot!
It means that your engine coolant has overheated.
If you have been operating your vehicle under normal
driving conditions, you should pull off the road, stop your
vehicle and turn off the engine as soon as possible.
See
Engine Overheating on page 5-31.
Malfunction Indicator Lamp
Service Engine Soon Light in the
United States or Check Engine Light
in Canada
Your vehicle is equipped with a computer which
monitors operation of the fuel, ignition and emission
control systems.
United StatesCanada
3-30
Page 211 of 382
Driving with a Trailer
{CAUTION:
If you have a rear-most window open and you
pull a trailer with your vehicle, carbon
monoxide (CO) could come into your vehicle.
You can't see or smell CO. It can cause
unconsciousness or death. See ªEngine
Exhaustº in the Index. To maximize your safety
when towing a trailer:
·Have your exhaust system inspected for
leaks, and make necessary repairs before
starting on your trip.
·Keep the rear-most windows closed.
·If exhaust does come into your vehicle
through a window in the rear or another
opening, drive with your front, main
heating or cooling system on and with the
fan on any speed. This will bring fresh,
outside air into your vehicle. Do not use
the climate control setting for maximum air
because it only recirculates the air inside
your vehicle. See ªClimate Controlsº in
the Index.Towing a trailer requires a certain amount of experience.
Before setting out for the open road, you'll want to get
to know your rig. Acquaint yourself with the feel of
handling and braking with the added weight of the trailer.
And always keep in mind that the vehicle you are
driving is now a good deal longer and not nearly as
responsive as your vehicle is by itself.
Before you start, check the trailer hitch and platform
(and attachments), safety chains, electrical connector,
lamps, tires and mirror adjustment. If the trailer has
electric brakes, start your vehicle and trailer moving and
then apply the trailer brake controller by hand to be
sure the brakes are working. This lets you check your
electrical connection at the same time.
During your trip, check occasionally to be sure that the
load is secure, and that the lamps and any trailer
brakes are still working.
4-37