2003 CHEVROLET ASTRO CARGO VAN bulb
[x] Cancel search: bulbPage 1 of 382

Seats and Restraint Systems........................... 1-1
Front Seats
............................................... 1-2
Rear Seats
............................................... 1-7
Safety Belts
.............................................1-13
Child Restraints
.......................................1-35
Air Bag System
.......................................1-62
Restraint System Check
............................1-71
Features and Controls..................................... 2-1
Keys
........................................................ 2-2
Doors and Locks
....................................... 2-7
Windows
.................................................2-16
Theft-Deterrent Systems
............................2-18
Starting and Operating Your Vehicle
...........2-19
Mirrors
....................................................2-32
HomeLink
žTransmitter
.............................2-34
Storage Areas
.........................................2-38
Instrument Panel............................................. 3-1
Instrument Panel Overview
.......................... 3-2
Climate Controls
......................................3-18
Warning Lights, Gages and Indicators
.........3-23
Audio System(s)
.......................................3-38
Driving Your Vehicle....................................... 4-1
Your Driving, the Road, and Your Vehicle
..... 4-2Towing
....................................................4-29
Service and Appearance Care.......................... 5-1
Service
..................................................... 5-3
Fuel
......................................................... 5-5
Checking Things Under the Hood
...............5-11
All-Wheel Drive
........................................5-52
Rear Axle
...............................................5-53
Front Axle
...............................................5-54
Bulb Replacement
....................................5-55
Windshield Wiper Blade Replacement
.........5-62
Tires
......................................................5-63
Appearance Care
.....................................5-83
Vehicle Identi®cation
.................................5-91
Electrical System
......................................5-92
Capacities and Speci®cations
.....................5-99
Normal Maintenance Replacement Parts
....5-101
Maintenance Schedule..................................... 6-1
Maintenance Schedule
................................ 6-2
Customer Assistance Information.................... 7-1
Customer Assistance Information
.................. 7-2
Reporting Safety Defects
...........................7-10
Index.................................................................1
2003 Chevrolet Astro Owner ManualM
Page 130 of 382

Turn Signal/Multifunction Lever
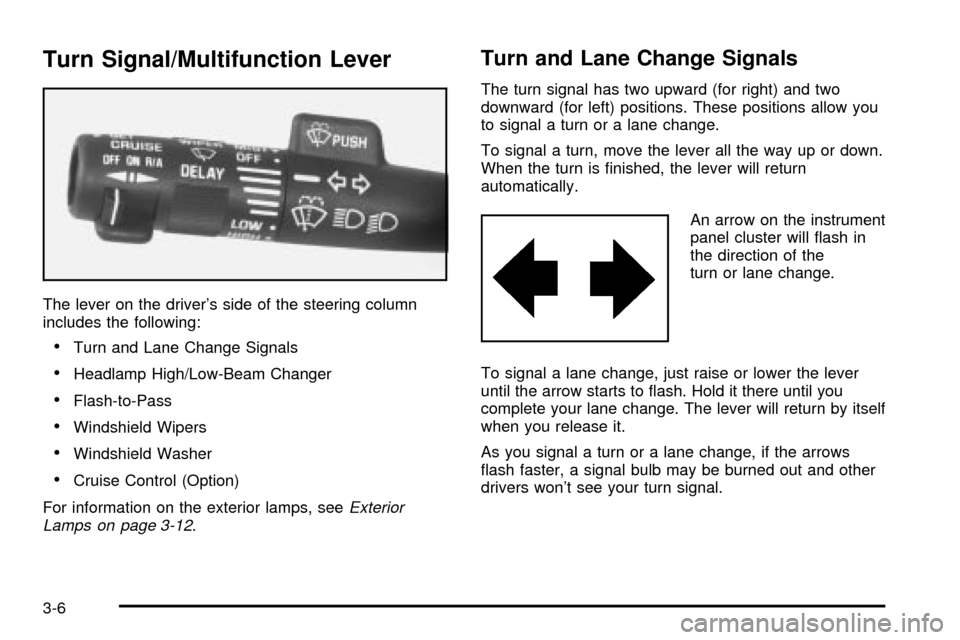
The lever on the driver's side of the steering column
includes the following:
·Turn and Lane Change Signals
·Headlamp High/Low-Beam Changer
·Flash-to-Pass
·Windshield Wipers
·Windshield Washer
·Cruise Control (Option)
For information on the exterior lamps, see
Exterior
Lamps on page 3-12.
Turn and Lane Change Signals
The turn signal has two upward (for right) and two
downward (for left) positions. These positions allow you
to signal a turn or a lane change.
To signal a turn, move the lever all the way up or down.
When the turn is ®nished, the lever will return
automatically.
An arrow on the instrument
panel cluster will ¯ash in
the direction of the
turn or lane change.
To signal a lane change, just raise or lower the lever
until the arrow starts to ¯ash. Hold it there until you
complete your lane change. The lever will return by itself
when you release it.
As you signal a turn or a lane change, if the arrows
¯ash faster, a signal bulb may be burned out and other
drivers won't see your turn signal.
3-6
Page 131 of 382

If a bulb is burned out, replace it to help avoid an
accident. If the arrows don't go on at all when you signal
a turn, check for burned-out bulbs and a blown fuse.
See
Fuses and Circuit Breakers on page 5-93.
If you have a trailer towing option with added wiring for
the trailer lamps, a different turn signal ¯asher is
used. With this ¯asher installed, the signal indicator will
¯ash even if a turn signal bulb is burned out. Check
the front and rear turn signal lamps regularly to make
sure they are working.
Turn Signal On Chime
If your turn signal is left on for more than 3/4 of a mile
(1.2 km), a chime will sound at each ¯ash of the
turn signal. To turn off the chime, move the turn signal
lever to the center position.
Headlamp High/Low-Beam Changer
To change the headlamps from low beam to high or high
to low, pull the multifunction lever all the way toward
you. Then release it.
When the high beams are
on, this indicator light
located on the instrument
panel cluster also will
be on.
Flash-to-Pass
This feature lets you use your high-beam headlamps to
signal a driver in front of you that you want to pass.
It works even if your headlamps are in automatic.
To use it, pull the turn signal lever toward you, but not
so far that you hear a click.
If your headlamps are in automatic or on low beam,
your high-beam headlamps will turn on. They'll stay on
as long as you hold the lever toward you and the
high-beam indicator located on the cluster comes on.
Release the lever to return to normal operation.
3-7
Page 212 of 382

Following Distance
Stay at least twice as far behind the vehicle ahead as
you would when driving your vehicle without a trailer.
This can help you avoid situations that require
heavy braking and sudden turns.
Passing
You'll need more passing distance up ahead when
you're towing a trailer. And, because you're a good deal
longer, you'll need to go much farther beyond the
passed vehicle before you can return to your lane.
Backing Up
Hold the bottom of the steering wheel with one hand.
Then, to move the trailer to the left, just move that hand
to the left. To move the trailer to the right, move your
hand to the right. Always back up slowly and, if possible,
have someone guide you.
Making Turns
Notice:Making very sharp turns while trailering
could cause the trailer to come in contact with the
vehicle. Your vehicle could be damaged. Avoid
making very sharp turns while trailering.
When you're turning with a trailer, make wider turns than
normal. Do this so your trailer won't strike soft shoulders,
curbs, road signs, trees or other objects. Avoid jerky or
sudden maneuvers. Signal well in advance.
Turn Signals When Towing a Trailer
When you tow a trailer, your vehicle has to have extra
wiring (included in the optional trailering package).
The arrows on your instrument panel will ¯ash whenever
you signal a turn or lane change. Properly hooked up,
the trailer lamps will also ¯ash, telling other drivers
you're about to turn, change lanes or stop.
When towing a trailer, the arrows on your instrument
panel will ¯ash for turns even if the bulbs on the trailer
are burned out. Thus, you may think drivers behind
you are seeing your signal when they are not. It's
important to check occasionally to be sure the trailer
bulbs are still working.
4-38
Page 217 of 382

Service............................................................5-3
Doing Your Own Service Work.........................5-3
Adding Equipment to the Outside
of Your Vehicle...........................................5-4
Fuel................................................................5-5
Gasoline Octane............................................5-5
Gasoline Speci®cations....................................5-5
California Fuel...............................................5-6
Additives.......................................................5-6
Fuels in Foreign Countries...............................5-7
Filling Your Tank............................................5-8
Filling a Portable Fuel Container.....................5-10
Checking Things Under the Hood....................5-11
Hood Release..............................................5-11
Engine Compartment Overview.......................5-14
Engine Oil...................................................5-15
Engine Cover...............................................5-20
Engine Air Cleaner/Filter................................5-24
Automatic Transmission Fluid.........................5-25
Engine Coolant.............................................5-28
Radiator Pressure Cap..................................5-30
Engine Overheating.......................................5-31Cooling System............................................5-33
Engine Fan Noise.........................................5-39
Power Steering Fluid.....................................5-40
Windshield Washer Fluid................................5-41
Brakes........................................................5-42
Battery........................................................5-46
Jump Starting...............................................5-47
All-Wheel Drive..............................................5-52
Rear Axle.......................................................5-53
Front Axle......................................................5-54
Bulb Replacement..........................................5-55
Halogen Bulbs..............................................5-55
Headlamps..................................................5-55
Front Turn Signal Lamps...............................5-59
Taillamps.....................................................5-60
Replacement Bulbs.......................................5-61
Windshield Wiper Blade Replacement..............5-62
Tires..............................................................5-63
In¯ation Ð Tire Pressure...............................5-64
Tire Inspection and Rotation...........................5-64
When It Is Time for New Tires.......................5-66
Section 5 Service and Appearance Care
5-1
Page 271 of 382

Bulb Replacement
For any bulb changing procedure not listed in this
section, contact your dealer.
For the type of bulbs, see
Replacement Bulbs on
page 5-61.
Halogen Bulbs
{CAUTION:
Halogen bulbs have pressurized gas inside and
can burst if you drop or scratch the bulb. You or
others could be injured. Be sure to read and
follow the instructions on the bulb package.
Headlamps
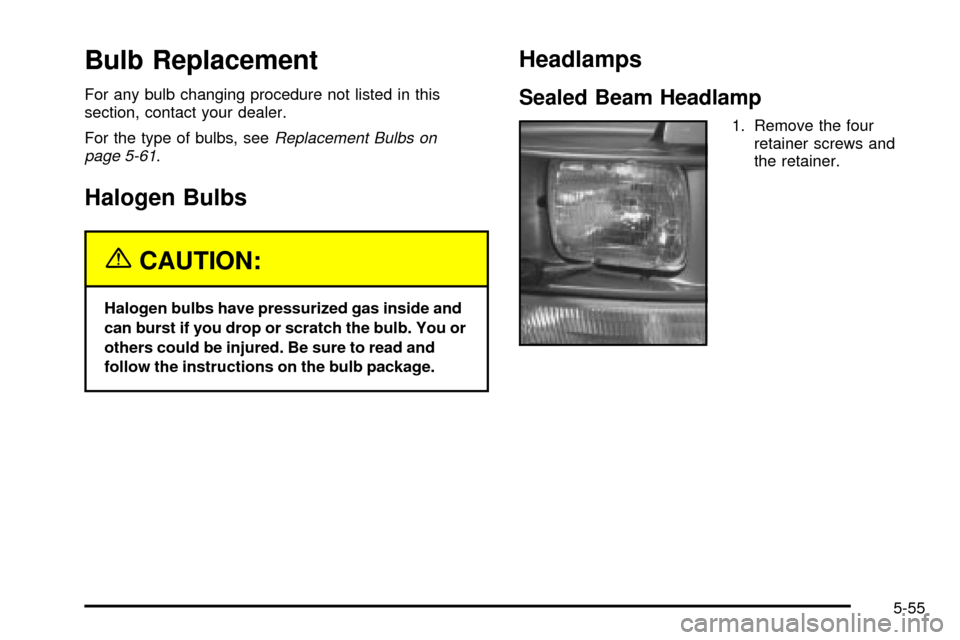
Sealed Beam Headlamp
1. Remove the four
retainer screws and
the retainer.
5-55
Page 274 of 382

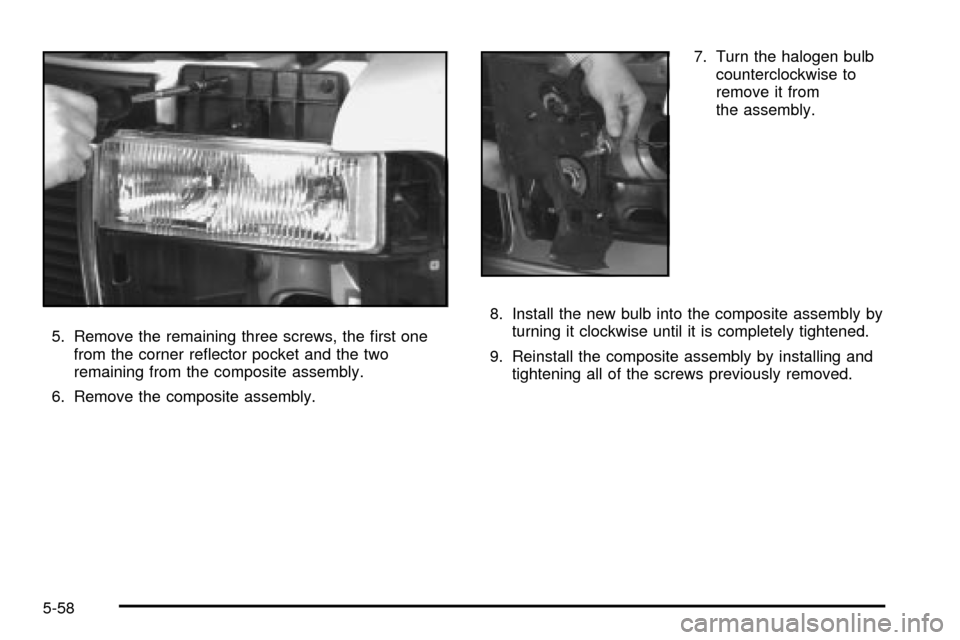
5. Remove the remaining three screws, the ®rst one
from the corner re¯ector pocket and the two
remaining from the composite assembly.
6. Remove the composite assembly.7. Turn the halogen bulb
counterclockwise to
remove it from
the assembly.
8. Install the new bulb into the composite assembly by
turning it clockwise until it is completely tightened.
9. Reinstall the composite assembly by installing and
tightening all of the screws previously removed.
5-58
Page 275 of 382

Front Turn Signal Lamps
1. Remove the two screws at the inside edge of the
parking/turn signal lamp assembly.
2. Remove the lamp assembly.
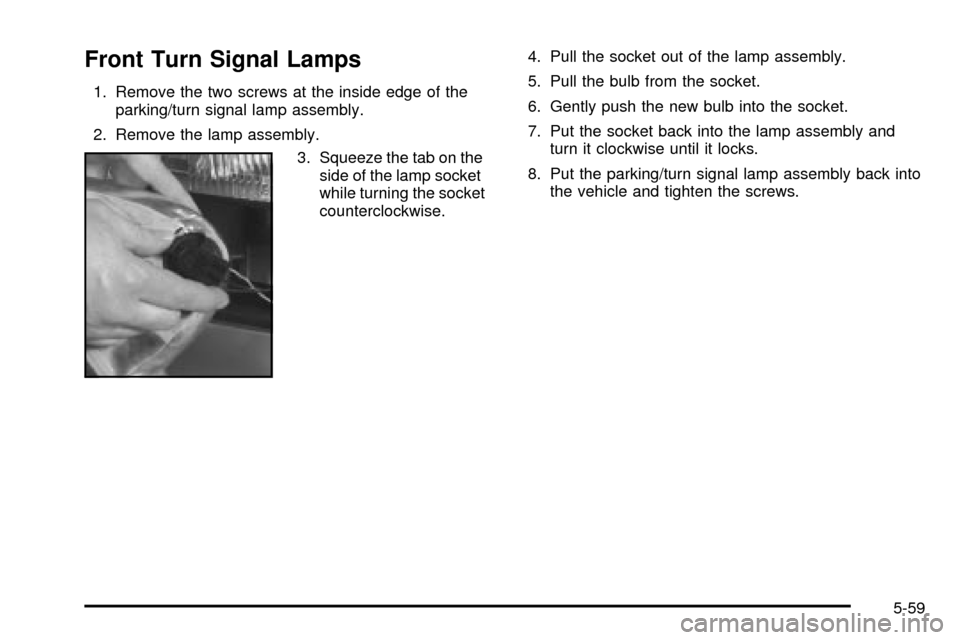
3. Squeeze the tab on the
side of the lamp socket
while turning the socket
counterclockwise.4. Pull the socket out of the lamp assembly.
5. Pull the bulb from the socket.
6. Gently push the new bulb into the socket.
7. Put the socket back into the lamp assembly and
turn it clockwise until it locks.
8. Put the parking/turn signal lamp assembly back into
the vehicle and tighten the screws.
5-59