2003 BUICK PARK AVENUE Key
[x] Cancel search: KeyPage 94 of 372

Torque Lock
If you are parking on a hill and you don't shift your
transaxle into PARK (P) properly, the weight of
the vehicle may put too much force on the parking pawl
in the transaxle. You may ®nd it difficult to pull the
shift lever out of PARK (P). This is called ªtorque lock.º
To prevent torque lock, set the parking brake and
then shift into PARK (P) properly before you leave the
driver's seat. To ®nd out how, see
Shifting Into Park (P)
on page 2-28.
When you are ready to drive, move the shift lever out of
PARK (P)
beforeyou release the parking brake.
If torque lock does occur, you may need to have another
vehicle push yours a little uphill to take some of the
pressure from the parking pawl in the transaxle, so you
can pull the shift lever out of PARK (P).
Shifting Out of Park (P)
Your vehicle has an automatic transaxle shift lock
control system. You have to fully apply your regular
brake before you can shift from PARK (P) when
the ignition is in RUN. See
Automatic Transaxle
Operation on page 2-24.
If you cannot shift out of PARK (P), ease pressure on
the shift lever ± push the shift lever all the way into
PARK (P) as you maintain brake application. Then move
the shift lever into the gear you want.
If you ever hold the brake pedal down but still can't shift
out of PARK (P), try this:
1. Turn the key to OFF. Open and close the driver's
door to turn off the RAP feature.
2. Apply and hold the brake until the end of Step 4.
3. Shift to NEUTRAL (N).
4. Start the vehicle and then shift to the drive gear
you want.
5. Have the vehicle ®xed as soon as you can.
2-30
Page 106 of 372

Erasing HomeLinkžButtons
To erase programming from the three buttons do the
following:
1. Press and hold down the two outside buttons until
the indicator light begins to ¯ash, after 20 seconds.
2. Release both buttons. Do not hold for longer than
30 seconds.
HomeLink
žis now in the train (learning) mode and can
be programmed at any time beginning with Step 2
under ªProgramming HomeLink
ž.º
Individual buttons can not be erased, but they can be
reprogrammed. See ªReprogramming a Single
HomeLink
žButtonº next.
Reprogramming a Single HomeLinkž
Button
To program a device to HomeLinkžusing a HomeLinkž
button previously trained, follow these steps:
1. Press and hold the desired HomeLink
žbutton. Do
not release the button.
2. The indicator light will begin to ¯ash after
20 seconds. While still holding the HomeLink
ž
button, proceed with Step 2 under ªProgramming
HomeLinkž.º
Resetting Defaults
To reset HomeLinkžto default settings do the following:
1. Hold down the two outside buttons for about
20 seconds until the indicator light begins to ¯ash.
2. Continue to hold both buttons until the HomeLink
ž
indicator light turns off.
3. Release both buttons.
For questions or comments, contact HomeLink
žat
1-800-355-3515, or on the internet at
www.homelink.com.
Storage Areas
Glove Box
Use the key to lock and unlock the glove box. To open
the glove box, pull the handle upward until the latch
opens.
2-42
Page 110 of 372

Open:Press and hold the switch rearward to the ®rst
position to open the glass panel and sunshade. The
sunshade can also be opened manually.
Comfort Stop:Press and release the switch rearward
to the second position to express open the glass
panel to the comfort stop position. The comfort stop
position is designed to help reduce noise and make
passengers more comfortable.
Express Open:When the glass panel is express
opening, pressing the switch in any direction will stop it
in a partially-opened position. The glass panel may
be fully opened by pressing the switch rearward again.
If you press and hold the switch in the express open
position for more than one and a half seconds, the
express open operation will be overridden and
the sunroof will operate manually.
Close:To close the glass panel, press and hold the
switch forward. As the glass panel reaches the closed
position, it will open slightly toward the vent position and
then drop down to the closed position to provide a
better seal. The sunshade must be closed manually.
Vent:Once the sunroof is closed, it can be opened to
the vent position by pushing the switch upward. To
close the glass panel, pull the switch downward. The
sunshade must be opened and closed manually for vent
operation.Vehicle Personalization
Memory Seat and Mirrors
If your vehicle has this
feature, the controls are
located on the driver's door
panel, and are used to
program and recall
memory settings for the
driver's seating, outside
mirror positions and
climate controls. See
Climate Controls
Personalization on
page 3-28
for more
information.
To save your seat and mirror positions into memory,
use the following procedure:
1. First identify the DRIVER # on the Driver Information
Center (DIC) by pressing the MEMORY button
1 or 2 or by pressing the unlock button on the
remote keyless entry transmitter. See
Driver
Information Center (DIC) on page 3-43.
2-46
Page 116 of 372

Hazard Warning Flashers
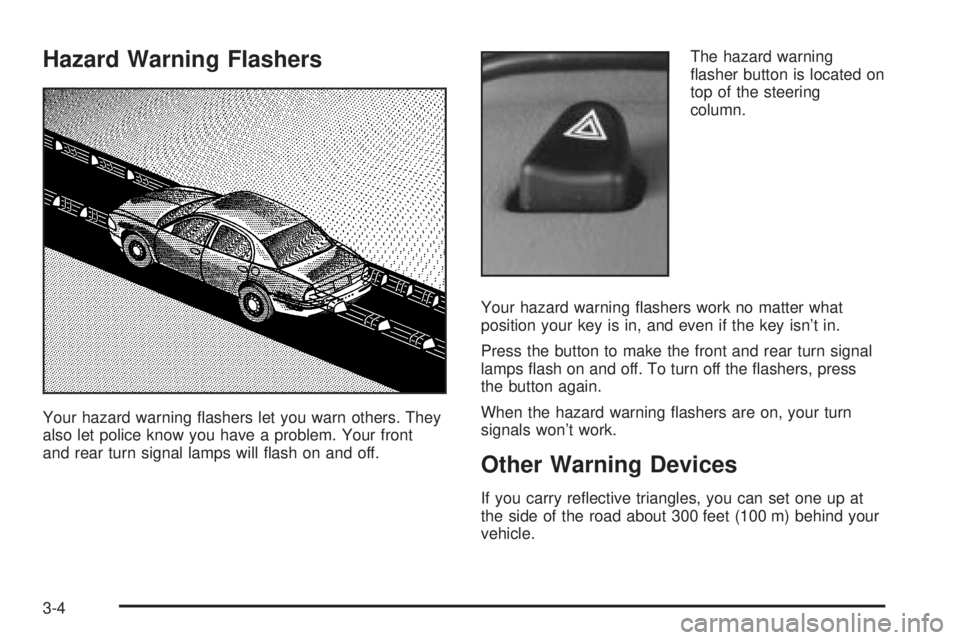
Your hazard warning ¯ashers let you warn others. They
also let police know you have a problem. Your front
and rear turn signal lamps will ¯ash on and off.The hazard warning
¯asher button is located on
top of the steering
column.
Your hazard warning ¯ashers work no matter what
position your key is in, and even if the key isn't in.
Press the button to make the front and rear turn signal
lamps ¯ash on and off. To turn off the ¯ashers, press
the button again.
When the hazard warning ¯ashers are on, your turn
signals won't work.
Other Warning Devices
If you carry re¯ective triangles, you can set one up at
the side of the road about 300 feet (100 m) behind your
vehicle.
3-4
Page 124 of 372

Exterior Lamps
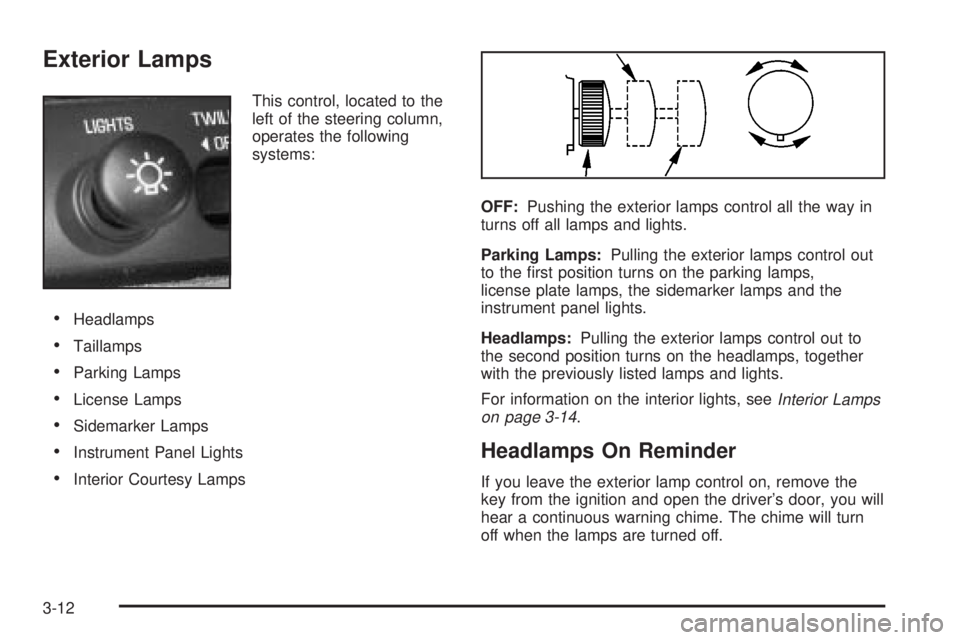
This control, located to the
left of the steering column,
operates the following
systems:
·Headlamps
·Taillamps
·Parking Lamps
·License Lamps
·Sidemarker Lamps
·Instrument Panel Lights
·Interior Courtesy LampsOFF:Pushing the exterior lamps control all the way in
turns off all lamps and lights.
Parking Lamps:Pulling the exterior lamps control out
to the ®rst position turns on the parking lamps,
license plate lamps, the sidemarker lamps and the
instrument panel lights.
Headlamps:Pulling the exterior lamps control out to
the second position turns on the headlamps, together
with the previously listed lamps and lights.
For information on the interior lights, see
Interior Lamps
on page 3-14.
Headlamps On Reminder
If you leave the exterior lamp control on, remove the
key from the ignition and open the driver's door, you will
hear a continuous warning chime. The chime will turn
off when the lamps are turned off.
3-12
Page 126 of 372

Twilight Sentinelž
Twilight Sentinelžturns
your headlamps on and off
by sensing how dark it
is outside.
To operate this feature, slide the control to any position
to vary the lamp timeout.
You can set the delay time from only a few seconds to
three minutes. If you move the control all the way to
MAX, your lamps will remain on for three minutes after
you turn off your engine. If you move the control
almost all the way in the other direction, so it's just on,
the lamps will go off quickly when you turn off your
engine. Sliding the control to OFF, turns off the Twilight
Sentinel
žfeature.
Light Sensor
Your Twilight Sentinelžand DRL work with the light
sensor on top of the instrument panel. Don't cover it up.
If you do, it will sense ªdarkº and the headlamps will
come on.
Interior Lamps
Instrument Panel Brightness
Instrument panel light brightness can be adjusted by
turning the exterior lamps control counterclockwise and
clockwise.
Courtesy Lamps
When any door is opened, several lamps go on. They
make it easy for you to enter and leave your vehicle.
You can also turn these lamps on by turning the exterior
lamps control clockwise all the way past the normal
stop.
Entry Lighting
When you open either front door or press the button
with the unlock symbol on the remote keyless entry
transmitter, the lamps inside your vehicle will turn on.
These lamps will turn off after about 40 seconds. These
lamps will also turn off if you start the engine or
activate the power door locks.
3-14
Page 127 of 372

Delayed Entry Lighting
When you open the door, the interior lamps will come on.
When you close the door with the ignition off, the interior
lamps will stay on for 25 seconds or until the ignition is
turned to an on position. Locking the doors with the power
door lock switch will override the delayed entry lighting
feature and the lamps will turn off right away.
Using the remote keyless entry transmitter to lock the
door will not cancel delayed lighting.
Theater Dimming
This feature allows for a three to ®ve-second fade out of
the courtesy lamps instead of immediate turn off.
Delayed Exit Lighting
With this feature, the interior lamps will come on for
25 seconds after you remove the key from the ignition.
This will give you time to ®nd the door handle or
lock switches.
Parade Dimming
This feature prohibits the dimming of your instrument
panel displays during daylight while your headlamps are
on. This feature operates with the light sensor for the
Twilight Sentinel
žand is fully automatic. When the light
sensor reads darkness outside, you will be able to
dim your instrument panel displays once again.
Perimeter Lighting
When the button with the unlock symbol on the remote
keyless entry transmitter is pressed, the DRL, parking
lamps and back-up lamps will come on if it is dark
enough outside.
This feature will only be activated when the security
feedback feature is programmed to be in Modes 1, 3
or 5 on the transmitter. Modes 0, 2 and 4 do not respond
with exterior lights ¯ashing when unlocking the vehicle
so perimeter lighting will not be active.
This feature can be programmed on or off for each
transmitter.
To turn the feature off do the following:
1. Press and hold LOCK on the driver's door
lock switch throughout this procedure. All doors will
lock.
2. Press the remote alarm button on the transmitter to
enter the programming mode. Perimeter lighting
remains on at this time and the horn will chirp two
times.
3. Press the remote alarm button on the transmitter
again. Perimeter lighting is disabled and the horn
will chirp one time.
4. Release the door lock switch. The perimeter lighting
feature is now off.
3-15
Page 133 of 372

If the URPA system is not functioning properly, the
display will ¯ash red, indicating that there is a problem.
The light will also ¯ash red when you are driving if a
trailer is attached to your vehicle, or if you have a bicycle
or an object hanging out of your trunk. The light will
continue to ¯ash until the trailer or the object is removed
and your vehicle is driven forward at at least 15 mph
(25 km/h). It may also ¯ash red if the ultrasonic sensors
are not kept clean. For cleaning instructions, see
Cleaning the Outside of Your Vehicle on page 5-82.
So be sure to keep your rear bumper free of mud, dirt,
snow, ice and slush or the system may not work
properly. If after cleaning the rear bumper and then
driving at at least 15 mph (25 km/h), the display
continues to ¯ash red, see your dealer. It may also ¯ash
red if your vehicle is moving in REVERSE (R) at a
speed greater than 3 mph (5 km/h). Other conditions
that may affect system performance include things like,
the vibrations from a jackhammer or the compression
of airbrakes on a very large truck.
As always, drivers should use care when backing up a
vehicle. Always look behind you, being sure to check
for other vehicles, obstructions and blind spots.
Accessory Power Outlets
The accessory power outlets can be used to plug in
electrical equipment such as a cellular telephone or
CB radio.Your vehicle has two power outlets located in the rear
storage area of the front center console. See
Center
Console Storage Area on page 2-44for more
information on location.
Your vehicle may have a small cap that must be pulled
down to access the accessory power outlet. If it
does, when not using the outlet be sure to cover it with
the protective cap.
The accessory power outlets will only operate while the
ignition key is in RUN and for 10 minutes after turning
the ignition off. If you would like to operate an accessory
for an extended period of time, contact your dealer for
more information.
Notice:When using an accessory power outlet,
maximum electrical load must not exceed 15 amps.
Always turn off any electrical equipment when
not in use. Leaving electrical equipment on for
extended periods will drain your battery.
Certain electrical accessories may not be compatible to
the accessory power outlet and could result in blown
vehicle or adapter fuses. If you experience a problem
see your dealer for additional information on accessory
power outlets.
Notice:Adding some electrical equipment to your
vehicle can damage it or keep other things from
working as they should. This wouldn't be covered by
your warranty. Check with your dealer before
adding electrical equipment, and never use anything
that exceeds the amperage rating.
3-21