Page 305 of 380

{CAUTION:
Never use oil or grease on studs or nuts. If
you do, the nuts might come loose. Your wheel
could fall off, causing a serious accident.
8. Place the compact spare tire on the wheel-mounting
surface.
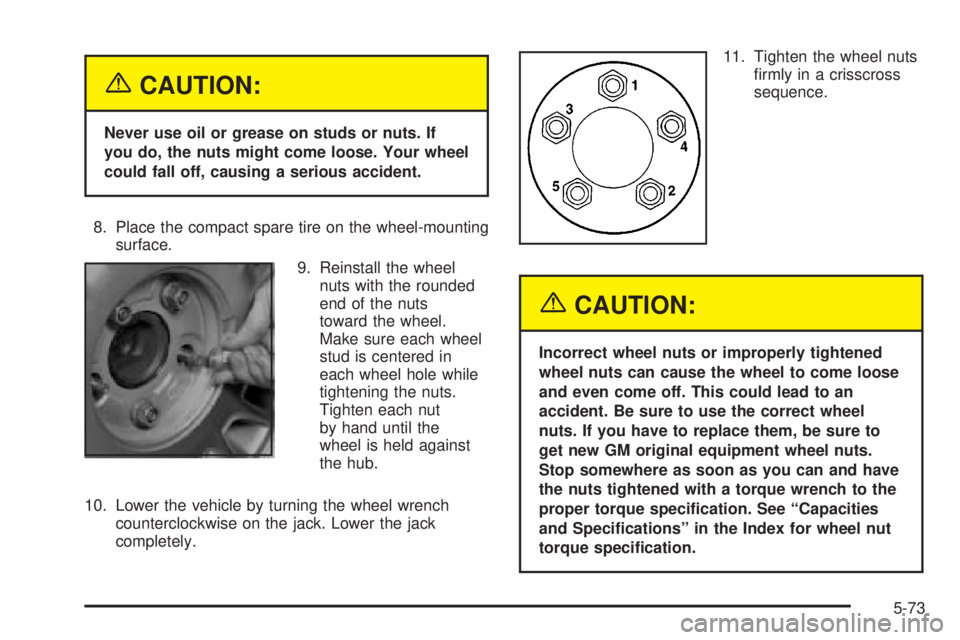
9. Reinstall the wheel
nuts with the rounded
end of the nuts
toward the wheel.
Make sure each wheel
stud is centered in
each wheel hole while
tightening the nuts.
Tighten each nut
by hand until the
wheel is held against
the hub.
10. Lower the vehicle by turning the wheel wrench
counterclockwise on the jack. Lower the jack
completely.11. Tighten the wheel nuts
®rmly in a crisscross
sequence.
{CAUTION:
Incorrect wheel nuts or improperly tightened
wheel nuts can cause the wheel to come loose
and even come off. This could lead to an
accident. Be sure to use the correct wheel
nuts. If you have to replace them, be sure to
get new GM original equipment wheel nuts.
Stop somewhere as soon as you can and have
the nuts tightened with a torque wrench to the
proper torque speci®cation. See ªCapacities
and Speci®cationsº in the Index for wheel nut
torque speci®cation.
5-73
Page 306 of 380

Notice:Improperly tightened wheel nuts can lead
to brake pulsation and rotor damage. To avoid
expensive brake repairs, evenly tighten the wheel
nuts in the proper sequence and to the proper
torque speci®cation. See ªCapacities and
Speci®cationsº in the index for the wheel nut torque
speci®cation.
Notice:Wheel covers won't ®t on your compact
spare. If you try to put a wheel cover on your
compact spare, you could damage the cover or the
spare.
Storing the Flat Tire and Tools
{CAUTION:
Storing a jack, a tire, or other equipment in the
passenger compartment of the vehicle could
cause injury. In a sudden stop or collision,
loose equipment could strike someone. Store
all these in the proper place.After you've put the compact spare tire on your vehicle,
you'll need to store the ¯at tire in your trunk. Use the
following procedure to secure the ¯at tire in the trunk.
Store the ¯at tire as far forward in the trunk as possible.
Store the jack and wheel wrench in their compartment
in the trunk.
5-74
Page 307 of 380
Storing the Spare Tire and Tools
{CAUTION:
Storing a jack, a tire, or other equipment in the
passenger compartment of the vehicle could
cause injury. In a sudden stop or collision,
loose equipment could strike someone. Store
all these in the proper place.
Store the compact spare tire and tools as shown in the
diagram.
A. Wrench
B. Jack
C. Jack ContainerD. Retainer
E. Spare Tire Cover
F. Retainer
The compact spare tire is for temporary use only.
Replace the compact spare tire with a full-size tire as
soon as you can. See ªCompact Spare Tireº following for
more information.
5-75
Page 308 of 380

Compact Spare Tire
Although the compact spare tire was fully in¯ated when
your vehicle was new, it can lose air after a time.
Check the in¯ation pressure regularly. It should be
60 psi (420 kPa).
After installing the compact spare on your vehicle, you
should stop as soon as possible and make sure
your spare tire is correctly in¯ated. The compact spare
is made to perform well at speeds up to 65 mph
(105 km/h) for distances up to 3,000 miles (5 000 km),
so you can ®nish your trip and have your full-size
tire repaired or replaced where you want. You must
calibrate the Check Tire Pressure System after installing
or removing the compact spare. See
Check Tire
Pressure System on page 5-59. Of course, it's best to
replace your spare with a full-size tire as soon as
you can. Your spare will last longer and be in good
shape in case you need it again.
Notice:When the compact spare is installed, don't
take your vehicle through an automatic car wash
with guide rails. The compact spare can get caught
on the rails. That can damage the tire and wheel,
and maybe other parts of your vehicle.
Don't use your compact spare on other vehicles.
And don't mix your compact spare tire or wheel with
other wheels or tires. They won't ®t. Keep your compact
spare tire and its wheel together.
Notice:Tire chains won't ®t your compact spare.
Using them can damage your vehicle and can
damage the chains too. Don't use tire chains on
your compact spare.
5-76
Page 309 of 380

Appearance Care
Remember, cleaning products can be hazardous. Some
are toxic. Others can burst into ¯ames if you strike a
match or get them on a hot part of the vehicle. Some are
dangerous if you breathe their fumes in a closed
space. When you use anything from a container to clean
your vehicle, be sure to follow the manufacturer's
warnings and instructions. And always open your doors
or windows when you are cleaning the inside.
Never use these to clean your vehicle:
·Gasoline
·Benzene
·Naphtha
·Carbon Tetrachloride
·Acetone
·Paint Thinner
·Turpentine
·Lacquer Thinner
·Nail Polish Remover
They can all be hazardous Ð some more than
others Ð and they can all damage your vehicle, too.Do not use any of these unless this manual says you
can. In many uses, these will damage your vehicle:
·Alcohol
·Laundry Soap
·Bleach
·Reducing Agents
Cleaning the Inside of Your Vehicle
Use a vacuum cleaner often to get rid of dust and
loose dirt. Wipe vinyl, leather, plastic and painted
surfaces with a clean, damp cloth.
Cleaning Fabric/Carpet
Your dealer has cleaners for the cleaning of fabric
and carpet. They will clean normal spots and stains
very well.
You can get GM-approved cleaning products from your
dealer. See
Vehicle Care/Appearance Materials on
page 5-84.
5-77
Page 310 of 380

Here are some cleaning tips:
·Always read the instructions on the cleaner label.
·Clean up stains as soon as you can Ð before
they set.
·Carefully scrape off any excess stain.
·Use a clean cloth or sponge, and change to a clean
area often. A soft brush may be used if stains are
stubborn.
·If a ring forms on fabric after spot cleaning, clean
the entire area immediately or it will set.
Using Cleaner on Fabric
1. Vacuum and brush the area to remove any
loose dirt.
2. Always clean a whole trim panel or section. Mask
surrounding trim along stitch or welt lines.
3. Follow the directions on the container label.
4. Apply cleaner with a clean sponge. Do not saturate
the material and do not rub it roughly.
5. As soon as you have cleaned the section, use a
sponge to remove any excess cleaner.
6. Wipe cleaned area with a clean, water-dampened
towel or cloth.
7. Wipe with a clean cloth and let dry.
Special Fabric Cleaning Problems
Stains caused by such things as catsup, coffee (black),
egg, fruit, fruit juice, milk, soft drinks, vomit, urine
and blood can be removed as follows:
1. Carefully scrape off excess stain, then sponge the
soiled area with cool water.
2. If a stain remains, follow the cleaning instructions
described earlier.
3. If an odor lingers after cleaning vomit or urine, treat
the area with a water and baking soda solution:
1 teaspoon (5 ml) of baking soda to 1 cup (250 ml)
of lukewarm water.
4. Let dry.
Stains caused by candy, ice cream, mayonnaise, chili
sauce and unknown stains can be removed as follows:
1. Carefully scrape off excess stain.
2. Clean with cool water and allow to dry completely.
3. If a stain remains, follow the cleaner instructions
described earlier.
5-78
Page 311 of 380

Cleaning Vinyl
Use warm water and a clean cloth.
·Rub with a clean, damp cloth to remove dirt. You
may have to do this more than once.
·Things like tar, asphalt and shoe polish will stain if
you do not get them off quickly. Use a clean cloth
and vinyl cleaner. See your dealer for this product.
Cleaning Leather
Use a soft cloth with lukewarm water and a mild soap or
saddle soap and wipe dry with a soft cloth. Then, let
the leather dry naturally. Do not use heat to dry.
·For stubborn stains, use a leather cleaner.
·Neveruse oils, varnishes, solvent-based or abrasive
cleaners, furniture polish or shoe polish on leather.
·Soiled or stained leather should be cleaned
immediately. If dirt is allowed to work into the ®nish,
it can harm the leather.
Cleaning the Top of the Instrument
Panel
Use only mild soap and water to clean the top surfaces
of the instrument panel. Sprays containing silicones
or waxes may cause annoying re¯ections in the
windshield and even make it difficult to see through the
windshield under certain conditions.
Cleaning Interior Plastic Components
Use only a mild soap and water solution on a soft cloth
or sponge. Commercial cleaners may affect the
surface ®nish.
Cleaning Glass Surfaces
Glass should be cleaned often. GM Glass Cleaner or a
liquid household glass cleaner will remove normal
tobacco smoke and dust ®lms on interior glass. See
Vehicle Care/Appearance Materials on page 5-84.
Notice:Don't use abrasive cleaners on glass,
because they may cause scratches. Avoid placing
decals on the inside rear window, since they
may have to be scraped off later. If abrasive cleaners
are used on the inside of the rear window, an
electric defogger element may be damaged. Any
temporary license should not be attached across the
defogger grid.
5-79
Page 312 of 380

Care of Safety Belts
Keep belts clean and dry.
{CAUTION:
Do not bleach or dye safety belts. If you do, it
may severely weaken them. In a crash, they
might not be able to provide adequate
protection. Clean safety belts only with mild
soap and lukewarm water.
Weatherstrips
Silicone grease on weatherstrips will make them last
longer, seal better, and not stick or squeak. Apply
silicone grease with a clean cloth at least every six
months. During very cold, damp weather more frequent
application may be required. See
Part D: Recommended
Fluids and Lubricants on page 6-23.
Cleaning the Outside of Your
Vehicle
The paint ®nish on your vehicle provides beauty, depth
of color, gloss retention and durability.
Washing Your Vehicle
The best way to preserve your vehicle's ®nish is to
keep it clean by washing it often with lukewarm or
cold water.
Don't wash your vehicle in the direct rays of the sun.
Use a car washing soap. Don't use strong soaps
or chemical detergents. Be sure to rinse the vehicle
well, removing all soap residue completely. You can get
GM-approved cleaning products from your dealer.
See
Vehicle Care/Appearance Materials on page 5-84.
Don't use cleaning agents that are petroleum based,
or that contain acid or abrasives. All cleaning agents
should be ¯ushed promptly and not allowed to dry on the
surface, or they could stain. Dry the ®nish with a soft,
clean chamois or an all-cotton towel to avoid surface
scratches and water spotting.
High pressure car washes may cause water to enter
your vehicle.
5-80