2003 BMW Z4 2.5I ESP
[x] Cancel search: ESPPage 7 of 106
At a glance
Controls
Driving tips
Mobility
Reference
7
For your own safety
Use unleaded gasoline only. Fuels
containing up to and including 10 %
ethanol or other oxygenates with up to
2.8 % oxygen by weight – i.e. 15 % MTBE or
3% methanol plus an equivalent amount of
co-solvent – will not void the applicable
warranties respecting defects in materials
or workmanship. Field experience has indi-
cated significant differences in fuel quality –
i.e. volatility, composition, additives, etc. –
among gasolines offered for sale in the
United States and Canada. The use of poor
quality fuels may result in drivability, start-
ing and stalling problems especially under
certain environmental conditions, such as
high ambient temperature and high alti-
tude.
Should you encounter driveability prob-
lems that you suspect could be related to
the fuel you are using, we recommend that
you respond by switching to a recognized
high-quality brand.
Failure to comply with these recommenda-
tions may result in unscheduled mainte-
nance.
Follow the relevant safety rules when you
are handling gasoline.<
Important safety information!
For your own safety, use parts and
accessories approved by BMW.
When you purchase accessories tested
and approved by BMW and Original BMW
Parts, you simultaneously acquire the
assurance that they have been thoroughly
tested by BMW to ensure optimum perfor-
mance when installed on your vehicle.
BMW warrants these parts to be free from
defects in material and workmanship.
BMW will not accept any liability for dam-
age resulting from installation of parts and
accessories not approved by BMW.
BMW cannot test every product made by
other manufacturers to verify if it can be
used on a BMW safely and without risk to
either the vehicle, its operation, or its occu-
pants.Original BMW Parts, BMW Accessories
and other products approved by BMW,
together with professional advice on using
these items, are available from all BMW
retailers.
Installation and operation of non-BMW
approved accessories such as alarms,
radios, amplifiers, radar detectors, wheels,
suspension components, brake dust
shields, telephones – including operation of
any portable cellular phone from within the
vehicle without using an externally mounted
antenna – or transceiver equipment – e.g.
C.B., walkie-talkie, ham radio or similar –
may cause extensive damage to the vehicle,
compromise its safety, interfere with the
vehicle's electrical system or affect the
validity of the BMW Limited Warranty. See
your BMW center for additional information.
Do not use key or remote control to lock
doors or luggage compartment with any-
one inside the car. Refer to the Owner's
Manual for more details.<
Maintenance, replacement or repair
of the emission control devices and
systems may be performed by any automo-
tive repair establishment or individual using
any certified automotive part.
and Warranty Information Booklet for US
models or a Warranty and Service Guide
Booklet for Canadian models.
We recommend that you read this publica-
tion thoroughly.
Your BMW is covered by the following war-
ranties:
>New Vehicle Limited Warranty
>Rust Perforation Limited Warranty
>Federal Emissions System Defect
Warranty
>Federal Emissions Performance
Warranty
>California Emission Control System
Limited Warranty.
Page 14 of 106

Overview
14
Indicator and warning
lamps
Technology that monitors itself
Indicator and warning lamps that are iden-
tified by
+ are tested for proper functioning
whenever the ignition key is turned. They
each light up once for different periods of
time.
If a fault should occur in one of these sys-
tems, the corresponding lamp does not go
out after the engine is started or it lights up
again while the vehicle is moving. The indi-
cated pages provide information on what
measures to take.
Please fasten safety belts
+31
Airbags
+33
Battery charge current
+87
Engine oil pressure/Engine oil level/
Engine oil sensor
+79
Parking brake/Chassis control sys-
tem/Dynamic Brake Control/Brake
fluid
+39/ 51/ 52/ 81
Brake warning lamp for Canadian
models
Antilock Brake System ABS/Chas-
sis control system
+53/ 51
Antilock Brake System ABS/Chas-
sis control system for Canadian
modelsDynamic Stability Control DSC
+51
Dynamic Traction Control DTC
+51
Flat Tire Monitor
+53
Automatic transmission
+41
Brake pads
+66
Add coolant80
Check Gas Cap
+
Service engine soon +83
Service engine soon
+
warning lamp for Canadian
models.
Defective bulbs45
Turn signal indicators42
Fog lamps46
Headlamp flasher/
High beams42/ 46
Page 15 of 106
At a glance
Controls
Driving tips
Mobility
Reference
15
Electric Power Steering EPS +42
Engine electronics
+
Malfunction in the engine electron-
ics. You can continue to drive with
reduced engine output or engine speed.
Please have the system inspected by your
BMW center.
Colors
The indicator and warning lamps can light
up in various colors and combinations.
The following section explains the signifi-
cance of the individual colors as well as
how you should respond when they
appear.
>Red:
Stop the vehicle immediately
or
an important reminder
>Yellow:
Have the system inspected as soon as
possible
or
for your information
>Green:
For your information
>Blue:
For your information.
Page 25 of 106
At a glance
Controls
Driving tips
Mobility
Reference
25
Ignition key in position 1 or higher.
With the vehicle standing.
1.Read and comply with the preceding
safety precautions
2.Make sure that the convertible top com-
partment panel in the luggage compart-
ment is lowered; refer to page 22. Oth-
erwise the convertible top cannot be
opened
3.Ensure that the luggage compartment
lid is closed
4.Press and hold the corresponding but-
ton for convertible top operation.
If the convertible top should halt right
before the closing phase is completed,
press against the front part of the convert-
ible top frame from the outside to help the
closing process along. Keep pressing the
button while doing so until the top starts up
again on its own.
Indicator lamps
>The red indicator lamp will light up while
the convertible top is in motion. It goes
out as soon as the opening or closing
operation has been completed
>If the red indicator lamp flashes after
the button has been released, then the
opening or closing operation has not
yet been completed.
The sequence can be continued in the
desired direction by pressing this but-
ton
>If the yellow indicator lamp lights up
continuously with the button pressed,
then the convertible top compartment
panel is raised and the convertible top
cannot be moved.
The side windows will lower slightly when
you press the button for operating the con-
vertible top.
After the opening or closing operation, the
side windows will go back up if you keep
the button pressed for more than 2 sec-
onds after the indicator lamp has gone out.
The automatic sequence will be interrupted
immediately if you release the button that
operates the top. The sequence can be continued in the desired direction by press-
ing this button.
If the convertible top operation has
been interrupted, do not close the
side windows using the power window but-
tons. Otherwise the side windows may not
close properly against the rubber seal of
the convertible top.<
After the convertible top has been
stored for an extended period of time
in the convertible top compartment – e.g. in
the winter months because the hardtop
was being used – you may have to support
the convertible top by hand when closing it
for the first time.<
If the opening or closing procedure has
been interrupted due to an electrical mal-
function, the convertible top will remain in
that position for 15 minutes. The procedure
can be resumed in the desired direction by
pressing the button. After that, the convert-
ible top can be moved again and, if it is an
emergency situation, you may have to help
the top along manually. This can also be
done in ignition key position 0.
Convenience operation from the
driver's door lock
Refer to page 20.
To close manually in the event of
an electrical malfunction
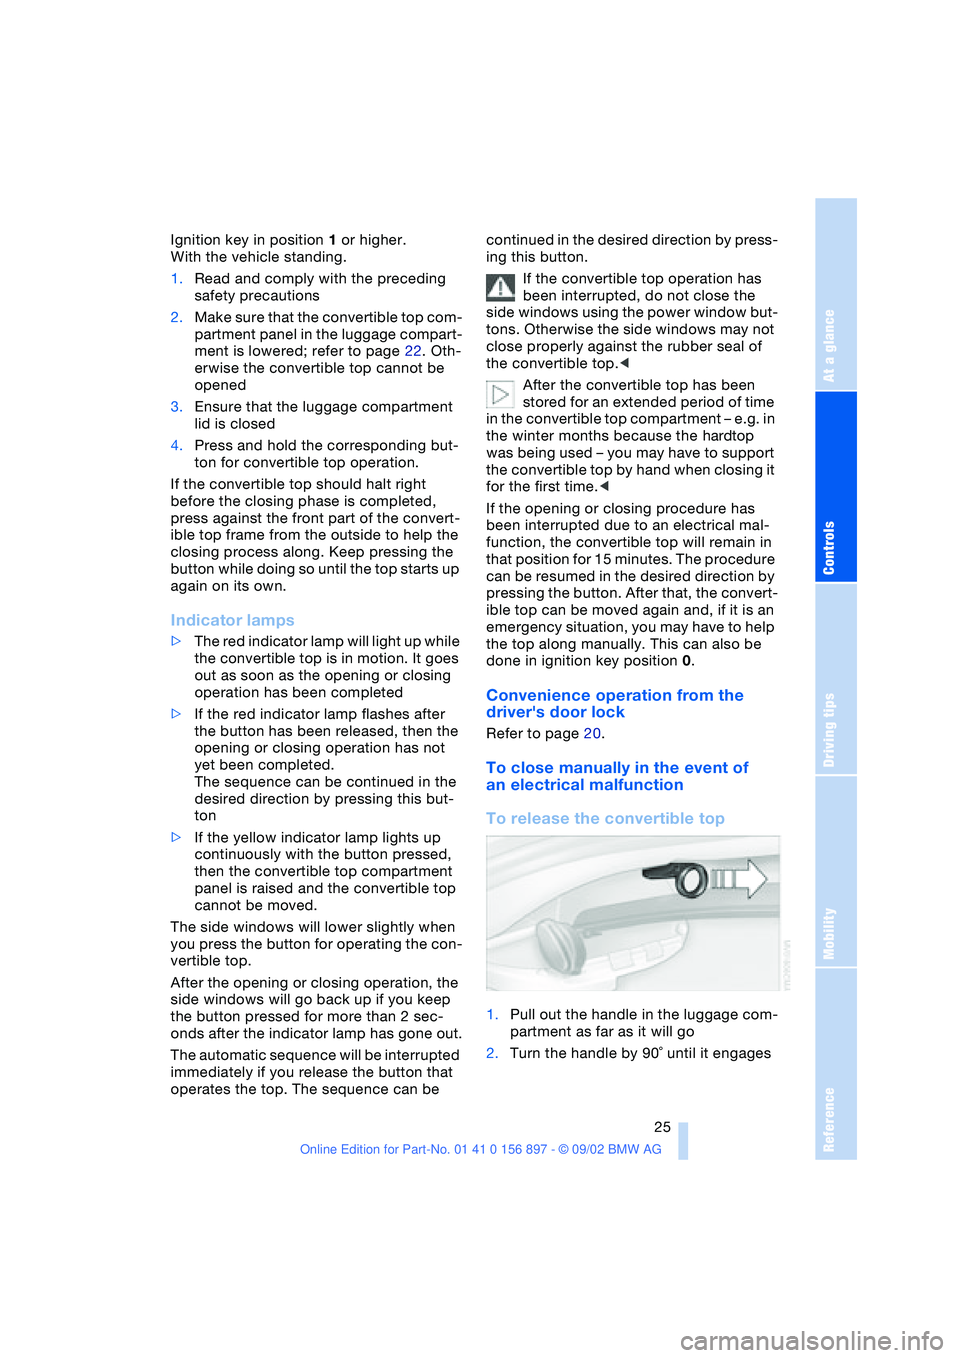
To release the convertible top
1.Pull out the handle in the luggage com-
partment as far as it will go
2.Turn the handle by 90˚ until it engages
Page 27 of 106

At a glance
Controls
Driving tips
Mobility
Reference
27
Installation
Insert the wind deflector in the guides pro-
vided on the rollover bars.
The wind deflector panels inserted in the
rollover bars cannot be removed.
Clothes hooks
Located on the wind deflector panel in the
rollover bars.
Do not hang heavy objects on the
hooks. If you do so, personal injury
could result during braking or evasive
maneuvers, for example.<
Alarm system*
The concept
The vehicle alarm system responds:
>When a door, the hood or the luggage
compartment lid is opened
>When attempts are made to start the
vehicle
>To movement inside the vehicle – inte-
rior motion sensor
>To alterations in the vehicle tilt, e.g. as
would occur during attempts to steal
the wheels or tow the vehicle
>To interruption of battery voltage.
The alarm produced by the system in the
event of unauthorized vehicle entry and
attempted theft depends on the country
version:
>Sounding of an acoustical alarm for
30 seconds
>Activation of the hazard warning flash-
ers for approx. five minutes.
Arming and disarming the alarm sys-
tem
When the vehicle is locked or unlocked
either via the driver's door lock or with the
remote control, the alarm system is simul-
taneously armed or disarmed.The hazard warning flashers blink once
when the alarm system has been properly
armed.
You can have different acknowledg-
ment signals set to confirm arming
and disarming.<
You can open the luggage compartment lid
when the system is armed by pressing the
remote control button. Refer to page 19.
When it is closed, the lid is once again
secured.
Manual operation of the luggage
compartment lid triggers the alarm.
Refer to page 21.<
To cancel an alarm:
Press the button on the remote control,
refer to page 18, or turn the ignition key to
position 1. Refer to page 38.
Indicator lamp displays
>The indicator lamp beneath the interior
mirror flashes continuously:
The system is armed
>The indicator lamp flashes when it is
being armed:
A door, the hood or luggage compart-
ment lid is not completely closed. Even
if you do not close the area causing the
alert, the remaining areas are secured
and the indicator lamp flashes continu-
ously after 10 seconds.
However, the interior motion sensor is
not activated
Page 29 of 106
At a glance
Controls
Driving tips
Mobility
Reference
29
Adjustments
Safe seating position
For relaxed and fatigue-free driving you
should select a seating position that
reflects your personal requirements. The
correct seating position combines with
safety belts and airbags to enhance occu-
pant safety in the event of an accident. To
ensure that the vehicle's safety systems
provide you with optimal protection, we
request that you direct your careful atten-
tion to the following section.
For supplementary information on trans-
porting children, refer to page 34.
Sitting safely with airbags
Always maintain an adequate dis-
tance between yourself and the air-
bags.
Always hold the steering wheel by its rim
with hands at the 9 and 3 o'clock positions,
to minimize the risk of injuries to your
hands or arms in the event of airbag
deployment. Never allow any objects, indi-
viduals or animals to obstruct the areas
between passengers and airbags. Never
use the front airbag's cover as a storage
tray or support for objects of any kind.
Never allow front passengers to rest their
feet or legs on the airbag cover.<
For airbag locations and additional infor-
mation on airbags, refer to page 33.
Sitting safely with safety belts
Never allow more than one person to
wear a single safety belt. Never allow
infants or small children to ride in a passen-
ger's lap. Avoid twisting the belt while rout-
ing it firmly across the pelvis and shoulder,
wear it as snugly against your body as pos-
sible. Do not allow the belt to rest against
hard or fragile objects. Do not route the belt
across your neck, or run it across sharp
edges. Be sure that the belt does not
become caught or jammed. Avoid wearing
bulky clothing and pull on the lap belt peri-odically to retension it over your shoulders.
In the event of a frontal impact, a loose lap
belt could slide over your hips, leading to
abdominal injury. In addition, the safety
belt's restraint effectiveness is reduced if
the belt is worn loosely. Expectant mothers
should always wear their safety belts, tak-
ing care to position the lap belt against the
lower hips, where it will not exert pressure
against the abdominal area.<
For information on using the safety belts,
refer to page 31.
Seats
Before adjusting your seat, always
observe the following precautions
Never try to adjust your seat while
operating the vehicle. The seat could
respond with an unexpected movement,
and the ensuing loss of vehicle control
could result in an accident. Never ride with
the backrest inclined to an extreme angle –
especially important for the front passen-
ger to remember. If you do so, there is a
risk that you will slide under the safety belt
in the event of an accident, thus reducing
the protection provided by the safety belt.<
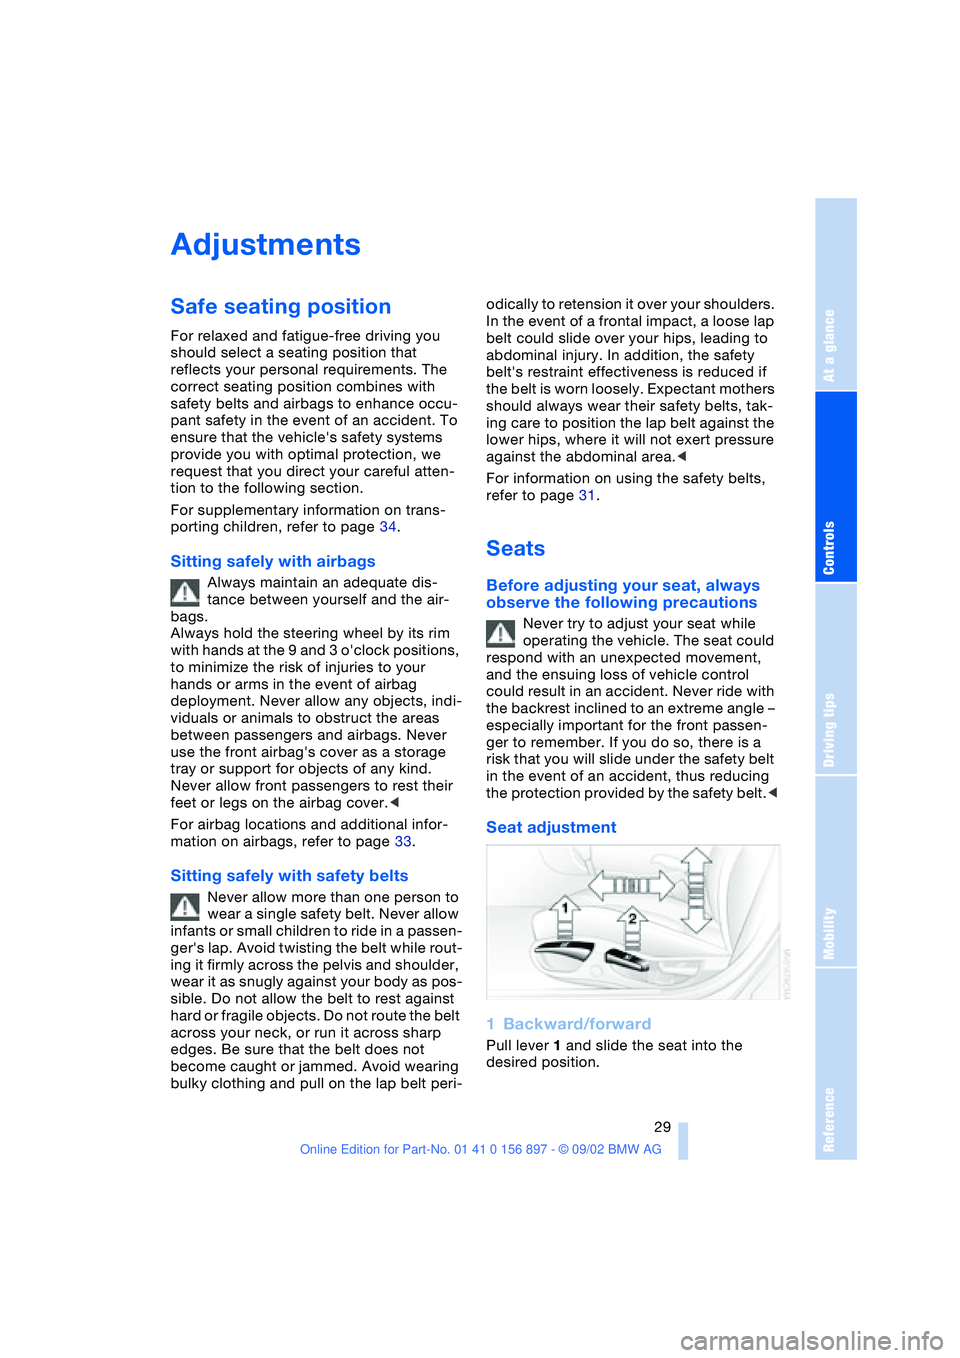
Seat adjustment
1Backward/forward
Pull lever 1 and slide the seat into the
desired position.
Page 32 of 106
Adjustments
32
To unlock the safety belt
1.Press the red button in the belt buckle
2.Hold the belt
3.Guide the belt back into its reel.
If the safety belt system has been
stressed as a result of an accident or
if it has been damaged in any other way:
have the safety belt mechanism, including
the safety belt tensioners and any child-
restraint systems, replaced by your BMW
center. In addition, have your BMW center
inspect the safety belt anchors. Otherwise,
the system cannot be guaranteed to pro-
vide the required protection in the event of
an accident.<
Steering wheel
Adjustments
Never attempt to adjust the steering
wheel while driving the vehicle. It
could respond with unexpected move-
ment, posing a potential accident hazard.<
1.Push the locking lever downward
2.Adjust the steering column's reach and
rake to suit your seat position
3.Pull the lever back in.
Mirrors
To adjust exterior mirrors
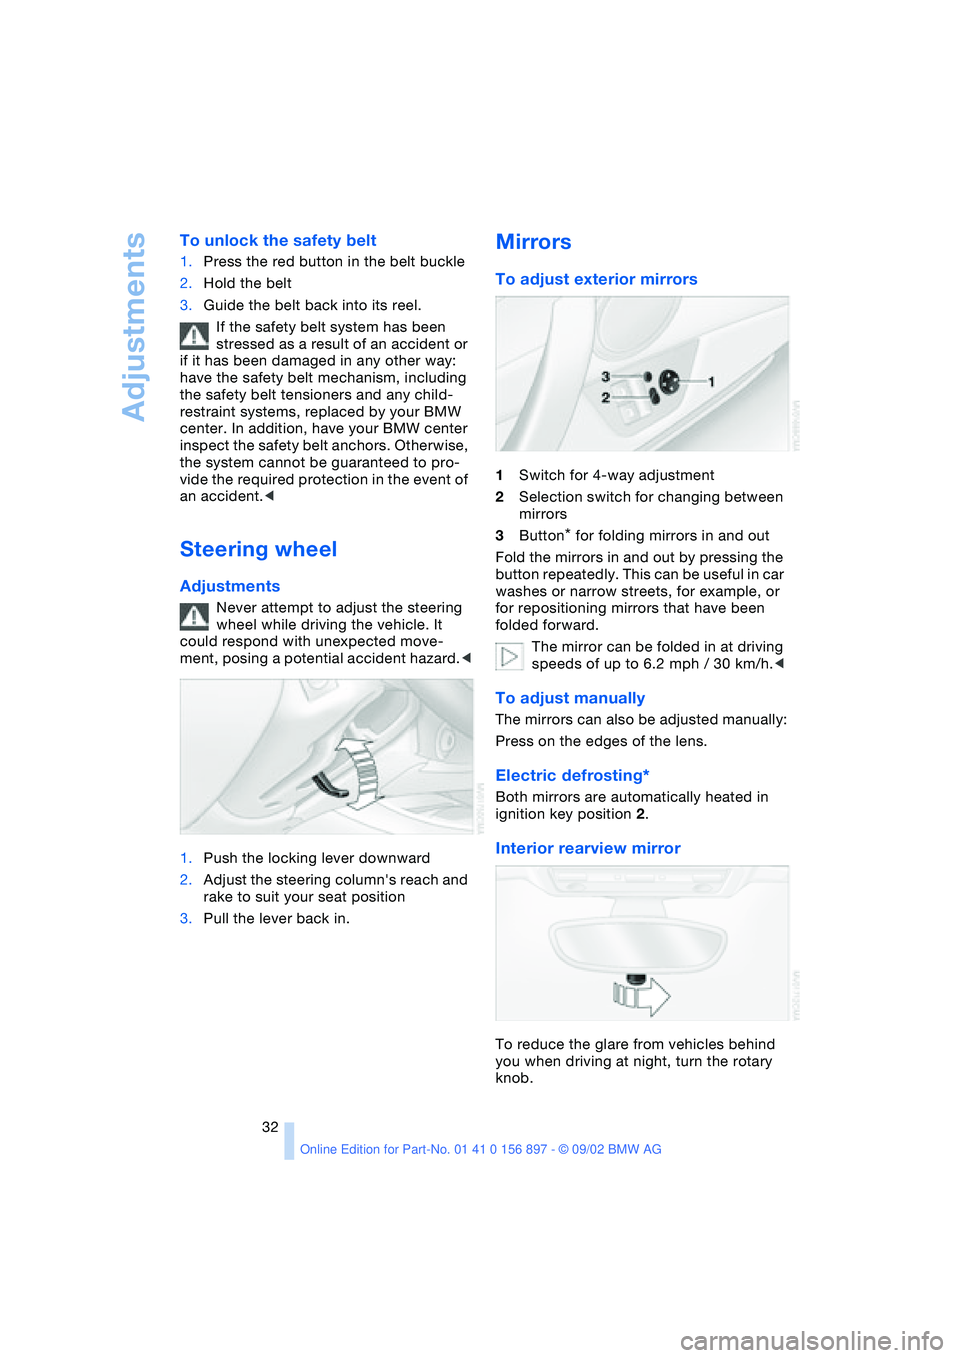
1Switch for 4-way adjustment
2Selection switch for changing between
mirrors
3Button
* for folding mirrors in and out
Fold the mirrors in and out by pressing the
button repeatedly. This can be useful in car
washes or narrow streets, for example, or
for repositioning mirrors that have been
folded forward.
The mirror can be folded in at driving
speeds of up to 6.2 mph / 30 km/h.<
To adjust manually
The mirrors can also be adjusted manually:
Press on the edges of the lens.
Electric defrosting*
Both mirrors are automatically heated in
ignition key position 2.
Interior rearview mirror
To reduce the glare from vehicles behind
you when driving at night, turn the rotary
knob.
Page 33 of 106
At a glance
Controls
Driving tips
Mobility
Reference
33
For vehicles without an alarm system:
Tilt the small lever forward.
Interior and exterior mirrors with
automatic dimming feature*
This mirror automatically dims through an
infinitely variable range and switches auto-
matically to its clear, undimmed mode
whenever you engage reverse gear or
place the selector lever in position R.
To ensure that the mirror continues to
operate properly, keep the two photocells
clean and unobstructed. One photocell is
positioned in the mirror's lens, see arrow,
while the other is slightly offset on the
opposite side of the mirror. Do not obstruct
the area between the interior rearview mir-
ror and the windshield; do not apply stick-
ers to the area of the windshield in front of
the mirror.
Airbags
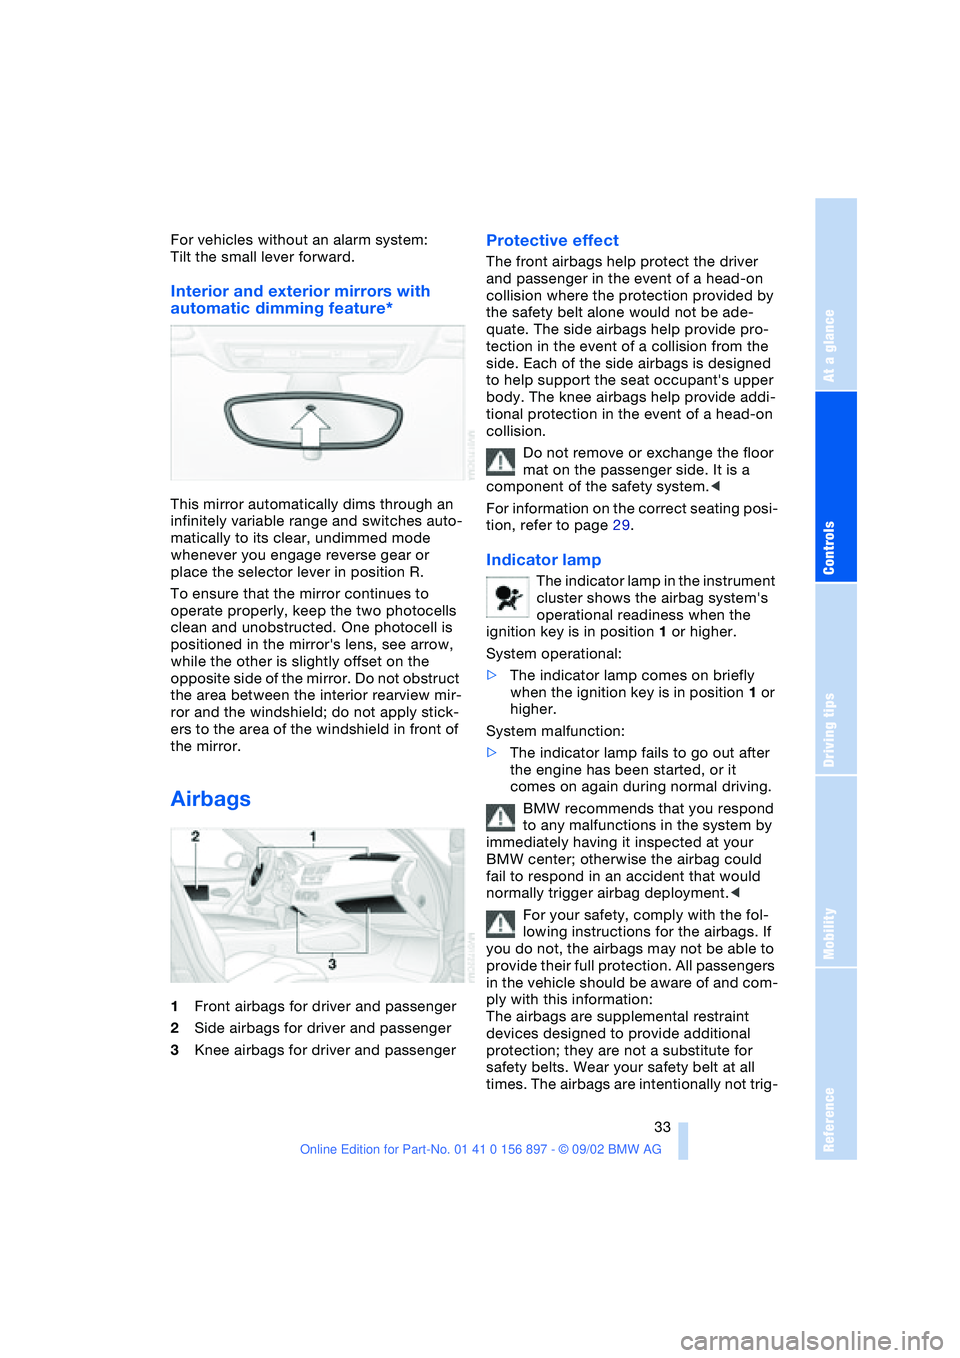
1Front airbags for driver and passenger
2Side airbags for driver and passenger
3Knee airbags for driver and passenger
Protective effect
The front airbags help protect the driver
and passenger in the event of a head-on
collision where the protection provided by
the safety belt alone would not be ade-
quate. The side airbags help provide pro-
tection in the event of a collision from the
side. Each of the side airbags is designed
to help support the seat occupant's upper
body. The knee airbags help provide addi-
tional protection in the event of a head-on
collision.
Do not remove or exchange the floor
mat on the passenger side. It is a
component of the safety system.<
For information on the correct seating posi-
tion, refer to page 29.
Indicator lamp
The indicator lamp in the instrument
cluster shows the airbag system's
operational readiness when the
ignition key is in position 1 or higher.
System operational:
>The indicator lamp comes on briefly
when the ignition key is in position 1 or
higher.
System malfunction:
>The indicator lamp fails to go out after
the engine has been started, or it
comes on again during normal driving.
BMW recommends that you respond
to any malfunctions in the system by
immediately having it inspected at your
BMW center; otherwise the airbag could
fail to respond in an accident that would
normally trigger airbag deployment.<
For your safety, comply with the fol-
lowing instructions for the airbags. If
you do not, the airbags may not be able to
provide their full protection. All passengers
in the vehicle should be aware of and com-
ply with this information:
The airbags are supplemental restraint
devices designed to provide additional
protection; they are not a substitute for
safety belts. Wear your safety belt at all
times. The airbags are intentionally not trig-