2003 BMW Z4 2.5I turn signal
[x] Cancel search: turn signalPage 42 of 106
Driving
42 positions, however, the vehicle will be
operating in the fourth gear only.
If this happens, avoid extreme engine loads
and consult the nearest BMW center.
Never work in the engine compart-
ment when a drive gear – forward or
reverse – is engaged. If you do so, the vehi-
cle could move.<
For towing, tow-starting and jump-starting:
refer to the information beginning on
page 89.
Electric Power Steering EPS
The concept
The electric power steering is a direct,
sporting steering system that is speed-sen-
sitive.
Power support is reduced with an increase
in driving speed.
Indicator lamp
Electric Power Steering
The indicator lamp stays lit:
The system has malfunctioned or is
faulty.
Please have the system inspected by the
nearest BMW center.
Steering remains operational.
Drivelogic*
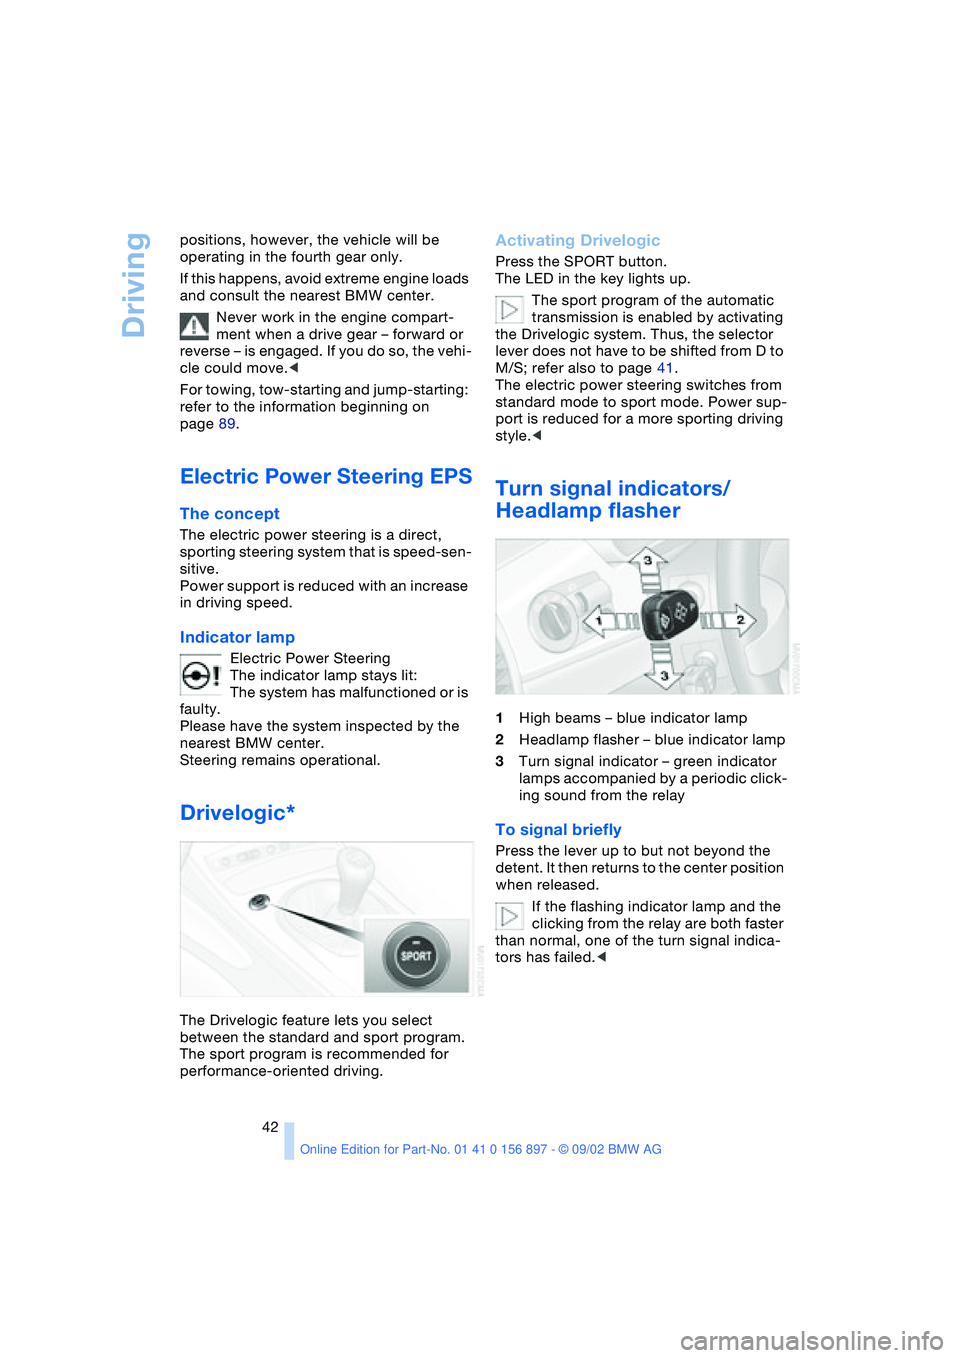
The Drivelogic feature lets you select
between the standard and sport program.
The sport program is recommended for
performance-oriented driving.
Activating Drivelogic
Press the SPORT button.
The LED in the key lights up.
The sport program of the automatic
transmission is enabled by activating
the Drivelogic system. Thus, the selector
lever does not have to be shifted from D to
M/S; refer also to page 41.
The electric power steering switches from
standard mode to sport mode. Power sup-
port is reduced for a more sporting driving
style.<
Turn signal indicators/
Headlamp flasher
1High beams – blue indicator lamp
2Headlamp flasher – blue indicator lamp
3Turn signal indicator – green indicator
lamps accompanied by a periodic click-
ing sound from the relay
To signal briefly
Press the lever up to but not beyond the
detent. It then returns to the center position
when released.
If the flashing indicator lamp and the
clicking from the relay are both faster
than normal, one of the turn signal indica-
tors has failed.<
Page 45 of 106

At a glance
Controls
Driving tips
Mobility
Reference
45
Lamps
Parking lamps/Low beams
Parking lamps
The front, rear and side vehicle
lighting is switched on. You can use
the parking lamps to signal the
position of the vehicle when it is parked.
For information on lighting on one side of
the vehicle for parking, which is available
as an additional feature, refer to page 46.
Low beams
When you switch off the ignition
with the low beam headlamps on,
only the parking lamps will remain
on.
Follow me home lamps:
When you activate the headlamp flasher
after parking the vehicle and switching off
the lights, the low beams will come on for a
brief period.
You can also have this function acti-
vated/deactivated if you wish.<
Defective bulbs
The defective bulb indicator lamp
lights up:
At least one bulb of the vehicle's
exterior lighting has failed.
For replacing bulbs: refer to page 84.
LIGHTS ON warning
Whenever you open the driver's door after
having turned the ignition key to position 0,
you will hear an acoustic signal for a few seconds to remind you that the lamps have
not been switched off
.
Daytime driving lamps*
If you wish, the light switch can be left in
the second position. When the ignition is
switched off, the external lighting is also
switched off.
You can have the activation settings
for the daytime driving lamps pro-
grammed on your vehicle.<
Automatic headlamp control*
When the switch is set to this posi-
tion, the system automatically
switches the low beams on and off
in response to changes in ambient light – in
tunnels, at dusk, etc. – as well as to rain and
snow.
The vehicle's external lights remain
on constantly when you switch on the
front fog lamps after the headlights have
come on automatically.<
Automatic headlamp control cannot
serve as a substitute for the driver's
judgement in determining when the vehicle
lights should be switched on. For example,
the sensors are not able to detect fog. To
avoid safety risks, you should respond to
these kinds of low-visibility situations by
switching the headlights on manually.<
You can have the sensitivity of your
vehicle's automatic headlamp control
adjusted.<
Page 46 of 106
Lamps
46
High beams/Standing
lamps
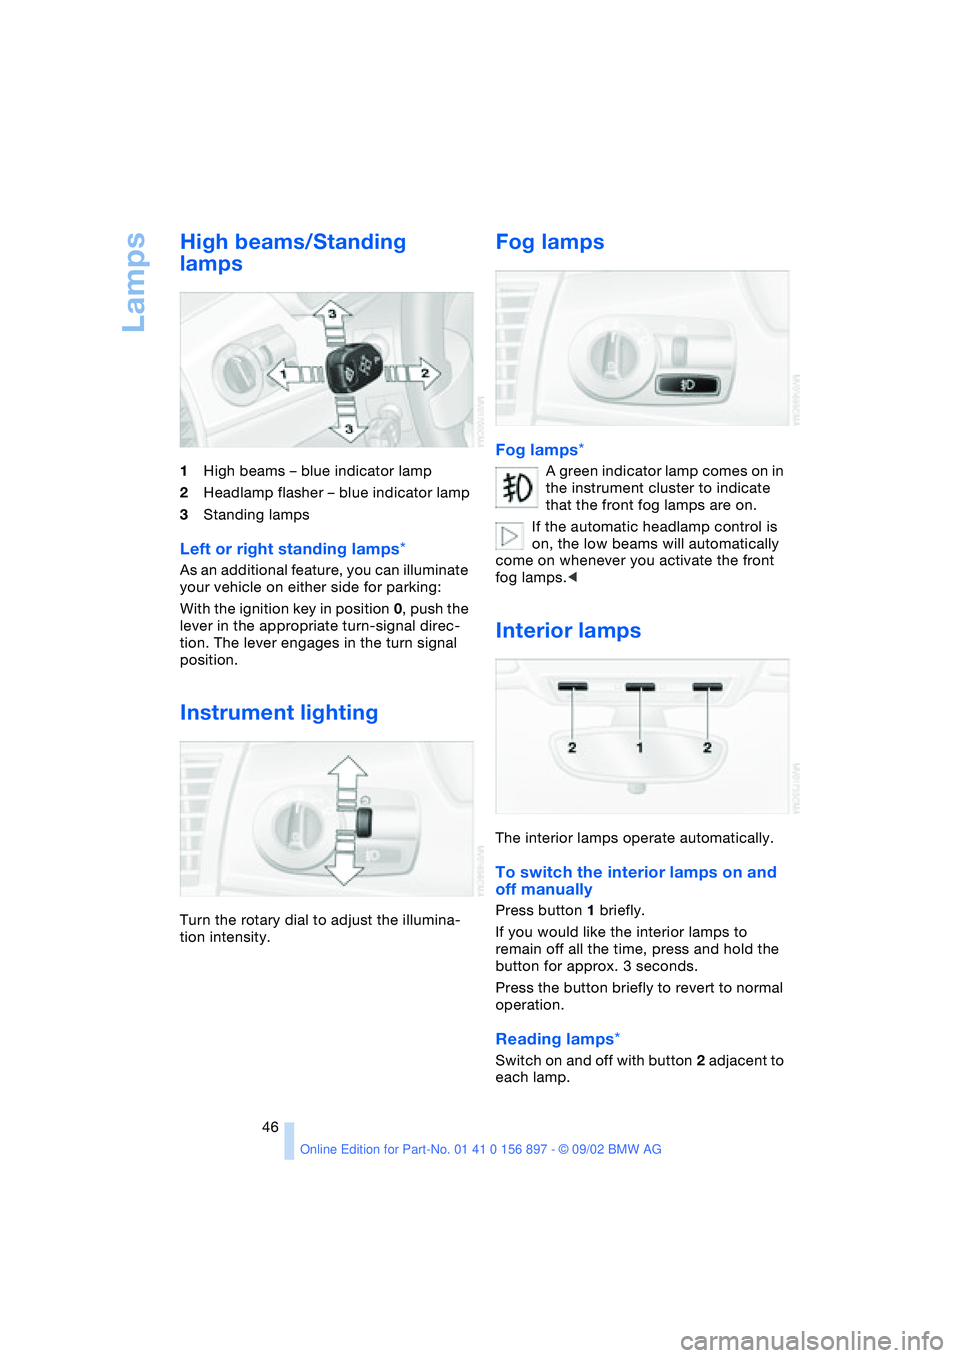
1High beams – blue indicator lamp
2Headlamp flasher – blue indicator lamp
3Standing lamps
Left or right standing lamps*
As an additional feature, you can illuminate
your vehicle on either side for parking:
With the ignition key in position 0, push the
lever in the appropriate turn-signal direc-
tion. The lever engages in the turn signal
position.
Instrument lighting
Turn the rotary dial to adjust the illumina-
tion intensity.
Fog lamps
Fog lamps*
A green indicator lamp comes on in
the instrument cluster to indicate
that the front fog lamps are on.
If the automatic headlamp control is
on, the low beams will automatically
come on whenever you activate the front
fog lamps.<
Interior lamps
The interior lamps operate automatically.
To switch the interior lamps on and
off manually
Press button 1 briefly.
If you would like the interior lamps to
remain off all the time, press and hold the
button for approx. 3 seconds.
Press the button briefly to revert to normal
operation.
Reading lamps*
Switch on and off with button 2 adjacent to
each lamp.
Page 49 of 106
At a glance
Controls
Driving tips
Mobility
Reference
49
4.Press button 1 repeatedly until the
required minutes are set
5.Press button 2 to confirm the settings.
The set time of day is transferred to the car
radio display or appears in the instrument
cluster display.
Display mode
In ignition key position 0:
Press button 1.
The time of day is displayed for several
seconds.
Computer*
Mode selection
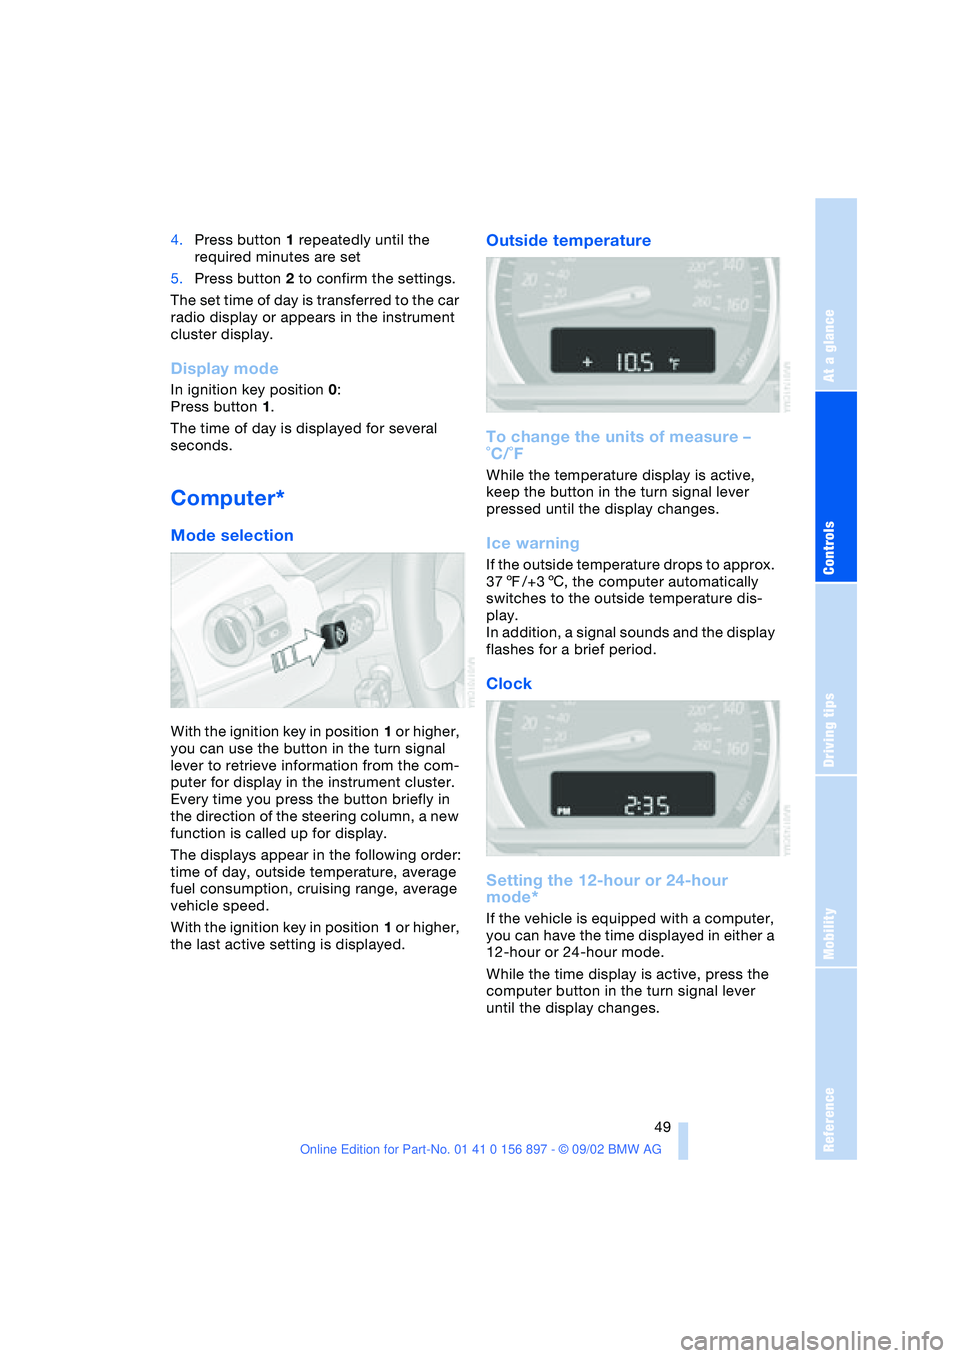
With the ignition key in position 1 or higher,
you can use the button in the turn signal
lever to retrieve information from the com-
puter for display in the instrument cluster.
Every time you press the button briefly in
the direction of the steering column, a new
function is called up for display.
The displays appear in the following order:
time of day, outside temperature, average
fuel consumption, cruising range, average
vehicle speed.
With the ignition key in position 1 or higher,
the last active setting is displayed.
Outside temperature
To change the units of measure –
˚C/˚F
While the temperature display is active,
keep the button in the turn signal lever
pressed until the display changes.
Ice warning
If the outside temperature drops to approx.
377/+36, the computer automatically
switches to the outside temperature dis-
play.
In addition, a signal sounds and the display
flashes for a brief period.
Clock
Setting the 12-hour or 24-hour
mode*
If the vehicle is equipped with a computer,
you can have the time displayed in either a
12-hour or 24-hour mode.
While the time display is active, press the
computer button in the turn signal lever
until the display changes.
Page 50 of 106
Everything under control
50
Average fuel consumption
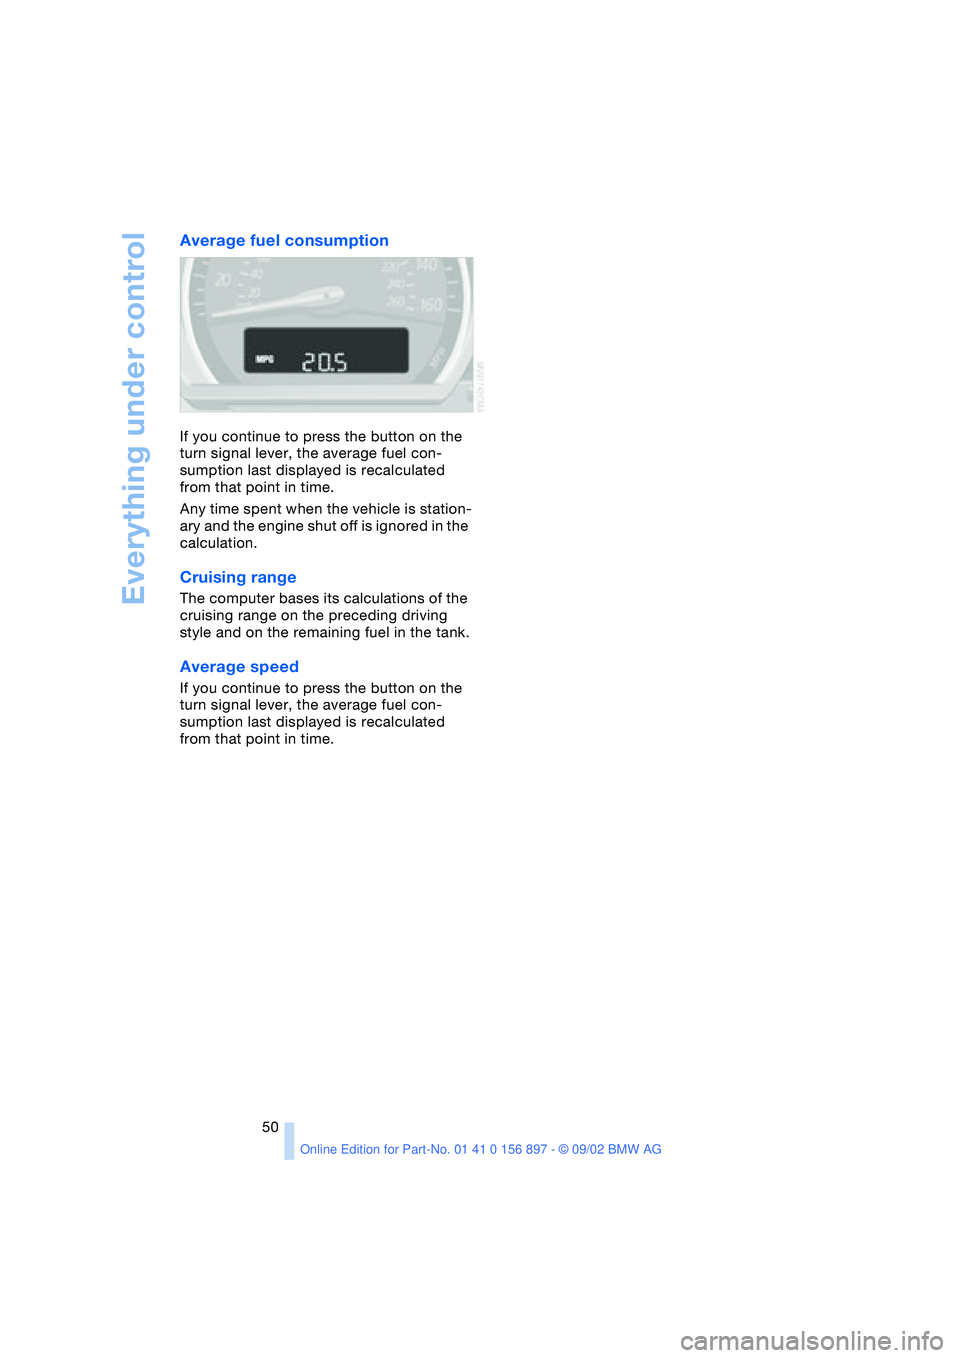
If you continue to press the button on the
turn signal lever, the average fuel con-
sumption last displayed is recalculated
from that point in time.
Any time spent when the vehicle is station-
ary and the engine shut off is ignored in the
calculation.
Cruising range
The computer bases its calculations of the
cruising range on the preceding driving
style and on the remaining fuel in the tank.
Average speed
If you continue to press the button on the
turn signal lever, the average fuel con-
sumption last displayed is recalculated
from that point in time.
Page 86 of 106
Replacement procedures
86 tion using the fog lamps, provided traffic
laws in your area do not prohibit this.
Because of the extremely high volt-
ages involved, any work on the xenon
lighting system, including bulb-changing,
should be carried out by technically quali-
fied personnel only. Otherwise, there is a
risk of fatal injury.<
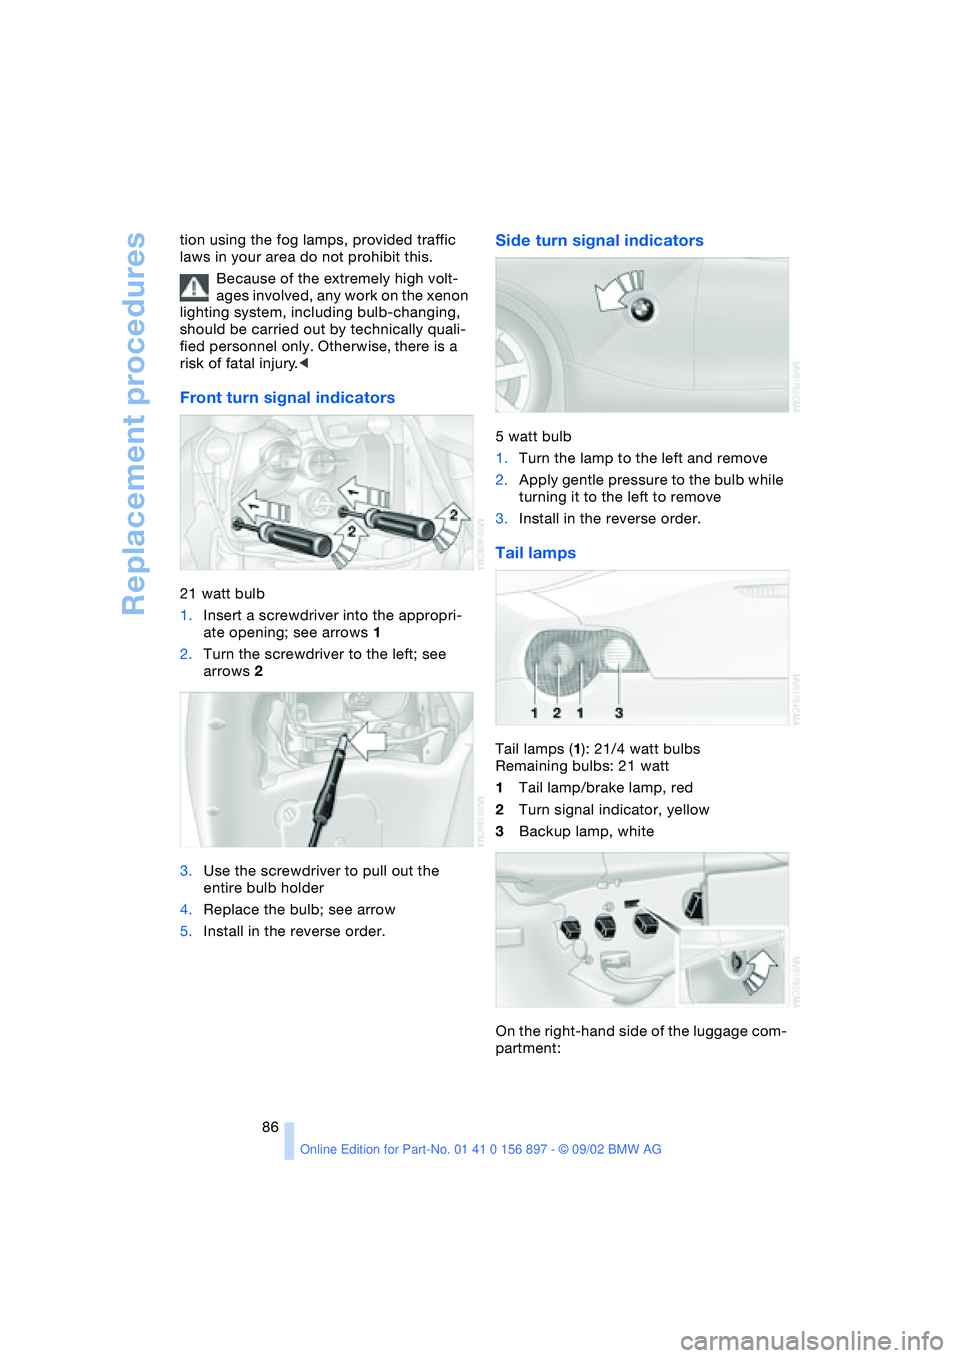
Front turn signal indicators
21 watt bulb
1.Insert a screwdriver into the appropri-
ate opening; see arrows 1
2.Turn the screwdriver to the left; see
arrows 2
3.Use the screwdriver to pull out the
entire bulb holder
4.Replace the bulb; see arrow
5.Install in the reverse order.
Side turn signal indicators
5 watt bulb
1.Turn the lamp to the left and remove
2.Apply gentle pressure to the bulb while
turning it to the left to remove
3.Install in the reverse order.
Tail lamps
Tail lamps (1): 21/4 watt bulbs
Remaining bulbs: 21 watt
1Tail lamp/brake lamp, red
2Turn signal indicator, yellow
3Backup lamp, white
On the right-hand side of the luggage com-
partment:
Page 97 of 106

At a glance
Controls
Driving tips
Mobility
Reference
97
A
ABS Antilock Brake
System 53
– indicator lamp 14
Accessories 7
Activated-charcoal filter 59
Air conditioning 55, 56
– air distribution 56
– air supply 56
– automatic climate
control 58
– defrosting windows
and removing
condensation 56
– outside-air mode 56
– rear window defroster 56
– recirculated-air mode 56
– temperature 56
Air distribution
– air conditioning 56
– automatic climate
control 58
Air outlets 56, 59
Air pressure 71
– checking 71
Air supply
– air conditioning 56
– automatic climate
control 58
Airbags 33
– activation/deactivation 34
– indicator lamp 14, 33
– passenger airbags
lamp 35
Alarm system 27
– arming/disarming 27
– indicator lamp 27
– tilt alarm sensor 28
– triggering 19
All-season tires, refer to
Winter tires 76
Antifreeze
– coolant 81
– washer fluid 79Antilock Brake System ABS
– indicator lamp 14
Anti-theft alarm system,
refer to Alarm system 27
Approved axle load 94
Approved gross vehicle
weight 94
Ashtray 61
AUC Automatic recircu-
lated air control 58
Automatic
– air distribution 58
– air supply 58
– cruise control 44
– lamp control 45
Automatic car wash, refer
to the Caring for your
vehicle brochure
Automatic climate
control 57, 58
– air conditioning 58
– air distribution 58
– air supply 58
– Automatic recirculated air
control AUC 58
– defrosting windows
and removing
condensation 58
– maximum cooling 58
– outside air 58
– rear window defroster 59
– recirculated air mode 58
– temperature 58
Automatic transmission
with Steptronic 40
– display 41
– electronic transmission
control 41
– indicator lamp 14
– manual mode 41
– selector lever position 40
– sport program 41
Automatic windshield
washer 44Average fuel
consumption 50
Average speed 50
Axle load, approved 94
B
Backrest, refer to Seats 30
Backup lamps 40
– bulb replacement 86
Bandages 89
Battery 87
Battery charge current
– indicator lamp 14, 88
Belt tensioner, refer to
Safety belts 31
Belts 31
Beverage holder 61
Blinker, refer to Turn signal
indicators 42
Blower
– air conditioning 56
– automatic climate
control 58
BMW High Performance
synthetic oils 80
BMW Maintenance
System 82
Bore 94
Brake fluid 81
– indicator lamp 14, 81
– refilling 81
Brake Force Display 52
Brake hydraulic system 65
Brake hydraulics
– indicator lamp 14
Brake lamps
– bulb replacement 86
– indicator lamp, defective
bulb 14
Brake pads 66
– indicator lamp 14
Everything from A - Z
Index
Page 98 of 106
Everything from A - Z
98 Brake system 65
– brake fluid level 81
– brake pads 66
– break-in procedures 64
– disc brakes 65
Brakes
– driving notes 65
Break-in procedures 64
– brake system 64
– clutch 64
– differential 64
– engine 64
– tires 64
Bulb
– defective 45
– replacement 84
C
California Proposition 65
warning 83
Can holder 61
Capacities 94, 96
– luggage
compartment 22, 94
Car battery 87
Car radio, refer to the
Owner's Manual for Radio
Car wash, refer to the Car-
ing for your vehicle bro-
chure
Cargo loading 66
Cassette player operation,
refer to the Owner's Man-
ual for Radio
Catalytic converter, refer to
High temperatures 65
CD player operation, refer
to the Owner's Manual for
Radio
Cellular phone
preparation 61
Cellular phone, refer to the
separate Owner's Manual
Center high-mount brake
lamp 87
Central locking system 18
– button 20
– interior 20
Charge indicator
lamp 14, 88Check gas cap 70
– indicator lamp 14
Child seat 34
Child-restraint mounting
system (LATCH) 36
Child-restraint systems 34
Cigarette lighter 61
Cleaning the headlamps 43
Cleaning the windshield 43
Clock
– 12/24-hour mode 49
– adjusting, refer also to the
radio or onboard com-
puter Owner's Manual
Clothes hooks 27
Cluster 13
Clutch
– break-in procedure 64
Cockpit 12
Code, refer to the Owner's
Manual for Radio
Combination switch, refer
to Turn signal indicators/
Headlamp flasher 42
Compartments 60
Compression ratio 94
Computer 49
– average fuel
consumption 50
– average speed 50
– clock, 12/24-hour
mode 49
– cruising range 50
– outside temperature 49
Condensation
– removing from
windows 56, 58
Configuring adjustments,
refer to Vehicle Memory,
Key Memory 37
Consumption 50
Convenience operation
– convertible top 20
– windows 20
Convertible top 23
– convenience operation 20
– electrical fault 25
– emergency operation 25
– malfunction 25
– manual operation 23
– mechanical 23Convertible top compart-
ment panel 22
Coolant 80, 96
– indicator lamp 14
Coolant thermometer 47
Cooling system 96
Cooling, maximum 58
Copyright 4, 6
Cruise control 44
Cruising range 50
Cup holder, refer to Bever-
age holder 61
Curb weight 94
Cylinders 94
D
Data 94
– engine 94
– filling capacities 96
– weights 94
Daytime driving lamps 45
DBC Dynamic Brake
Control 52
Defects 8
Deflector for wind 26
Defrost setting 56, 58
Defroster, rear window
– air conditioning 56
– automatic climate
control 59
Defrosting
– windows 56, 58
Differential
– break-in procedures 64
Digital clock
Dimensions 95
Dimming mirror 33
Dipstick, engine oil 79
Disc brakes 65
Displacement 94
Displays, refer to Instru-
ment cluster 13
Door lock 20
Door lock buttons 21
Doors
– emergency operation 20
– locking 19
– unlocking 19
DOT quality grades 73
Drivelogic 42