2003 BMW Z4 2.5I tow
[x] Cancel search: towPage 66 of 106
Special operating instructions
66 the engine switched off. Otherwise the
engine provides no braking effect and there
is no power-assist for braking or steering
when the engine is off.<
Brake pads
The yellow indicator lamp for the
brake pads lights up:
Have the condition of the brake
pads inspected.<
For your own safety: use brake pads
which the manufacturer has approved
for your specific vehicle model. The manu-
facturer cannot evaluate non-approved
brake pads to determine if they are suitable
for use, and therefore cannot ensure the
operating safety of the vehicle in the event
of their use.<
Cargo loading
Stowing cargo
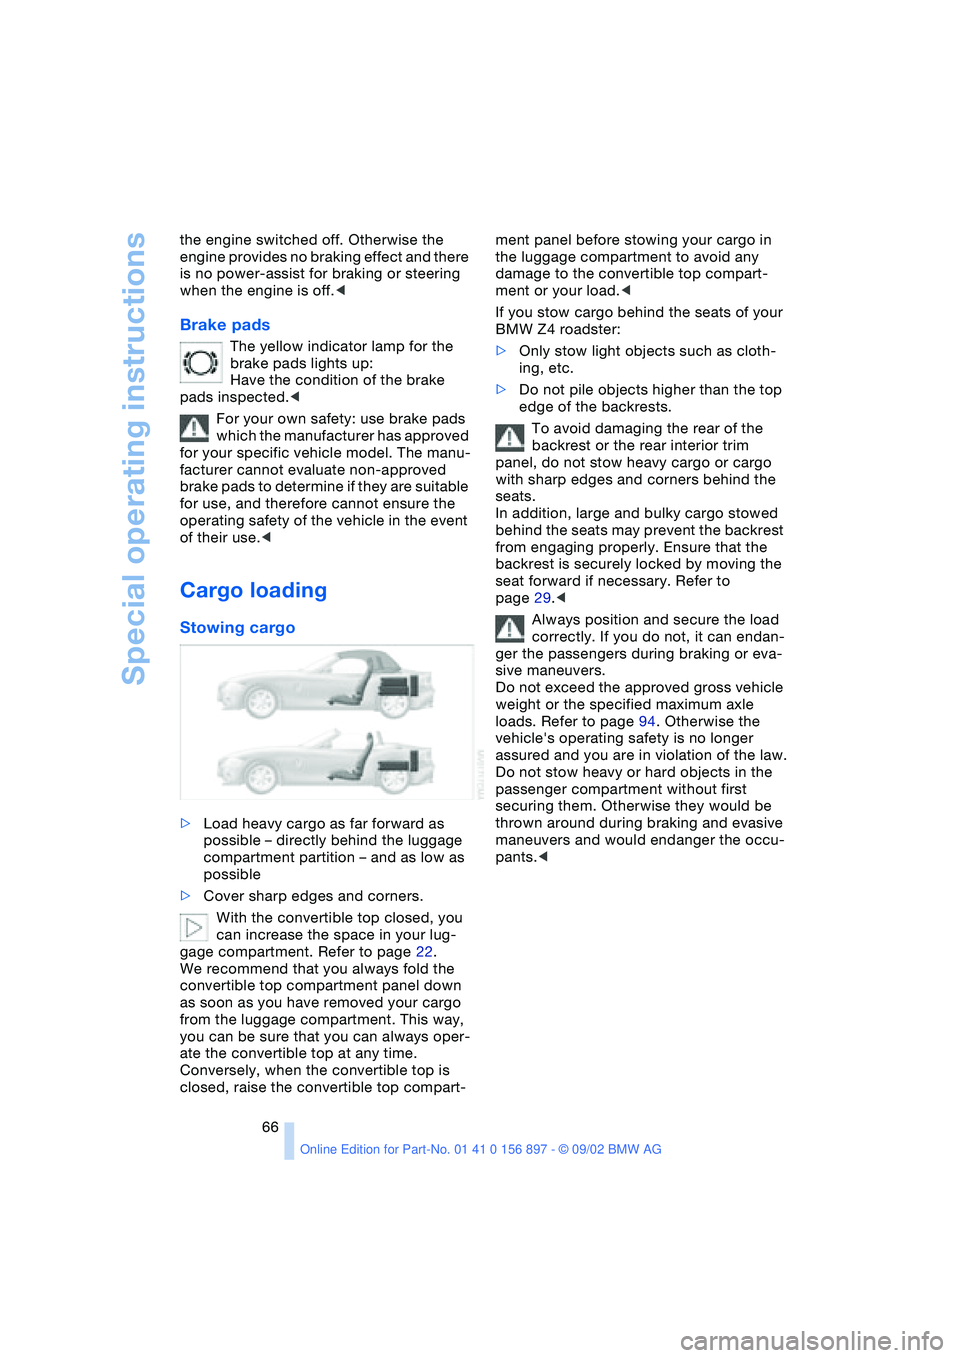
>Load heavy cargo as far forward as
possible – directly behind the luggage
compartment partition – and as low as
possible
>Cover sharp edges and corners.
With the convertible top closed, you
can increase the space in your lug-
gage compartment. Refer to page 22.
We recommend that you always fold the
convertible top compartment panel down
as soon as you have removed your cargo
from the luggage compartment. This way,
you can be sure that you can always oper-
ate the convertible top at any time.
Conversely, when the convertible top is
closed, raise the convertible top compart-ment panel before stowing your cargo in
the luggage compartment to avoid any
damage to the convertible top compart-
ment or your load.<
If you stow cargo behind the seats of your
BMW Z4 roadster:
>Only stow light objects such as cloth-
ing, etc.
>Do not pile objects higher than the top
edge of the backrests.
To avoid damaging the rear of the
backrest or the rear interior trim
panel, do not stow heavy cargo or cargo
with sharp edges and corners behind the
seats.
In addition, large and bulky cargo stowed
behind the seats may prevent the backrest
from engaging properly. Ensure that the
backrest is securely locked by moving the
seat forward if necessary. Refer to
page 29.<
Always position and secure the load
correctly. If you do not, it can endan-
ger the passengers during braking or eva-
sive maneuvers.
Do not exceed the approved gross vehicle
weight or the specified maximum axle
loads. Refer to page 94. Otherwise the
vehicle's operating safety is no longer
assured and you are in violation of the law.
Do not stow heavy or hard objects in the
passenger compartment without first
securing them. Otherwise they would be
thrown around during braking and evasive
maneuvers and would endanger the occu-
pants.<
Page 70 of 106

Refueling
70
Refueling
Fuel filler door
1.Open fuel filler door
2.Turn the filler cap in a counter-clock-
wise direction
3.Place the filler cap in the bracket on the
filler door.
Releasing manually
If an electrical malfunction occurs, you can
unlock the fuel filler door manually.
1.Remove the covers of the tail lamps by
turning the lock to the right; refer also to
page 87
2.Pull the luggage compartment trim
panel slightly toward the interior.
The green button with the fuel pump
symbol is revealed
3.Undo the adhesive strip and pull off
4.Pull on the knob
Fuel filler cap is released.
Fuel gas cap
Close the gas cap carefully after refu-
eling until a "click" is heard. While closing, be sure not to squeeze the strap
which is fastened to the cap. A loose or
missing cap will activate the "Check gas
cap" lamp.<
Check gas cap
This indicator lamp comes on when
the fuel gas cap is loose or missing.
Close the gas cap tightly as described
above.
Tank capacity: approx. 14.5 gallons /
55 liters, of which approx. 2.1 gallons /
8 liters are reserve capacity.
Simple and environmentally friendly
When handling fuels, comply with all
of the applicable safety precautions
posted at the service station.<
When refueling, insert the filler nozzle com-
pletely into the filler pipe. Pulling the nozzle
out of the pipe during refueling
>results in premature shutoff
>and will reduce the effect of the vapor
recovery system on the pump.
The fuel tank is full when the filler nozzle
shuts off the first time.
Fill the fuel tank before it is com-
pletely empty. Driving to the last drop
of fuel can prevent the engine from operat-
ing properly and result in damage.<
Fuel specifications
The engine uses lead-free gasoline only.
Required fuel:
>Premium Unleaded Gasoline,
min. 91 AKI.
AKI = Anti Knock Index.
Do not use leaded fuels. The use of
leaded fuels will cause permanent
damage to the system's oxygen sensor and
the catalytic converter.<
Page 73 of 106
At a glance
Controls
Driving tips
Mobility
Reference
73
Tire condition
Tire tread – Tire damage
Inspect your tires frequently for tread wear,
signs of damage and for foreign objects
lodged in the tread. Check the tread depth.
Tread depth should not be allowed to go
below
1/8 in / 3 mm, even though in
Europe, for example, the legally specified
minimum tread depth is only
1/16 in /
1.6 mm.
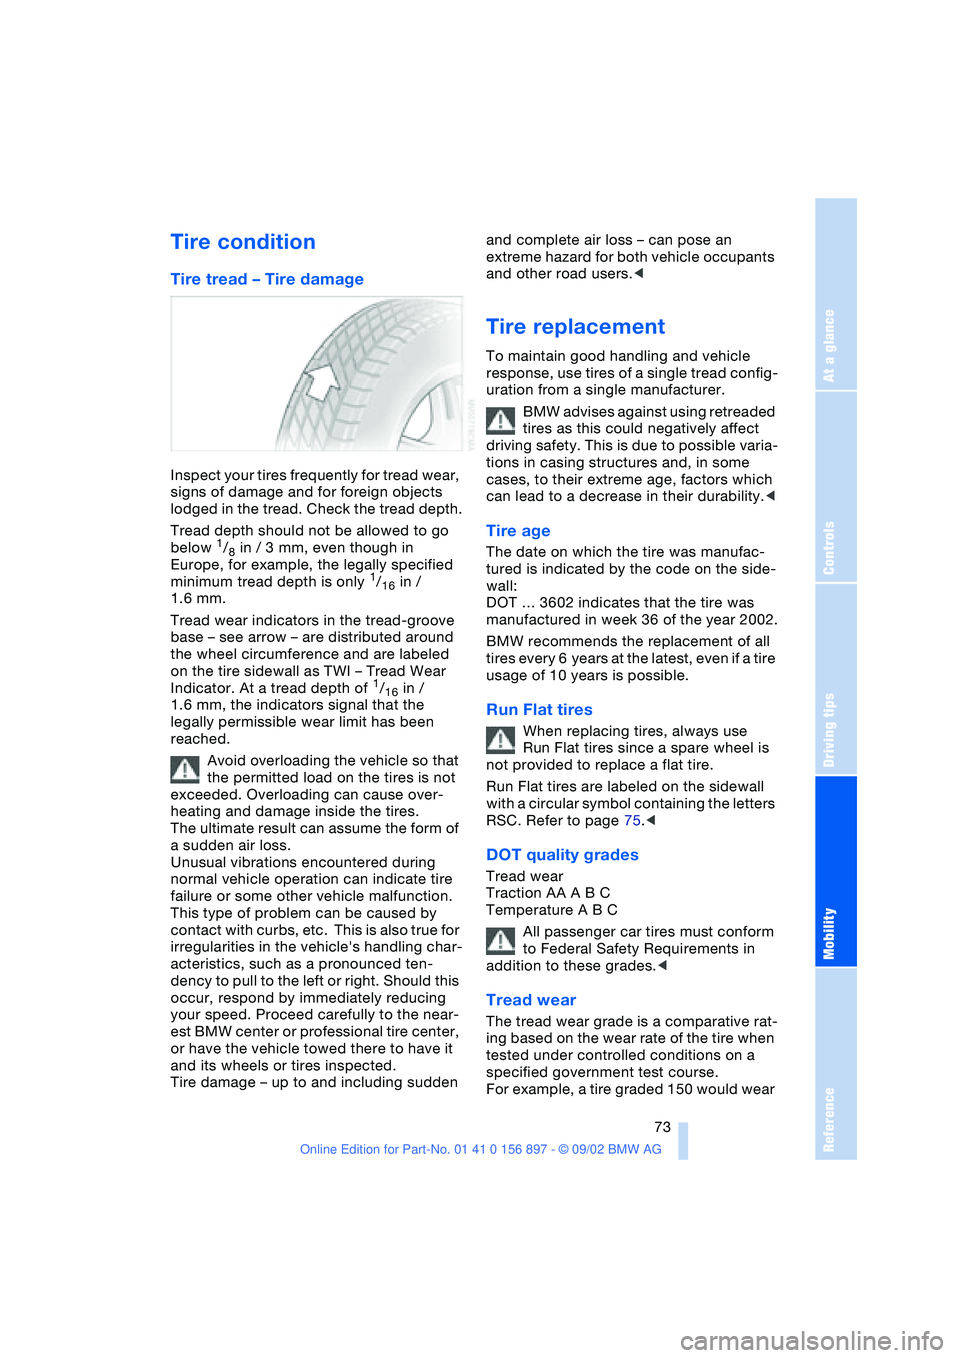
Tread wear indicators in the tread-groove
base – see arrow – are distributed around
the wheel circumference and are labeled
on the tire sidewall as TWI – Tread Wear
Indicator. At a tread depth of
1/16 in /
1.6 mm, the indicators signal that the
legally permissible wear limit has been
reached.
Avoid overloading the vehicle so that
the permitted load on the tires is not
exceeded. Overloading can cause over-
heating and damage inside the tires.
The ultimate result can assume the form of
a sudden air loss.
Unusual vibrations encountered during
normal vehicle operation can indicate tire
failure or some other vehicle malfunction.
This type of problem can be caused by
contact with curbs, etc. This is also true for
irregularities in the vehicle's handling char-
acteristics, such as a pronounced ten-
dency to pull to the left or right. Should this
occur, respond by immediately reducing
your speed. Proceed carefully to the near-
est BMW center or professional tire center,
or have the vehicle towed there to have it
and its wheels or tires inspected.
Tire damage – up to and including sudden and complete air loss – can pose an
extreme hazard for both vehicle occupants
and other road users.<
Tire replacement
To maintain good handling and vehicle
response, use tires of a single tread config-
uration from a single manufacturer.
BMW advises against using retreaded
tires as this could negatively affect
driving safety. This is due to possible varia-
tions in casing structures and, in some
cases, to their extreme age, factors which
can lead to a decrease in their durability.<
Tire age
The date on which the tire was manufac-
tured is indicated by the code on the side-
wall:
DOT … 3602 indicates that the tire was
manufactured in week 36 of the year 2002.
BMW recommends the replacement of all
tires every 6 years at the latest, even if a tire
usage of 10 years is possible.
Run Flat tires
When replacing tires, always use
Run Flat tires since a spare wheel is
not provided to replace a flat tire.
Run Flat tires are labeled on the sidewall
with a circular symbol containing the letters
RSC. Refer to page 75.<
DOT quality grades
Tread wear
Traction AA A B C
Temperature A B C
All passenger car tires must conform
to Federal Safety Requirements in
addition to these grades.<
Tread wear
The tread wear grade is a comparative rat-
ing based on the wear rate of the tire when
tested under controlled conditions on a
specified government test course.
For example, a tire graded 150 would wear
Page 79 of 106

At a glance
Controls
Driving tips
Mobility
Reference
79
Washer fluids for washer
systems
Headlamp* and windshield washer
system
Capacity of windshield washer system:
approx. 3.2 US quarts / 3 liters.
Capacity when equipped with headlamp
washer system: approx. 5.3 US quarts /
5 liters.
Fill with water and – if required – with an
antifreeze agent according to the manufac-
turer's recommendations.
We recommend that you mix the
washer fluid before adding it to the
reservoir.<
Antifreeze agent for the washer sys-
tems is flammable. For this reason,
keep it away from sources of flame and
store it only in its original container. Store it
so that it is inaccessible to children. Com-
ply with the instructions on the contain-
ers.<
Engine oil
Engine oil pressure
The red engine oil warning lamp
lights up:
Stop the vehicle immediately and
switch off the engine. Check the engine oil
level and top off as required. If the oil level
is correct, please contact the nearest BMW
center.
Do not continue driving, as the engine
could sustain serious damage from
inadequate lubrication.<
Engine oil level
The yellow engine oil indicator lamp
lights up while driving:
The oil level is at the absolute mini-
mum; refill as soon as possible. Do not
drive more than approx. 30 miles / 50 km
until you do.
The yellow engine oil indicator lamp
lights up after the engine is
switched off: add engine oil at the
earliest opportunity, when you stop to
refuel.
Engine oil sensor
The yellow engine oil indicator lamp
lights up within 20 seconds after
the engine is started:
The oil level sensor is defective. Please
have it checked by a BMW center.
Checking the oil level
1.Park the vehicle on a level surface
2.Switch the engine off after it has
reached normal operating temperature
3.After approx. 5 minutes, pull the dip-
stick out and wipe it off with a clean lint-
free cloth, paper towel, or similar mate-
rial
4.Carefully push the dipstick all the way
into the guide tube and pull it out again
5.The oil level should be between the two
marks on the dipstick
6.Return the dipstick to the guide tube,
inserting it as far as it will go.
As with fuel economy, oil consumption is
directly influenced by your driving style and
vehicle operating conditions.
Page 84 of 106
Replacement procedures
84
Replacement procedures
Onboard tool kit
The onboard tool kit is stored in a tool
pouch. It is located in the luggage compart-
ment beneath the floor panel.
Windshield wiper blades
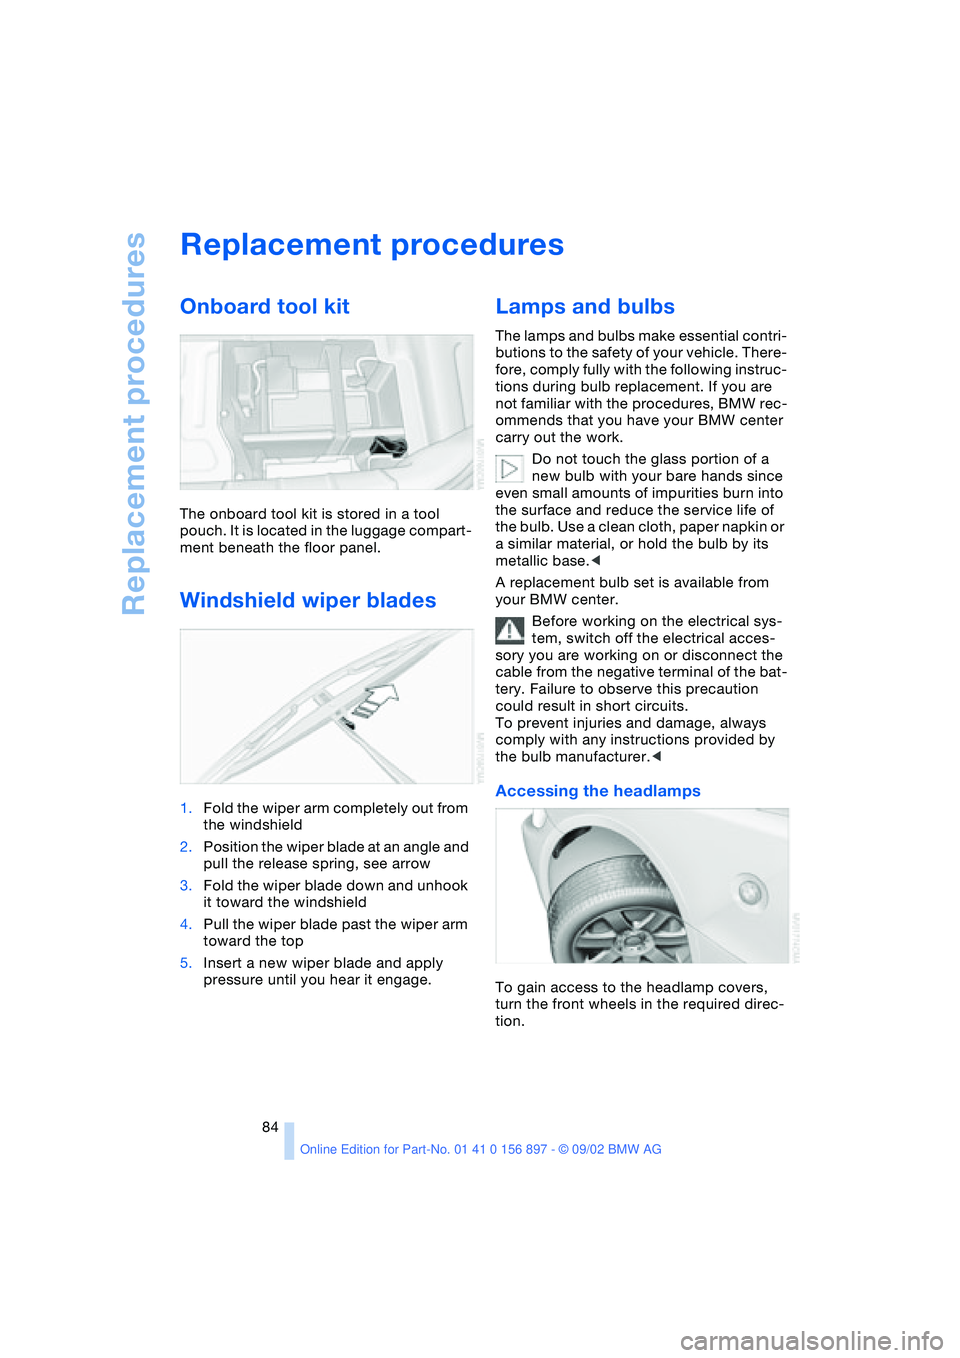
1.Fold the wiper arm completely out from
the windshield
2.Position the wiper blade at an angle and
pull the release spring, see arrow
3.Fold the wiper blade down and unhook
it toward the windshield
4.Pull the wiper blade past the wiper arm
toward the top
5.Insert a new wiper blade and apply
pressure until you hear it engage.
Lamps and bulbs
The lamps and bulbs make essential contri-
butions to the safety of your vehicle. There-
fore, comply fully with the following instruc-
tions during bulb replacement. If you are
not familiar with the procedures, BMW rec-
ommends that you have your BMW center
carry out the work.
Do not touch the glass portion of a
new bulb with your bare hands since
even small amounts of impurities burn into
the surface and reduce the service life of
the bulb. Use a clean cloth, paper napkin or
a similar material, or hold the bulb by its
metallic base.<
A replacement bulb set is available from
your BMW center.
Before working on the electrical sys-
tem, switch off the electrical acces-
sory you are working on or disconnect the
cable from the negative terminal of the bat-
tery. Failure to observe this precaution
could result in short circuits.
To prevent injuries and damage, always
comply with any instructions provided by
the bulb manufacturer.<
Accessing the headlamps
To gain access to the headlamp covers,
turn the front wheels in the required direc-
tion.
Page 90 of 106
Giving and receiving assistance
90 4.Start the engine on the support vehicle
and allow it to run
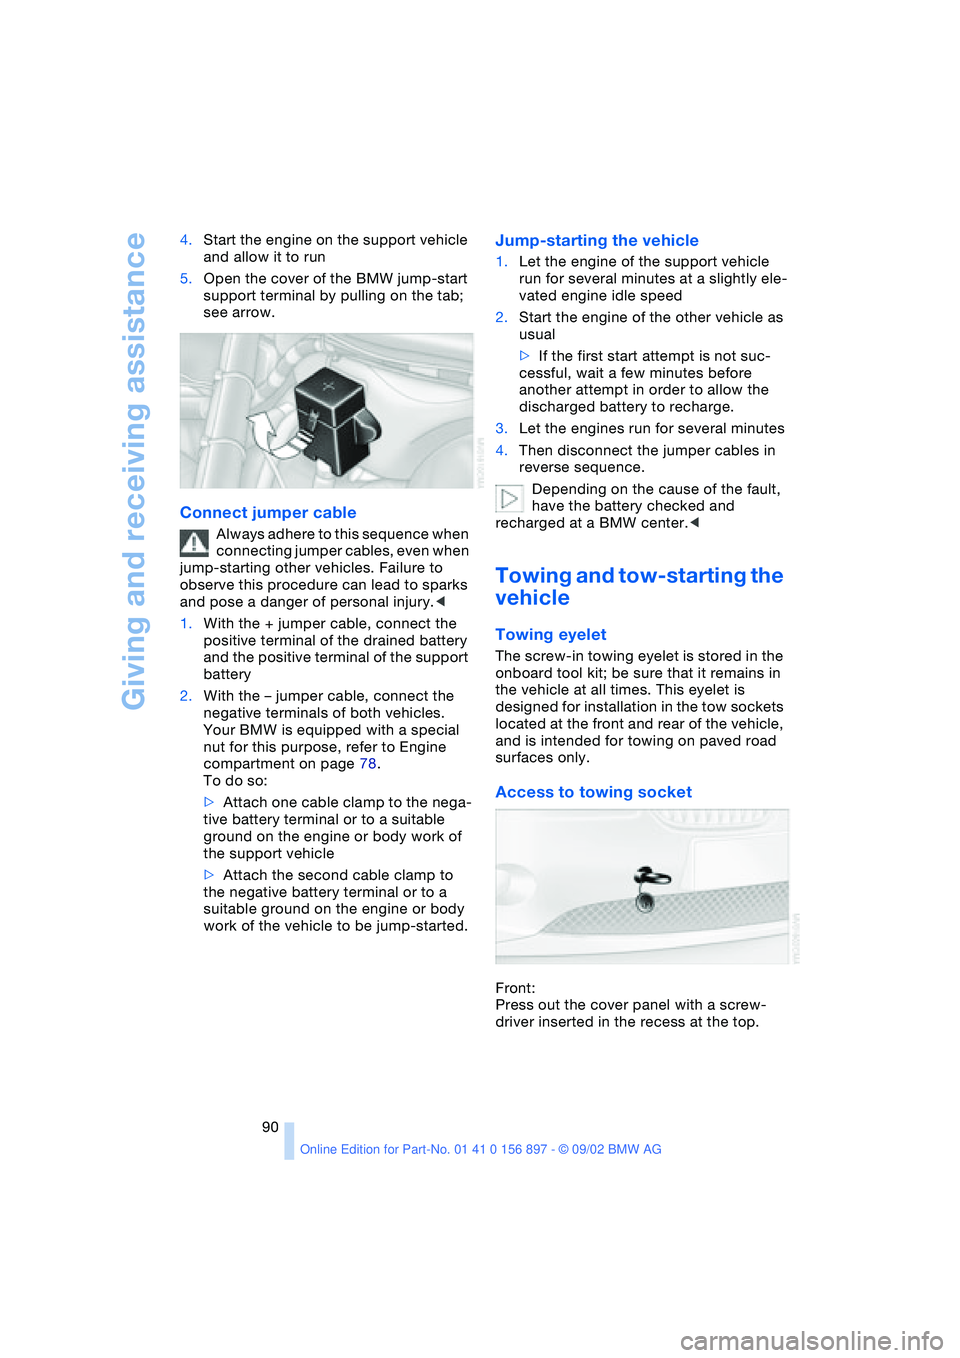
5.Open the cover of the BMW jump-start
support terminal by pulling on the tab;
see arrow.
Connect jumper cable
Always adhere to this sequence when
connecting jumper cables, even when
jump-starting other vehicles. Failure to
observe this procedure can lead to sparks
and pose a danger of personal injury.<
1.With the + jumper cable, connect the
positive terminal of the drained battery
and the positive terminal of the support
battery
2.With the – jumper cable, connect the
negative terminals of both vehicles.
Your BMW is equipped with a special
nut for this purpose, refer to Engine
compartment on page 78.
To do so:
>Attach one cable clamp to the nega-
tive battery terminal or to a suitable
ground on the engine or body work of
the support vehicle
>Attach the second cable clamp to
the negative battery terminal or to a
suitable ground on the engine or body
work of the vehicle to be jump-started.
Jump-starting the vehicle
1.Let the engine of the support vehicle
run for several minutes at a slightly ele-
vated engine idle speed
2.Start the engine of the other vehicle as
usual
>If the first start attempt is not suc-
cessful, wait a few minutes before
another attempt in order to allow the
discharged battery to recharge.
3.Let the engines run for several minutes
4.Then disconnect the jumper cables in
reverse sequence.
Depending on the cause of the fault,
have the battery checked and
recharged at a BMW center.<
Towing and tow-starting the
vehicle
Towing eyelet
The screw-in towing eyelet is stored in the
onboard tool kit; be sure that it remains in
the vehicle at all times. This eyelet is
designed for installation in the tow sockets
located at the front and rear of the vehicle,
and is intended for towing on paved road
surfaces only.
Access to towing socket
Front:
Press out the cover panel with a screw-
driver inserted in the recess at the top.
Page 91 of 106
At a glance
Controls
Driving tips
Mobility
Reference
91
Rear:
Press out the cover panel with a screw-
driver inserted in the recess at the top.
Make sure the towing eyelet is firmly
screwed all the way in, otherwise the
thread could be damaged.
Do not tow the vehicle by any components
of the chassis or suspension, or lash them
down in any way. If you do, the compo-
nents could be damaged, possibly leading
to accidents.
If the engine is off, increased effort will be
required to steer the vehicle since power
support will not be available.<
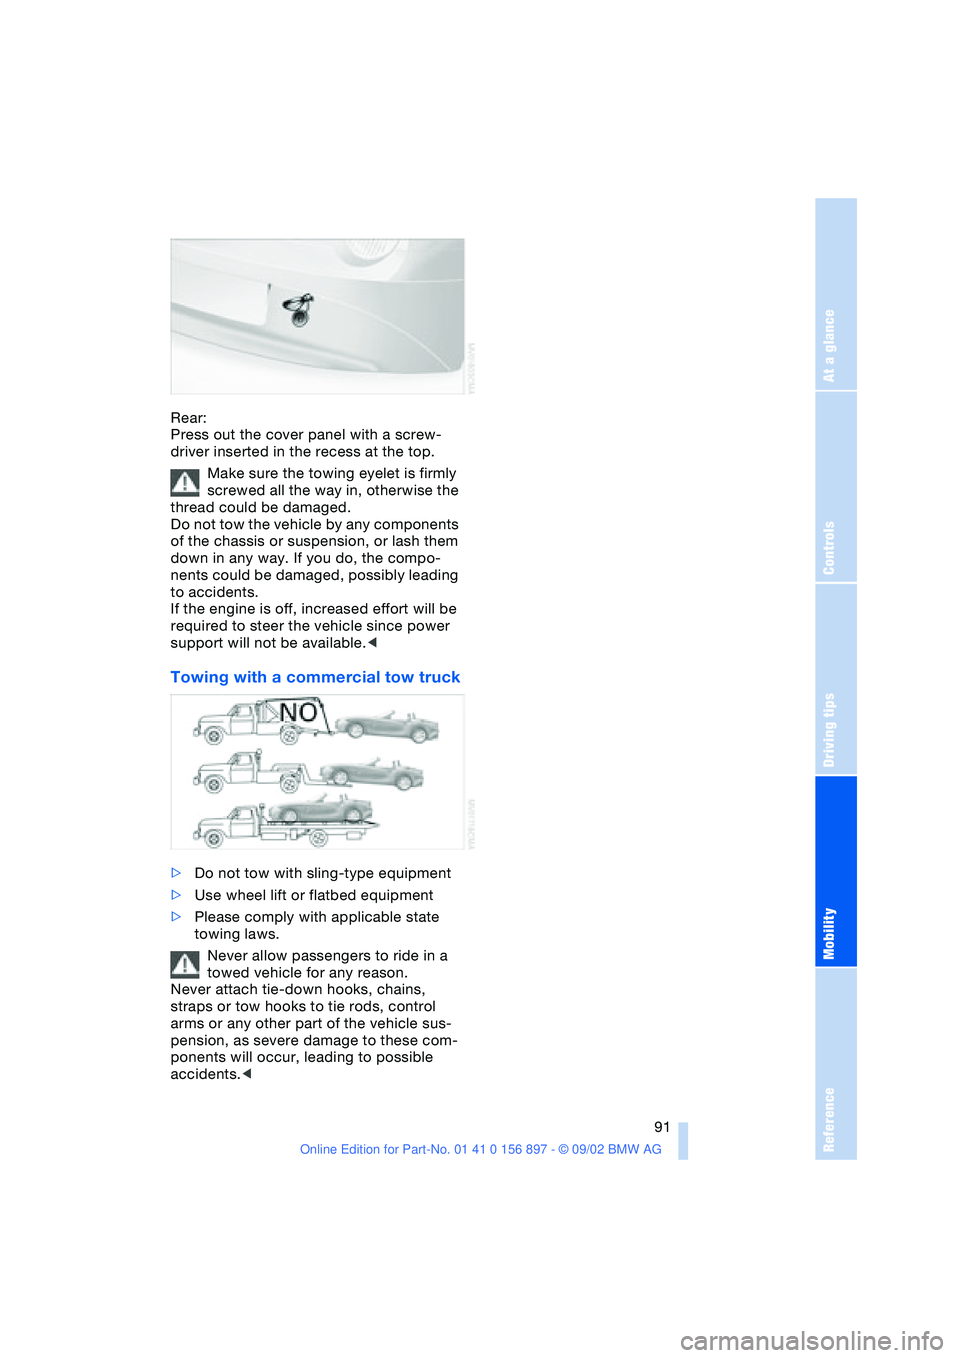
Towing with a commercial tow truck
>Do not tow with sling-type equipment
>Use wheel lift or flatbed equipment
>Please comply with applicable state
towing laws.
Never allow passengers to ride in a
towed vehicle for any reason.
Never attach tie-down hooks, chains,
straps or tow hooks to tie rods, control
arms or any other part of the vehicle sus-
pension, as severe damage to these com-
ponents will occur, leading to possible
accidents.<
Page 99 of 106

At a glance
Controls
Driving tips
Mobility
Reference
99
Driving lamps
– indicator lamp, defective
bulb 14
Driving notes 65
DSC Dynamic Stability
Control 51
– indicator lamp 14
DTC Dynamic Traction
Control 51
– indicator lamp 14
Dynamic Brake Control
DBC 52
– indicator lamp 14
Dynamic Stability Control
DSC 51
– indicator lamp 14
Dynamic Traction Control
DTC 51
– indicator lamp 14
E
Electric Power Steering
EPS 42
– indicator lamp 15
Electric power windows 22
Electrical convertible
top 25
Electrical fault
– convertible top 25
– door lock 20
– fuel filler door 70
– storage compartment 60
Emergency operation
– convertible top 25
– doors 20
– fuel filler door 70
– storage compartment 60
Emergency release
– from inside luggage
compartment 22
Engine 38
– break-in procedures 64
– starting 38
– switching off 39
Engine compartment 78
Engine coolant 96
– refilling 81Engine oil 79
– capacity 96
– quality 80
– refilling 79
Engine oil consumption 79
Engine oil level 79
– checking 79
Engine oil pressure 79
– indicator lamp 14
Engine oil sensor 79
– indicator lamp 14
Engine oil types 80
Engine output 94
Engine speed 94
EPS Electric Power
Steering 42
ESP, refer to DSC 51
Exhaust system, refer to
High temperatures 65
Exterior mirrors 32
– automatic dimming
feature 33
Eyelet for tow-starting and
towing 90
F
False alarm 28
Fault
– storage compartment 60
First-aid kit 89
Flat tire 73, 75
Flat Tire Monitor 53
– indicator lamp 14, 53
Fog lamps 46
– indicator lamp 14
Footbrake, refer to Driving
notes 65
Front airbags 33
Fuel consumption 50
– display 47
Fuel filler door 70
– unlocking in case of elec-
trical fault 70
Fuel gas cap 70
Fuel gauge 47
Fuel specifications 70, 94
Fuel tank capacity 96
Fuses 88
G
Gasoline gauge, refer to
Fuel gauge 47
Gasoline specifications,
refer to Fuel
specifications 70
Glove compartment 60
Gross vehicle weight,
approved 94
Guide Booklet, Warranty
and Service 82
H
Handbrake 39
Hands-free system 61
Hardtop preparation 67
Hardtop, refer to the sepa-
rate Owner's Manual
Hazard warning flashers 12
Hazard warning triangle 89
Head restraints 30
Headlamp flasher 42, 46
Headlamp washer
system 79, 96
Headlamps 84
– access 84
– high beam 42
Heated seats 31
Heavy loads 66
Height 95
High beams 42, 46
– bulb replacement 85
– indicator lamp 14
High temperatures 65
Hood 77
Hood release 77
Hydraulic brake assistant,
refer to DBC
Hydroplaning 65
I
Ignition lock 38
Imprint 4, 6
Indicator and warning
lamps 14