2003 BMW X5 3.0I key
[x] Cancel search: keyPage 97 of 183
97n
OverviewControlsMaintenanceRepairsDataIndex
Tire Pressure Monitor RDC*The conceptRDC monitors the tire pressures at all
four tires, even when the vehicle is
moving. The system provides an alert
whenever the inflation pressure drops
significantly below the specified pres-
sure in one or more tires.
In order for the system to learn the cor-
rect tire inflation pressure, check the
inflation pressures in all tires, refer to
the table on page 27 and make any
necessary corrections. Then activate
the system.
This indicator lamp in the instru-
ment cluster or the Check Con-
trol will inform you if the tire
pressure is different from the learned
values.
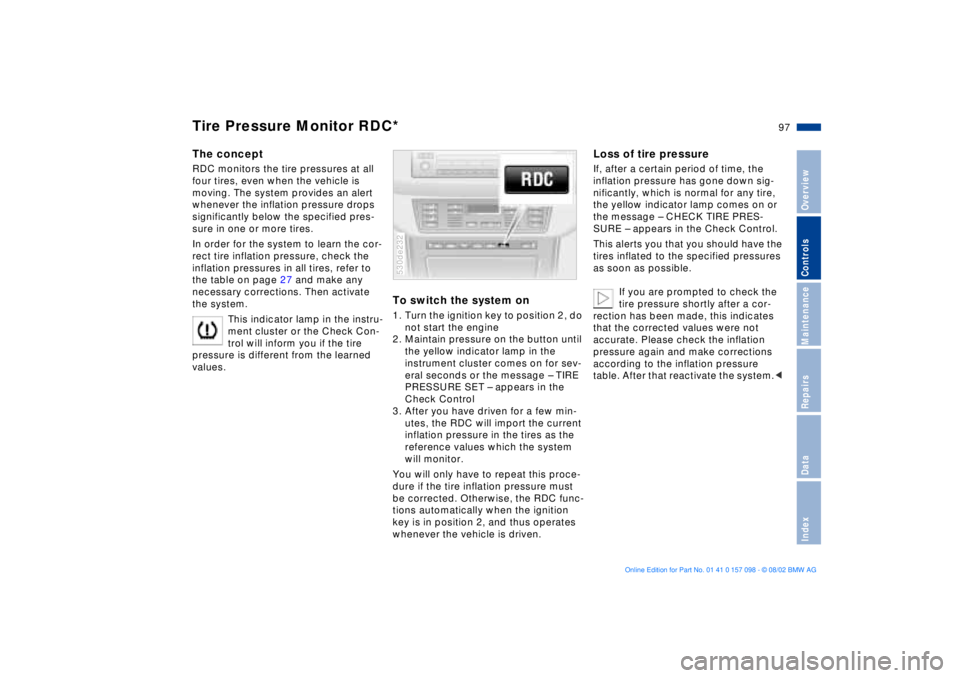
To switch the system on1. Turn the ignition key to position 2, do
not start the engine
2. Maintain pressure on the button until
the yellow indicator lamp in the
instrument cluster comes on for sev-
eral seconds or the message Ð TIRE
PRESSURE SET Ð appears in the
Check Control
3. After you have driven for a few min-
utes, the RDC will import the current
inflation pressure in the tires as the
reference values which the system
will monitor.
You will only have to repeat this proce-
dure if the tire inflation pressure must
be corrected. Otherwise, the RDC func-
tions automatically when the ignition
key is in position 2, and thus operates
whenever the vehicle is driven.530de232
Loss of tire pressureIf, after a certain period of time, the
inflation pressure has gone down sig-
nificantly, which is normal for any tire,
the yellow indicator lamp comes on or
the message Ð CHECK TIRE PRES-
SURE Ð appears in the Check Control.
This alerts you that you should have the
tires inflated to the specified pressures
as soon as possible.
If you are prompted to check the
tire pressure shortly after a cor-
rection has been made, this indicates
that the corrected values were not
accurate. Please check the inflation
pressure again and make corrections
according to the inflation pressure
table. After that reactivate the system.<
Page 99 of 183

99n
OverviewControlsMaintenanceRepairsDataIndex
Parking lamps Ð side marker
lamps
The front, rear and side vehicle
lighting is switched on. You can
use the parking lamps for
parking. For lighting on one side for
parking as an additional feature, refer to
page 100.
Low beams
When the ignition is switched off
and the low beams are on, only
the parking lamps Ð side marker
lamps Ð remain on.
530us215
Follow me home lamps:
When you activate the headlamp
flasher after parking the vehicle and
switching off the lamps, the low beams
will come on for a brief period. You may
also have this function deactivated if
you wish.<
LIGHTS ON warningWhenever you open the driver's door,
after having turned the ignition key to
position 0, you will hear an acoustic
signal for a few seconds to remind you
that the lamps have not been switched
off.
On vehicles with alphanumeric Check
Control
*:
The reminder is given through the
Check Control.
Daytime driving lamps
*
The headlamps are automatically
switched on for daylight driving at
ignition key position 2.
Automatic headlamp control
*
When the switch is set to this
position the system automati-
cally activates or deactivates the
low beams in response to changes in
ambient light, e. g. in tunnels, at dusk,
as well as rain and snow.
The vehicle's external lamps
remain on constantly when you
switch on the fog lamps after the head-
lamps have come on automatically.<
Automatic headlamp control
cannot serve as a substitute for
the driver's judgement in determining
when the vehicle lamps should be
switched on. For example, the sensors
are not able to detect fog. To avoid
safety risks, you should respond to
these kinds of low-visibility situations
by switching the headlamps on manu-
ally.<
You can have the sensitivity of
your vehicle's automatic head-
lamp control adjusted.<
Parking lamps/Low beams
Page 100 of 183

100n
Instrument lighting
High beams/Standing lamps
Fog lamps
Turn the rotary dial to adjust the illumi-
nation intensity. 530us216
1 High beams Ð blue indicator lamp
2 Headlamp flasher Ð blue indicator
lamp
3 Standing lamps Standing lamps, left or right
*
As an additional feature, you can
illuminate your vehicle on either side
for parking, if you wish to do so:
With the ignition key in position 0,
engage the lever in the appropriate
turn signal position. 530de265
Fog lamps
A green indicator lamp appears
in the instrument cluster to indi-
cate that the front fog lamps are
on.
If the high beams are switched on, the
fog lamps go out.
If the automatic headlamp control
is activated, the low beams will
automatically be switched on when the
front fog lamps are switched on.<
530us210
Page 101 of 183
101n
OverviewControlsMaintenanceRepairsDataIndex
Interior lamps The interior lamps operate automati-
cally. Switching the interior lamps on
and off manuallyPress the button briefly.
If you want the interior lamps to remain
off all the time, press and hold the
button for approx. 3 seconds.
Press the button briefly to revert to
normal operation.
The button for the interior lamps in the
rear passenger area only switches
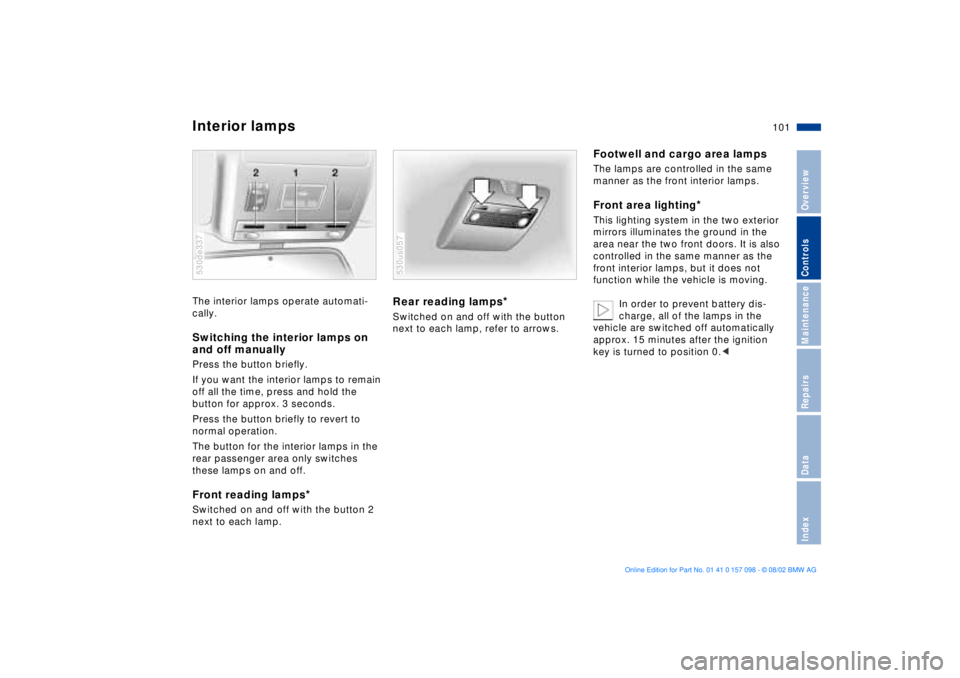
these lamps on and off. Front reading lamps
*
Switched on and off with the button 2
next to each lamp.530de337
Rear reading lamps
*
Switched on and off with the button
next to each lamp, refer to arrows.530us057
Footwell and cargo area lampsThe lamps are controlled in the same
manner as the front interior lamps.Front area lighting
*
This lighting system in the two exterior
mirrors illuminates the ground in the
area near the two front doors. It is also
controlled in the same manner as the
front interior lamps, but it does not
function while the vehicle is moving.
In order to prevent battery dis-
charge, all of the lamps in the
vehicle are switched off automatically
approx. 15 minutes after the ignition
key is turned to position 0.<
Page 107 of 183
107n
OverviewControlsMaintenanceRepairsDataIndex
Automatic climate control
*
Tips for pleasant drivingUse the automatic system; that is press
AUTO button 6. Select an interior
temperature that is comfortable for you.
Detailed setting options are described
for you in the following section.
Your BMW center can program
the settings of your vehicle in such
a manner that, when you unlock the
vehicle with your individualized key,
your own personalized setting for the
automatic climate control is initiated.< Automatic air distribution
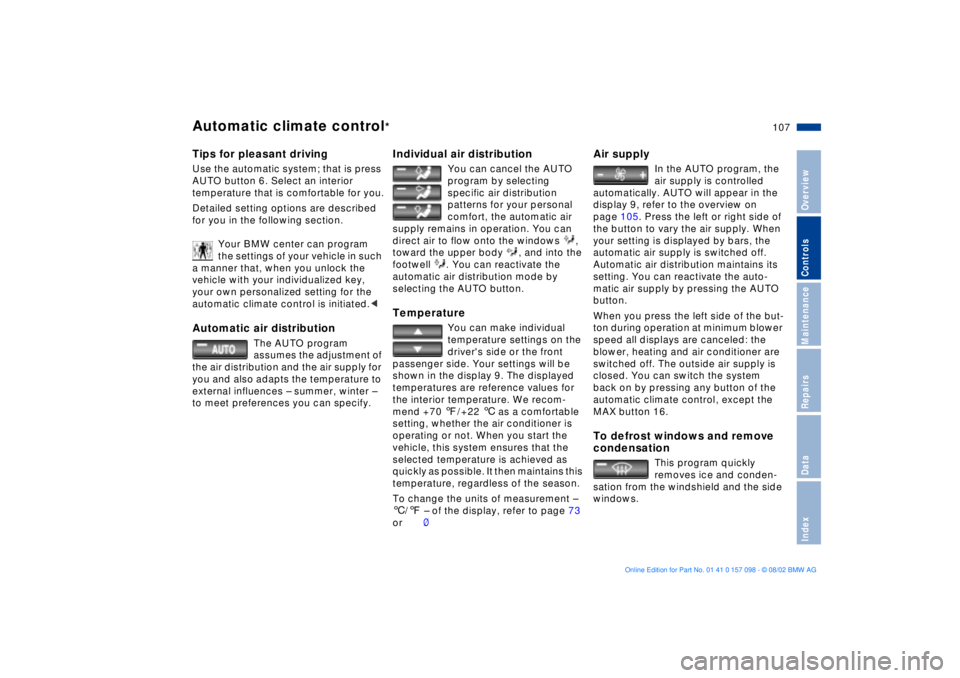
The AUTO program
assumes the adjustment of
the air distribution and the air supply for
you and also adapts the temperature to
external influences Ð summer, winter Ð
to meet preferences you can specify.
Individual air distribution
You can cancel the AUTO
program by selecting
specific air distribution
patterns for your personal
comfort, the automatic air
supply remains in operation. You can
direct air to flow onto the windows ,
toward the upper body , and into the
footwell . You can reactivate the
automatic air distribution mode by
selecting the AUTO button.
Temperature
You can make individual
temperature settings on the
driver's side or the front
passenger side. Your settings will be
shown in the display 9. The displayed
temperatures are reference values for
the interior temperature. We recom-
mend +70 7/+22 6 as a comfortable
setting, whether the air conditioner is
operating or not. When you start the
vehicle, this system ensures that the
selected temperature is achieved as
quickly as possible. It then maintains this
temperature, regardless of the season.
To change the units of measurement Ð
6/7 Ð of the display, refer to page 73
or 80.
Air supply
In the AUTO program, the
air supply is controlled
automatically. AUTO will appear in the
display 9, refer to the overview on
page 105. Press the left or right side of
the button to vary the air supply. When
your setting is displayed by bars, the
automatic air supply is switched off.
Automatic air distribution maintains its
setting. You can reactivate the auto-
matic air supply by pressing the AUTO
button.
When you press the left side of the but-
ton during operation at minimum blower
speed all displays are canceled: the
blower, heating and air conditioner are
switched off. The outside air supply is
closed. You can switch the system
back on by pressing any button of the
automatic climate control, except the
MAX button 16.
To defrost windows and remove
condensation
This program quickly
removes ice and conden-
sation from the windshield and the side
windows.
Page 109 of 183
109n
OverviewControlsMaintenanceRepairsDataIndex
Automatic climate control
*
Residual heat mode
The heat which is stored in
the engine is utilized for
heating the interior when the engine
has been switched off (while waiting at
a railroad crossing, for instance).
In ignition key position 1, you can alter
the settings of the automatic climate
control. With the ignition key in posi-
tion 0, the system automatically directs
heated air to the windshield, side
windows and footwells.
This function may be activated
when the outside temperature is
below approx. 59 7/15 6, the engine
is at operating temperature, and the
battery is adequately charged. The LED
on the button will light up when all
conditions have been met.<
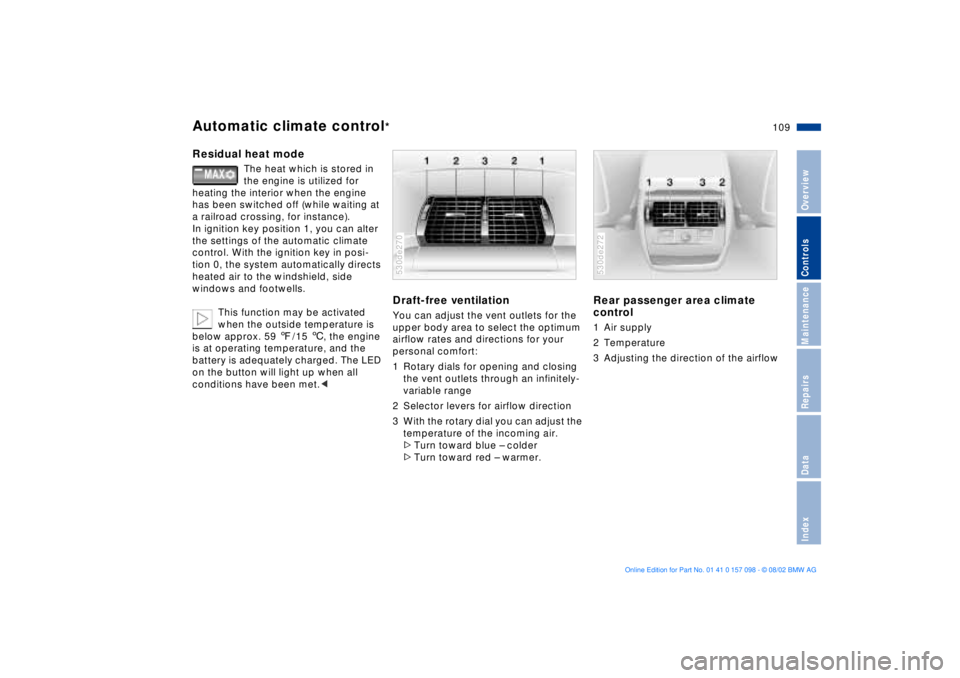
Draft-free ventilation You can adjust the vent outlets for the
upper body area to select the optimum
airflow rates and directions for your
personal comfort:
1 Rotary dials for opening and closing
the vent outlets through an infinitely-
variable range
2 Selector levers for airflow direction
3 With the rotary dial you can adjust the
temperature of the incoming air.
>Turn toward blue Ð colder
>Turn toward red Ð warmer. 530de270
Rear passenger area climate
control 1 Air supply
2 Temperature
3 Adjusting the direction of the airflow 530de272
Page 112 of 183
112n
The concept The BMW Universal Transmitter
replaces up to three hand-held trans-
mitters of different devices such as
garage door openers, alarm systems, or
door locking systems. The BMW
Universal Transmitter recognizes and
learns the transmitted signal of each of
the original hand-held transmitters.
The signal of an original hand-held
transmitter can be programmed on one
of the three channel keys. Following
that, each of the devices can be actu-ated with the appropriately-programmed
channel key. The indicator lamp flashes
to confirm transmission of the signal.
If the vehicle is sold, the memory of the
channel keys should be cleared as
described on page 114. During programming and before
every remote actuation of a
programmed device by the BMW
Universal Transmitter, check to be sure
that there are no persons, animals or
objects within the actuation range of
the device in order to prevent possible
injuries or damage. Also, comply with
the safety precautions of the original
hand-held transmitter.<
To Canadian residents:
During programming, your hand-
held transmitter may automatically stop
transmitting after two seconds. This
may not be long enough to program the
BMW Universal Transmitter. If you are
programming from one of these hand-
held transmitters, the Universal Trans-
mitter's light may begin to flash in a
series of double-blinks. If this occurs,
continue to hold the button of the
Universal Transmitter while you reacti-
vate your hand-held transmitter. You
may have to repeat this function several
times while programming.<
Before programming, read the
User information section on
page 114.<
Original hand-held transmitter
If this symbol is present on the
packaging or in the instructions
of the original hand-held trans-
mitter, it may be assumed that this
hand-held transmitter is compatible
with the BMW Universal Transmitter.
BMW Universal Transmitter
Page 113 of 183
113n
OverviewControlsMaintenanceRepairsDataIndex
BMW Universal TransmitterChecking for the conversion code To determine whether the original
hand-held transmitter is provided with
a conversion-code system, you may
either read the instructions for the orig-
inal hand-held transmitter or program a
channel key as described on the next
page Ð left-hand column under
Programming.
Then press and hold the programmed
channel key of the BMW Universal
Transmitter. If the indicator lamp of the
BMW Universal Transmitter flashes for
two seconds and then comes on
steadily, the original hand-held trans-
mitter is provided with a conversion-
code system. With a conversion-code
system, program the channel keys as
described on the next page Ð right-hand
column under Programming a hand-
held transmitter with conversion code.
If you have additional questions,
please consult your BMW Sports
Activity Vehicle center or call
1-800-355-3515.
You can also visit this website:
www.bmwusa.com.<
Programming 1 Channel keys
2 Indicator lamp
3 Receiver for programming
Read and comply with the safety
precautions on the previous
page.<
1. Turn the ignition key to position 2
2. For initial use:
Press and hold both outside keys 1
until the indicator lamp 2 flashes, and
then release them. The three channel
keys are cleared 530us136
3. Hold the original hand-held trans-
mitter toward the receiver 3 a
maximum of 2 in/5 cm away
4. Press the transmission key of the
original hand-held transmitter, refer
to arrow 2, and the desired channel
key of the Integrated BMW Universal
Transmitter, refer to arrow 1, simulta-
neously. Release both keys as soon
as the indicator lamp flashes rapidly
5. To program other original hand-held
transmitters, repeat steps 3 and 4.
The corresponding channel key is now
programmed with the signal of the orig-
inal hand-held transmitter. 530us137