2003 BMW M5 SEDAN light
[x] Cancel search: lightPage 111 of 155

111n
OverviewControlsMaintenanceRepairsDataIndex
Tire replacement Wheel and tire combinations
Do not use retreaded tires, since
driving safety may be impaired.
This is due to the possible variations in
casing structures and, in some cases,
to their extreme age, which can lead to
a decrease in their durability.<
Tire ageThe date on which the tire was manu-
factured is indicated by the code on the
sidewall:
DOT ... 3401 indicates that the tire was
manufactured in week 34 of the year
2001.
Although tires may have a theoretical
service life of up to 10 years, BMW
strongly recommends that you replace
all tires after an absolute maximum of
6 years.
The right choice
Never mount wheels and tires that
have not been specifically
approved by BMW for use on your par-
ticular model. Although other wheels
and tires may theoretically have the
same dimensions, variations in factors
such as manufacturing tolerances can
result in contact between tire and body-
work, ultimately leading to serious acci-
dents. If non-approved wheels and tires
are used, BMW cannot evaluate their
suitability, and therefore cannot be held
liable for driving safety.<
BMW has tested certain tires for each
tire size, rated them according to road
safety and approved them. Your BMW
center can inform you which tires have
been tested in this way. Observe pos-
sible national guidelines, e.g. regarding
entry into vehicle documents.
Because various systems on your
vehicle, such as ABS, DSC and
the Flat Tire Monitor, rely on the correct
combination of tires and wheels for
optimal operation, their operation may
be adversely affected if other tires and/
or wheels are mounted .
You should therefore ensure that tires
from a single manufacturer with the
same tread pattern are mounted at all
four wheels. After installing a spare tire
in response to a flat tire you should
always ensure that a tire of the original
specifications is remounted as soon as
possible.<
The use of rims and wheel bolts
that do not meet the specifica-
tions of the original factory-installed
equipment will affect the safe operation
of your vehicle and may cause an acci-
dent and personal injury.
Never mix tires of different design, such
as steel-belted radials with radial bias-
belted or bias-ply tires, etc. Mixing tire
types will adversely affect roadholding and can lead to loss of vehicle control.
possible. Protect the tires against con-
tact with oil, grease and fuel.
Page 118 of 155
118n
Coolant Brake fluidChecking coolant level and
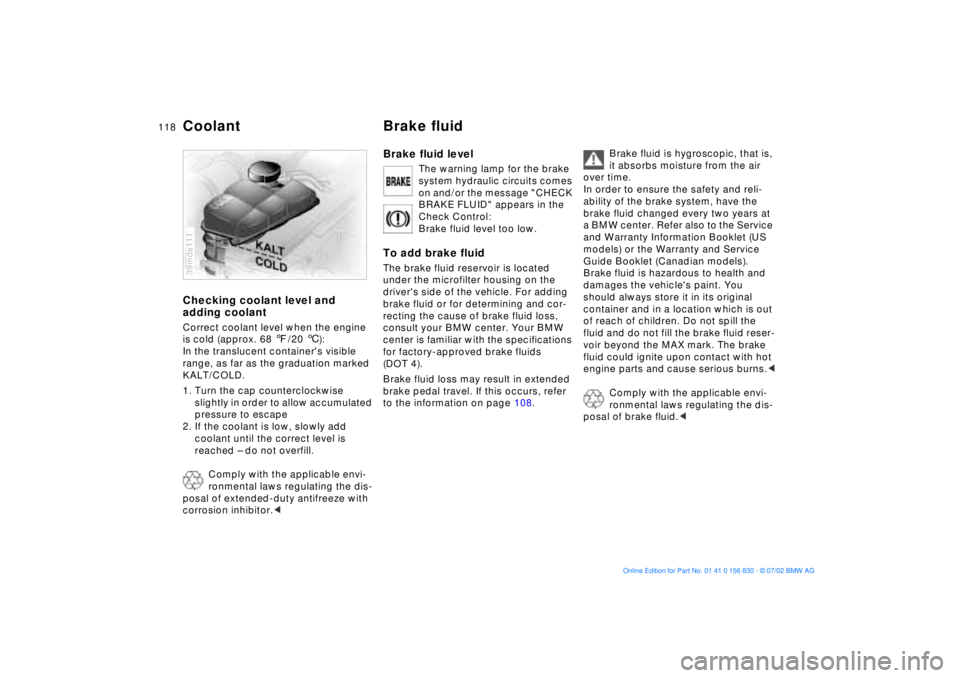
adding coolantCorrect coolant level when the engine
is cold (approx. 68 7/20 6):
In the translucent container's visible
range, as far as the graduation marked
KALT/COLD.
1. Turn the cap counterclockwise
slightly in order to allow accumulated
pressure to escape
2. If the coolant is low, slowly add
coolant until the correct level is
reached Ð do not overfill.
Comply with the applicable envi-
ronmental laws regulating the dis-
posal of extended-duty antifreeze with
corrosion inhibitor.<39mde111
Brake fluid level
The warning lamp for the brake
system hydraulic circuits comes
on and/or the message "CHECK
BRAKE FLUID" appears in the
Check Control:
Brake fluid level too low.
To add brake fluidThe brake fluid reservoir is located
under the microfilter housing on the
driver's side of the vehicle. For adding
brake fluid or for determining and cor-
recting the cause of brake fluid loss,
consult your BMW center. Your BMW
center is familiar with the specifications
for factory-approved brake fluids
(DOT 4).
Brake fluid loss may result in extended
brake pedal travel. If this occurs, refer
to the information on page 108.
Brake fluid is hygroscopic, that is,
it absorbs moisture from the air
over time.
In order to ensure the safety and reli-
ability of the brake system, have the
brake fluid changed every two years at
a BMW center. Refer also to the Service
and Warranty Information Booklet (US
models) or the Warranty and Service
Guide Booklet (Canadian models).
Brake fluid is hazardous to health and
damages the vehicle's paint. You
should always store it in its original
container and in a location which is out
of reach of children. Do not spill the
fluid and do not fill the brake fluid reser-
voir beyond the MAX mark. The brake
fluid could ignite upon contact with hot
engine parts and cause serious burns.<
Comply with the applicable envi-
ronmental laws regulating the dis-
posal of brake fluid.<
Page 120 of 155

120n
Technical modifications California Proposition 65 WarningLight-emitting diodes (LEDs)Light-emitting diodes installed behind
translucent lenses serve as the light
source for many of the controls and dis-
plays in your vehicle. The concept
behind their operation is related to that
employed for lasers.
Do not remove the protective lens
and avoid staring directly at the
unfiltered beam for extended periods
(several hours), as inflammation of the
iris could result.<
California laws require us to state the
following warning:
Engine exhaust, some of its con-
stituents, and certain vehicle com-
ponents contain or emit chemicals
known to the State of California to
cause cancer and birth defects and
reproductive harm. In addition, certain
fluids contained in vehicles and certain
products of component wear contain or
emit chemicals known to the State of
California to cause cancer and birth
defects or other reproductive harm.
Battery posts, terminals and related
accessories contain lead and lead
compounds. Wash your hands after
handling.
Used engine oil contains chemicals that
have caused cancer in laboratory ani-
mals. Always protect your skin by
washing thoroughly with soap and
water.<
Page 121 of 155
121n
OverviewControlsMaintenanceRepairsDataIndex
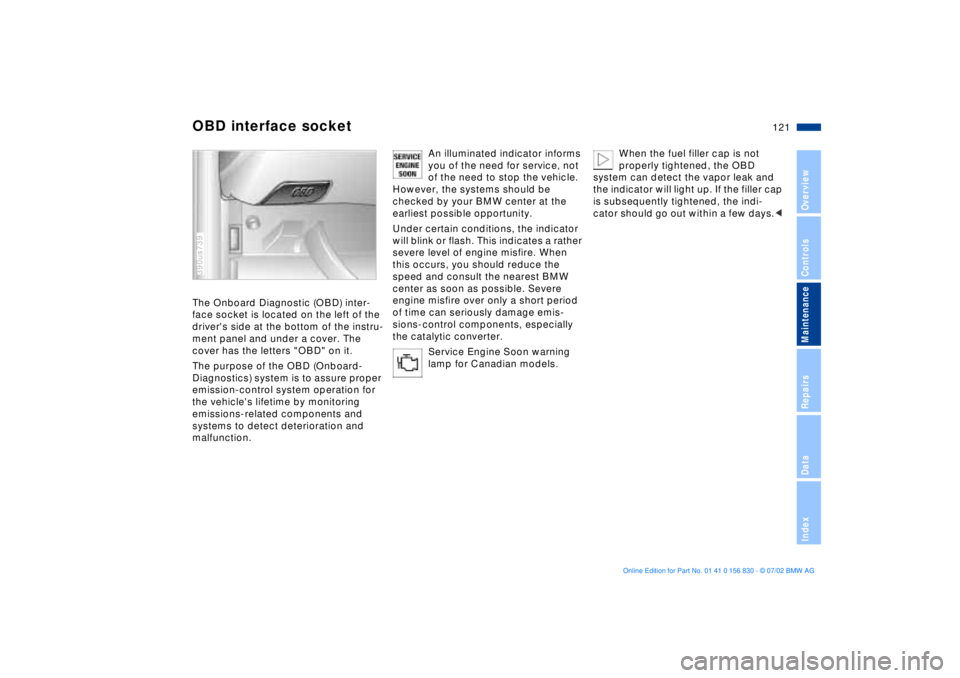
OBD interface socketThe Onboard Diagnostic (OBD) inter-
face socket is located on the left of the
driver's side at the bottom of the instru-
ment panel and under a cover. The
cover has the letters "OBD" on it.
The purpose of the OBD (Onboard-
Diagnostics) system is to assure proper
emission-control system operation for
the vehicle's lifetime by monitoring
emissions-related components and
systems to detect deterioration and
malfunction.390us739
An illuminated indicator informs
you of the need for service, not
of the need to stop the vehicle.
However, the systems should be
checked by your BMW center at the
earliest possible opportunity.
Under certain conditions, the indicator
will blink or flash. This indicates a rather
severe level of engine misfire. When
this occurs, you should reduce the
speed and consult the nearest BMW
center as soon as possible. Severe
engine misfire over only a short period
of time can seriously damage emis-
sions-control components, especially
the catalytic converter.
Service Engine Soon warning
lamp for Canadian models.
When the fuel filler cap is not
properly tightened, the OBD
system can detect the vapor leak and
the indicator will light up. If the filler cap
is subsequently tightened, the indi-
cator should go out within a few days.<
Page 124 of 155
124n
The onboard tool kit is located in the
luggage compartment lid.
Loosen the wingnut to open.
394de080
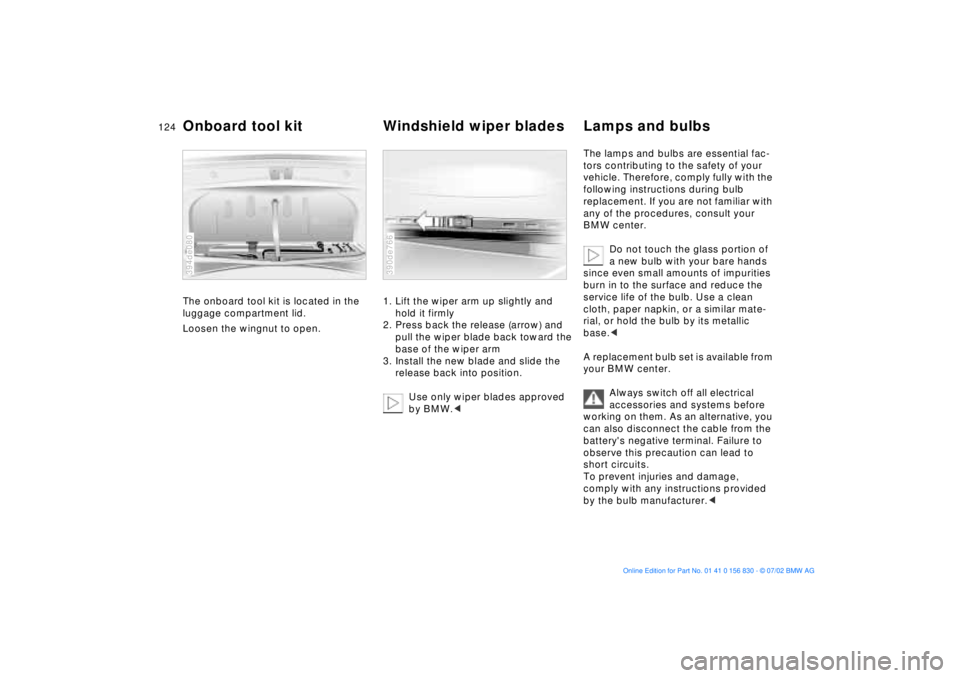
1. Lift the wiper arm up slightly and
hold it firmly
2. Press back the release (arrow) and
pull the wiper blade back toward the
base of the wiper arm
3. Install the new blade and slide the
release back into position.
Use only wiper blades approved
by BMW.< 390de766
The lamps and bulbs are essential fac-
tors contributing to the safety of your
vehicle. Therefore, comply fully with the
following instructions during bulb
replacement. If you are not familiar with
any of the procedures, consult your
BMW center.
Do not touch the glass portion of
a new bulb with your bare hands
since even small amounts of impurities
burn in to the surface and reduce the
service life of the bulb. Use a clean
cloth, paper napkin, or a similar mate-
rial, or hold the bulb by its metallic
base.<
A replacement bulb set is available from
your BMW center.
Always switch off all electrical
accessories and systems before
working on them. As an alternative, you
can also disconnect the cable from the
battery's negative terminal. Failure to
observe this precaution can lead to
short circuits.
To prevent injuries and damage,
comply with any instructions provided
by the bulb manufacturer.<
Onboard tool kit Windshield wiper blades Lamps and bulbs
Page 126 of 155
126n
Lamps and bulbsSide turn signal indicators5 watt bulb
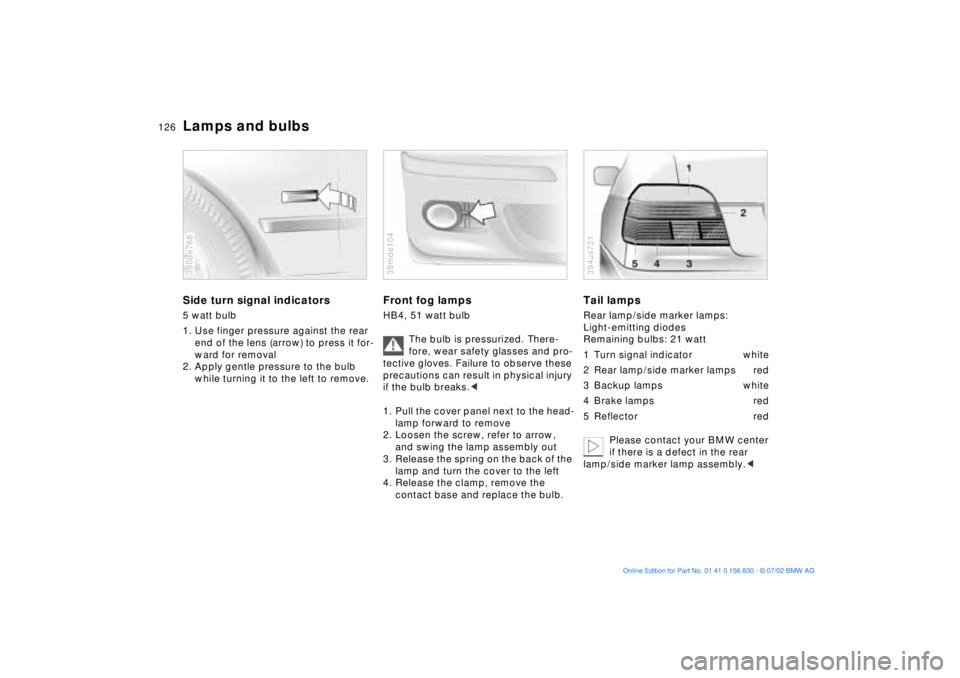
1. Use finger pressure against the rear
end of the lens (arrow) to press it for-
ward for removal
2. Apply gentle pressure to the bulb
while turning it to the left to remove.390de768
Front fog lamps HB4, 51 watt bulb
The bulb is pressurized. There-
fore, wear safety glasses and pro-
tective gloves. Failure to observe these
precautions can result in physical injury
if the bulb breaks.<
1. Pull the cover panel next to the head-
lamp forward to remove
2. Loosen the screw, refer to arrow,
and swing the lamp assembly out
3. Release the spring on the back of the
lamp and turn the cover to the left
4. Release the clamp, remove the
contact base and replace the bulb.39mde104
Tail lamps Rear lamp/side marker lamps:
Light-emitting diodes
Remaining bulbs: 21 watt
1 Turn signal indicator white
2 Rear lamp/side marker lamps red
3 Backup lamps white
4 Brake lamps red
5 Reflector red
Please contact your BMW center
if there is a defect in the rear
lamp/side marker lamp assembly.<394us721
Page 128 of 155
128n
Repairing a flat tire
Precautions in case of a flat tire:
Stop the vehicle as far as possible
from passing traffic. Switch on the
hazard warning flashers.
Turn the steering wheel to the straight-
ahead position, remove the key and
engage the steering lock. Shift into 1st
or reverse and engage the parking
brake.
All passengers should be outside the
vehicle and well away from your imme-
diate working area (behind a guardrail,
for instance).
If necessary, set up your warning tri-
angle or portable hazard warning lamp
on the roadside at an appropriate dis-
tance from the rear of the vehicle.
Comply with all safety guidelines and
regulations.<
M Mobility systemFor repairing a flat tire, you will find an
M Mobility system in the BMW M5. With
the aid of this system, you can apply a
liquid sealant to the inside of the tire,
thereby sealing off the damaged area,
and then continue driving.
The M Mobility system makes the trans-
port of a spare wheel superfluous and
minimizes the curb weight.
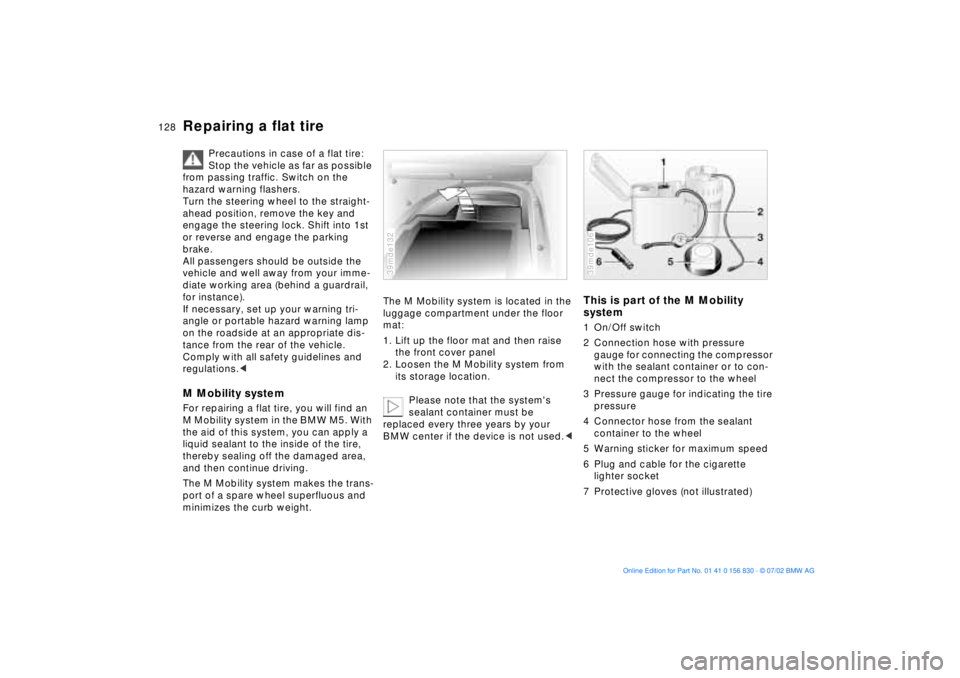
The M Mobility system is located in the
luggage compartment under the floor
mat:
1. Lift up the floor mat and then raise
the front cover panel
2. Loosen the M Mobility system from
its storage location.
Please note that the system's
sealant container must be
replaced every three years by your
BMW center if the device is not used.<39mde132
This is part of the M Mobility
system1 On/Off switch
2 Connection hose with pressure
gauge for connecting the compressor
with the sealant container or to con-
nect the compressor to the wheel
3 Pressure gauge for indicating the tire
pressure
4 Connector hose from the sealant
container to the wheel
5 Warning sticker for maximum speed
6 Plug and cable for the cigarette
lighter socket
7 Protective gloves (not illustrated)39mde106
Page 129 of 155
129n
OverviewControlsMaintenanceRepairsDataIndex
Repairing a flat tireUse the M Mobility system
If possible, leave the foreign
object in the tire.<
Do not exceed the maximum
speeds indicated below, as an
accident could result.
Before you use the M Mobility system,
read the warnings and danger notices
on the device carefully.<
1. Remove the warning sticker 5 for
maximum speed that is located on
top of the device and affix it to the
steering wheel
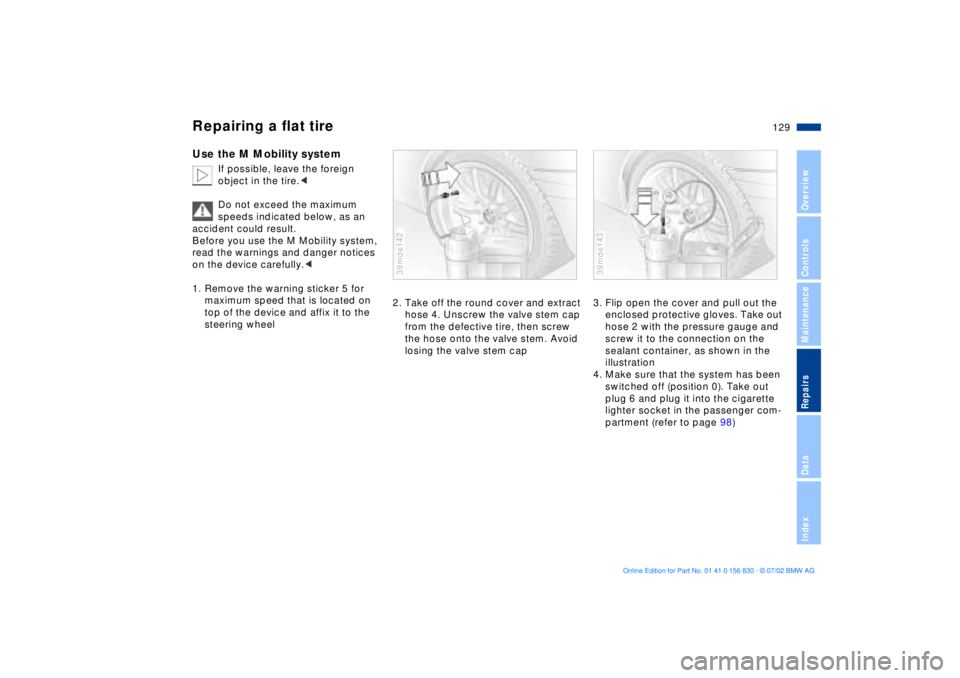
2. Take off the round cover and extract
hose 4. Unscrew the valve stem cap
from the defective tire, then screw
the hose onto the valve stem. Avoid
losing the valve stem cap39mde142
3. Flip open the cover and pull out the
enclosed protective gloves. Take out
hose 2 with the pressure gauge and
screw it to the connection on the
sealant container, as shown in the
illustration
4. Make sure that the system has been
switched off (position 0). Take out
plug 6 and plug it into the cigarette
lighter socket in the passenger com-
partment (refer to page 98)39mde143