2003 BMW M5 SEDAN maintenance
[x] Cancel search: maintenancePage 45 of 155
45n
OverviewControlsMaintenanceRepairsDataIndex
Seat, mirror and steering wheel memory
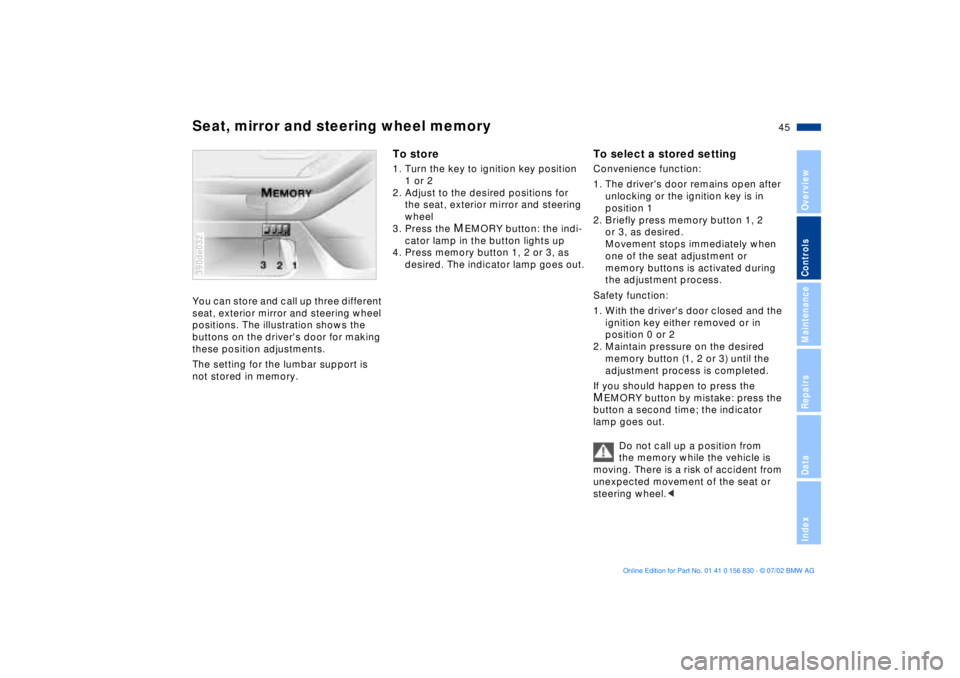
You can store and call up three different
seat, exterior mirror and steering wheel
positions. The illustration shows the
buttons on the driver's door for making
these position adjustments.
The setting for the lumbar support is
not stored in memory. 390de032
To store1. Turn the key to ignition key position
1 or 2
2. Adjust to the desired positions for
the seat, exterior mirror and steering
wheel
3. Press the
MEMORY button: the indi-
cator lamp in the button lights up
4. Press memory button 1, 2 or 3, as
desired. The indicator lamp goes out.
To select a stored settingConvenience function:
1. The driver's door remains open after
unlocking or the ignition key is in
position 1
2. Briefly press memory button 1, 2
or 3, as desired.
Movement stops immediately when
one of the seat adjustment or
memory buttons is activated during
the adjustment process.
Safety function:
1. With the driver's door closed and the
ignition key either removed or in
position 0 or 2
2. Maintain pressure on the desired
memory button (1, 2 or 3) until the
adjustment process is completed.
If you should happen to press the MEMORY button by mistake: press the
button a second time; the indicator
lamp goes out.
Do not call up a position from
the memory while the vehicle is
moving. There is a risk of accident from
unexpected movement of the seat or
steering wheel.<
Page 47 of 155
47n
OverviewControlsMaintenanceRepairsDataIndex
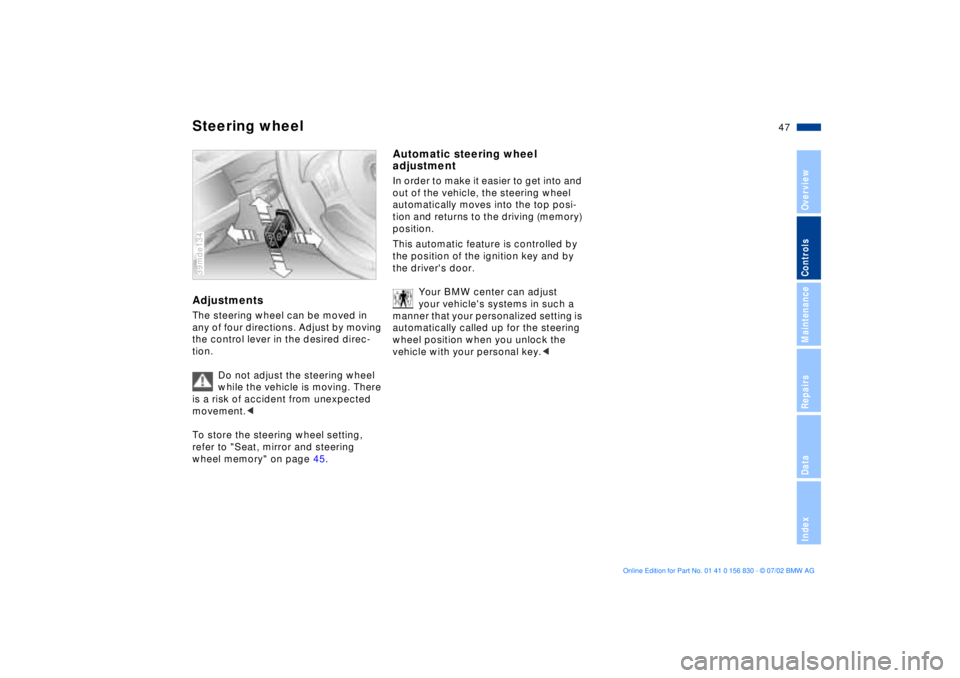
Steering wheelAdjustmentsThe steering wheel can be moved in
any of four directions. Adjust by moving
the control lever in the desired direc-
tion.
Do not adjust the steering wheel
while the vehicle is moving. There
is a risk of accident from unexpected
movement.<
To store the steering wheel setting,
refer to "Seat, mirror and steering
wheel memory" on page 45.39mde134
Automatic steering wheel
adjustmentIn order to make it easier to get into and
out of the vehicle, the steering wheel
automatically moves into the top posi-
tion and returns to the driving (memory)
position.
This automatic feature is controlled by
the position of the ignition key and by
the driver's door.
Your BMW center can adjust
your vehicle's systems in such a
manner that your personalized setting is
automatically called up for the steering
wheel position when you unlock the
vehicle with your personal key.<
Page 49 of 155
49n
OverviewControlsMaintenanceRepairsDataIndex
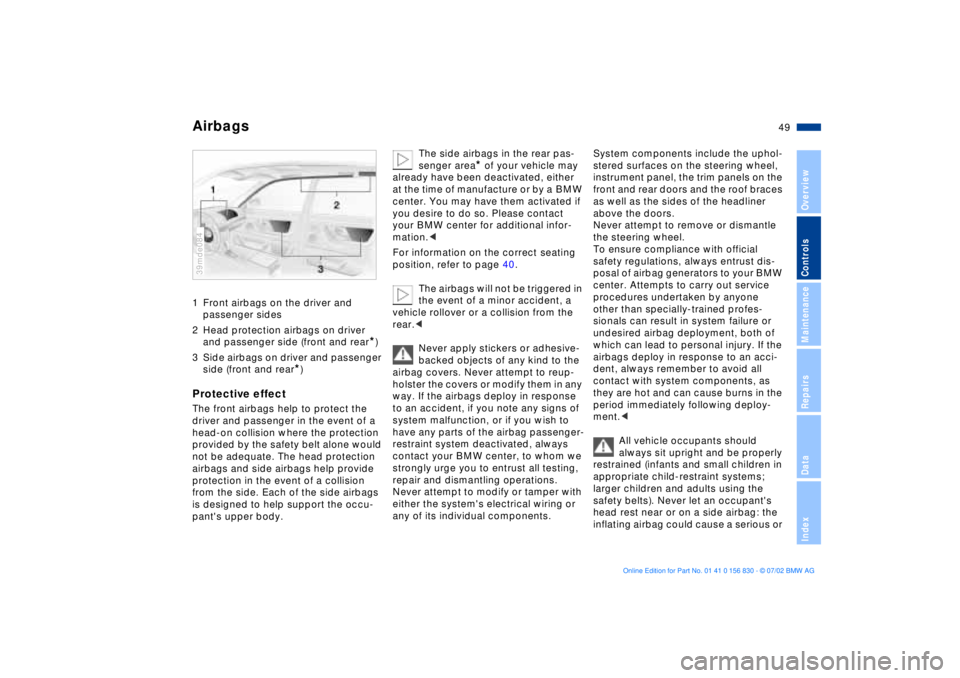
Airbags1 Front airbags on the driver and
passenger sides
2 Head protection airbags on driver
and passenger side (front and rear
*)
3 Side airbags on driver and passenger
side (front and rear
*)
Protective effectThe front airbags help to protect the
driver and passenger in the event of a
head-on collision where the protection
provided by the safety belt alone would
not be adequate. The head protection
airbags and side airbags help provide
protection in the event of a collision
from the side. Each of the side airbags
is designed to help support the occu-
pant's upper body.39mde084
The side airbags in the rear pas-
senger area
* of your vehicle may
already have been deactivated, either
at the time of manufacture or by a BMW
center. You may have them activated if
you desire to do so. Please contact
your BMW center for additional infor-
mation.<
For information on the correct seating
position, refer to page 40.
The airbags will not be triggered in
the event of a minor accident, a
vehicle rollover or a collision from the
rear.<
Never apply stickers or adhesive-
backed objects of any kind to the
airbag covers. Never attempt to reup-
holster the covers or modify them in any
way. If the airbags deploy in response
to an accident, if you note any signs of
system malfunction, or if you wish to
have any parts of the airbag passenger-
restraint system deactivated, always
contact your BMW center, to whom we
strongly urge you to entrust all testing,
repair and dismantling operations.
Never attempt to modify or tamper with
either the system's electrical wiring or
any of its individual components.
System components include the uphol-
stered surfaces on the steering wheel,
instrument panel, the trim panels on the
front and rear doors and the roof braces
as well as the sides of the headliner
above the doors.
Never attempt to remove or dismantle
the steering wheel.
To ensure compliance with official
safety regulations, always entrust dis-
posal of airbag generators to your BMW
center. Attempts to carry out service
procedures undertaken by anyone
other than specially-trained profes-
sionals can result in system failure or
undesired airbag deployment, both of
which can lead to personal injury. If the
airbags deploy in response to an acci-
dent, always remember to avoid all
contact with system components, as
they are hot and can cause burns in the
period immediately following deploy-
ment.<
All vehicle occupants should
always sit upright and be properly
restrained (infants and small children in
appropriate child-restraint systems;
larger children and adults using the
safety belts). Never let an occupant's
head rest near or on a side airbag: the
inflating airbag could cause a serious or
Page 51 of 155
51n
OverviewControlsMaintenanceRepairsDataIndex
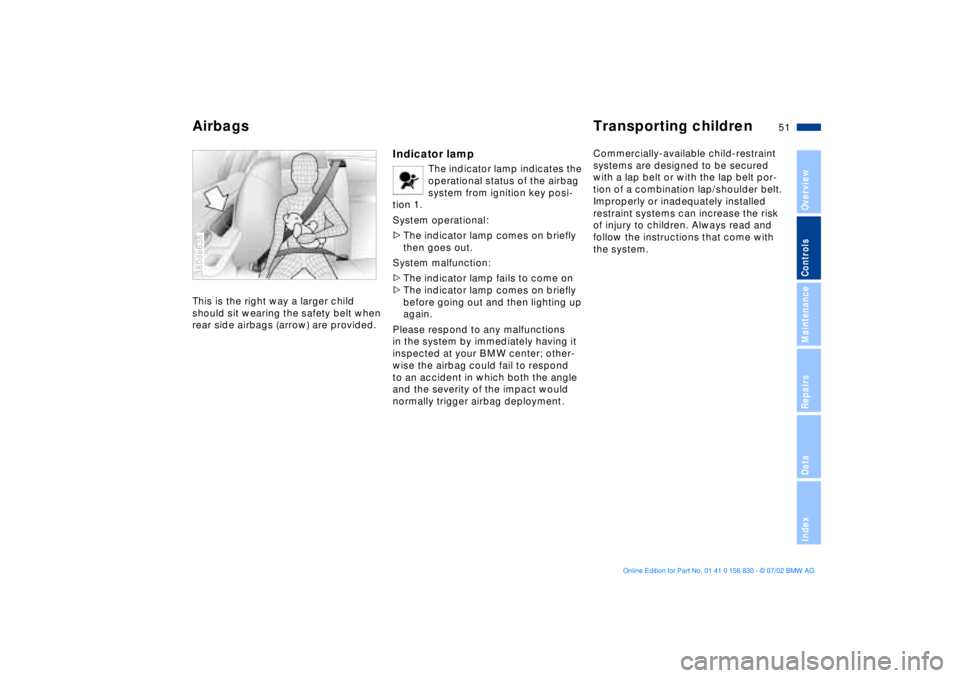
Airbags Transporting childrenThis is the right way a larger child
should sit wearing the safety belt when
rear side airbags (arrow) are provided.380de638
Indicator lamp
The indicator lamp indicates the
operational status of the airbag
system from ignition key posi-
tion 1.
System operational:
>The indicator lamp comes on briefly
then goes out.
System malfunction:
>The indicator lamp fails to come on
>The indicator lamp comes on briefly
before going out and then lighting up
again.
Please respond to any malfunctions
in the system by immediately having it
inspected at your BMW center; other-
wise the airbag could fail to respond
to an accident in which both the angle
and the severity of the impact would
normally trigger airbag deployment.
Commercially-available child-restraint
systems are designed to be secured
with a lap belt or with the lap belt por-
tion of a combination lap/shoulder belt.
Improperly or inadequately installed
restraint systems can increase the risk
of injury to children. Always read and
follow the instructions that come with
the system.
Page 53 of 155
53n
OverviewControlsMaintenanceRepairsDataIndex
Transporting children safelyThis important precaution is intended to
maximize the distance between the
airbag and the child. Older children
should be tightly secured with a safety
belt, after they have outgrown a booster
seat that is appropriate for their age,
height and weight.
Younger children should be secured in
an appropriate forward-facing child-
restraint system that has first been
properly secured with a safety belt.
Never install a rearward-facing child-
restraint system in the front passenger
seat. We strongly urge you to carefully
read and comply with the instructions
for installation and use provided by the
child restraint's manufacturer when-
ever you use such a device.
Be sure that all occupants (of all ages)
remain properly and securely restrained
at all times.<
All rear seating positions in your vehicle
meet the recommendations of SAE
J1819, an industry-recommended prac-
tice for securing child-restraint systems
in motor vehicles.
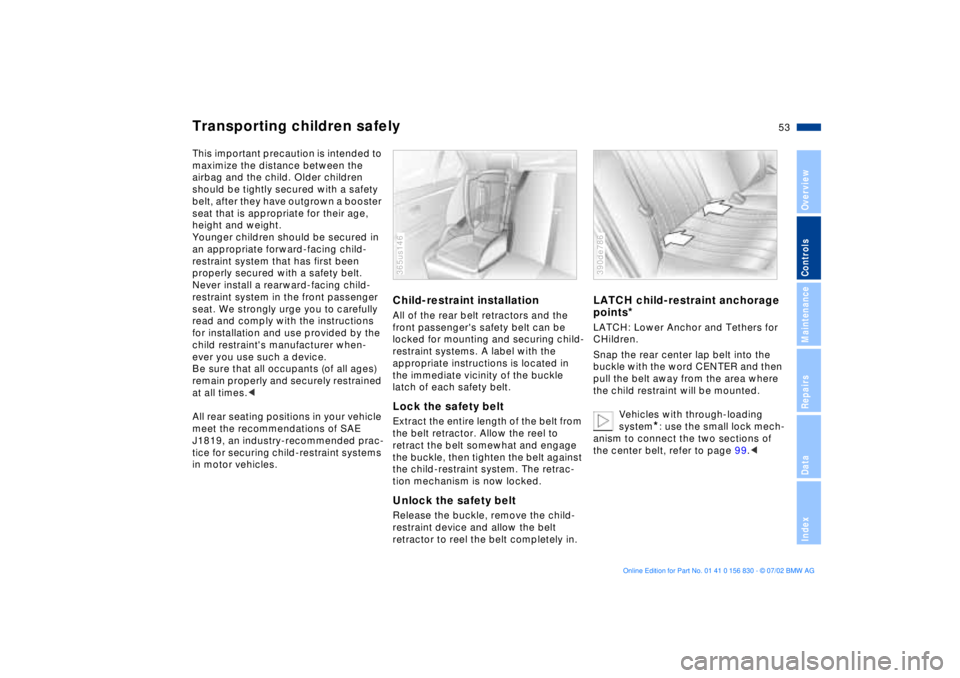
Child-restraint installationAll of the rear belt retractors and the
front passenger's safety belt can be
locked for mounting and securing child-
restraint systems. A label with the
appropriate instructions is located in
the immediate vicinity of the buckle
latch of each safety belt.Lock the safety beltExtract the entire length of the belt from
the belt retractor. Allow the reel to
retract the belt somewhat and engage
the buckle, then tighten the belt against
the child-restraint system. The retrac-
tion mechanism is now locked.Unlock the safety beltRelease the buckle, remove the child-
restraint device and allow the belt
retractor to reel the belt completely in.365us146
LATCH child-restraint anchorage
points
*
LATCH: Lower Anchor and Tethers for
CHildren.
Snap the rear center lap belt into the
buckle with the word CENTER and then
pull the belt away from the area where
the child restraint will be mounted.
Vehicles with through-loading
system
*: use the small lock mech-
anism to connect the two sections of
the center belt, refer to page 99.<
390de786
Page 55 of 155
55n
OverviewControlsMaintenanceRepairsDataIndex
Vehicle Memory, Key Memory How the system functionsNo doubt you have reflected at one
time or another on how great it would
be if you could permanently configure
your vehicle's various features and
adjustments to mirror your own indi-
vidual preferences. In engineering your
vehicle, BMW has incorporated a
number of options for personal adjust-
ment that can be programmed into your
vehicle at your BMW center.
The available configuration data fall into
two categories, according to whether
their primary orientation is the vehicle
("Vehicle Memory") or the individual
("Key Memory"). Provided that each
person has a separate remote-control
key, you can have your BMW center
enter two personal adjustments for two
different individuals into the system.463de029
When your vehicle is unlocked with the
remote control, the vehicle recognizes
the individual user by means of a data
exchange with the key, and makes
adjustments accordingly.
In order for you to distinguish between
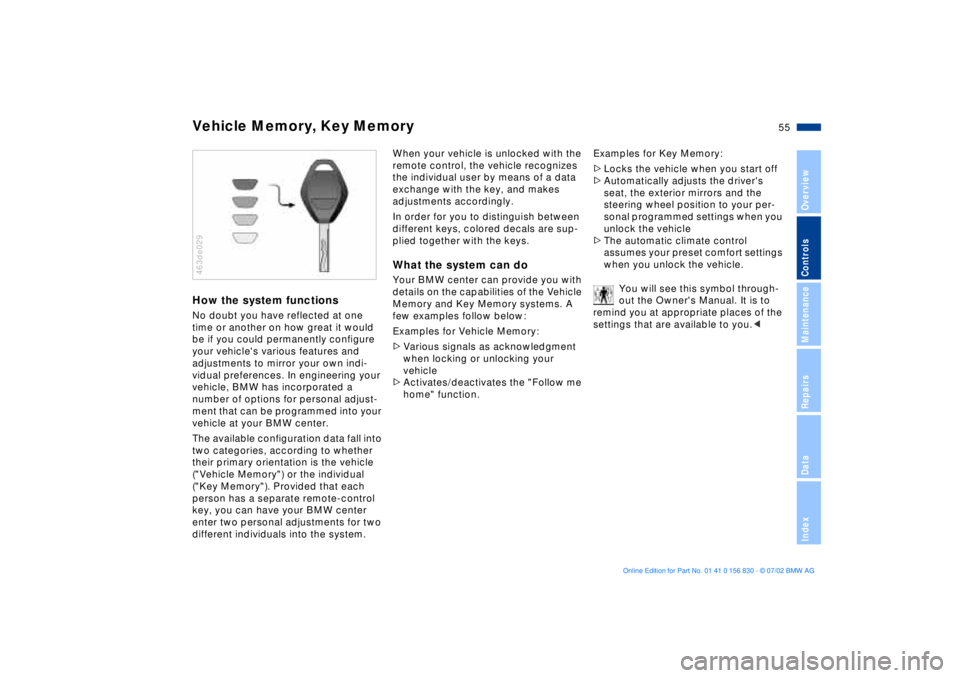
different keys, colored decals are sup-
plied together with the keys.What the system can doYour BMW center can provide you with
details on the capabilities of the Vehicle
Memory and Key Memory systems. A
few examples follow below:
Examples for Vehicle Memory:
>Various signals as acknowledgment
when locking or unlocking your
vehicle
>Activates/deactivates the "Follow me
home" function.Examples for Key Memory:
>Locks the vehicle when you start off
>Automatically adjusts the driver's
seat, the exterior mirrors and the
steering wheel position to your per-
sonal programmed settings when you
unlock the vehicle
>The automatic climate control
assumes your preset comfort settings
when you unlock the vehicle.
You will see this symbol through-
out the Owner's Manual. It is to
remind you at appropriate places of the
settings that are available to you.<
Page 57 of 155
57n
OverviewControlsMaintenanceRepairsDataIndex
Starting the engine Switching off the engine Starting engineDo not press the accelerator pedal
while starting the engine.
While it is important not to release
the key prematurely, you should
also avoid allowing the starter to
operate continuously for more than
20 seconds at a time. Release the igni-
tion key immediately when the engine
starts.<
Do not warm up the engine by allowing
it to run with the vehicle parked.
Instead, you should drive away immedi-
ately while taking care to avoid high
engine speeds until the engine warms
to its normal operating temperature.
If the engine does not start on the first
attempt (the engine is very hot or cold,
for instance):
>Press the accelerator pedal halfway
down while engaging the starter.
Cold starts at extremely low tempera-
tures of roughly +57 (Ð156) or below
and at altitudes of over 3,300 ft
(1,000 m):
>Allow the starter to turn somewhat
longer (approx. 10 seconds) during
your initial starting attempt.
The engine's idle speed is automatically
regulated by the computerized engine-
management system. A brief period at
high idle is normal just after starting; the
idle speed should gradually return to
normal as the engine warms. Should
the engine fail to revert to its normal
idle speed after warming, a problem
may exist: please refer the problem to
your BMW center.
To prevent the battery from discharging,
always switch off any electrical devices
not in use, as well as the ignition when
the vehicle is not being driven.
Extended starting attempts,
characterized by excessively fre-
quent or long periods with the
starter engaged, can lead to catalyst
damage.<
When driving, standing at idle,
and parking the vehicle, take care
to avoid contact between the exhaust
system and flammable materials (grass,
hay, leaves, etc.). Such contact could
lead to a fire, resulting in serious per-
sonal injury and property damage.<
Turn the ignition key to position 1 or 0.
Do not remove the ignition key
while the vehicle is still moving. If
you do so, the steering will lock, making
it impossible to steer the vehicle.
When you leave the vehicle, always
remove the ignition key and engage the
steering lock.
Always engage the parking brake
when parking on hills and inclined sur-
faces, as even first gear or reverse may
not provide adequate resistance to
rolling.<
Page 59 of 155
59n
OverviewControlsMaintenanceRepairsDataIndex
Manual transmission Turn signal/Headlamp flasherReverse Select only when the vehicle is com-
pletely stopped. Press the gearshift
lever to the left to overcome the resis-
tance.
As you do this, the backup lamps will
turn on automatically when the ignition
key is in position 2.
Do not hold the vehicle in place on
slopes by slipping or "riding" the
clutch. Use the parking brake instead.
Riding the clutch causes the clutch
assembly to wear out prematurely.<
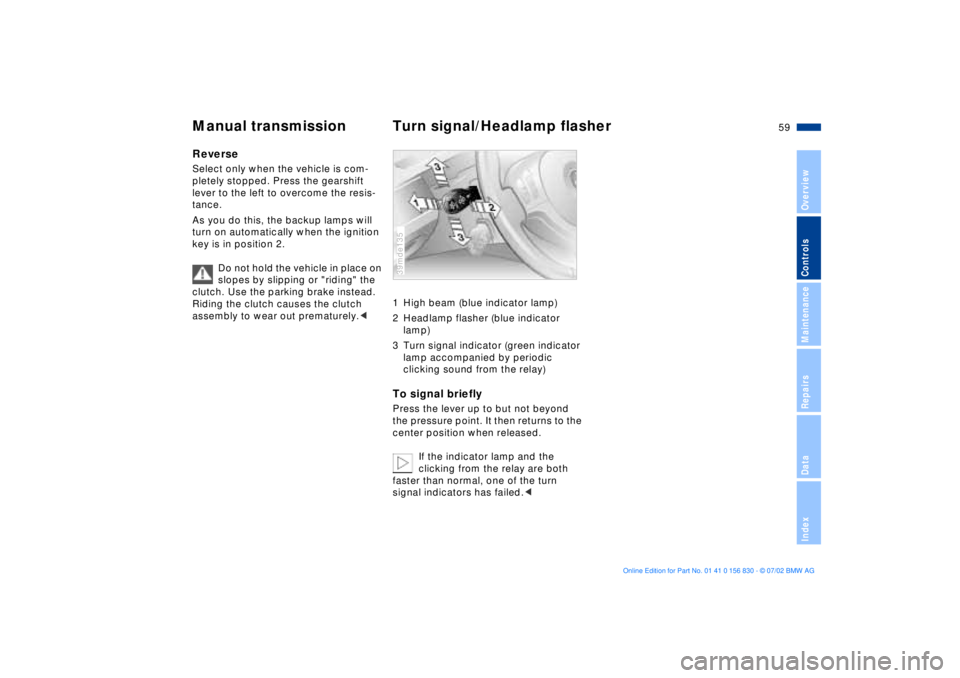
1 High beam (blue indicator lamp)
2 Headlamp flasher (blue indicator
lamp)
3 Turn signal indicator (green indicator
lamp accompanied by periodic
clicking sound from the relay)To signal brieflyPress the lever up to but not beyond
the pressure point. It then returns to the
center position when released.
If the indicator lamp and the
clicking from the relay are both
faster than normal, one of the turn
signal indicators has failed.<39mde135