2003 BMW M5 SEDAN display
[x] Cancel search: displayPage 76 of 155
76n
ComputerSpeedYou can call up a display of the
vehicle's average speed.
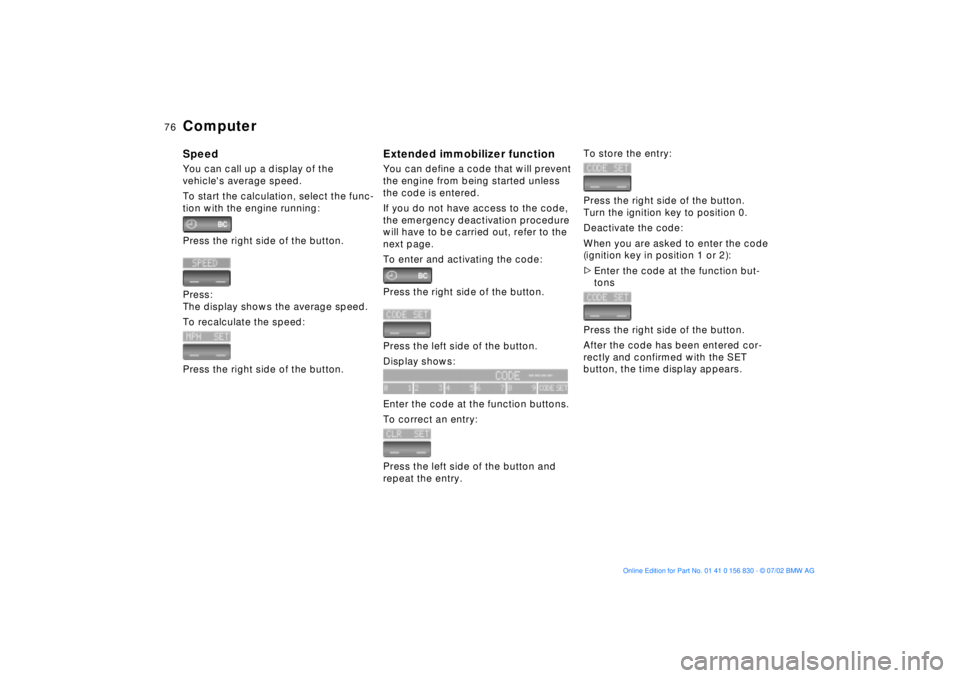
To start the calculation, select the func-
tion with the engine running:
Press the right side of the button.
Press:
The display shows the average speed.
To recalculate the speed:
Press the right side of the button.
Extended immobilizer functionYou can define a code that will prevent
the engine from being started unless
the code is entered.
If you do not have access to the code,
the emergency deactivation procedure
will have to be carried out, refer to the
next page.
To enter and activating the code:
Press the right side of the button.
Press the left side of the button.
Display shows:
Enter the code at the function buttons.
To correct an entry:
Press the left side of the button and
repeat the entry.
To store the entry:
Press the right side of the button.
Turn the ignition key to position 0.
Deactivate the code:
When you are asked to enter the code
(ignition key in position 1 or 2):
>Enter the code at the function but-
tons
Press the right side of the button.
After the code has been entered cor-
rectly and confirmed with the SET
button, the time display appears.
Page 77 of 155
77n
OverviewControlsMaintenanceRepairsDataIndex
ComputerAfter three incorrect code entries,
or three attempts to start the engine
without a code entry, the alarm will
sound for 30 seconds on vehicles
equipped with an alarm system.
Setting the alarm in an emergency:
If you have forgotten the code, proceed
as follows:
1. Disconnect the battery, wait about
2 minutes, then reconnect it. Note
that on vehicles with an alarm
system, the alarm will sound
2. Turn the ignition key to position 1:
The time display will count down for
the next ten minutes
3. After ten minutes, start the engine.
If the code becomes available
again in the meantime, it can be
entered during the waiting period after
pressing the CODE button.<
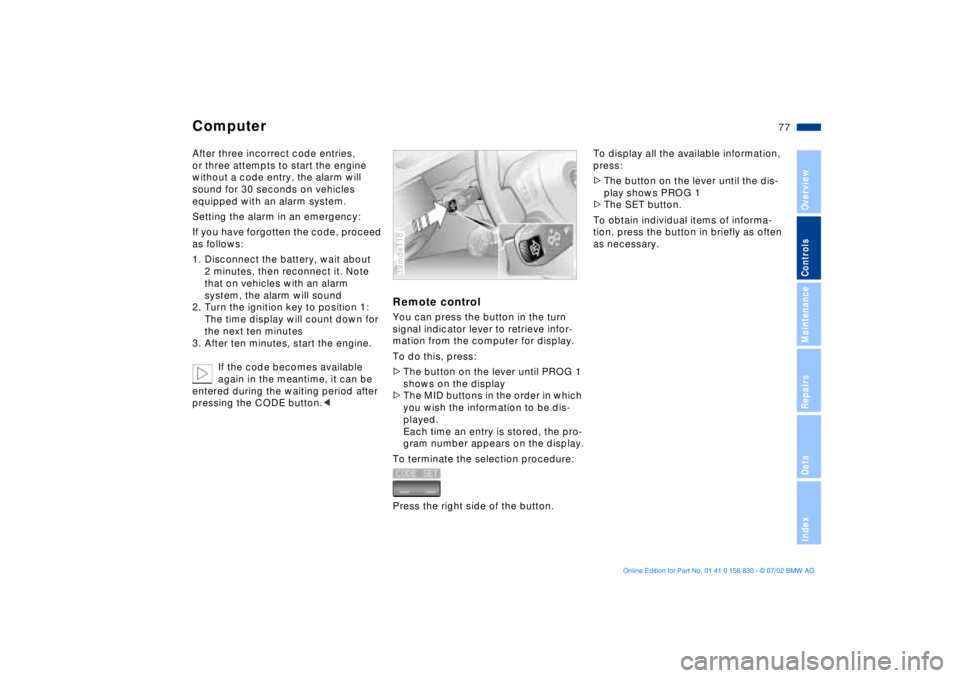
Remote controlYou can press the button in the turn
signal indicator lever to retrieve infor-
mation from the computer for display.
To do this, press:
>The button on the lever until PROG 1
shows on the display
>The MID buttons in the order in which
you wish the information to be dis-
played.
Each time an entry is stored, the pro-
gram number appears on the display.
To terminate the selection procedure:
Press the right side of the button.39mde118
To display all the available information,
press:
>The button on the lever until the dis-
play shows PROG 1
>The SET button.
To obtain individual items of informa-
tion, press the button in briefly as often
as necessary.
Page 83 of 155
83n
OverviewControlsMaintenanceRepairsDataIndex
Flat Tire MonitorFlat tireIn the event of a flat tire, the message,
"TIRE DEFECT" will appear in the
Check Control. This visual alert will be
accompanied by a gong.
If this occurs, reduce vehicle speed
immediately and stop the vehicle. Avoid
hard braking and overcorrecting at the
steering wheel.
Correct the flat tire using the M Mobility
system (refer to page 128).
The Flat Tire Monitor cannot alert
you to severe and sudden tire
damage caused by external factors.
Another factor which the Flat Tire Mon-
itor does not recognize is the balanced
and very gradual pressure loss that
takes place in all tires over an extended
period of time.<
Check the tire inflation pressure
on a regular basis and correct if
necessary. Refer to page 22.
Do not carry out any kind of system
activation when using snow chains.
Under these kinds of conditions, false
warnings and unidentified losses in
pressure are possible.
In certain circumstances, when driving
on snow-covered or slippery road sur-
faces, there may be a delay in identi-
fying any loss in inflation pressure.
Performance-oriented driving (slip at
the drive wheels, high levels of lateral
acceleration) can also delay the appear-
ance of status messages in the Flat Tire
Monitor's display panel.<
System malfunctionsThe message "TIRECONTROL INAC-
TIVE" appears in the Check Control
and remains on until the problem is cor-
rected.
The same message is displayed if there
is a system malfunction.
Please refer the problem to your BMW
center.
Page 87 of 155
87n
OverviewControlsMaintenanceRepairsDataIndex
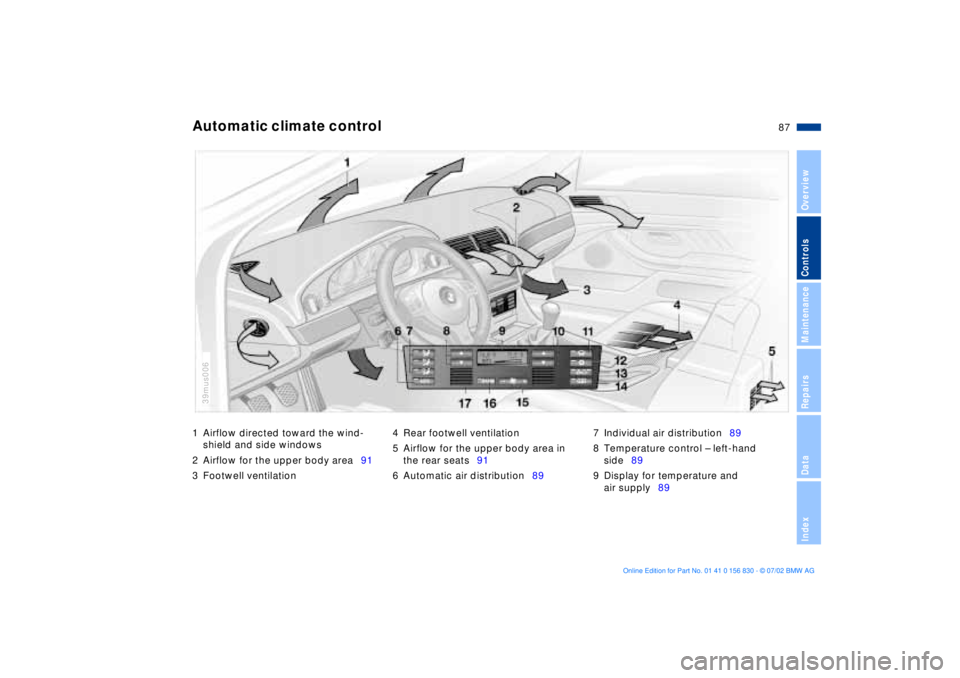
1 Airflow directed toward the wind-
shield and side windows
2 Airflow for the upper body area91
3 Footwell ventilation4 Rear footwell ventilation
5 Airflow for the upper body area in
the rear seats91
6 Automatic air distribution897 Individual air distribution89
8 Temperature control Ð left-hand
side89
9 Display for temperature and
air supply89Automatic climate control
39mus006
Page 89 of 155
89n
OverviewControlsMaintenanceRepairsDataIndex
Automatic climate controlTips for pleasant drivingUse the automatic system (switch on
with AUTO button 6). Select an interior
temperature that you find comfortable.
The following description will lead you
through additional individual settings.
Your BMW center can program
the settings of your vehicle in such
a manner that, when you unlock the
vehicle with your individualized key,
your own personalized setting for the
automatic climate control is initiated.
assumes the adjustment of
the air distribution and the air supply for
you and Ð in addition to that Ð adapts
the temperature to external influences
(summer, winter) to meet preferences
you can specify.
Individual air distribution
You also have the option of
individually configuring the
air distribution pattern to
suit your own personal pref-
erences. While the AUTO
program is then deactivated, the auto-
matic airflow control remains in opera-
tion. The system directs air to the win-
dows , the upper body and into
the footwells . You can reactivate the
automatic air distribution mode by
selecting the AUTO button.
Temperature
You can make individual
temperature settings on the
driver's side or the front
passenger side. The figures in the dis-
play provide a general indication of
interior temperature. We recommend a
setting of 72 7 (22 6) for a congenial
interior climate, even when the air con-
ditioner is in operation. When you start
the vehicle, the system ensures that the
selected temperature is achieved as
quickly as possible. It then maintains
this temperature, regardless of the
season.
Air supply
In the AUTO program, the
airflow is controlled auto-
matically. AUTO will appear in display 9,
refer to the overview on page 87.
Use "+" and "Ð" to vary the airflow.
Your setting is displayed with bars and
the automatic air supply is switched off.
The automatic air distribution setting is
maintained. You can reactivate the
automatic air supply by pressing the
AUTO button.
When you press "Ð" during operation at
the lowest blower speed, all displays
are canceled: the blower, heating and
air conditioning are switched off. The
outside air supply is deactivated. By
pressing the desired button on the
automatic climate control (except MAX
button 16), you can switch the system
back on.
To defrost windows and remove
condensation
This program quickly
removes ice and conden-
sation from the windshield and the side
windows.
Page 90 of 155
90n
Automatic climate control Air conditioning
The air is cooled and
dehumidified and Ð
depending on the temperature setting Ð
warmed again when the air conditioning
is switched on.
Depending on the weather, the wind-
shield may fog over briefly when the
engine is started. You can reduce con-
densation forming on the windows by
switching on the air conditioning.
Condensation forms in the air
condition system during opera-
tion, which then exits under the vehicle.
Traces of condensed water of this kind
are thus normal.<
Maximum cooling
At outside temperatures
above roughly 41 7 (5 6)
this program furnishes maximum
cooling whenever the engine is running.
The temperature displays 9 jump to
60 7 (16 6), the system reverts to
operating in the recirculated-air mode
and maximum airflow emerges from the
vent outlets only. That is why you need
to keep these open if you select this
program.
Automatic recirculated-air control
You can respond to
unpleasant external odors
by temporarily excluding the flow of
outside air. The system then recircu-
lates the air currently within the vehicle.
By repeated actuations of the button,
you can select one of three different
operation modes.
>Indicator lamps off: outside airflow
operational
>Left-hand indicator lamp on Ð AUC
mode: the system recognizes pollut-
ants in the outside air and blocks the
flow of air when necessary. The
system then recirculates the air cur-
rently within the vehicle.
Depending on the air quality, the
automatic system then switches back
and forth between outside air supply
and recirculation of the air within the
vehicle
>Right indicator lamp on Ð recircu-
lated-air mode: the flow of external
air into the vehicle is permanently
blocked. The system then recirculates
the air currently within the vehicle.
If the windows should fog over in
the recirculated-air mode, switch
it off and increase the air supply as
required.<
Rear window defroster
When the rear window
defroster is activated, the
indicator lamp comes on. The rear
window defroster switches off automat-
ically.
Residual heating mode
The heat which is stored in
the engine is utilized for
heating the interior when the engine
has been switched off (while waiting at
a railroad crossing, for instance). In
ignition key position 1, you can alter the
settings of the automatic climate con-
trol. With the ignition key in posi-tion 0,
the system automatically directs heated
air to the windshield, side windows and
footwells.
This function is available for oper-
ation when the outside tempera-
ture is below approx. 59 7 (15 6),
with the engine warm from recent oper-
ation and an adequate charge in the
battery. The LED on the button will light
up when all conditions have been
met.<
Page 119 of 155
119n
OverviewControlsMaintenanceRepairsDataIndex
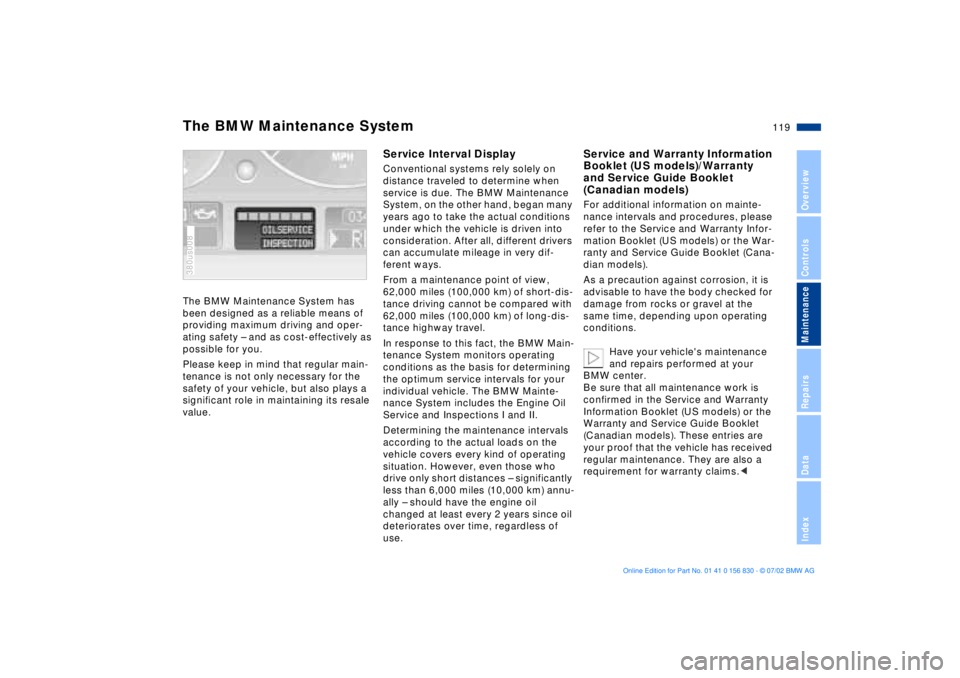
The BMW Maintenance System has
been designed as a reliable means of
providing maximum driving and oper-
ating safety Ð and as cost-effectively as
possible for you.
Please keep in mind that regular main-
tenance is not only necessary for the
safety of your vehicle, but also plays a
significant role in maintaining its resale
value. 380us008
Service Interval DisplayConventional systems rely solely on
distance traveled to determine when
service is due. The BMW Maintenance
System, on the other hand, began many
years ago to take the actual conditions
under which the vehicle is driven into
consideration. After all, different drivers
can accumulate mileage in very dif-
ferent ways.
From a maintenance point of view,
62,000 miles (100,000 km) of short-dis-
tance driving cannot be compared with
62,000 miles (100,000 km) of long-dis-
tance highway travel.
In response to this fact, the BMW Main-
tenance System monitors operating
conditions as the basis for determining
the optimum service intervals for your
individual vehicle. The BMW Mainte-
nance System includes the Engine Oil
Service and Inspections I and II.
Determining the maintenance intervals
according to the actual loads on the
vehicle covers every kind of operating
situation. However, even those who
drive only short distances Ð significantly
less than 6,000 miles (10,000 km) annu-
ally Ð should have the engine oil
changed at least every 2 years since oil
deteriorates over time, regardless of
use.
Service and Warranty Information
Booklet (US models)/Warranty
and Service Guide Booklet
(Canadian models)For additional information on mainte-
nance intervals and procedures, please
refer to the Service and Warranty Infor-
mation Booklet (US models) or the War-
ranty and Service Guide Booklet (Cana-
dian models).
As a precaution against corrosion, it is
advisable to have the body checked for
damage from rocks or gravel at the
same time, depending upon operating
conditions.
Have your vehicle's maintenance
and repairs performed at your
BMW center.
Be sure that all maintenance work is
confirmed in the Service and Warranty
Information Booklet (US models) or the
Warranty and Service Guide Booklet
(Canadian models). These entries are
your proof that the vehicle has received
regular maintenance. They are also a
requirement for warranty claims.<
The BMW Maintenance System
Page 147 of 155

Everything from A to Z
147n
OverviewControlsMaintenanceRepairsDataIndex
Cockpit14
Code76
activating76
deactivating76
refer also to the "Owner's
Manual for Onboard
Computer"
selecting76
Comfort seat42
Compartments96
Computer73
refer also to the "Owner's
Manual for Onboard
Computer"
remote control77
Configuring individual
settings55
Consumption75
Convenience operation of
windows and sliding/tilt
sunroof27
Coolant117
disposal118
Coolant temperature
gauge65
Cooling, maximum90
Copyright4
Cover, roller sun blinds92
Cruise control61
Cruising range75 Cup holder, refer to
Beverage holder97
Curb weight142
D
Date
calling up70
changing70
refer also to the "Owner's
Manual for Onboard
Computer"
Daytime driving lamps84
DBC (Dynamic Brake
Control)17, 80
Deactivating
interior motion sensor36
tilt alarm sensor36
Deep water107
Defrosting position89
Defrosting the
windows89t
Digital clock70
refer also to the "Owner's
Manual for Onboard
Computer"
Dimensions141
Disconnecting the
battery133t
Displacement140
Display lighting85 Displays, instrument
cluster15
Disposal
brake fluid118
coolant118
engine oil116
Distance from
destination74
Divided rear backrest99
Door key26
Doors
manual operation27
remote control28
unlocking and locking27
DOT Quality Grades110
Driving notes107
DSC (Dynamic Stability
Control)17, 80
Dynamic Brake Control
(DBC)17, 80
Dynamic Driving Control81
Dynamic Stability Control
(DSC)17, 80
E
Electric power windows36
Electrical heating, exterior
mirror48 Electrical malfunction
doors27t
fuel filler door20t
luggage compartment
lid32t
sliding/tilt sunroof39t
Elements of operation14
Emergency release of
luggage compartment
lid from luggage
compartment's interior34
Engine compartment114
Engine coolant118
temperature gauge65
Engine data140
Engine oil
checking level115
consumption115
dipstick115
disposal116
grades117
level16
pressure16
temperature gauge64
Engine performance140
Estimated time of arrival75
Exterior mirrors48
automatic dimming48
electrical heating48