2003 BMW M3 COUPE tow
[x] Cancel search: towPage 93 of 158

93
Outside air/Automatic
recirculated-air control (AUC)/
Recirculated air
You can respond to unpleasant
external odors or pollutants by
temporarily stopping the flow of outside
air. The system then recirculates the air
currently within the vehicle.
By repeatedly pressing the button, you
can select one of three different operat-
ing modes.
>Indicator lamps off: outside air always
flowing into the vehicle
>Left-hand indicator lamp on – auto-
matic mode: the system detects pol-
lutants in the outside air and
responds by deactivating the outside
airflow as required. The system then
recirculates the air currently within
the vehicle.
Depending on air quality require-
ments, the system automatically
switches between outside air supply
and recirculation of the air already
within the vehicle
>Right-hand indicator lamp on: the
flow of outside air is permanently
blocked. The system recirculates the
air already within the vehicle.
If the windows fog over in the
recirculated-air mode, switch the
recirculated-air mode off and increase
the air supply as required.<
Rear window defroster
When the rear window defroster
is activated, the indicator lamp
comes on. The rear window defroster
switches off automatically.
You can have your vehicle pro-
grammed in such a way that the
rear window defroster switches on
automatically. This occurs within 5 min-
utes after starting the engine when out-
side temperatures are below approx.
397/+46.<
Draft-free ventilationYou can adjust the blower controls for
the upper body area to obtain the opti-
mum airflow rates and directions for
your personal requirements:
1Rotary dials for infinitely variable
opening and closing of the vents
2Lever for adjusting airflow direction
3With the rotary dial you can adjust the
temperature of the outgoing air:
>Turn toward blue – colder
>Turn toward red – warmer
Automatic climate control
OverviewControlsMaintenanceRepairsDataIndex
handbook.book Page 93 Saturday, July 27, 2002 1:12 PM
Page 102 of 158
102
Cargo loading
Always position and secure the
load correctly. If you do not, it can
endanger the passengers during brak-
ing or evasive maneuvers.
Do not exceed the approved gross
weight or the approved maximum axle
loads, refer to page 146. Otherwise the
vehicle's operating safety is no longer
assured and you are in violation of the
law
Do not stow heavy or hard objects in
the passenger compartment without
first securing them. Otherwise they
would be thrown around during braking
and evasive maneuvers and endanger
the occupants.<
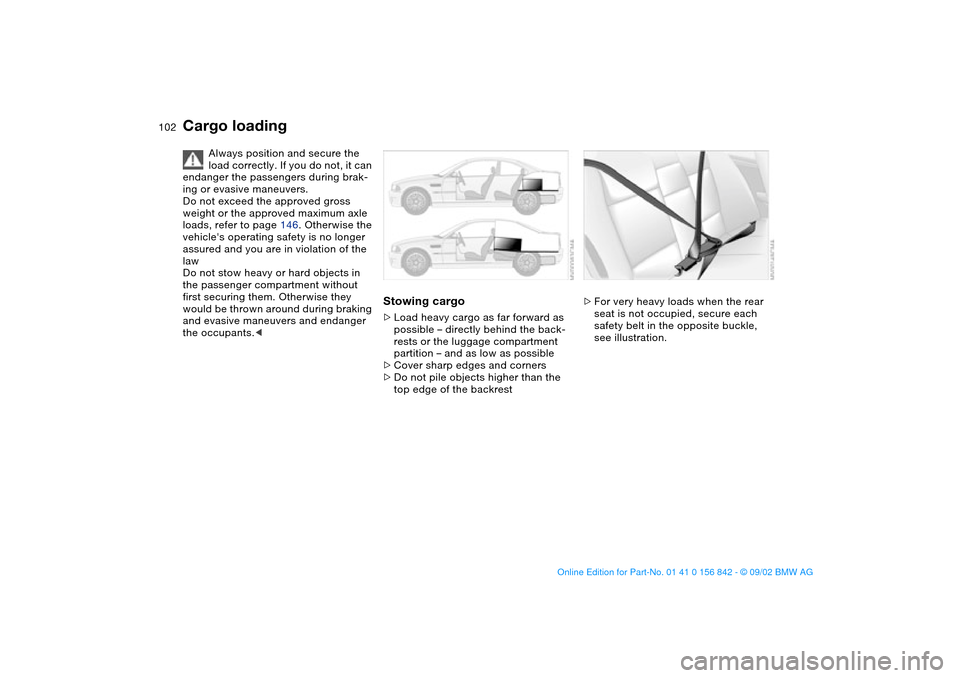
Stowing cargo>Load heavy cargo as far forward as
possible – directly behind the back-
rests or the luggage compartment
partition – and as low as possible
>Cover sharp edges and corners
>Do not pile objects higher than the
top edge of the backrest
>For very heavy loads when the rear
seat is not occupied, secure each
safety belt in the opposite buckle,
see illustration.
handbook.book Page 102 Saturday, July 27, 2002 1:12 PM
Page 106 of 158
106Special operating instructions
Break-in proceduresTo ensure that your vehicle provides
maximum economy throughout a long
service life, we request that you
observe the following suggestions.
Because of its engineering design,
the BMW M3 is an especially high-
quality vehicle. It is in your best interest
to follow the break-in tips very closely.
Doing this, you will create the basis for
a long, optimum service life.
varying engine and road speeds, but
do not exceed the following engine or
road speeds:
5,500 rpm or 105 mph / 170 km/h.
Obey your local and state maximum
speed limits.
Do not depress the accelerator pedal to
the full-throttle position.
Vehicles with SMG II, refer to page 65:
refrain from using driving program 6 in
the sequential mode during the break-
in period.
>Following the break-in inspection at
1,250 miles/2,000 km, you can grad-
ually increase engine or road speeds.
Follow the same break-in procedure if
either the engine or the differential
should have to be replaced in the
future.TiresDue to technical factors associated
with their manufacture, tires do not
achieve their full traction potential until
an initial break-in period has elapsed.
Thus drive with extra care during the
initial 200 miles/300 km.
Obey your local and state maximum
speed limits.
When the vehicle is operated on
wet or slushy roads, a wedge of
water may form between the tire and
the road surface. This phenomenon is
referred to as hydroplaning, and can
lead to partial or complete loss of trac-
tion, as well as loss of vehicle control
and braking effectiveness. Reduce your
speed on wet roads.
achieve the optimal pad-surface and
wear patterns required for trouble-free
operation and long service life later on.
To break in the separate parking brake
drums, apply the parking brake lightly
when coasting to a standstill – at a traf-
fic signal, for instance – use caution to
avoid posing a danger to other road
users.
To avoid corrosion, repeat this proce-
dure from time to time.
The brake lamps do not come on
when the parking brake is set.
Vacuum for the brake system servo unit
on your BMW is available only when the
engine is running. When you move the
vehicle with the engine off – when tow-
ing, for example – substantially higher
levels of pedal force will be required to
brake the vehicle.
Drive cautiously during this break-in
period and do not press the clutch or
shift at high engine speeds.
handbook.book Page 106 Saturday, July 27, 2002 1:12 PM
Page 110 of 158
110
ceed carefully to the nearest BMW cen-
ter or professional tire center, or have
the vehicle towed in to have it, its
wheels or its tires inspected.
Tire damage, up to and including blow-
outs, can endanger the lives of both the
vehicle occupants and other road
users.<
Tire replacementDOT quality gradesTreadwear
Traction AA A B C
Temperature A B C
All passenger car tires must con-
form to Federal Safety Require-
ments in addition to these grades.
when tested under controlled condi-
tions on a specified government test
course.
For example, a tire graded 150 would
wear one and one-half – 1 1/2 – times
as well on the government course as a
tire graded 100. The relative perfor-
mance of tires depends upon the actual
conditions of their use, however, and
may depart significantly from the norm
due to variations in driving habits, ser-
vice practices and differences in road
characteristics and climate.TractionThe traction grades, from highest to
lowest, are AA, A, B and C.
Those grades represent the tire's ability
to stop on wet pavement as measured
under controlled conditions on speci-
fied government test surfaces of
asphalt and concrete. A tire marked C
may have poor traction performance.
The traction grade assigned to
this tire is based on straight-
ahead braking traction tests, and does
not include acceleration, cornering,
hydroplaning, or peak traction charac-
teristics.
tire's resistance to the generation of
heat and its ability to dissipate heat
when tested under controlled condi-
tions on a specified indoor laboratory
test wheel.
Sustained high temperature can cause
the material of the tire to degenerate
and reduce tire life, and excessive tem-
perature can lead to sudden tire failure.
The grade C corresponds to a level of
performance which all passenger car
tires must meet under the Federal
Motor Vehicle Safety Standard No. 109.
Tire condition
handbook.book Page 110 Saturday, July 27, 2002 1:12 PM
Page 118 of 158

118
Washer fluidsHeadlamp* and windshield
washer systemCapacity approx.
5.6 US quarts/5.3 liters.
Fill with water and – if required – with a
washer antifreeze additive according to
manufacturer's recommendations.
We recommend that you mix the
washer fluid before adding it to
the reservoir.<
Antifreeze agents for the washer
fluid are highly flammable. For this
reason, keep them away from sources
of flame and store them only in their
original containers. Store them inacces-
sible to children. Comply with the
instructions on the containers.<
Engine oilChecking the oil level1. Park the vehicle on a level surface
2. Switch the engine off after it has
reached normal operating tempera-
ture
3. After approx. 5 minutes, pull the dip-
stick out and wipe it off with a clean
lint-free cloth, paper towel, or similar
material
4. Carefully push the dipstick all the
way into the guide tube and pull it
out again
5. The oil level should be between the
two marks on the dipstick.
As with fuel economy, oil consumption
is directly influenced by your driving
style and vehicle operating conditions.
The oil volume between the two marks
on the dipstick corresponds to approx.
1.4 US quarts/1.3 liter.
handbook.book Page 118 Saturday, July 27, 2002 1:12 PM
Page 128 of 158
128Replacement procedures
Onboard tool kitThe onboard tool kit is located in the
luggage compartment lid.
To open, loosen the wing nut.
For storing the towing eyelet, refer to
page 140.
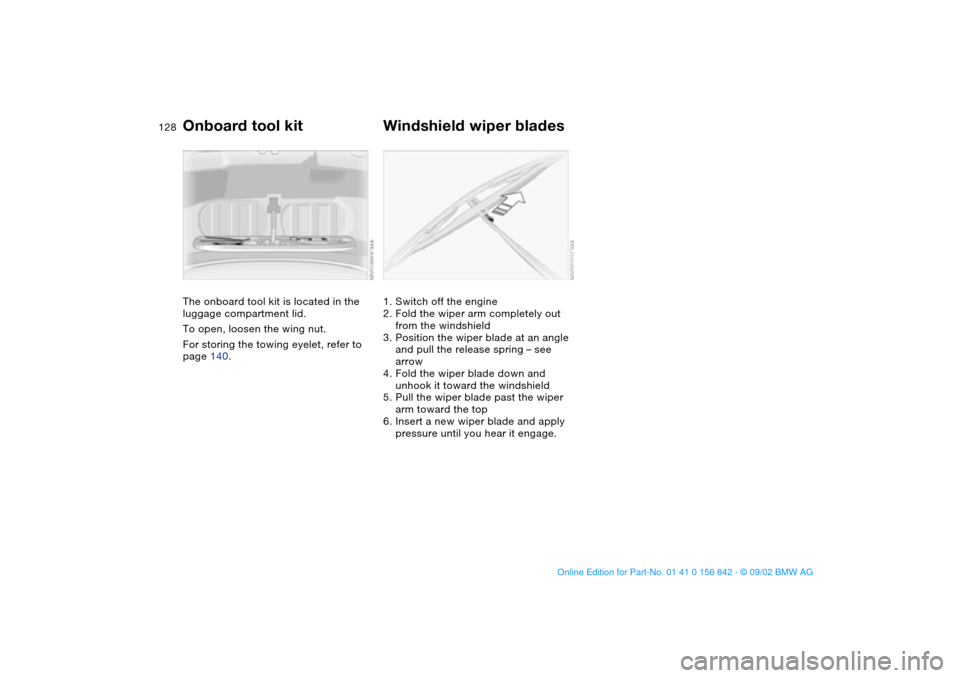
Windshield wiper blades1. Switch off the engine
2. Fold the wiper arm completely out
from the windshield
3. Position the wiper blade at an angle
and pull the release spring – see
arrow
4. Fold the wiper blade down and
unhook it toward the windshield
5. Pull the wiper blade past the wiper
arm toward the top
6. Insert a new wiper blade and apply
pressure until you hear it engage.
handbook.book Page 128 Saturday, July 27, 2002 1:12 PM
Page 130 of 158

130
Front turn signal indicators21 watt bulb
1. Extend a screwdriver through the
upper opening, loosen and remove
the screw
2. Remove lamp by pulling it out toward
the front
3. Applying light pressure, turn the bulb
to the left. Remove and exchange the
bulb
4. Insert the 2 pins on the lamp into the
guides on the vehicle
5. Slide in the lamp and screw the bulb
in place through the upper opening.
Side turn signal indicators5 watt bulb
1. Use finger pressure against the rear
end of the lamp – see arrow – to
press it forward for removal
2. Apply gentle pressure to the bulb
while turning it to the left to remove.
Lamps and bulbs
handbook.book Page 130 Saturday, July 27, 2002 1:12 PM
Page 133 of 158
133
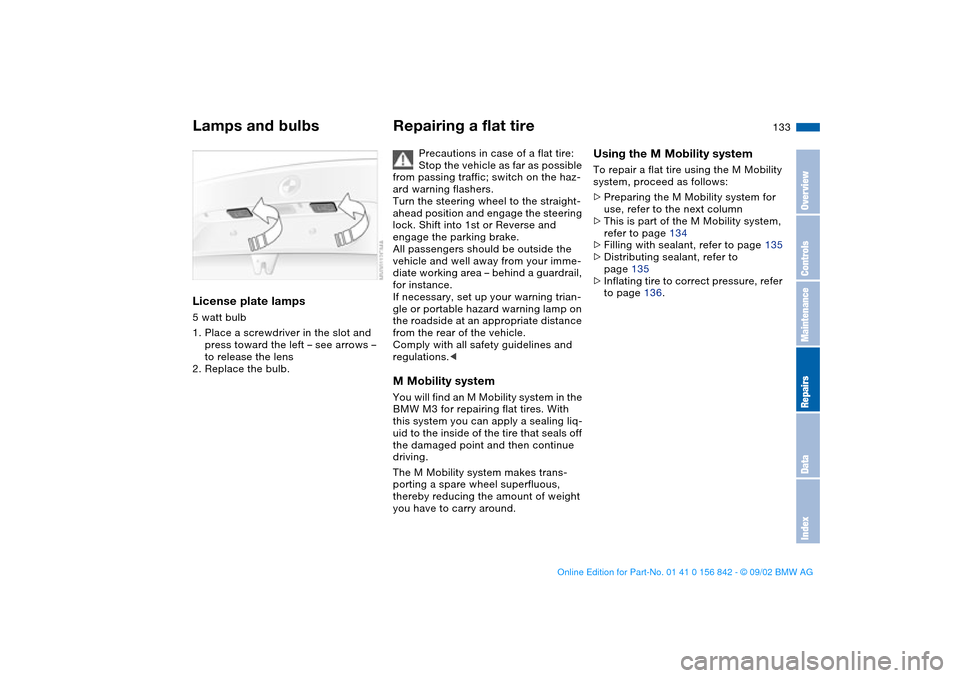
License plate lamps5 watt bulb
1. Place a screwdriver in the slot and
press toward the left – see arrows –
to release the lens
2. Replace the bulb.
Repairing a flat tire
Precautions in case of a flat tire:
Stop the vehicle as far as possible
from passing traffic; switch on the haz-
ard warning flashers.
Turn the steering wheel to the straight-
ahead position and engage the steering
lock. Shift into 1st or Reverse and
engage the parking brake.
All passengers should be outside the
vehicle and well away from your imme-
diate working area – behind a guardrail,
for instance.
If necessary, set up your warning trian-
gle or portable hazard warning lamp on
the roadside at an appropriate distance
from the rear of the vehicle.
Comply with all safety guidelines and
regulations.<
M Mobility systemYou will find an M Mobility system in the
BMW M3 for repairing flat tires. With
this system you can apply a sealing liq-
uid to the inside of the tire that seals off
the damaged point and then continue
driving.
The M Mobility system makes trans-
porting a spare wheel superfluous,
thereby reducing the amount of weight
you have to carry around.
Using the M Mobility systemTo repair a flat tire using the M Mobility
system, proceed as follows:
>Preparing the M Mobility system for
use, refer to the next column
>This is part of the M Mobility system,
refer to page 134
>Filling with sealant, refer to page 135
>Distributing sealant, refer to
page 135
>Inflating tire to correct pressure, refer
to page 136.
Lamps and bulbs
OverviewControlsMaintenanceRepairsDataIndex
handbook.book Page 133 Saturday, July 27, 2002 1:12 PM