2003 BMW M3 COUPE inflation pressure
[x] Cancel search: inflation pressurePage 109 of 158

109 Wheels and tires
Tire inflation pressureInformation for your safetyThe factory-approved tires are matched
to your vehicle and have been selected
to provide optimum safety and driving
comfort when used properly.
It is not merely the tire's service life, but
also driving comfort and – above all else
– driving safety that depend on the con-
dition of the tires and the maintenance
of the specified tire pressure.
Incorrect tire inflation pressure is
a frequent cause of tire damage. It
also significantly influences the road-
holding ability of your BMW. Check tire
inflation pressures on a regular basis,
refer to page 25, at least every two
weeks and before beginning a longer
trip. Incorrect tire pressure can other-
wise lead to driving instability, tire dam-
age and accidents.<
Tire conditionTire tread – tire damageInspect your tires frequently for tread
wear, signs of damage and for foreign
objects lodged in the tread. Check the
tread depth.
Tread depth should not be allowed to
go below 1/8 in / 3 mm, even though
the legally specified minimum tread
depth is only 1/16 in / 1.6 mm.
Below 1/8 in / 3 mm tread depth, there
is a great risk of hydroplaning, even at
relatively moderate speeds and with
only small amounts of water on the
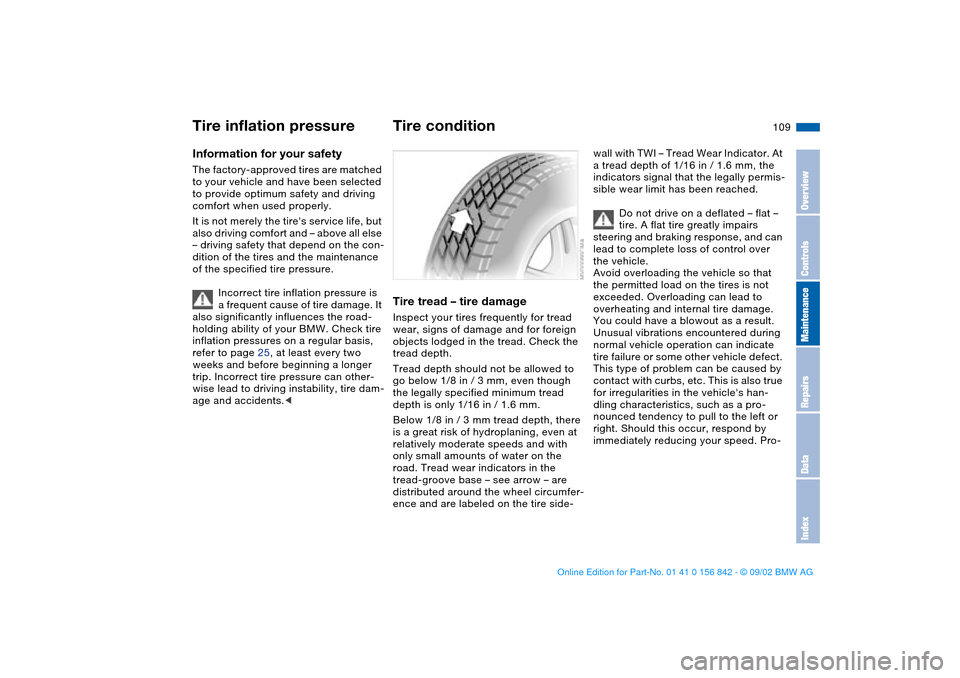
road. Tread wear indicators in the
tread-groove base – see arrow – are
distributed around the wheel circumfer-
ence and are labeled on the tire side-
wall with TWI – Tread Wear Indicator. At
a tread depth of 1/16 in / 1.6 mm, the
indicators signal that the legally permis-
sible wear limit has been reached.
Do not drive on a deflated – flat –
tire. A flat tire greatly impairs
steering and braking response, and can
lead to complete loss of control over
the vehicle.
Avoid overloading the vehicle so that
the permitted load on the tires is not
exceeded. Overloading can lead to
overheating and internal tire damage.
You could have a blowout as a result.
Unusual vibrations encountered during
normal vehicle operation can indicate
tire failure or some other vehicle defect.
This type of problem can be caused by
contact with curbs, etc. This is also true
for irregularities in the vehicle's han-
dling characteristics, such as a pro-
nounced tendency to pull to the left or
right. Should this occur, respond by
immediately reducing your speed. Pro-
OverviewControlsMaintenanceRepairsDataIndex
handbook.book Page 109 Saturday, July 27, 2002 1:12 PM
Page 113 of 158

113
Do not exceed specified
maximum speeds
Never exceed the maximum
speed for which the winter tires
are rated.
Unprofessional attempts by laymen to
service tires can lead to damage and
accidents.
Have this work performed by skilled
professionals only. Your BMW center
will be glad to assist you with both their
expertise and the proper equipment for
your vehicle.<
Tire condition, tire pressureAt tread depths below approx. 3/16 in /
4 mm, their performance under winter
driving conditions deteriorates notice-
ably. Worn tires should therefore be
replaced for safety considerations.
Comply with the specified tire inflation
pressures – and be sure to have the
wheel and tire assembly balanced
every time you change a tire or wheel.
Snow chains*Only certain snow chains have been
tested by BMW and determined and
approved as roadworthy. Consult your
BMW center for more information.
BMW recommends using only these
approved fine-link snow chains. Use
them in pairs on winter tires, but only on
both rear wheels.
Comply with all manufacturer's safety
precautions when mounting the chains.
Do not exceed a maximum speed of
30 mph / 50 km/h when using snow
chains.
After mounting or removing snow
chains, always reinitialize the sequential
M gearbox SMG II, refer to page 69.
It is not possible to mount snow
chains on tires with 18-inch and
19-inch wheels.
Deactivate the Flat Tire Monitor when
using snow chains. Malfunction warn-
ings and undetected losses in pressure
are a possibility when driving with snow
chains.
For additional information, refer to
page 82.<
Winter tires
OverviewControlsMaintenanceRepairsDataIndex
handbook.book Page 113 Saturday, July 27, 2002 1:12 PM
Page 135 of 158

135
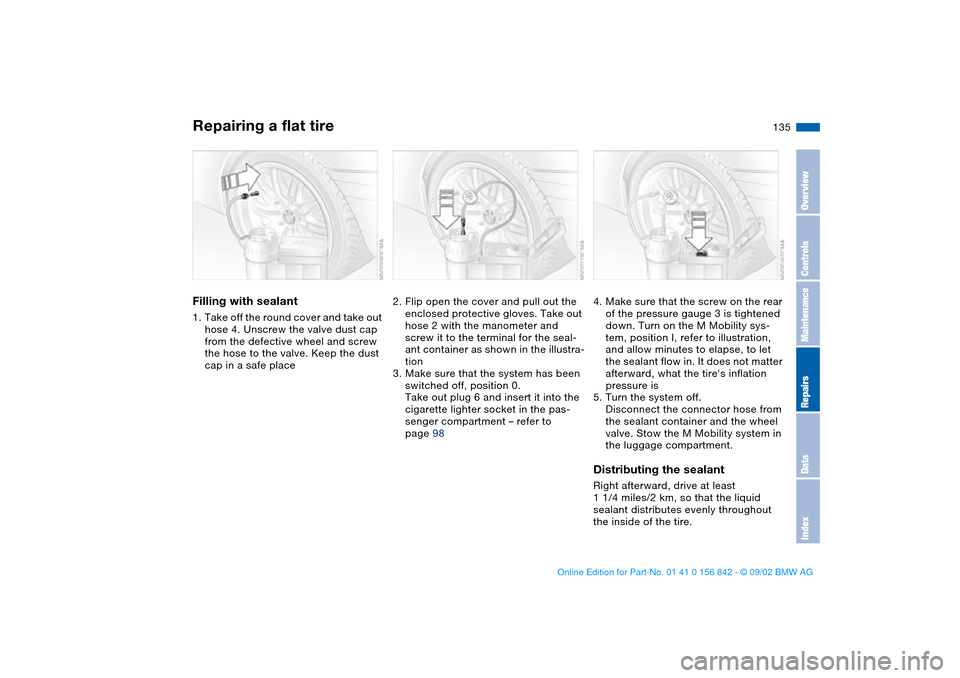
Filling with sealant1. Take off the round cover and take out
hose 4. Unscrew the valve dust cap
from the defective wheel and screw
the hose to the valve. Keep the dust
cap in a safe place
2. Flip open the cover and pull out the
enclosed protective gloves. Take out
hose 2 with the manometer and
screw it to the terminal for the seal-
ant container as shown in the illustra-
tion
3. Make sure that the system has been
switched off, position 0.
Take out plug 6 and insert it into the
cigarette lighter socket in the pas-
senger compartment – refer to
page 98
4. Make sure that the screw on the rear
of the pressure gauge 3 is tightened
down. Turn on the M Mobility sys-
tem, position I, refer to illustration,
and allow minutes to elapse, to let
the sealant flow in. It does not matter
afterward, what the tire's inflation
pressure is
5. Turn the system off.
Disconnect the connector hose from
the sealant container and the wheel
valve. Stow the M Mobility system in
the luggage compartment.Distributing the sealantRight afterward, drive at least
1 1/4 miles/2 km, so that the liquid
sealant distributes evenly throughout
the inside of the tire.
Repairing a flat tire
OverviewControlsMaintenanceRepairsDataIndex
handbook.book Page 135 Saturday, July 27, 2002 1:12 PM
Page 152 of 158

Everything from A to ZEngine speed 144
Entering the rear 47
Exterior mirrors 51
Eyelet, towing 140
F
False alarm, avoiding 39
Fault displays 76
First-aid kit 23
Flat tire 109
repairing 133
Flat Tire Monitor 82
indicator lamp 18, 19
Fog lamps 88
Folding rear backrest 100
Follow me home lamps 86
Footbrake 108
see Driving notes 107
Footwell lamps 88
Front fog lamps 88
indicator lamp 20
Front seat adjustment 44
Frost protection,
radiator 120
Fuel 25
Fuel consumption 79
display 75
Fuel filler door 24
release following an elec-
trical malfunction 24
Fuel gauge 75
Fuel specifications 25Fuel tank capacity 147
Fuel tank display 75
Fuel tank gauge 75
Fuel-injection system 144
Fuses 138
replacing 138
G
Gasoline 25
gauge 75
Gearbox, sequential 65
Gearshift lever 64
Glove compartment 95
Gradient assistance 68
Grills 90
Gross vehicle weight 146
H
Hands-free system 97
Harman Kardon premium
sound system 95
Hazard warning flashers 14
Hazard warning triangle 23
Head airbags 53
Head restraints 46
Headlamp 86
Headlamp cleaning system
116, 118, 147
Headlamp control 86
Headlamp flasher 70, 87
Heated mirror 51
Heated seats 50Heavy loads 102
High beams 70, 87
indicator lamps 21
Holder for beverages 96
Hood release 114
Horn 14
Hydroplaning 107, 109
I
Ice warning 78
Ignition key 30
positions 60
Ignition lock 60
Imprint 4
Indicator lamps 18
Individual settings
Vehicle Memory, Key
Memory 59
Inflation pressure 25, 109
INSPECTION 76
Instrument cluster 16
Instrument lighting 87
Instrument panel 14, 16
Interface socket for onboard
diagnostics (OBD) 124
Interior lamps 32, 88
remote control 32
Interior motion sensor 38
remote control 32
switching off 32, 39Interior rearview mirror
automatic dimming
feature 52
Interior temperature
adjusting 92
Intermittent mode 71
J
Jump-starting 139
K
Key Memory 59
Keys 30
L
Lamps
daytime driving lamps 86
fog lamps 88
footwell lamps 88
headlamp flasher 70, 87
high beams 87
instrument lighting 87
interior lamps 88
low beams 86
parking lamps 86
reading lamps 88
replacing 129
standing lamps 87
Lashing fittings 103
LATCH child-restraint
mounting system 57
handbook.book Page 152 Saturday, July 27, 2002 1:12 PM
Page 154 of 158

Everything from A to ZRadio, refer to the Owner's
Manual for Radio
Rain sensor 71
Range 79
Reading lamps
front 88
rear 88
Rear backrest, folding 100
Rear lamps 131
Rear window defroster 93
Rear-entry assist 47
Rearview mirror 51
Recirculated-air mode 93
Refueling 24
Remote control 31
Remote key 30
Replacement key 30, 31
Reporting safety defects 6
Reserve indicator lamp 75
Restraint system 55
Reverse 64
Rims 112
Roof load capacity 146
Roof-mounted luggage
rack 103
S
Safe seating position 43
Safety belts 47
3-point safety belt 100
height adjustment 48Safety feature
power windows 40
sliding/tilt sunroof 41
Seat adjustment 43, 44
adjusting the lumbar sup-
port 45
backrest width adjust-
ment 46
lumbar support 45
manual 44
power 45
Seat heating 50
Seat height adjustment 44
Seat memory 49
Securing cargo 102
Securing child-restraint sys-
tem 57
Securing devices 103
Sequential M gearbox
SMG II 65
indicator lamp 19, 69
Service and Warranty Infor-
mation Booklet 122
SERVICE ENGINE SOON
warning lamp 19
Service interval display
76, 122
Set clock 77
Shift lights 69
Side airbags 53
Side turn signals
bulb replacement 130Size 145
Ski bag 101
Sliding/tilt sunroof 40
closing following an elec-
trical malfunction 42
convenience operation
31, 33
manual operation 42
remote control 31
SMG gearbox 65
Snow chains 113
Socket 98
Spare key 30
Speedometer 16
Sport mode 85
Standing lamps 87
bulb replacement 129
Starting 61
Starting problems 61
Steering wheel lock 60
Steering wheel with multi-
function buttons 22
Steering wheel, adjusting 51
Storage compartments 96
Stroke 144
Summer tires 112
Sun blind 94
Surface ice warning 78
Switching off the engine 63
Symbols used 4T
Tachometer 16, 74
Tail lamps 131
replacing bulb 131
Tank capacity 147
Technical data 144
Technical modifications 5
Telephone hookup 97
Telephone, refer to the sep-
arate Owner's Manual
Temperature adjustment 92
Temperature display
engine coolant 75
ice warning 78
interior temperature 92
outside temperature 78
Temperature gauge 74
Temperature layering 93
Thigh support area, adjust-
ing 45
Third brake lamp 132
Through-loading system 100
Tilt alarm sensor
remote control 32
switching off 32, 39
Time 77
Tire code 112
Tire damage 109
Tire inflation pressure
25, 109
checking 25
Tire replacement 110
handbook.book Page 154 Saturday, July 27, 2002 1:12 PM
Page 157 of 158

Refueling
To ensure that you always have conve-
nient access to all essential information
when you stop for fuel, we recommend
that you take the time to fill out the
adjoining chart by entering the data that
apply to your vehicle. Consult the index
for individual specifications.
FuelPlease enter your preferred fuel here.Engine oilThe oil quantity between the two marks
on the dipstick is approx.
1.4 US quarts/1.3 liters.Tire inflation pressureDesignation
Quality
Summer tires Winter tires
front rear front rear
Up to 4 persons
5 persons or 4 plus luggage
handbook.book Page 157 Saturday, July 27, 2002 1:12 PM