2003 BMW 540I SEDAN clock
[x] Cancel search: clockPage 5 of 187
5n
OverviewControlsMaintenanceRepairsDataIndex
Controls and features
Passenger safety systems:
Airbags59
Transporting children safely62
Vehicle Memory, Key
Memory67
Driving:
Steering/Ignition lock68
Starting the engine68
Switching off the engine70
Parking brake70
Manual transmission71
Automatic transmission72
Automatic transmission with
Steptronic75
Indicator/Headlamp flasher78
Washer/Wiper system/Rain
sensor78
Cruise control80
Everything under control:
Odometer, outside temperature
display82
Tachometer83
Energy control83
Fuel gauge83
Coolant temperature gauge84
Service Interval Display84
Check Control85
Computer88
Multi-Information Display
(MID)89
Digital clock in the MID90
Computer in the MID93
Technology for safety and
driving convenience:
Park Distance Control (PDC)98
Automatic Stability Control plus
Traction (ASC+T)/Dynamic
Stability Control (DSC)99
Self-leveling suspension 101
Tire Pressure Monitor (RDC)101
Lamps:
Parking lamps/Low beams103
Instrument lighting104
High beams/Standing
lamps104
Fog lamps104
Interior lamps105
Reading lamps105
Controlling the climate for
pleasant driving:
Air conditioning106
Automatic climate control109
Roller sun blind114
Parked-car ventilation
system114
Cabin convenience:
BMW Universal Transmitter115
Glove compartment118
Storage compartments118
Cellular phone119
Beverage holder119
Ashtray, front119
Cigarette lighter120
Ashtray, rear120
Loading and transporting
cargo:
Through-loading system121
Ski bag122
sport wagon:
Cargo area125
Roll-up cover125
Partition net125
Storage areas in the luggage
compartment126
Cargo loading128
Roof-mounted luggage rack129
Page 89 of 187
89n
OverviewControlsMaintenanceRepairsDataIndex
Multi-Information Display (MID)
*
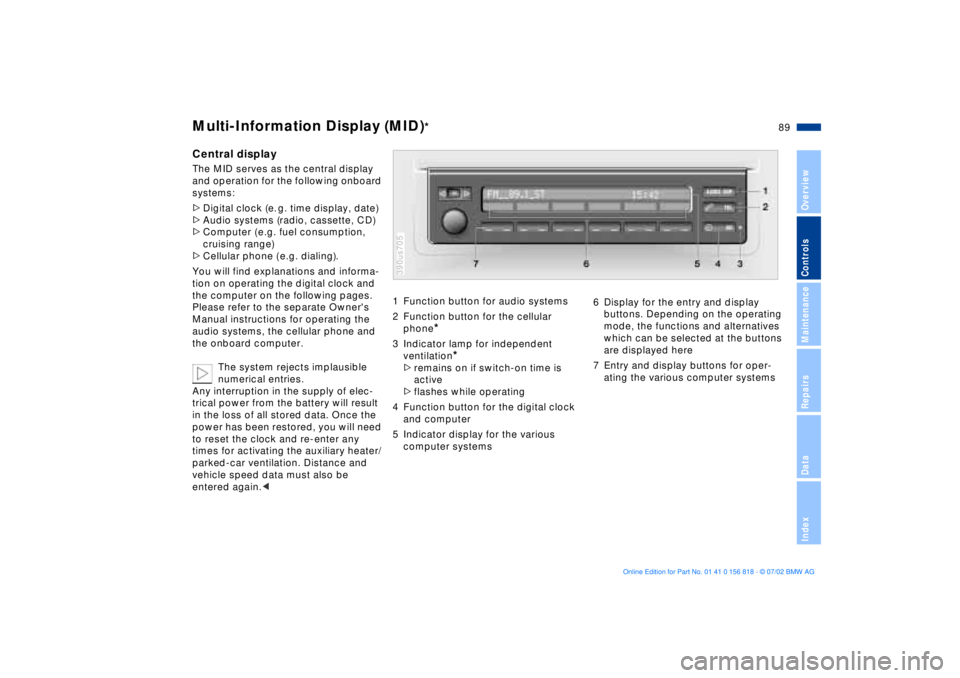
Central displayThe MID serves as the central display
and operation for the following onboard
systems:
>Digital clock (e. g. time display, date)
>Audio systems (radio, cassette, CD)
>Computer ( e.g. fuel consumption,
cruising range)
>Cellular phone ( e.g. dialing).
You will find explanations and informa-
tion on operating the digital clock and
the computer on the following pages.
Please refer to the separate Owner's
Manual instructions for operating the
audio systems, the cellular phone and
the onboard computer.
The system rejects implausible
numerical entries.
Any interruption in the supply of elec-
trical power from the battery will result
in the loss of all stored data. Once the
power has been restored, you will need
to reset the clock and re-enter any
times for activating the auxiliary heater/
parked-car ventilation. Distance and
vehicle speed data must also be
entered again.<
1 Function button for audio systems
2 Function button for the cellular
phone
*
3 Indicator lamp for independent
ventilation
*
>remains on if switch-on time is
active
>flashes while operating
4 Function button for the digital clock
and computer
5 Indicator display for the various
computer systems390us705
6 Display for the entry and display
buttons. Depending on the operating
mode, the functions and alternatives
which can be selected at the buttons
are displayed here
7 Entry and display buttons for oper-
ating the various computer systems
Page 90 of 187
90n
Digital clock in the MID
*
Only make entries when the
vehicle is standing still Ð to avoid
endangering yourself or other road
users.<
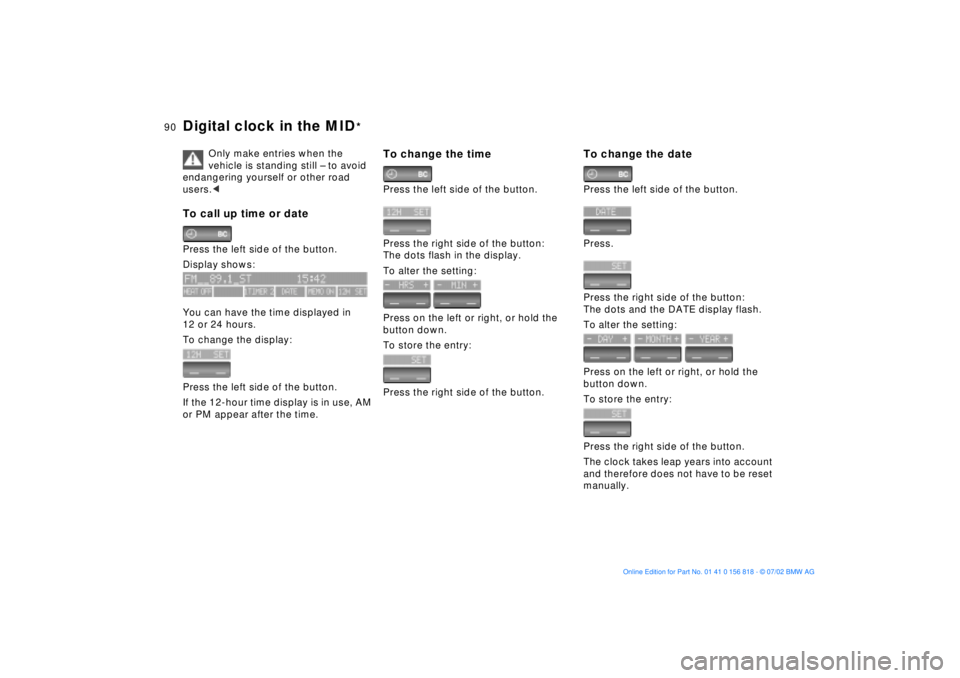
To call up time or datePress the left side of the button.
Display shows:
You can have the time displayed in
12 or 24 hours.
To change the display:
Press the left side of the button.
If the 12-hour time display is in use, AM
or PM appear after the time.
To change the timePress the left side of the button.
Press the right side of the button:
The dots flash in the display.
To alter the setting:
Press on the left or right, or hold the
button down.
To store the entry:
Press the right side of the button.
To change the datePress the left side of the button.
Press.
Press the right side of the button:
The dots and the DATE display flash.
To alter the setting:
Press on the left or right, or hold the
button down.
To store the entry:
Press the right side of the button.
The clock takes leap years into account
and therefore does not have to be reset
manually.
Page 91 of 187
91n
OverviewControlsMaintenanceRepairsDataIndex
Digital clock in the MID
*
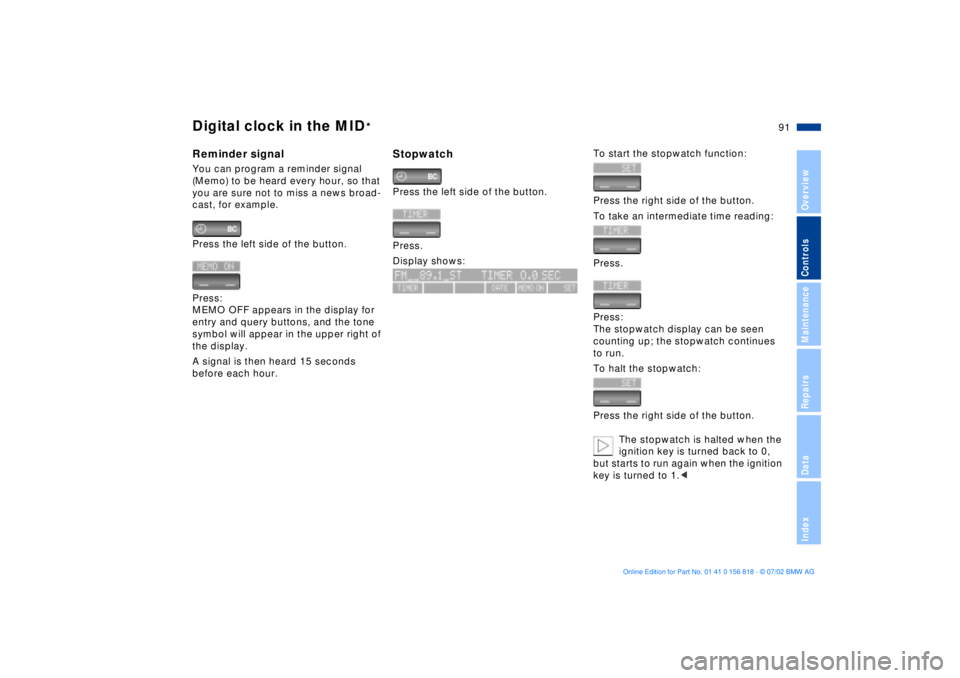
Reminder signalYou can program a reminder signal
(Memo) to be heard every hour, so that
you are sure not to miss a news broad-
cast, for example.
Press the left side of the button.
Press:
MEMO OFF appears in the display for
entry and query buttons, and the tone
symbol will appear in the upper right of
the display.
A signal is then heard 15 seconds
before each hour.
StopwatchPress the left side of the button.
Press.
Display shows:
To start the stopwatch function:
Press the right side of the button.
To take an intermediate time reading:
Press.
Press:
The stopwatch display can be seen
counting up; the stopwatch continues
to run.
To halt the stopwatch:
Press the right side of the button.
The stopwatch is halted when the
ignition key is turned back to 0,
but starts to run again when the ignition
key is turned to 1.<
Page 92 of 187
92n
Digital clock in the MID
*
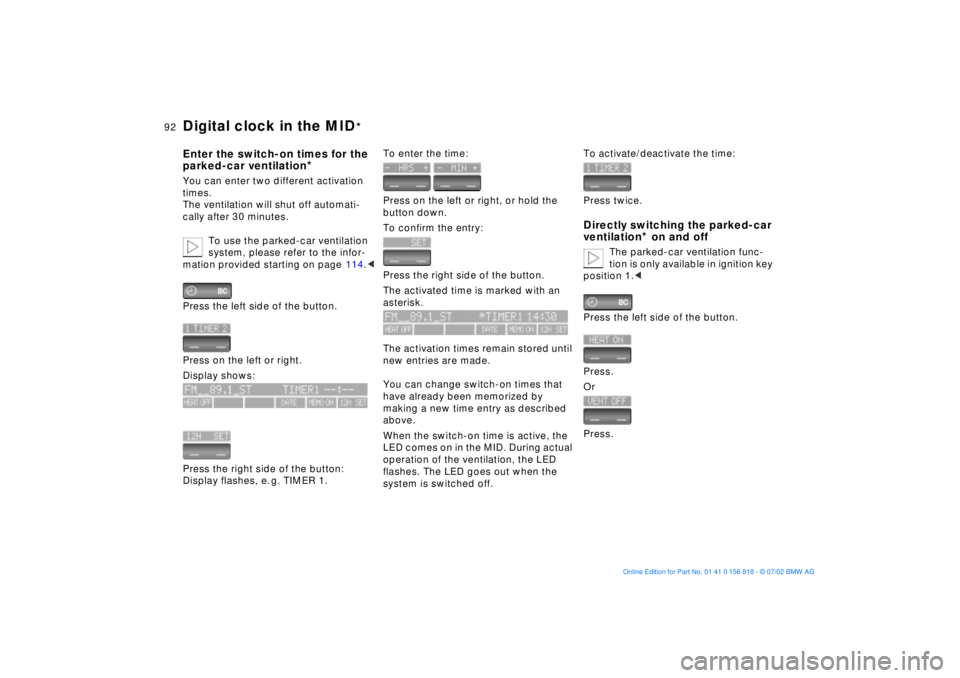
Enter the switch-on times for the
parked-car ventilation
*
You can enter two different activation
times.
The ventilation will shut off automati-
cally after 30 minutes.
To use the parked-car ventilation
system, please refer to the infor-
mation provided starting on page 114.<
Press the left side of the button.
Press on the left or right.
Display shows:
Press the right side of the button:
Display flashes, e. g. TIMER 1.
To enter the time:
Press on the left or right, or hold the
button down.
To confirm the entry:
Press the right side of the button.
The activated time is marked with an
asterisk.
The activation times remain stored until
new entries are made.
You can change switch-on times that
have already been memorized by
making a new time entry as described
above.
When the switch-on time is active, the
LED comes on in the MID. During actual
operation of the ventilation, the LED
flashes. The LED goes out when the
system is switched off.
To activate/deactivate the time:
Press twice.Directly switching the parked-car
ventilation
* on and off
The parked-car ventilation func-
tion is only available in ignition key
position 1.<
Press the left side of the button.
Press.
Or
Press.
Page 144 of 187
144n
Coolant
Do not add coolant to the cooling
system when the engine is hot. If
you attempt to do so, escaping coolant
can cause scalds.
To avoid the possibility of damage later
on, never use anything other than fac-
tory-approved, nitrite and amino-free
extended-duty antifreeze with corrosion
inhibitor. Your BMW center is familiar
with the factory specifications.
Antifreeze and anti-corrosion agents
are hazardous to health. You should
always store them in their original con-
tainers and in a location which is out of
reach of children.
Extended-duty antifreeze with corro-
sion inhibitor contains the inflammable
substance ethylene-glycol. For this
reason, do not spill antifreeze with cor-
rosion inhibitor on hot engine parts. It
could catch fire and cause burns.<
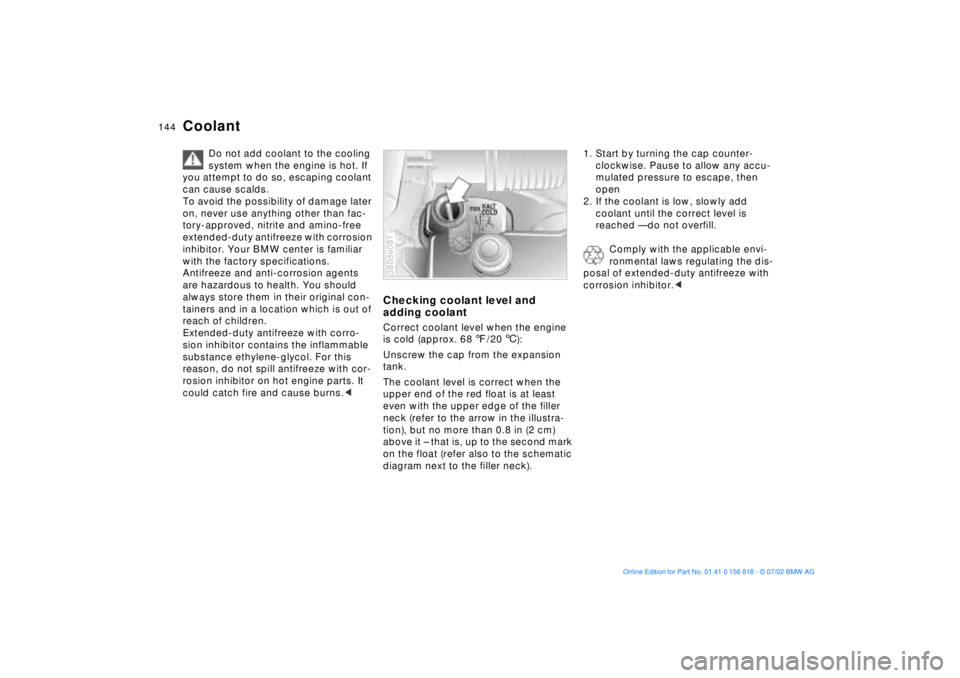
Checking coolant level and
adding coolantCorrect coolant level when the engine
is cold (approx. 687/206):
Unscrew the cap from the expansion
tank.
The coolant level is correct when the
upper end of the red float is at least
even with the upper edge of the filler
neck (refer to the arrow in the illustra-
tion), but no more than 0.8 in (2 cm)
above it Ð that is, up to the second mark
on the float (refer also to the schematic
diagram next to the filler neck).380de081
1. Start by turning the cap counter-
clockwise. Pause to allow any accu-
mulated pressure to escape, then
open
2. If the coolant is low, slowly add
coolant until the correct level is
reached Ñ do not overfill.
Comply with the applicable envi-
ronmental laws regulating the dis-
posal of extended-duty antifreeze with
corrosion inhibitor.<
Page 179 of 187
Everything from A to Z
179n
OverviewControlsMaintenanceRepairsDataIndex
C
California Proposition
65 Warning147
Capacities175
Cargo area
floor compartment127
lamps105
opening from the
inside40
partition net125
roll-up cover125
Cargo loading128
Cellular phone119
Center (high-mount) brake
lamp157
Central locking
system32, 37
Changing a wheel/
tire158t
Charge indicator lamp19
CHECK button85
Check Control85t
Check engine oil
level142t
Child seats62
Child-restraint
installation64
Child-restraint system with
tether strap62
Child-restraint systems62
Child-safety locks66
Cigarette lighter120 Clean rear window79
Cleaning windshield79
Climate control, refer to
Automatic climate
control109
Clock90
for additional information
refer to the "Owner's
Manual for Onboard
Computer"
Cockpit14
Code, refer to immobilizer
function96
Cold start69
Comfort seat51
Compartments118
Computer88
for additional information
refer to the "Owner's
Manual for Onboard
Computer"
remote control97
Computer in the MID93
Configuring personal
adjustments, Vehicle and
Key Memory67
Consumption display83
Consumption, fuel88, 95
Convenience operation of
windows and sliding/tilt
sunroof33 Convenience starting
feature69
Coolant144
Coolant temperature
gauge84
Copyright4
Cover, sun blinds114
Cruising range88, 95
Cup holder119
Cup holder, refer to
beverage holder119
Curb monitor55
D
Date
calling up90
changing90
Daytime driving lamps103
DBC (Dynamic Brake
Control)20
Deactivating97
interior motion sensor43
tilt alarm sensor43
Deep water133
Defrost windows108, 111
Defroster mode108, 111
Digital clock in the MID90
Dimensions171
Dipstick, engine oil142t
Displacement170
Display lighting104 Displays16, 17
Disposal
antifreeze with corrosion
inhibitor144t
used batteries162t
used oils143t
Distance from
destination94
Distance warning98
Divided rear-seat
backrest121
Doors
manual operation33
opening and closing34
opening/closing from the
inside34
operation via remote
control34
DOT Quality Grades136
Driving notes133
DSC (Dynamic Stability
Control)21, 99
Dynamic Brake Control
(DBC)20
Dynamic Stability Control
(DSC)21, 99
E
Electric power seat50
Electric power windows44