Page 49 of 114

6
PERIODIC MAINTENANCE AND MINOR REPAIR
Owner’s tool kit .................................................... 6-1
Periodic maintenance and lubrication chart ......... 6-2
Removing and installing cowlings ........................ 6-5
Checking the spark plugs .................................... 6-8
Engine oil and oil filter cartridge ........................ 6-10
Coolant .............................................................. 6-13
Cleaning the air filter element ............................ 6-17
Checking the air vent hose ................................ 6-18
Air intake duct .................................................... 6-19
Adjusting the carburetors ................................... 6-19
Adjusting the engine idling speed ...................... 6-19
Adjusting the throttle cable free play .................. 6-20
Adjusting the valve clearance ............................ 6-20
Tires ................................................................... 6-21
Cast wheels ....................................................... 6-24
Adjusting the clutch lever free play .................... 6-25
Adjusting the brake pedal position ..................... 6-25
Adjusting the rear brake light switch .................. 6-26
Checking the front and rear brake pads ............. 6-27
Checking the brake fluid level ............................ 6-27
Changing the brake fluid .................................... 6-28
Drive chain slack ................................................ 6-29
Lubricating the drive chain ................................. 6-30Checking and lubricating the cables ................. 6-31
Checking and lubricating the throttle grip and
cable ............................................................... 6-31
Checking and lubricating the brake and shift
pedals ............................................................. 6-31
Checking and lubricating the brake and clutch
levers ............................................................... 6-32
Checking and lubricating the sidestand ............ 6-32
Lubricating the rear suspension ........................ 6-32
Checking the front fork ...................................... 6-33
Checking the steering ....................................... 6-33
Checking the wheel bearings ............................ 6-34
Battery ............................................................... 6-35
Replacing the fuses .......................................... 6-36
Replacing the headlight bulb ............................. 6-37
Replacing the tail/brake light bulb ..................... 6-38
Replacing a turn signal light bulb ...................... 6-39
Supporting the motorcycle ................................ 6-39
Front wheel ....................................................... 6-40
Rear wheel ........................................................ 6-41
Troubleshooting ................................................. 6-43
Troubleshooting charts ...................................... 6-44
U4TVE6.book Page 1 Saturday, August 4, 2001 12:14 PM
Page 50 of 114

6-1
6
EAU00462
6-PERIODIC MAINTENANCE AND MINOR REPAIR
EAU00464
Safety is an obligation of the owner.
Periodic inspection, adjustment and lu-
brication will keep your vehicle in the
safest and most efficient condition pos-
sible. The most important points of in-
spection, adjustment, and lubrication
are explained on the following pages.
The intervals given in the periodic
maintenance and lubrication chart
should be simply considered as a gen-
eral guide under normal riding condi-
tions. However, DEPENDING ON THE
WEATHER, TERRAIN, GEOGRAPHI-
CAL LOCATION, AND INDIVIDUAL
USE, THE MAINTENANCE INTER-
VALS MAY NEED TO BE SHORT-
ENED.
EW000060
WARNING
_ If you are not familiar with motor-
cycle maintenance work, have a
Yamaha dealer do it for you. _
EAU01299
Owner’s tool kit The owner’s tool kit is located inside
the storage compartment under the
seat. (See page 3-11 for seat removal
procedures.)
The service information included in this
manual and the tools provided in the
owner’s tool kit are intended to assist
you in the performance of preventive
maintenance and minor repairs. How-
ever, additional tools such as a torque
wrench may be necessary to perform
certain maintenance work correctly.
NOTE:_ If you do not have the tools or experi-
ence required for a particular job, have
a Yamaha dealer perform it for you. _
EW000063
WARNING
_ Modifications not approved by
Yamaha may cause loss of perfor-
mance and render the vehicle un-
safe for use. Consult a Yamaha
dealer before attempting any chang-
es. _
1. Owner’s tool kit
U4TVE6.book Page 1 Saturday, August 4, 2001 12:14 PM
Page 51 of 114

PERIODIC MAINTENANCE AND MINOR REPAIR
6-2
6
EAU03685
Periodic maintenance and lubrication chart
NOTE:_ �
The annual checks must be performed every year, except if a kilometer-based maintenance is performed instead.
�
From 50,000 km, repeat the maintenance intervals starting from 10,000 km.
�
Items marked with an asterisk should be performed by a Yamaha dealer as they require special tools, data and techni-
cal skills.
_
CP-03ENO. ITEM CHECK OR MAINTENANCE JOBODOMETER READING (×1,000 km)
ANNUAL
CHECK
1 10203040
1
*Fuel lineCheck fuel hoses for cracks or damage.√√√√ √
2*Fuel filterCheck condition.√√
3 Spark plugsCheck condition.
Clean and regap.√√
Replace.√√
4*ValvesCheck valve clearance.
Adjust.Every 40,000 km
5 Air filter elementClean.√√
Replace.√√
6ClutchCheck operation.
Adjust.√√√√√
7*Front brakeCheck operation, fluid level and vehicle for fluid leakage.
(See NOTE on page 6-4.)√√ √ √ √ √
Replace brake pads. Whenever worn to the limit
8*Rear brakeCheck operation, fluid level and vehicle for fluid leakage.
(See NOTE on page 6-4.)√√ √ √ √ √
Replace brake pads. Whenever worn to the limit
U4TVE6.book Page 2 Saturday, August 4, 2001 12:14 PM
Page 52 of 114
 Every 4 years
10*WheelsCheck runout and for damage.√√√�")
PERIODIC MAINTENANCE AND MINOR REPAIR
6-3
6
9
*Brake hosesCheck for cracks or damage.√√√√ √
Replace. (See NOTE on page 6-4.) Every 4 years
10*WheelsCheck runout and for damage.√√√√
11*TiresCheck tread depth and for damage.
Replace if necessary.
Check air pressure.
Correct if necessary.√√√√ √
12*Wheel bearingsCheck bearing for looseness or damage.√√√√
13*SwingarmCheck operation and for excessive play.√√√√
Lubricate with lithium-soap-based grease. Every 50,000 km
14 Drive chainCheck chain slack.
Make sure that the rear wheel is properly aligned.
Clean and lubricate.Every 1,000 km and after washing
the motorcycle or riding in the rain
15*Steering bearingsCheck bearing play and steering for roughness.√√√√√
Lubricate with lithium-soap-based grease. Every 50,000 km
16*Chassis fastenersMake sure that all nuts, bolts and screws are properly tightened.√√√√ √
17 SidestandCheck operation.
Lubricate.√√√√ √
18*Sidestand switchCheck operation.√√√√√ √
19*Front forkCheck operation and for oil leakage.√√√√
20*Shock absorber
assemblyCheck operation and shock absorber for oil leakage.√√√√
21*Rear suspension relay
arm and connecting arm
pivoting pointsCheck operation.√√√√
Lubricate with lithium-soap-based grease.√√
22*CarburetorsCheck starter (choke) operation.
Adjust engine idling speed and synchronization.√√√√√ √ NO. ITEM CHECK OR MAINTENANCE JOBODOMETER READING (×1,000 km)
ANNUAL
CHECK
1 10203040
U4TVE6.book Page 3 Saturday, August 4, 2001 12:14 PM
Page 53 of 114
PERIODIC MAINTENANCE AND MINOR REPAIR
6-4
6
EAU03884
NOTE:_ �
The air filter needs more frequent service if you are riding in unusually wet or dusty areas.
�
Hydraulic brake service
Regularly check and, if necessary, correct the brake fluid level.
Every two years replace the internal components of the brake master cylinders and calipers, and change the brake
fluid.
Replace the brake hoses every four years and if cracked or damaged.
_23 Engine oilChange.
Check oil level and vehicle for oil leakage.√√√√√ √
24 Engine oil filter cartridgeReplace.√√√
25
*Cooling systemCheck coolant level and vehicle for coolant leakage.√√√√ √
Change. Every 3 years
26*Front and rear brake
switchesCheck operation.√√√√√ √
27 Moving parts and cablesLubricate.√√√√ √
28*Lights, signals and
switchesCheck operation.
Adjust headlight beam.√√√√√ √ NO. ITEM CHECK OR MAINTENANCE JOBODOMETER READING (×1,000 km)
ANNUAL
CHECK
1 10203040
U4TVE6.book Page 4 Saturday, August 4, 2001 12:14 PM
Page 54 of 114
PERIODIC MAINTENANCE AND MINOR REPAIR
6-5
6
EAU01065
Removing and installing
cowlings The cowlings shown above need to be
removed to perform some of the main-
tenance jobs described in this chapter.Refer to this section each time a cowl-
ing needs to be removed and installed.
EAU04277
Cowlings A and C
To remove one of the cowlings1. Remove the bolts.
1. Cowling A
2. Cowling B
1. Cowling C
2. Cowling D
1. Bolt (× 3 on each side)
U4TVE6.book Page 5 Saturday, August 4, 2001 12:14 PM
Page 55 of 114
PERIODIC MAINTENANCE AND MINOR REPAIR
6-6
6 2. Disconnect the turn signal connec-
tors (and, for the left-side cowling,
also the auxiliary light coupler),
and then take the cowling off.
To install the cowling
1. Connect the turn signal connec-
tors (and, for the left-side cowling,
also the auxiliary light coupler).
2. Place the cowling in the original
position, and then install the bolts.
Bolt (× 6) Bolt (× 7)Left side
Right side
1. Bolt (× 5 on each side)
1. Auxiliary light coupler
2. Turn signal connector (× 2)
U4TVE6.book Page 6 Saturday, August 4, 2001 12:14 PM
Page 56 of 114
PERIODIC MAINTENANCE AND MINOR REPAIR
6-7
6
EAU03595
Cowling B
To remove the cowling1. Remove the seat. (See page 3-11
for seat removal and installation
procedures.)
2. Remove the screws, and then pull
the cowling off as shown.NOTE:_ Pull the cowling up, then back to re-
move it. _To install the cowling1. Place the cowling in the original
position, and then install the
screws.
2. Install the seat.
EAU04278
Cowling D
To remove the cowling1. Remove the seat and cowling B.
(See pages 3-11 and 6-7 for seat
and cowling removal and installa-
tion procedures.)
2. Remove the grab bar by removing
the bolts.
3. Remove the screw, and then pull
the cowling off as shown.To install the cowling
1. Place the cowling in the original
position, and then install the
screw.
2. Install the grab bar by installing the
bolts.
3. Install the cowling and the seat.
1. Screw (× 2)
1. Bolt (× 2)
2. Screw
U4TVE6.book Page 7 Saturday, August 4, 2001 12:14 PM
 1
1 2
2 3
3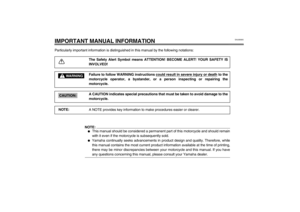 4
4 5
5 6
6 7
7 8
8 9
9 10
10 11
11 12
12 13
13 14
14 15
15 16
16 17
17 18
18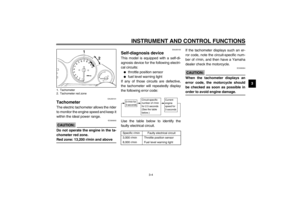 19
19 20
20 21
21 22
22 23
23 24
24 25
25 26
26 27
27 28
28 29
29 30
30 31
31 32
32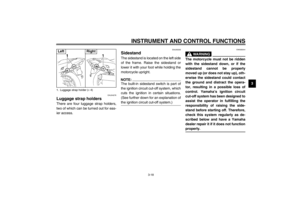 33
33 34
34 35
35 36
36 37
37 38
38 39
39 40
40 41
41 42
42 43
43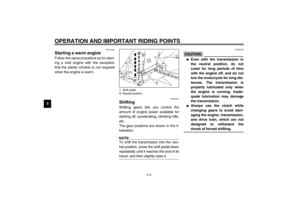 44
44 45
45 46
46 47
47 48
48 49
49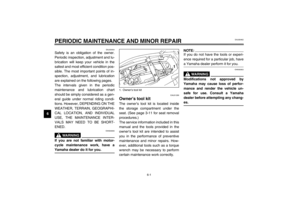 50
50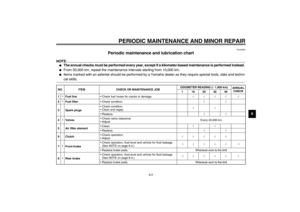 51
51 52
52 53
53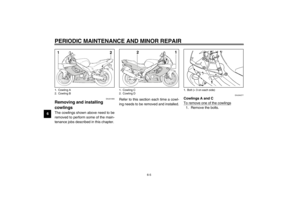 54
54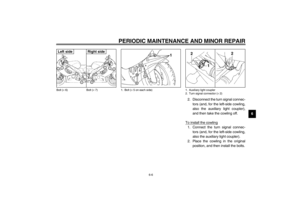 55
55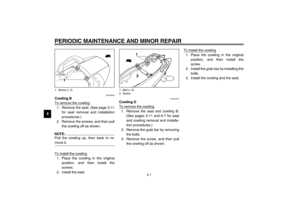 56
56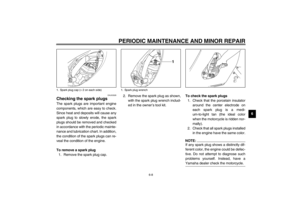 57
57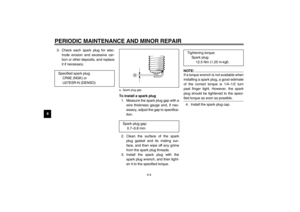 58
58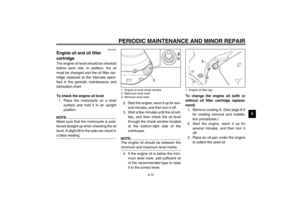 59
59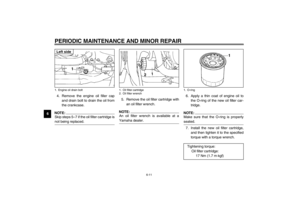 60
60 61
61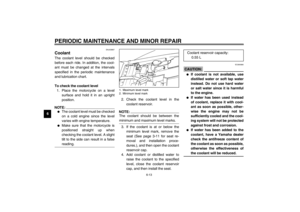 62
62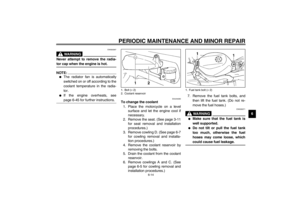 63
63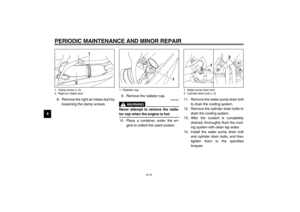 64
64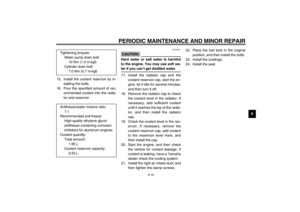 65
65 66
66 67
67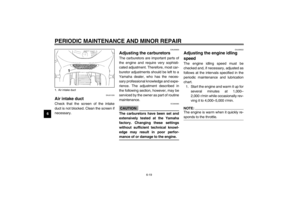 68
68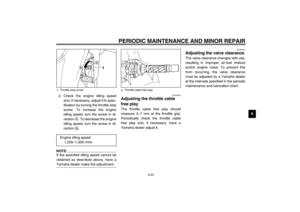 69
69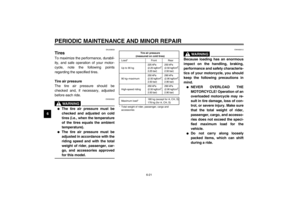 70
70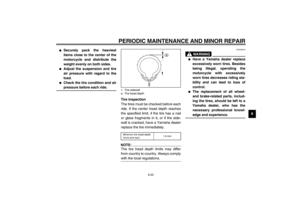 71
71 72
72 73
73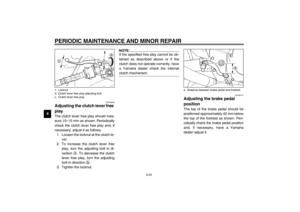 74
74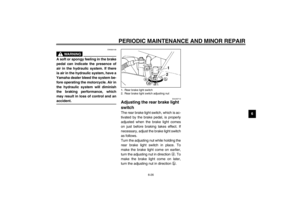 75
75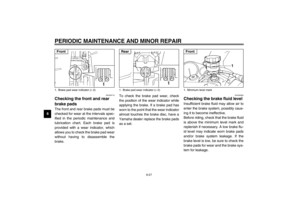 76
76 77
77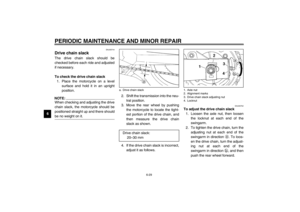 78
78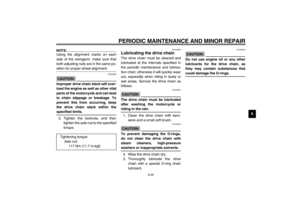 79
79 80
80 81
81 82
82 83
83 84
84 85
85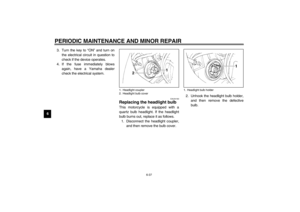 86
86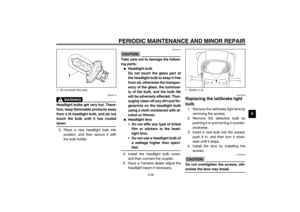 87
87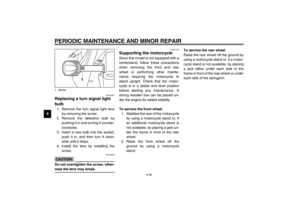 88
88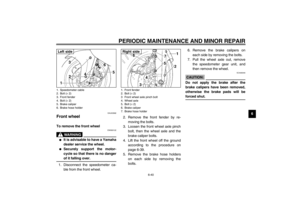 89
89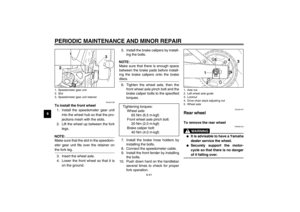 90
90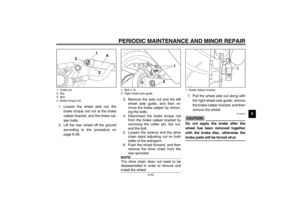 91
91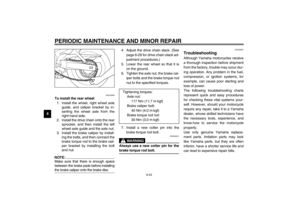 92
92 93
93 94
94 95
95 96
96 97
97 98
98 99
99 100
100 101
101 102
102 103
103 104
104 105
105 106
106 107
107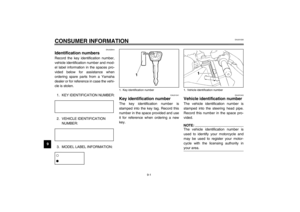 108
108 109
109 110
110 111
111 112
112 113
113

,
and then take the cowling off.
To install the")

2. Remove the screws, and then pul")