Page 194 of 414
7-17 1. Locknut 2. Adjusting screw
1. Contre-écrou 2. Vis de réglage
1. Contratuerca 2. Tornillo de ajuste
Speed limiter
For riders inexperienced with this model, this mod-
el is equipped with a speed limiter in the throttle le-
ver housing. The speed limiter limits the power
and top speed of the ATV. Turning the screw in de-
creases top speed, and turning it out increases top
speed.
Loading and accessories
Use extra caution when riding the ATV with addi-
tional loads, such as accessories or cargo. The
ATV’s handling may be adversely affected. Re-
duce your speed when adding additional loads.
U5LP61.book Page 17 Monday, August 27, 2001 3:49 PM
Page 230 of 414
7-53
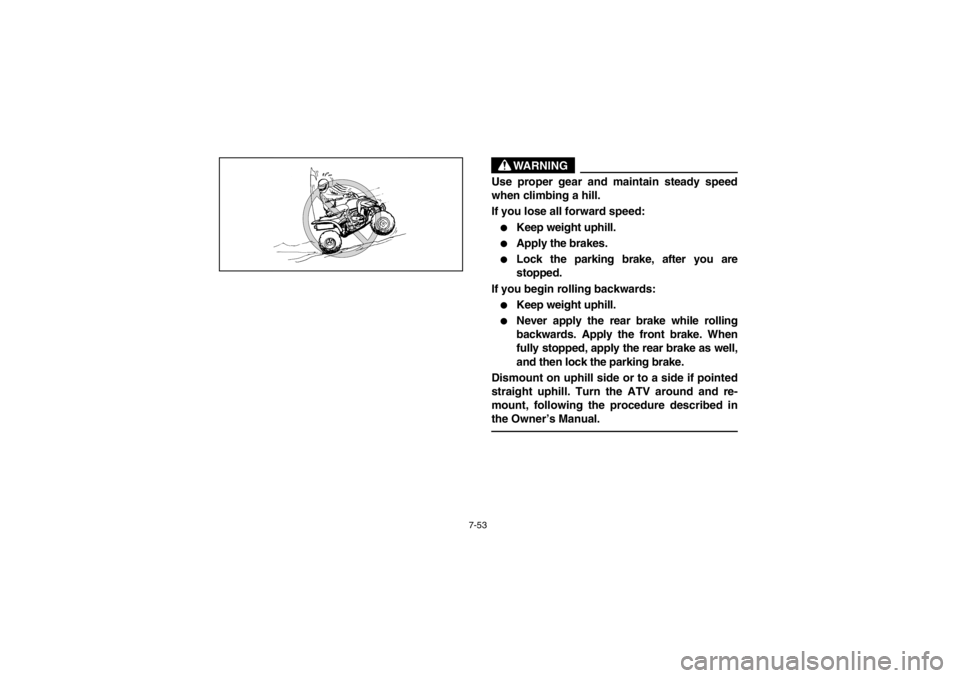
WARNING
_ Use proper gear and maintain steady speed
when climbing a hill.
If you lose all forward speed: �
Keep weight uphill.
�
Apply the brakes.
�
Lock the parking brake, after you are
stopped.
If you begin rolling backwards:
�
Keep weight uphill.
�
Never apply the rear brake while rolling
backwards. Apply the front brake. When
fully stopped, apply the rear brake as well,
and then lock the parking brake.
Dismount on uphill side or to a side if pointed
straight uphill. Turn the ATV around and re-
mount, following the procedure described in
the Owner’s Manual.
_
U5LP61.book Page 53 Monday, August 27, 2001 3:49 PM
Page 302 of 414
8-47 1. Unlock 2. Element retaining plate
1. Déverrouiller 2. Plaquette de retenue d’élément
1. Levántelo 2. Placa de retención del elemento
1. Frame 2. Air filter element
3. Element retaining plate
1. Armature 2.Élément du filtre à air
3. Plaquette de retenue d’élément
1. Bastidor 2. Elemento filtrante
3. Placa de retención del elemento
5. Squeeze the excess solvent out of the filter
element and let it dry.CAUTION:
Do not twist the filter element when squeezing
it. 6. Inspect the element and replace it if dam-
aged.
7. Apply foam air filter oil to the element. If foam
air filter oil is not available, motor oil may be
used.NOTE:The element should be wet but not dripping. 8. Pull the element over its frame.
9. Install the element assembly.
10. Install the air filter case cover and be sure to
connect the hose.
U5LP61.book Page 47 Monday, August 27, 2001 3:49 PM
Page 310 of 414
8-55 1. Locknut 2. Adjusting bolt
a. Throttle lever free play
1. Contre-écrou 2. Boulon de réglage
a. Jeu du levier d’accélération
1. Contratuerca 2. Perno de ajuste
a. Juego libre de la palanca del acelerador
EBU00307
Throttle lever adjustmentNOTE:Adjust the engine idling speed before adjusting the
throttle lever free play.1. Loosen the locknut.
2. Turn the adjusting bolt until the throttle lever
free play is 3 ~ 5 mm.
3. Tighten the locknut.
U5LP61.book Page 55 Monday, August 27, 2001 3:49 PM
Page 318 of 414

1. Couvercle du réservoir de liquide de frein
2. Boulon (× 2)
1. Cubierta del depósito de líquido de frenos
2. Perno (× 2)
Rear
Arrière
Trasero")
8-63 1. Brake fluid reservoir cover
2. Bolt (× 2)
1. Couvercle du réservoir de liquide de frein
2. Boulon (× 2)
1. Cubierta del depósito de líquido de frenos
2. Perno (× 2)
Rear
Arrière
Trasero
Observe these precautions:�
When checking the fluid level, make sure the
top of the brake fluid reservoir is level.
�
Use only the designated quality brake fluid.
Otherwise, the rubber seals may deteriorate,
causing leakage and poor brake performance.
�
Refill with the same type of brake fluid. Mixing
fluids may result in a harmful chemical reaction
and lead to poor brake performance.
�
Be careful that water does not enter the brake
fluid reservoir when refilling. Water will signifi-
cantly lower the boiling point of the fluid and
may result in vapor lock.
�
Brake fluid may deteriorate painted surfaces or
plastic parts. Always clean up spilled fluid im-
mediately.
�
Have a Yamaha dealer check the cause if the
brake fluid level goes down. Recommended brake fluid: DOT 4
U5LP61.book Page 63 Monday, August 27, 2001 3:49 PM
Page 326 of 414
8-71 1. Locknut 2. Adjusting bolt
1. Contre-écrou 2. Boulon de réglage
1. Contratuerca 2. Perno de ajuste
1. Locknut 2. Adjusting bolt
a. Cable length
1. Contre-écrou 2. Boulon de réglage
a. Longueur de câble
1. Contratuerca 2. Perno de ajuste
a. Longitud del cable
EBU00953
Parking brake adjustment
Parking brake adjustment may be required if the
parking brake does not hold properly.
1. Fully loosen the parking brake cable adjust-
ing bolt locknut and the adjusting bolt on the
clutch lever.
2. Loosen the adjusting bolt locknut and the ad-
justing bolt on the rear brake caliper.
3. Turn the adjusting bolt on the clutch lever so
that cable length
a is 64 ~ 68 mm.NOTE:If the cable cannot be adjusted to specification,
consult a Yamaha dealer. _4. Tighten the adjusting bolt locknut on the
clutch lever.
U5LP61.book Page 71 Monday, August 27, 2001 3:49 PM
Page 328 of 414
8-73
5. Screw in the adjusting bolt on the brake cali-
per by hand until it feels tight, then screw it
out 1/8 turn. Tighten the adjusting bolt locknut
to the specified torque.CAUTION:_ When tightening the locknut, hold the adjust-
ing bolt with a wrench so that the adjusting
bolt does not turn together with the locknut. _
WARNING
_ Operating with improperly adjusted brakes
could cause the brakes to malfunction, result-
ing in reduced braking performance. This
could increase the chance of a collision or ac-
cident. After adjusting the parking brake, block
the rear of the machine off the ground and spin
the rear wheels. Check to make sure there is
no brake drag. If brake drag is noticed, perform
the adjustment again. _
Tightening torque:
Locknut:
16 Nm (1.6 m·kgf)
U5LP61.book Page 73 Monday, August 27, 2001 3:49 PM
Page 332 of 414

8-77 1. Locknut 2. Adjusting bolt c. Free play
1. Contre-écrou 2. Boulon de réglage c. Jeu
1. Contratuerca 2. Perno de ajuste c. Juego libre
1. Locknut 2. Adjusting nut
1. Contre-écrou 2.Écrou de réglage
1. Contratuerca 2. Tuerca de ajuste
EBU00741
Clutch lever free play adjustment
The clutch lever free play should be adjusted to
5~10mm.
1. Loosen the locknut at the clutch lever.
2. Turn the adjusting bolt at the clutch lever in
direction
a to increase the free play or in di-
rection
b to decrease the free play.
3. Tighten the locknut at the clutch lever.NOTE:If the specified free play cannot be obtained, pro-
ceed with the following steps.4. Loosen the locknut at the clutch lever.
5. Turn the adjusting bolt at the clutch lever in
direction
a to loosen the cable.
6. Loosen the locknut at the crankcase side.
7. Turn the adjusting nut at the crankcase in di-
rection
a to increase the free play or in direc-
tion
b to decrease the free play.
8. Tighten the locknut at the crankcase and the
clutch lever.
U5LP61.book Page 77 Monday, August 27, 2001 3:49 PM