Page 166 of 414
6-27 1. Button 2. Lock plate
1. Bouton 2. Verrou
1. Botón 2. Placa de bloqueo
1. Locked position
1. Position verrou bloqué
1. Posición bloqueada
EBU00211
Parking
When parking, stop the engine and shift into neu-
tral. Turn the fuel cock to “OFF” and apply the
parking brake.
U5LP61.book Page 27 Monday, August 27, 2001 3:49 PM
Page 168 of 414
6-29
EBU00993
Parking on a slope
WARNING
_ Avoid parking on hills or other inclines. Park-
ing on a hill or other incline could cause the
ATV to roll out of control, increasing the
chance of an accident. If you must park on an
incline, put the machine in low gear, apply the
parking brake, and block the front and rear
wheels with rocks or other objects.
Do not park the ATV at all on hills that are so
steep you could not walk up them easily. _1. Bring the machine to a stop by applying the
brakes in low gear.
2. Stop the engine and release the clutch lever.
3. With the front and rear brakes applied, apply
the parking brake and slowly release the
brake pedal.
U5LP61.book Page 29 Monday, August 27, 2001 3:49 PM
Page 210 of 414
7-33
Select a large, flat area off-road to become familiar
with your ATV. Make sure that this area is free of
obstacles and other riders. You should practice
control of the throttle, brakes, shifting procedures,
and turning techniques in this area before trying
more difficult terrain. Always avoid riding on paved
surfaces: the ATV is designed for off-road use
only, and handling maneuvers are more difficult to
perform on pavement.
Set the parking brake and follow the instruction on
page 6-3 to start the engine. Once it has warmed
up you are ready to begin riding your ATV. As you
get on the ATV, be sure not to accidentally move
the shift pedal. Remember that the engine and ex-
haust pipe will be hot when riding and afterwards;
do not allow skin or clothing to come in contact
with these components.
U5LP61.book Page 33 Monday, August 27, 2001 3:49 PM
Page 212 of 414
 7-35
With the engine idling, pull the clutch lever to dis-
engage the clutch and shift into 1st gear, and then
release the parking brake. Open the throttle grad-
ually, and at the same time, release t")
7-35
With the engine idling, pull the clutch lever to dis-
engage the clutch and shift into 1st gear, and then
release the parking brake. Open the throttle grad-
ually, and at the same time, release the clutch le-
ver slowly. Once the ATV has attained adequate
speed, release the throttle lever and at the same
time, quickly pull in the clutch lever and shift into
2nd gear. Open the throttle part way and gradually
release the clutch. Use this same procedure as
you move into the higher gears. Be sure to coordi-
nate the use of the throttle and shift pedal properly.
If the throttle is applied too abruptly or if the throttle
is not released during shifting, or if the shift pedal
is not released before applying the throttle, the
front wheels may lift off the ground resulting in a
loss of directional control. Avoid higher speeds un-
til you are thoroughly familiar with the operation of
your ATV.
WARNING
_ Always open the throttle gradually and release
the clutch lever slowly. Otherwise, the ATV
could wheelie which would increase the
chance of an accident. _
U5LP61.book Page 35 Monday, August 27, 2001 3:49 PM
Page 230 of 414
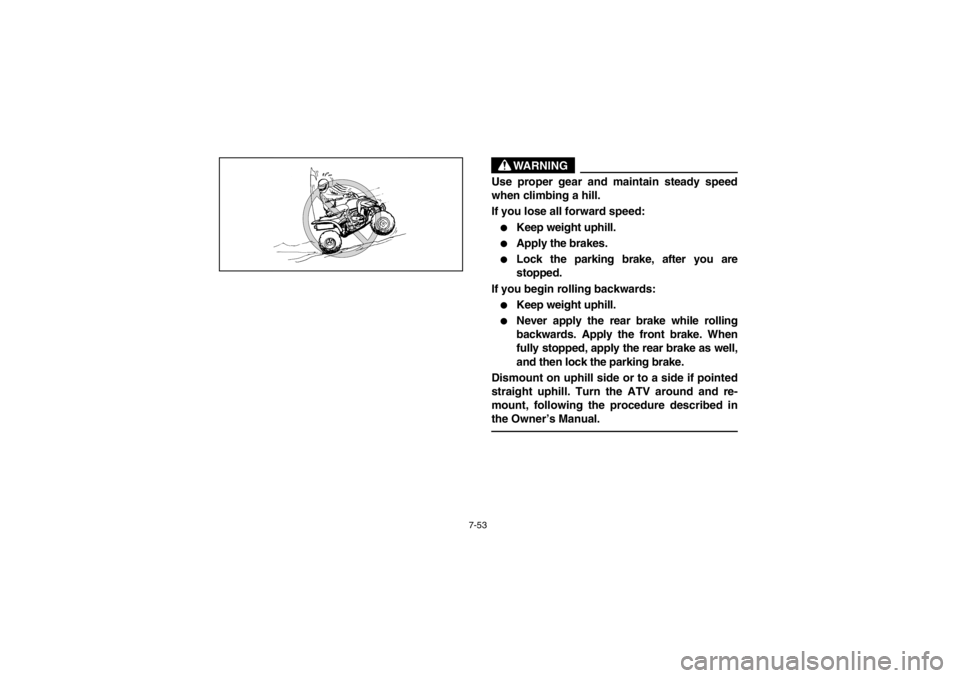
7-53
WARNING
_ Use proper gear and maintain steady speed
when climbing a hill.
If you lose all forward speed: �
Keep weight uphill.
�
Apply the brakes.
�
Lock the parking brake, after you are
stopped.
If you begin rolling backwards:
�
Keep weight uphill.
�
Never apply the rear brake while rolling
backwards. Apply the front brake. When
fully stopped, apply the rear brake as well,
and then lock the parking brake.
Dismount on uphill side or to a side if pointed
straight uphill. Turn the ATV around and re-
mount, following the procedure described in
the Owner’s Manual.
_
U5LP61.book Page 53 Monday, August 27, 2001 3:49 PM
Page 326 of 414
8-71 1. Locknut 2. Adjusting bolt
1. Contre-écrou 2. Boulon de réglage
1. Contratuerca 2. Perno de ajuste
1. Locknut 2. Adjusting bolt
a. Cable length
1. Contre-écrou 2. Boulon de réglage
a. Longueur de câble
1. Contratuerca 2. Perno de ajuste
a. Longitud del cable
EBU00953
Parking brake adjustment
Parking brake adjustment may be required if the
parking brake does not hold properly.
1. Fully loosen the parking brake cable adjust-
ing bolt locknut and the adjusting bolt on the
clutch lever.
2. Loosen the adjusting bolt locknut and the ad-
justing bolt on the rear brake caliper.
3. Turn the adjusting bolt on the clutch lever so
that cable length
a is 64 ~ 68 mm.NOTE:If the cable cannot be adjusted to specification,
consult a Yamaha dealer. _4. Tighten the adjusting bolt locknut on the
clutch lever.
U5LP61.book Page 71 Monday, August 27, 2001 3:49 PM
Page 328 of 414
8-73
5. Screw in the adjusting bolt on the brake cali-
per by hand until it feels tight, then screw it
out 1/8 turn. Tighten the adjusting bolt locknut
to the specified torque.CAUTION:_ When tightening the locknut, hold the adjust-
ing bolt with a wrench so that the adjusting
bolt does not turn together with the locknut. _
WARNING
_ Operating with improperly adjusted brakes
could cause the brakes to malfunction, result-
ing in reduced braking performance. This
could increase the chance of a collision or ac-
cident. After adjusting the parking brake, block
the rear of the machine off the ground and spin
the rear wheels. Check to make sure there is
no brake drag. If brake drag is noticed, perform
the adjustment again. _
Tightening torque:
Locknut:
16 Nm (1.6 m·kgf)
U5LP61.book Page 73 Monday, August 27, 2001 3:49 PM
 6-27 1. Button 2. Lock plate
1. Bouton 2. Verrou
1. Botón 2. Placa de bloqueo
1. Locked position
1. Position verrou bloqué
1. Posición bloqueada
EBU00211
Parking
When parking, stop the engine and s")
 6-29
EBU00993
Parking on a slope
WARNING
_ Avoid parking on hills or other inclines. Park-
ing on a hill or other incline could cause the
ATV to roll out of control, increasing the
chance of an accide")
 7-33
Select a large, flat area off-road to become familiar
with your ATV. Make sure that this area is free of
obstacles and other riders. You should practice
control of the throttle, brakes, shifting")
 8-71 1. Locknut 2. Adjusting bolt
1. Contre-écrou 2. Boulon de réglage
1. Contratuerca 2. Perno de ajuste
1. Locknut 2. Adjusting bolt
a. Cable length
1. Contre-écrou 2. Boulon de réglage
a. Longu")
 8-73
5. Screw in the adjusting bolt on the brake cali-
per by hand until it feels tight, then screw it
out 1/8 turn. Tighten the adjusting bolt locknut
to the specified torque.CAUTION:_ When tightenin")