Page 16 of 258
3
1. Headlight and turn signal switch
2. Wiper and washer switch
3. Rear window defogger switch
4. Trip meter reset button
5. Emergency flasher switch
6. Multi−information display
7. Switching km/h MPH button
8. Security indicator light
9. Clock
10. Car audio 11. Air conditioning controls
12. Auxiliary box
13. Power outlet
14. Ignition switch
15. Cruise control switch
16. Power rear view mirror control switch
17. Instrument panel light control dial
11p001g
Page 37 of 258

24
CAUTION
Before driving, be sure that the doors
are closed and locked, especially
when small children are in the ve-
hicle. Along with the proper use of
seat belts, locking the doors helps
prevent the driver and passengers
from being thrown out from the ve-
hicle during an accident. It also helps
prevent the doors from being opened
unintentionally.
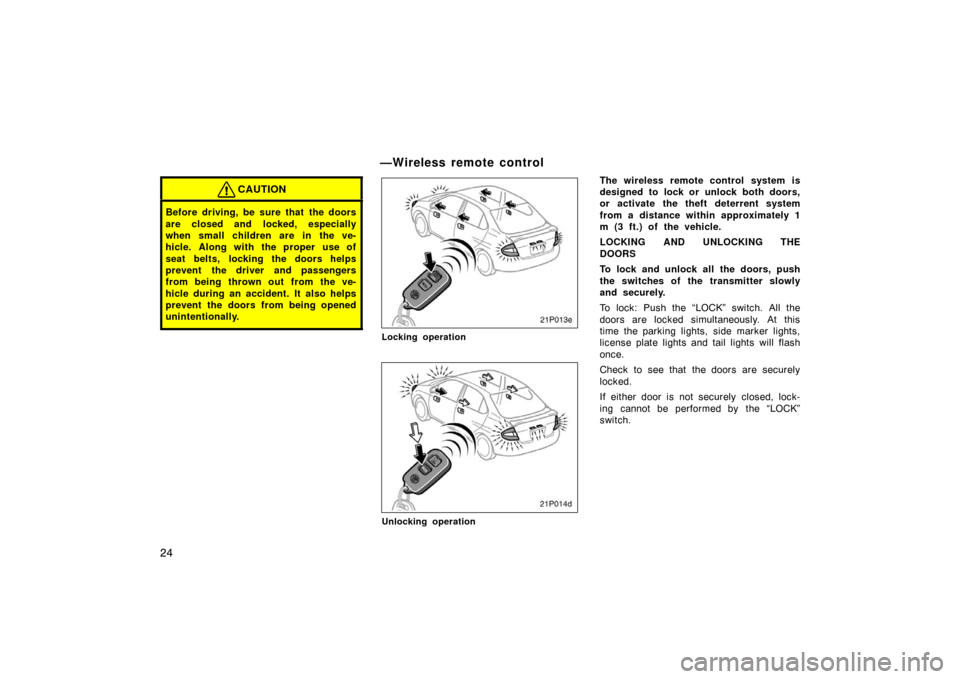
21p013e
Locking operation
21p014d
Unlocking operation
The wireless remote control system is
designed to lock or unlock both doors,
or activate the theft deterrent system
from a distance within approximately 1
m (3 ft.) of the vehicle.
LOCKING AND UNLOCKING THE
DOORS
To lock and unlock all the doors, push
the switches of the transmitter slowly
and securely.
To lock: Push the “LOCK” switch. All the
doors are locked simultaneously. At this
time the parking lights, side marker lights,
license plate lights and tail lights will flash
once.
Check to see that the doors are securely
locked.
If either door is not securely closed, lock-
ing cannot be performed by the “LOCK”
switch.
—Wireless remote control
Page 41 of 258

28
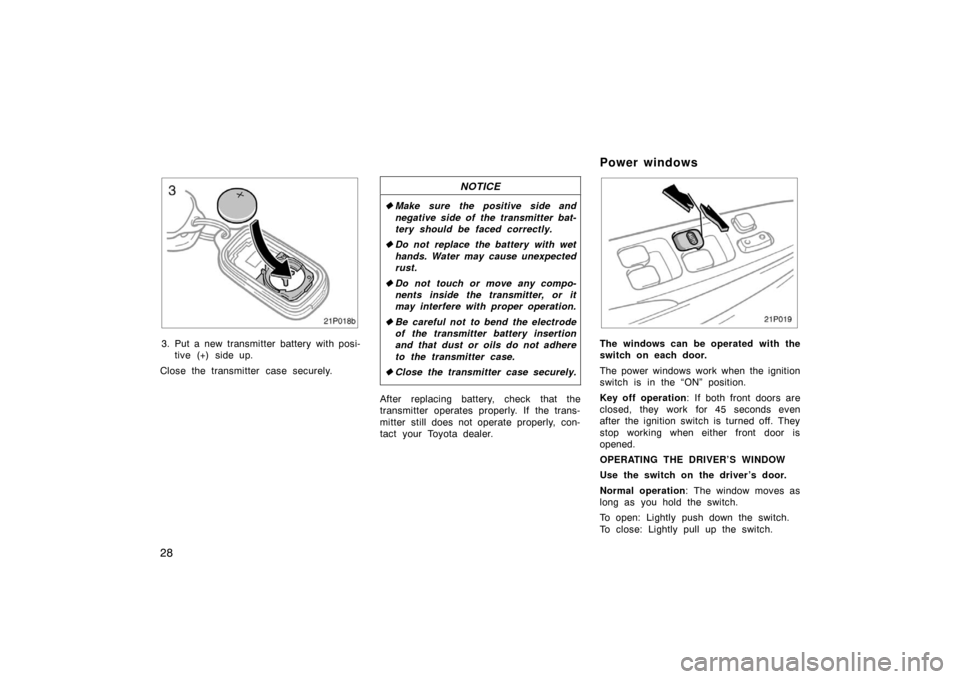
21p018b
3. Put a new transmitter battery with posi-tive (+) side up.
Close the transmitter case securely.
NOTICE
� Make sure the positive side and
negative side of the transmitter bat-
tery should be faced correctly.
� Do not replace the battery with wet
hands. Water may cause unexpected
rust.
� Do not touch or move any compo-
nents inside the transmitter, or it
may interfere with proper operation.
� Be careful not to bend the electrode
of the transmitter battery insertion
and that dust or oils do not adhere
to the transmitter case.
� Close the transmitter case securely.
After replacing battery, check that the
transmitter operates properly. If the trans-
mitter still does not operate properly, con-
tact your Toyota dealer.
21p019
The windows can be operated with the
switch on each door.
The power windows work when the ignition
switch is in the “ON” position.
Key off operation : If both front doors are
closed, they work for 45 seconds even
after the ignition switch is turned off. They
stop working when either front door is
opened.
OPERATING THE DRIVER’S WINDOW
Use the switch on the driver’s door.
Normal operation : The window moves as
long as you hold the switch.
To open: Lightly push down the switch.
To close: Lightly pull up the switch.
Power windows
Page 44 of 258
31
21p024a
To open the trunk lid from the outside,
insert the key and turn it clockwise.
See “Luggage stowage precautions” on
page 156 in Section 3 for precautions to
observe in loading luggage.
To close the trunk lid, lower it and press
down on it. After closing the trunk lid, try
pulling it up to make sure it is securely
closed.
CAUTION
Keep the trunk lid closed while driv-
ing. This not only keeps the luggage
from being thrown out, but also pre-
vents exhaust gases from entering
the vehicle.
�Always lock the trunk lid and all
doors, and keep away the vehicle
keys out of children’s reaches.
�Never leave children unattended in
the vehicle. Unsupervised children
may lock themselves in the vehicle
or trunk and suffer serious injuries
or death.
21p025a
To open the trunk lid from the driver’s
seat, pull up on the lock release lever.
Trunk lid——Lock release lever
Page 45 of 258
32
21p042
After closing the trunk lid, insert the
master key and turn it counterclockwise
to deactivate the lock release lever.
After closing the trunk lid, try pulling it up
to make sure it is securely locked.
—Internal trunk release handle
21p033c
If a person is locked in the trunk, he
or she can pull down the phosphores-
cent handle on the inside of trunk lid
in case of emergency to open the trunk
lid.
The phosphorescent (glow−in −the −dark)
handle will continue to glow for a time
after the trunk lid is closed. Exposing the
handle to stronger light will cause it to
glow longer.
21p026a
To open the hood:
1. Pull the hood lock release lever. The hood will spring up slightly.
CAUTION
Before driving, be sure that the hood
is closed and securely locked. Other-
wise, the hood may open unexpected-
ly while driving and an accident may
occur.
—Lock release lever
cancelling system Hood
Page 46 of 258
33
21p027c
2. In front of the vehicle, pull up theauxiliary catch l ever and lift the
hood.
21p032c
3. Hold the hood open by inserting the support rod into the slot.
Before closing the hood, check to see that
you have not forgotten any tools, rags,
etc. and return the support rod to its
clip—this prevents rattles. Then lower the
hood and make sure it locks into place.
If necessary, press down gently on the
front edge to lock it.
CAUTION
After inserting the support rod into
the slot, make sure the rod supports
the hood securely from falling down
on to your head or body.
NOTICE
Be sure to return the support rod to
its clip before closing the hood. Clos-
ing the hood with the support rod
inserted into the slot could cause the
hood to bend.
Page 49 of 258

36
CAUTION
�Do not smoke, cause spark or allow
open flames when refueling. The
fumes are flammable.
�When opening the cap, do not re-
move the cap quickly. In hot weath-
er, fuel under pressure could cause
injury by spraying out the filler
neck if the cap is suddenly re-
moved.
�Insert the fuel nozzle fully, or fuel
may splash out.
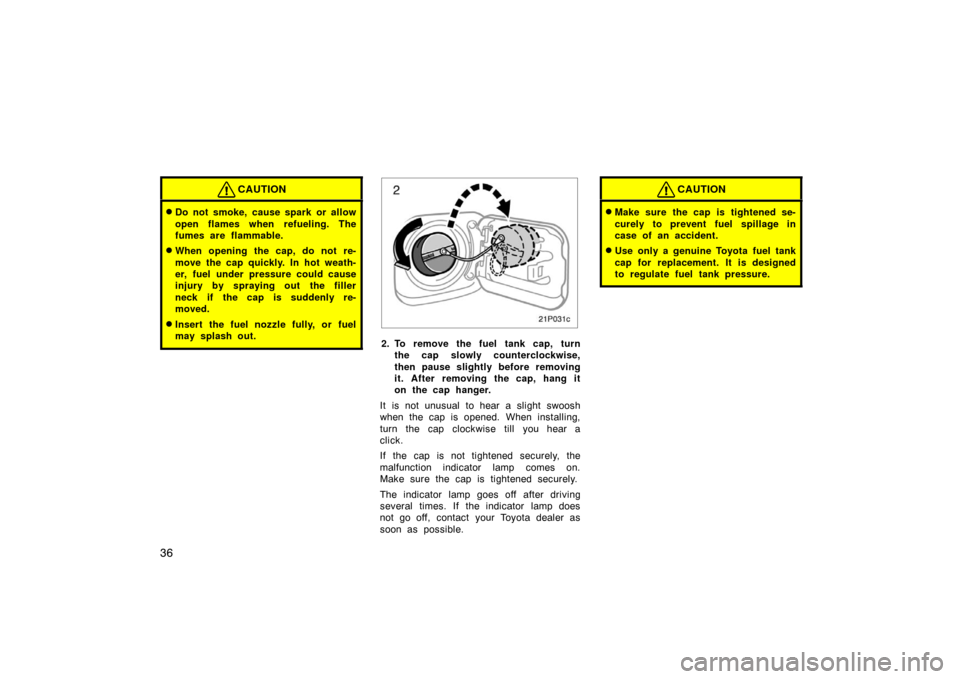
21p031c
2. To remove the fuel tank cap, turnthe cap slowly counterclockwise,
then pause slightly before removing
it. After removing the cap, hang it
on the cap hanger.
It is not unusual to hear a slight swoosh
when the cap is opened. When installing,
turn the cap clockwise till you hear a
click.
If the cap is not tightened securely, the
malfunction indicator lamp comes on.
Make sure the cap is tightened securely.
The indicator lamp goes off after driving
several times. If the indicator lamp does
not go off, contact your Toyota dealer as
soon as possible.
CAUTION
�Make sure the cap is tightened se-
curely to prevent fuel sp illage in
case of an accident.
�Use only a genuine Toyota fuel tank
cap for replacement. It is designed
to regulate fuel tank pressure.
Page 54 of 258

41
Do not allow the child to stand up or
kneel on either rear or front seats. An
unrestrained child could suffer serious in-
jury or death during emergency braking or
a collision. Also, do not let the child sit
on your lap. It does not provide sufficient
restraint.
Pregnant woman. Toyota recommends the
use of a seat belt. Ask your doctor for
specific recommendations. The lap belt
should be worn securely and as low as
possible over the hips and not on the
waist.
Injured person. Toyota recommends the
use of a seat belt. Depending on the inju-
ry, first check with your doctor for specific
recommendations.CAUTION
Persons should ride in their seats
properly wearing their seat belts
whenever the vehicle is moving.
Otherwise, they are much more likely
to suffer serious bodily injury or
death in the event of sudden braking
or a collision.
When using the seat belts, observe
the following:
�Use the belt for only one person at
a time. Do not use a single belt for
two or more people—even children.
�Avoid reclining the seatbacks too
much. The seat belts provide maxi-
mum protection when the seatbacks
are in the upright position. (Refer
to the seat adjustment instructions.)
�Be careful not to damage the belt
webbing or hardware. Take care that
they do not get caught or pinched
in the seat or doors.
�Inspect the belt system periodically.
Check for cuts, fraying, and loose
parts. Damaged parts should be re-
placed. Do not disassemble or
modify the system.
�Keep the belts clean and dry. If
they need cleaning, use a mild soap
solution or lukewarm water. Never
use bleach, dye or abrasive clean-
ers—they may severely weaken the
belts. (See “Cleaning the interior”
on page 189 in Section 6.)
�Replace the belt assembly (includ-
ing bolts) if it has been used in a
severe impact. The entire assembly
should be replaced even if damage
is not obvious.