2002 SUBARU FORESTER brake light
[x] Cancel search: brake lightPage 252 of 466
6-12
ing gears and operating the accelerator and brake pedals. If they do, do not use the electrical appliance while driving.If the socket has been used for electrical appliances, damage may
have been done to the internal mechanism that cause a cigarette
lighter to “pop-out” after its element has been heated. For that reason,
a cigarette lighter, even if it is a genuine part, should not be used in
the socket. If you want to use the socket for a cigarette lighter again,
or to protect your purchaser before you sell your car, have your
SUBARU dealer replace the socket with a new one.
Ashtray
CAUTION
Do not use ashtrays as waste receptacles or leave a lighted ciga-
rette in an ashtray. This could cause a fire.
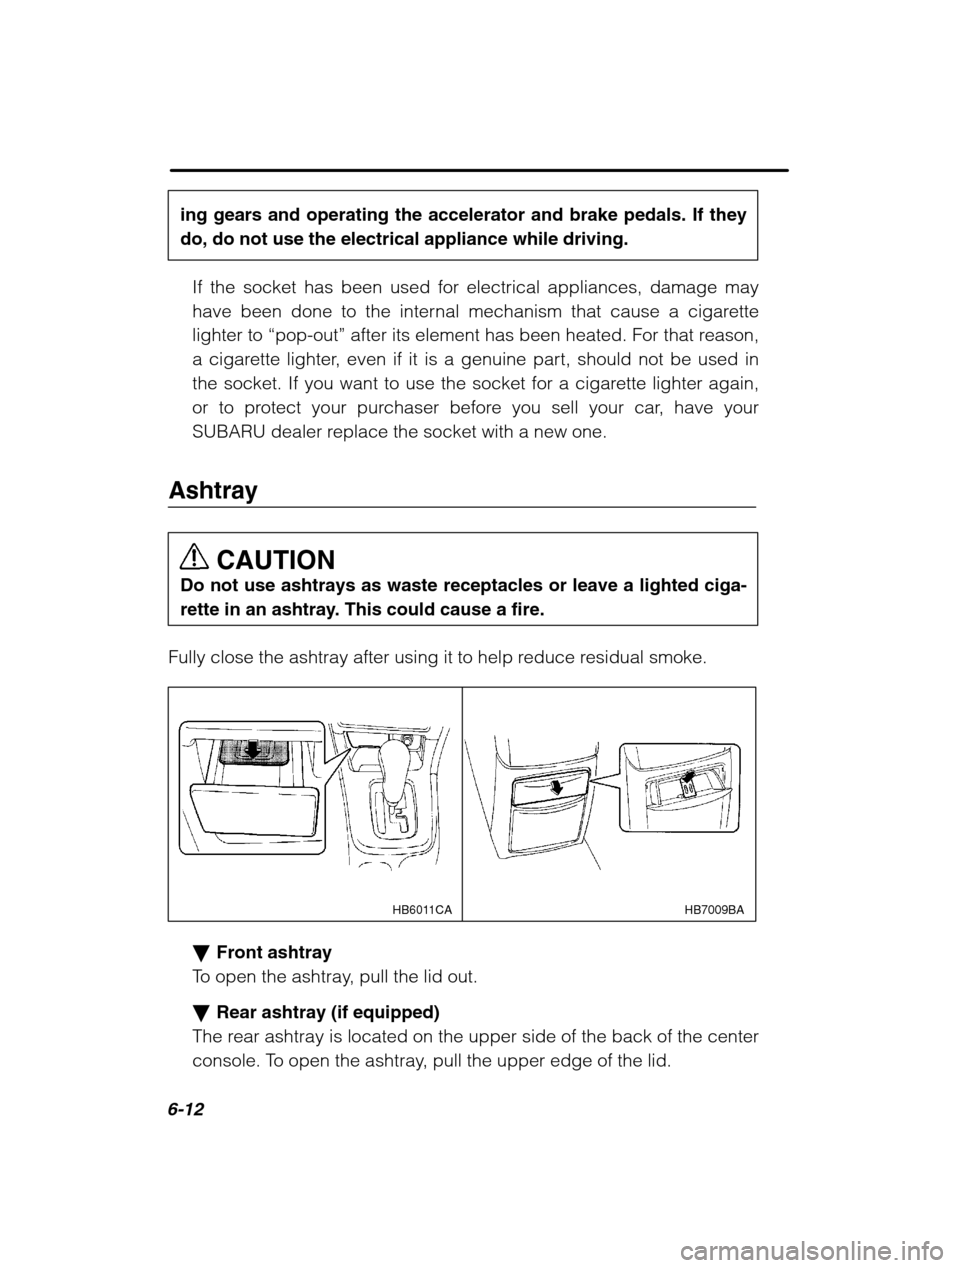
Fully close the ashtray after using it to help reduce residual smoke.
HB7009BA
HB6011CA
� Front ashtray
To open the ashtray, pull the lid out. � Rear ashtray (if equipped)
The rear ashtray is located on the upper side of the back of the center
console. To open the ashtray, pull the upper edge of the lid.
Page 267 of 466

7-8
more accurate measurement of tailpipe emitted pollution than the basic emission test.
The U.S. Environmental Protection Agency (EPA) and states using two-
wheel dynamometers in their emission testing programs haveEXEMPTED Subaru AWD vehicles from the portion of the testing pro-
gram that involves a two-wheel dynamometer.
There are some states that use four-wheel dynamometers in their testing
programs. When properly used, that equipment will not damage an AWD Subaru vehicle.
Under no circumstances should the rear wheels be jacked off the
ground, nor should the driveshaft be disconnected for state emission testing.
Preparing to drive
You should perform the following checks and adjustments every day be-
fore you start driving.
1. Check that all windows, mirrors, and lights are clean and unob- structed.
2. Check the appearance and condition of the tires. Also check tires for
proper inflation.
3. Look under the vehicle for any sign of leaks.
4. Check that the hood, trunk and rear gate are fully closed.
5. Check the adjustment of the seat.
6. Check the adjustment of the inside and outside mirrors.
7. Fasten your seatbelt. Check that your passengers have fastened theirseatbelts.
8. Check the operation of the warning and indicator lights when the igni-
tion switch is turned to the “ON” position.
9. Check the gauges, indicator and warning lights after starting the en-gine. NOTE Engine oil, engine coolant, brake fluid, washer fluid and other fluid
levels should be checked daily, weekly or at fuel stops.
Page 268 of 466
Starting and operating7-9
–
CONTINUED –
Starting the engine
CAUTION
Do not operate the starter motor continuously for more than ten
seconds. If the engine fails to start after operating the starter forfive to ten seconds, wait for ten seconds or more before tryingagain.
� Starting the engine for a manual transmission vehicle
1. Apply the parking brake.
2. Turn off unnecessary lights and accessories.
3. Press the clutch pedal to the floor and shift the shift lever into neutral.
Hold the clutch pedal to the floor while starting the engine. The starter
motor will only operate when the clutch pedal is pressed fully to the floor.
4. Turn the ignition switch to the “ON” position and check the operation
of the warning and indicator lights. Refer to the “Warning and indicator
light” section (chapter 3).
5. Turn the ignition switch to the “START” position without depressing
the accelerator pedal. Release the key immediately after the engine has
started.
If the engine does not start within ten seconds, wait a while and then turn the ignition switch to the “START” position again while depressing the ac-
celerator pedal half way down.
6. Confirm that all warning and indicator lights have gone off after the
engine has started. The fuel injection system automatically lowers the
idle speed as the engine warms up.
� Starting the engine for an automatic transmission ve- hicle
CAUTION
If you restart the engine while the vehicle is moving, shift the se- lector lever into the “N” position. Do not attempt to place the se-
lector lever of a moving vehicle into the “P” position.
Page 269 of 466
7-10
1. Apply the parking brake.
2. Turn off unnecessary lights and accessories.
3. Shift the selector lever to the “P” or “N” position (preferably “P” posi-
tion). The starter will only operate when the select lever is at the “P” or
“N” position.
4. Turn the ignition switch to the “ON” position and check the operation
of the warning and indicator lights. Refer to the “Warning and indicator
lights” section (chapter 3).
5. Turn the ignition switch to the “START” position without depressing
the accelerator pedal. Release the key immediately after the engine has
started.
If the engine does not start within ten seconds, wait a while and then turnthe ignition switch to the “START” position again while depressing the ac-
celerator pedal half way down.
6. Confirm that all warning and indicator lights have gone out after the
engine has started. The fuel injection system automatically lowers the
idle speed as the engine warms up.
While the engine is warming up, make sure that the selector lever is at the “P” or “N” position and that the parking brake is applied.
� Starting the engine during cold weather below –4°F
(–20 °C)
If the engine is difficult to start using the normal method (without de-
pressing the accelerator pedal), turn the ignition switch to the “START”
position while slightly depressing the accelerator pedal.
� Starting a flooded engine
If the engine does not start, it may be flooded (excessive fuel in the en-gine).
In case of a flooded engine, turn the starter motor for five seconds with
the accelerator pedal fully depressed. Repeat this two or three times until
the engine starts. Release the ignition switch and accelerator pedal as
soon as the engine starts.
Page 275 of 466
7-16
To shift the selector lever from the “P” to the any other position, you
have to depress the brake pedal fully when the ignition switch is in the
“ON” position. This prevents the vehicle from lurching when it is
started.
If the shift lever does not move from the “P” position with the brake
pedal depressed, refer to the “Shift lock release ” section in this chap-
ter. � R (Reverse)
This position is for backing the vehicle.
To shift from the “N” to “R” position, first stop the vehicle completely
then move the lever to the “R” position.
� N (Neutral)
WARNING
Do not drive the vehicle with the selector lever in the “N” (neutral)
position. Engine braking has no effect in this condition and the risk of an accident is consequently increased.
This position is for restarting a stalled engine.
In this position the wheels and transmission are not locked. In this
position, the transmission is neutral; the vehicle will roll freely, even onthe slightest incline unless the parking brake or foot brake is on. � D (Drive)
This position is for normal driving.
The transmission automatically shifts into a suitable gear from 1st to
4th according to the vehicle speed and the acceleration you require.
When more acceleration is required in this position, press the acceler- ator pedal fully to the floor and hold that position. The transmission
will automatically downshift to 3rd, 2nd or 1st gear. When you release
the pedal, the transmission will return to the original gear position. n While climbing a grade
When driving up a hill, undesired upshift to 4th gear is prevented from
Page 280 of 466
Starting and operating7-21
–
CONTINUED –
Power steering
CAUTION
Do not hold the steering wheel at the fully locked position left or right for more than five seconds. This may damage the powersteering pump.
The power steering system operates only when the engine is running.
If you lose power steering assist because the engine stops or the system
fails to function, you can steer but it will take much more effort. NOTE Right after the engine has been started and before it has warmed up, you may hear a noise coming from areas adjacent to the powersteering pump which is located at the right-front area of the enginecompartment. This noise is normal. It does not indicate power steer-ing system trouble. Braking � Braking tips
WARNING
Never rest your foot on the brake pedal while driving. This can
cause dangerous overheating of the brakes and needless wearon the brake pads and linings.
� When the brakes get wet
When driving in rain or after washing the vehicle, the brakes may get
wet. As a result, brake stopping distance will be longer. To dry the
brakes, drive the vehicle at a safe speed while lightly depressing thebrake pedal to heat up the brakes.
Page 283 of 466
7-24
leave ample distance from other vehicles. �When you feel the ABS system operating, you should maintain
constant brake pedal pressure. Do not pump the brake pedal
since doing so may defeat the operation of the ABS system.
The ABS system prevents the lock-up of wheels which may occur during
sudden braking or braking on slippery road surfaces. This helps prevent
the loss of steering control and directional stability caused by wheellock-up.
When the ABS system is operating, you may hear a chattering noise or
feel a slight vibration in the brake pedal. This is normal when the ABSoperates. The ABS system will not operate when the vehicle speed is below
approximately 6 mph (10 km/h). � ABS system self-check
You may feel a slight shock in the brake pedal and hear the operating
sound of ABS from the engine compartment just after the vehicle is
started. This is caused by an automatic functional test of the ABS sys-
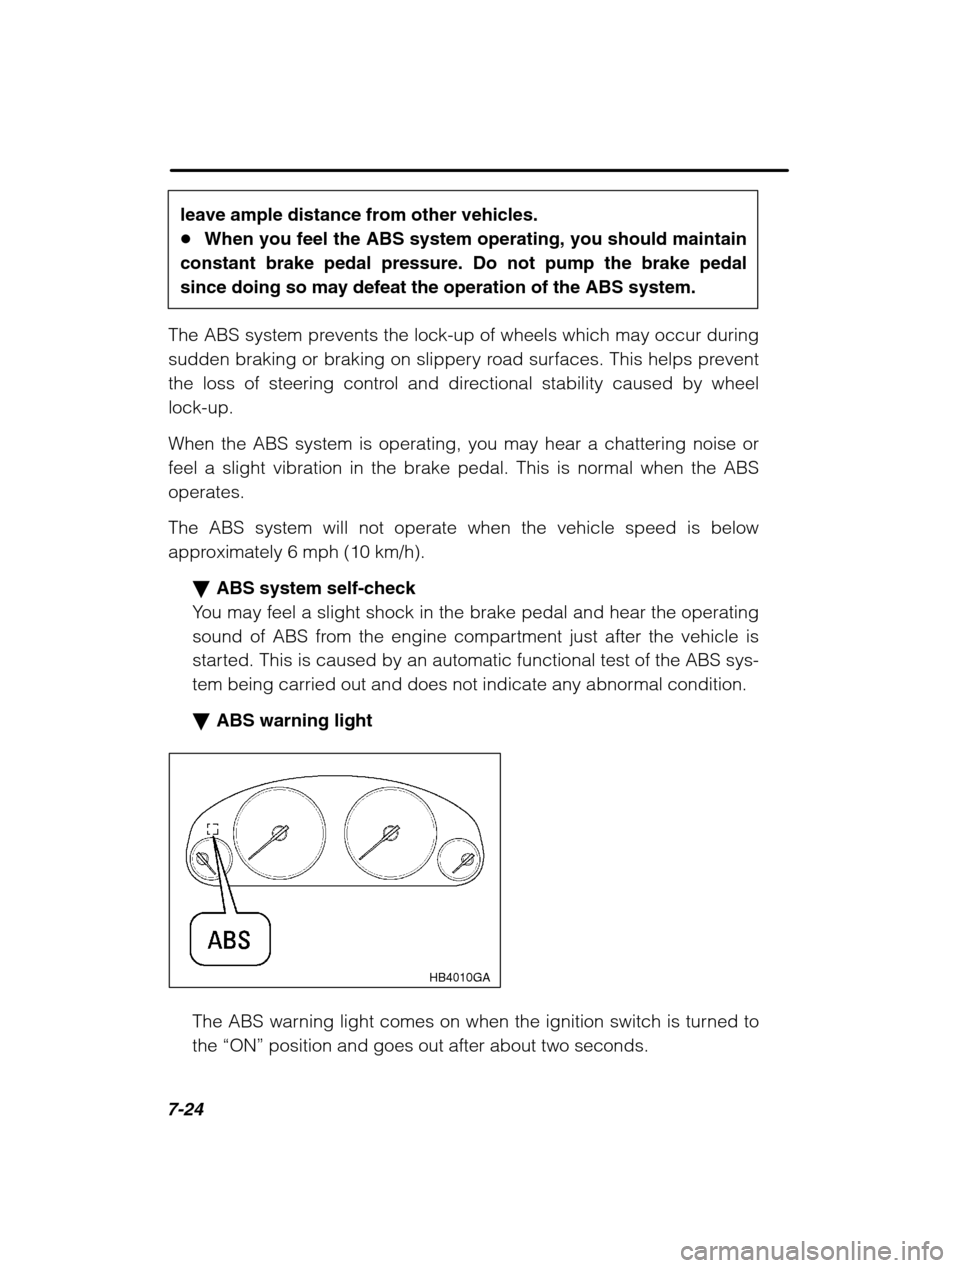
tem being carried out and does not indicate any abnormal condition. � ABS warning light
HB4010GA
The ABS warning light comes on when the ignition switch is turned to the “ON” position and goes out after about two seconds.
Page 284 of 466
Starting and operating7-25
–
CONTINUED –
This is an indication that the ABS system is working properly.
CAUTION
If the warning light behaves as follows, the ABS system may not
be working properly.When the warning light is on, the ABS function shuts down; how-
ever, the conventional brake system continues to operate normal-
ly.� The warning light does not come on when the ignition switch
is turned to the “ON” position.
� The warning light comes on when the ignition switch is turned
to the “ON” position, but it does not go out even when the vehicle
speed exceeds approximately 8 mph (12 km/h).� The warning light comes on during driving.
If these occur, have the ABS system repaired at the first available
opportunity by your SUBARU dealer.
NOTE
If the warning light behavior is as described below, the ABS sys- tem may be considered normal.� The warning light comes on right after the engine is started
but goes out immediately, remaining off.� The warning light remains on after the engine has been
started, but it goes out when the vehicle speed reaches about 8mph (12 km/h).� The warning light comes on during driving, but it goes out
immediately and remains off.
When driving with an insufficient battery voltage such as when the en-
gine is jump started, the ABS warning light may come on. This is due
to the low battery voltage and does not indicate a malfunction. When
the battery becomes fully charged, the light will go out.