Page 276 of 374
6-14
Turn off the engine and give the oil several minutes to
drain back into the oil pan. If you don't, the oil dipstick
might not show the actual level.
Pull out the dipstick and clean it with a paper towel or
cloth, then push it back in all the way. Remove it again,
keeping the tip down, and check the level.
3100 V6 Engine
3800 V6 Engine or 3800 V6 Supercharged Engine
Page 282 of 374

6-20
Engine Air Cleaner/Filter
The engine air cleaner/filter is located in the front of the
engine compartment on the driver's side. See ªEngine
Compartment Overviewº in the Index for more
information on location.
To check or replace the engine air cleaner/filter do
the following:
1. Loosen the two clips located on the top of the engine
air cleaner/filter housing and lift the filter cover tabs
out of the housing.
2. Push the filter cover housing toward the engine.
3. Pull out the old filter.
4. Check or install a new engine air cleaner/filter.
See ªNormal Maintenance Replacement Partsº in
the Index.
5. To reinstall the cover, position the tabs through the
slots on the housing. A notch on the sides of the
filter cover will indicate the correct placement.
Reinstall the two clips on the top of the engine air
cleaner/filter housing when you are finished.
Refer to the Maintenance Schedule to determine when to
replace the air filter.
See ªScheduled Maintenance Servicesº in the Index.
Page 284 of 374

6-22 How to Check and Add Oil
Park the vehicle on a level surface. Check oil only when
the engine is cold. Allow the engine to cool two to three
hours after running.
CAUTION:
If you remove the supercharger oil fill plug while
the engine is hot, pressure may cause hot oil to
blow out of the oil fill hole. You may be burned.
Do not remove the plug until the engine cools.
1. Clean the area around the oil fill plug before
removing it.
2. Remove the oil fill plug using a 3/16 inch
Allen wrench.
3. The oil level is correct when it just reaches the
bottom of the threads of the inspection hole.
4. Replace the oil plug with the O
-ring in place.
Tighten to 88 lb
-in (10 N´m).
Automatic Transaxle Fluid
When to Check and Change
A good time to check your automatic transaxle fluid
level is when the engine oil is changed.
Change both the fluid and filter every 50,000 miles
(83 000 km) if the vehicle is mainly driven under one or
more of these conditions:
�In heavy city traffic where the outside temperature
regularly reaches 90�F (32�C) or higher.
�In hilly or mountainous terrain.
�When doing frequent trailer towing.
�Uses such as found in taxi, police or delivery service.
If you do not use your vehicle under any of
these conditions, change the fluid and filter
at 100,000 miles (166 000 km).
See ªScheduled Maintenance Servicesº in the Index.
Page 286 of 374
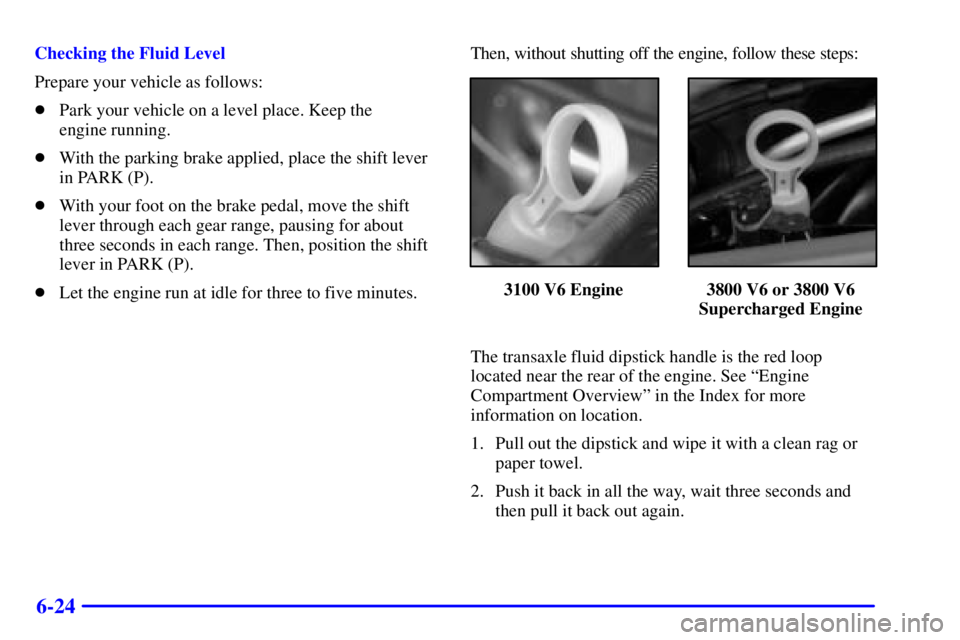
6-24
Checking the Fluid Level
Prepare your vehicle as follows:
�Park your vehicle on a level place. Keep the
engine running.
�With the parking brake applied, place the shift lever
in PARK (P).
�With your foot on the brake pedal, move the shift
lever through each gear range, pausing for about
three seconds in each range. Then, position the shift
lever in PARK (P).
�Let the engine run at idle for three to five minutes.Then, without shutting off the engine, follow these steps:
3100 V6 Engine 3800 V6 or 3800 V6
Supercharged Engine
The transaxle fluid dipstick handle is the red loop
located near the rear of the engine. See ªEngine
Compartment Overviewº in the Index for more
information on location.
1. Pull out the dipstick and wipe it with a clean rag or
paper towel.
2. Push it back in all the way, wait three seconds and
then pull it back out again.
Page 291 of 374
6-29 Checking Coolant
The coolant recovery tank is located in the engine
compartment toward the rear of the engine on the
passenger's side of the vehicle. See ªEngine
Compartment Overviewº in the Index for more
information on location.The vehicle must be on a level surface. When your
engine is cold, the coolant level should be at the COLD
mark or a little higher. When your engine is warm, the
level should be up to the HOT mark or a little higher.
If this LOW COOLANT
light comes on and stays on,
it means you're low on
engine coolant.
Page 310 of 374
6-48
Windshield Wiper
Blade Replacement
Windshield wiper blades should be inspected at
least twice a year for wear or cracking. See
ªWindshield Wipers, Blade Checkº in the
Index for more information.
Replacement blades come in different types and are
removed in different ways. For the proper type and
length, see ªNormal Maintenance and Replacement
Partsº in the Index.To remove the wiper blade do the following:
1. Pull the windshield wiper arm away from
the windshield.
2. Push the release lever and slide the wiper assembly
toward the driver's side of the vehicle.
3. Install a new blade by reversing Steps 1 and 2.
Page 313 of 374
. Any time you notice unusual
wear, rotate your tires as soon as possible and check
wheel ali")
6-51 Tire Inspection and Rotation
Tires should be rotated every 6,000 to 8,000 miles
(10 000 to 13 000 km). Any time you notice unusual
wear, rotate your tires as soon as possible and check
wheel alignment. Also check for damaged tires or
wheels. See ªWhen It's Time for New Tiresº and
ªWheel Replacementº later in this section for
more information.
The purpose of regular rotation is to achieve more
uniform wear for all tires on the vehicle. The first
rotation is the most important. See ªScheduled
Maintenance Servicesº in the Index for scheduled
rotation intervals.
When rotating your tires, always use the correct
rotation pattern shown here.
Don't include the compact spare tire in your
tire rotation.
After the tires have been rotated, adjust the front and
rear inflation pressures as shown on the Tire
-Loading
Information label. Make certain that all wheel nuts
are properly tightened. See ªWheel Nut Torqueº in
the Index.
CAUTION:
Rust or dirt on a wheel, or on the parts to which
it is fastened, can make wheel nuts become loose
after a time. The wheel could come off and cause
an accident. When you change a wheel, remove
any rust or dirt from places where the wheel
attaches to the vehicle. In an emergency, you can
use a cloth or a paper towel to do this; but be
sure to use a scraper or wire brush later, if you
need to, to get all the rust or dirt off. See
ªChanging a Flat Tireº in the Index.
Page 321 of 374

6-59 Cleaning of Fabric/Carpet
Your dealer has cleaners for the cleaning of fabric and
carpet. They will clean normal spots and stains very
well. You can get GM
-approved cleaning products
from your dealer. See ªAppearance Care and Materialsº
in the Index.
Here are some cleaning tips:
�Always read the instructions on the cleaner label.
�Clean up stains as soon as you can
-- before they set.
�Carefully scrape off any excess stain.
�Use a clean cloth or sponge, and change to a
clean area often. A soft brush may be used if stains
are stubborn.
�If a ring forms on fabric after spot cleaning, clean the
entire area immediately or it will set.
Using Cleaner on Fabric
1. Vacuum and brush the area to remove any loose dirt.
2. Always clean a whole trim panel or section. Mask
surrounding trim along stitch or welt lines.
3. Follow the directions on the container label.
4. Apply cleaner with a clean sponge. Don't saturate
the material and don't rub it roughly.
5. As soon as you've cleaned the section, use a sponge
to remove any excess cleaner.
6. Wipe cleaned area with a clean, water
-dampened
towel or cloth.
7. Wipe with a clean cloth and let dry.