Page 175 of 427
3-
3-1
Section 3 Comfort Controls and Audio Systems
In this section, you'll find out how to operate the comfort control and audio systems offered with your vehicle.
Be sure to read about the particular systems supplied with your vehicle.
3
-2 Comfort Controls
3
-7 Air Conditioning
3
-7 Heating
3
-8 Defogging and Defrosting
3
-8 Rear Window Defogger
3
-9 Ventilation System
3
-11 Comfort Controls Personalization
(If Equipped)
3
-11 Audio Systems
3
-12 Setting the Clock
3
-12 AM-FM Stereo with Cassette Tape Player
with Programmable Equalization and Radio
Data System (RDS) (If Equipped)
3
-20 AM-FM Stereo with Compact Disc Player
with Programmable Equalization and Radio
Data System (RDS) (If Equipped)3
-29 AM-FM Stereo with Cassette Tape
and Compact Disc Player with
Programmable Equalization and
Radio Data System (RDS) (If Equipped)
3
-39 Trunk-Mounted CD Changer (Option)
3
-43 Theft-Deterrent Feature
3
-44 Audio Steering Wheel Controls (If Equipped)
3
-45 Understanding Radio Reception
3
-45 Tips About Your Audio System
3
-46 Care of Your Cassette Tape Player
3
-47 Care of Your Compact Discs
3
-47 Care of Your Compact Disc Player
3
-47 Diversity Antenna System
3
-48 Chime Level Adjustment
Page 213 of 427
3-39
Compact Disc Messages
CHECK CD: If this message appears on the radio
display and the disc comes out, it could be for one of the
following reasons:
�The road is too rough. The disc should play when the
road is smoother.
�The disc is dirty, scratched, wet or upside down.
�The air is very humid. If so, wait about an hour and
try again.
If the CD is not playing correctly, for any other reason,
try a known good CD.
If any error occurs repeatedly or if an error can't be
corrected, contact your dealer. If your radio displays an
error message, write it down and provide it to your
dealer when reporting the problem.Trunk-Mounted CD Changer (Option)
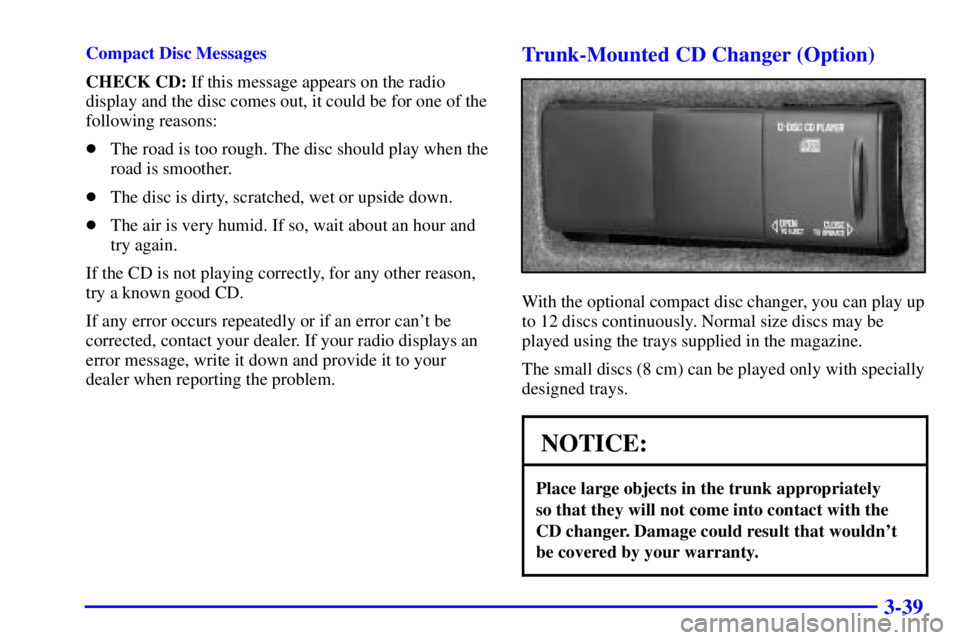
With the optional compact disc changer, you can play up
to 12 discs continuously. Normal size discs may be
played using the trays supplied in the magazine.
The small discs (8 cm) can be played only with specially
designed trays.
NOTICE:
Place large objects in the trunk appropriately
so that they will not come into contact with the
CD changer. Damage could result that wouldn't
be covered by your warranty.
Page 215 of 427
3-41
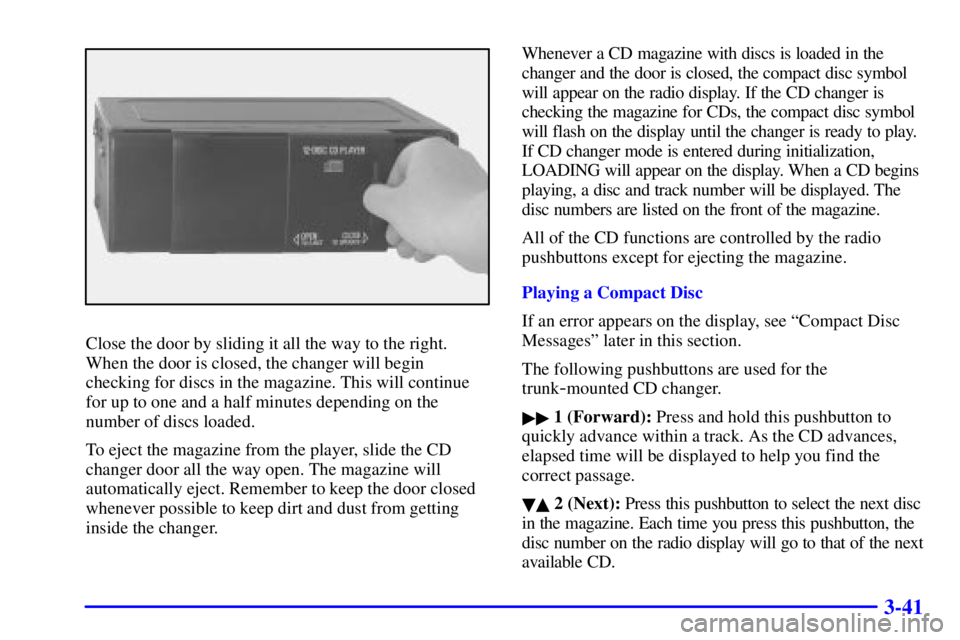
Close the door by sliding it all the way to the right.
When the door is closed, the changer will begin
checking for discs in the magazine. This will continue
for up to one and a half minutes depending on the
number of discs loaded.
To eject the magazine from the player, slide the CD
changer door all the way open. The magazine will
automatically eject. Remember to keep the door closed
whenever possible to keep dirt and dust from getting
inside the changer.Whenever a CD magazine with discs is loaded in the
changer and the door is closed, the compact disc symbol
will appear on the radio display. If the CD changer is
checking the magazine for CDs, the compact disc symbol
will flash on the display until the changer is ready to play.
If CD changer mode is entered during initialization,
LOADING will appear on the display. When a CD begins
playing, a disc and track number will be displayed. The
disc numbers are listed on the front of the magazine.
All of the CD functions are controlled by the radio
pushbuttons except for ejecting the magazine.
Playing a Compact Disc
If an error appears on the display, see ªCompact Disc
Messagesº later in this section.
The following pushbuttons are used for the
trunk
-mounted CD changer.
�� 1 (Forward): Press and hold this pushbutton to
quickly advance within a track. As the CD advances,
elapsed time will be displayed to help you find the
correct passage.
�� 2 (Next): Press this pushbutton to select the next disc
in the magazine. Each time you press this pushbutton, the
disc number on the radio display will go to that of the next
available CD.
Page 217 of 427

3-43
TAPE AUX, CD AUX or CD TAPE: Press this
button to play a CD if you have a magazine loaded in
the changer when listening to the radio. You can also
press this button to switch between a cassette tape, a CD
in the compact disc player and a CD in the
trunk
-mounted CD changer, if these sources are loaded.
Compact Disc Messages
If an error appears on the display, an error has occurred
and the compact disc temporarily cannot play.
The CD changer will send an error message to the
receiver to indicate one of the following:
�NO CDS: An empty magazine is inserted in the CD
changer. Try the magazine again with a disc loaded
on one of the trays.
�CHECK CD: If this message appears, it could be
one of the following:
The road is too rough. The disc should play when the
road is smoother.
The disc is dirty, scratched or wet.
The air is very humid. If so, wait about an hour and
try again.
�CD DOOR OPEN: The CD changer door is open.
Completely close the door to restore normal operation.If the CD is not playing correctly, for any other reason,
try a known good CD.
If any error occurs repeatedly or if an error can't be
corrected, contact your dealer. If your radio displays an
error message, write it down and provide it to your
dealer when reporting the problem.
Theft-Deterrent Feature
THEFTLOCK� is designed to discourage theft of your
radio. The feature works automatically by learning a
portion of the Vehicle Identification Number (VIN).
If the radio is moved to a different vehicle, it will not
operate and LOCKED will be displayed.
With THEFTLOCK activated, your radio will not
operate if stolen.
Page 248 of 427
4-26
Winter Driving
Here are some tips for winter driving:
�Have your vehicle in good shape for winter.
�You may want to put winter emergency supplies in
your trunk.
Include an ice scraper, a small brush or broom, a supply
of windshield washer fluid, a rag, some winter outer
clothing, a small shovel, a flashlight, a red cloth and a
couple of reflective warning triangles. And, if you will
be driving under severe conditions, include a small bag
of sand, a piece of old carpet or a couple of burlap bags
to help provide traction. Be sure you properly secure
these items in your vehicle.
Page 254 of 427

4-32
Loading Your Vehicle
Two labels on your vehicle show how much weight it
may properly carry. The Tire
-Loading Information label
found on the rear edge of the driver's door tells you the
proper size, speed rating and recommended inflation
pressures for the tires on your vehicle. It also gives you
important information about the number of people that
can be in your vehicle and the total weight that you can
carry. This weight is called the Vehicle Capacity Weight
and includes the weight of all occupants, cargo and all
nonfactory
-installed options.
The other label is the Certification label, found on the
rear edge of the driver's door. It tells you the gross
weight capacity of your vehicle, called the Gross
Vehicle Weight Rating (GVWR). The GVWR includes
the weight of the vehicle, all occupants, fuel and cargo.
Never exceed the GVWR for your vehicle, or the Gross
Axle Weight Rating (GAWR) for either the front or
rear axle.
And if you do have a heavy load, you should spread
it out. Don't carry more than 176 lbs. (80 kg) in
your trunk.
Page 255 of 427
4-33
CAUTION:
Do not load your vehicle any heavier than the
GVWR, or either the maximum front or rear
GAWR. If you do, parts on your vehicle can
break, and it can change the way your vehicle
handles. These could cause you to lose control
and crash. Also, overloading can shorten the life
of your vehicle.
NOTICE:
Your warranty does not cover parts or
components that fail because of overloading.
If you put things inside your vehicle, like suitcases,
tools, packages, or anything else, they will go as fast as
the vehicle goes. If you have to stop or turn quickly, or
if there is a crash, they'll keep going.
CAUTION:
Things you put inside your vehicle can strike
and injure people in a sudden stop or turn, or in
a crash.
�Put things in the trunk of your vehicle. In a
trunk, put them as far forward as you can.
Try to spread the weight evenly.
�Never stack heavier things, like suitcases,
inside the vehicle so that some of them are
above the tops of the seats.
�Don't leave an unsecured child restraint in
your vehicle.
�When you carry something inside the
vehicle, secure it whenever you can.
Page 260 of 427
4-38 Trailer Wiring Harness
All of the electrical circuits required for your trailer
lighting system can be accessed at the driver's side rear
lamp connector. This connector is located under the
carpet on the rear corner of your trunk compartment.
Driving with a Trailer
Towing a trailer requires a certain amount of experience.
Before setting out for the open road, you'll want to get
to know your rig. Acquaint yourself with the feel of
handling and braking with the added weight of the
trailer. And always keep in mind that the vehicle you are
driving is now a good deal longer and not nearly as
responsive as your vehicle is by itself.
Before you start, check the trailer hitch and platform
(and attachments), safety chains, electrical connector,
lamps, tires and mirror adjustment. If the trailer has
electric brakes, start your vehicle and trailer moving and
then apply the trailer brake controller by hand to be sure
the brakes are working. This lets you check your
electrical connection at the same time.
During your trip, check occasionally to be sure that the
load is secure, and that the lamps and any trailer brakes
are still working.
Following Distance
Stay at least twice as far behind the vehicle ahead as you
would when driving your vehicle without a trailer. This
can help you avoid situations that require heavy braking
and sudden turns.
Passing
You'll need more passing distance up ahead when
you're towing a trailer. And, because you're a good deal
longer, you'll need to go much farther beyond the
passed vehicle before you can return to your lane.
Backing Up
Hold the bottom of the steering wheel with one hand.
Then, to move the trailer to the left, just move that hand
to the left. To move the trailer to the right, move your
hand to the right. Always back up slowly and, if
possible, have someone guide you.