2002 NISSAN XTERRA park assist
[x] Cancel search: park assistPage 156 of 263
hill grade, place the gearshift lever in the
1st position.
Automatic transmission models:
Move the gearshift lever to the P (Park)
position.
3. To help prevent the vehicle from rolling
into the street when parked on an incline,
it is a good practice to turn the wheels as
illustrated.
O
HEADED DOWNHILL WITH CURB:s1
Turn the wheels into the curb and move
the vehicle forward until the curb side
wheel gently touches the curb.
OHEADED UPHILL WITH CURB:
s2
Turn the wheels away from the curb and
move the vehicle back until the curb side
wheel gently touches the curb.
OHEADED UPHILL OR DOWNHILL, NO
CURB:
s3
Turn the wheels toward the side of the
road so the vehicle will move away from
the center of the road if it moves.
4. Turn the ignition key to the LOCK posi-
tion and remove the key.The power assisted steering is designed to
use a hydraulic pump, driven by the engine,
to assist steering.
If the engine stops or drive belt breaks, you
will still have control of the vehicle. How-
ever, much greater steering effort is needed,
especially in sharp turns and at low speeds.
WARNING
If the engine is not running or is turned
off while driving, the power assist for
the steering will not work. Steering will
be much harder to operate.The brake system has two separate hydrau-
lic circuits. If one circuit malfunctions, you
will still have braking at two wheels.
BRAKING PRECAUTIONS
Vacuum assisted brakes
The brake booster aids braking by using
engine vacuum. If the engine stops, you can
stop the vehicle by depressing the brake
pedal. However, greater foot pressure on
the brake pedal will be required to stop the
vehicle and stopping distance will be longer.
Using the brakes
Avoid resting your foot on the brake pedal
while driving. This will overheat the brakes,
wear out the brake linings and pads faster,
and reduce gas mileage.
To help reduce brake wear, and to prevent
the brakes from overheating, reduce speed
and downshift to a lower gear before going
down a slope or long grade.
POWER STEERING BRAKE SYSTEM
Starting and driving5-25
ZX
Page 164 of 263
5. Raise the hood to warn other traffic and
to signal professional road assistance
personnel that you require assistance.
6. Have all passengers get out of the ve-
hicle and stand in a safe place away from
traffic and clear of the vehicle.
WARNING
OMake sure the parking brake is se-
curely applied and the manual trans-
mission is shifted into R (Reverse),
or the automatic transmission into P
(Park).
ONever change tires when the vehicle
is on a slope, ice or slippery areas.
This is hazardous.
ONever change tires if oncoming traf-
fic is close to your vehicle. Wait for
professional road assistance.
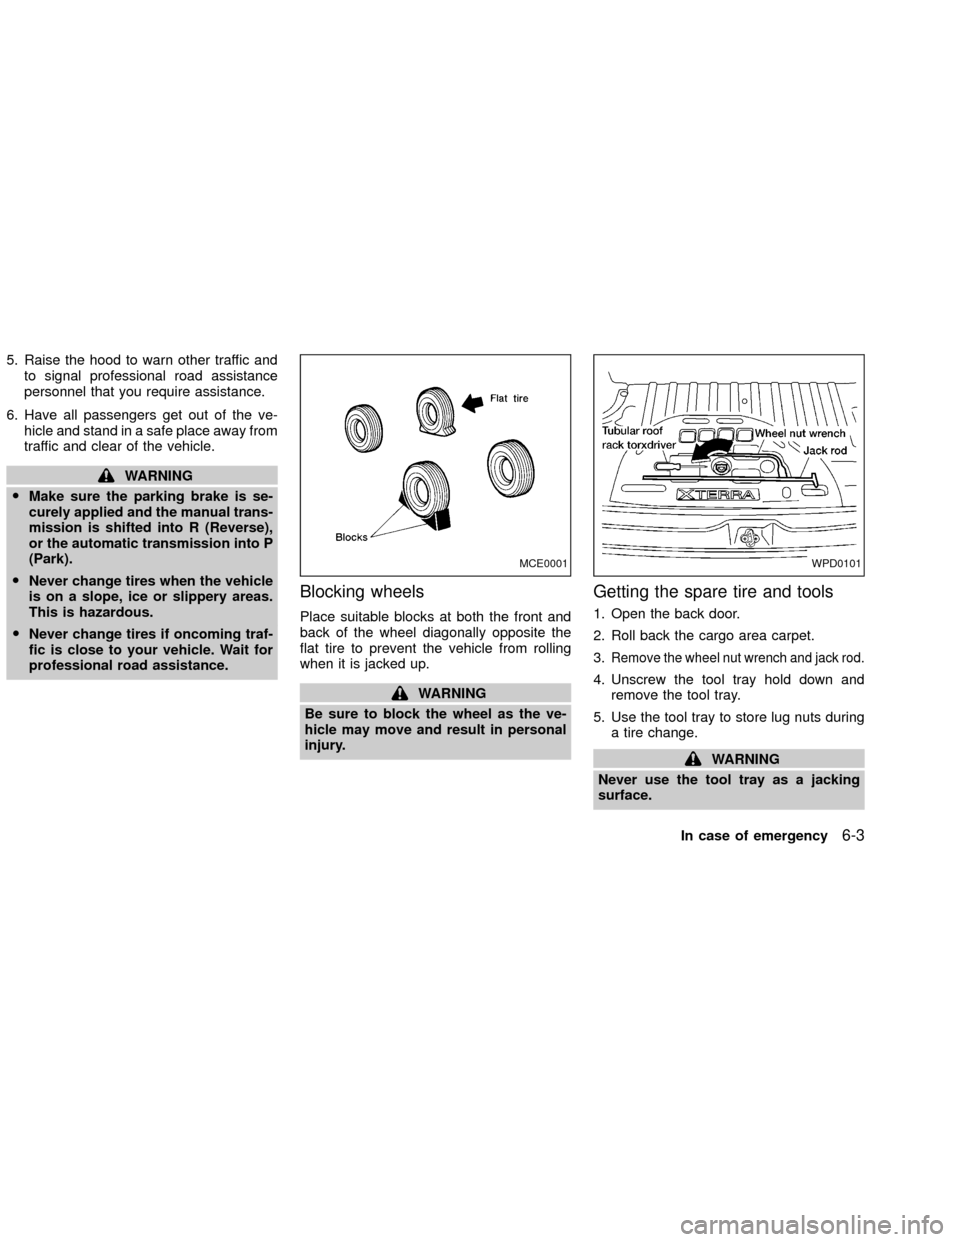
Blocking wheels
Place suitable blocks at both the front and
back of the wheel diagonally opposite the
flat tire to prevent the vehicle from rolling
when it is jacked up.
WARNING
Be sure to block the wheel as the ve-
hicle may move and result in personal
injury.
Getting the spare tire and tools
1. Open the back door.
2. Roll back the cargo area carpet.
3.
Remove the wheel nut wrench and jack rod.
4. Unscrew the tool tray hold down and
remove the tool tray.
5. Use the tool tray to store lug nuts during
a tire change.
WARNING
Never use the tool tray as a jacking
surface.
MCE0001WPD0101
In case of emergency6-3
ZX
Page 177 of 263
In order to maintain the appearance of your
vehicle, it is important to take proper care of
it.
In the following cases, please wash your
vehicle as soon as possible to protect the
paint surface:
Oafter a rainfall to prevent possible dam-
age from acid rain.
Oafter driving on coastal roads.
Owhen contaminants such as soot, bird
droppings, tree sap, metal particles or
bugs get on the paint surface.Owhen dust or mud builds up on the
surface.
Whenever possible, store or park your ve-
hicle inside a garage or in a covered area.
When it is necessary to park outside, park in
a shady area or protect the vehicle with a
body cover.
Be careful not to scratch the paint sur-
face when putting on or removing the
body cover.
WASHING
Wash dirt off with a wet sponge and plenty
of water. Clean the vehicle thoroughly using
a mild soap, a special vehicle soap or
general purpose dishwashing liquid mixed
with clean, lukewarm (never hot) water.
CAUTION
ODo not use strong household soap,
strong chemical detergents, gaso-
line or solvents.
ODo not wash the vehicle in direct
sunlight or while the vehicle body is
hot, as the surface may become
water-spotted.OAvoid using tight-napped or rough
cloths, such as washing mitts. Care
must be taken when removing
caked-on dirt or other foreign sub-
stances so that the paint surface is
not scratched or damaged.
Rinse the vehicle thoroughly with plenty of
clean water.
Inside flanges, seams and folds on the
doors, hatches and hood are particularly
vulnerable to the effects of road salt. There-
fore, these areas must be regularly cleaned.
Take care that the drain holes in the lower
edge of the door are open. Spray water
under the body and in the wheel wells to
loosen the dirt and wash away road salt.
A damp chamois can be used to dry the
vehicle to avoid water spots.
WAXING
Regular waxing protects the paint surface
and helps retain new vehicle appearance.
After waxing, polishing is recommended to
remove built-up residue and to avoid a
``weathered'' appearance.
An authorized NISSAN dealer can assist
MAI0001
CLEANING EXTERIOR
7-2Appearance and care
ZX
Page 206 of 263
Spark plug tightening torque:
14 to 22 ft-lb (20 to 29 Nzm)
4. Reconnect the spark plug cables to their
original positions.
REPLACING SPARK PLUGS (with
supercharger)
Please see your authorized NISSAN dealer
for assistance.
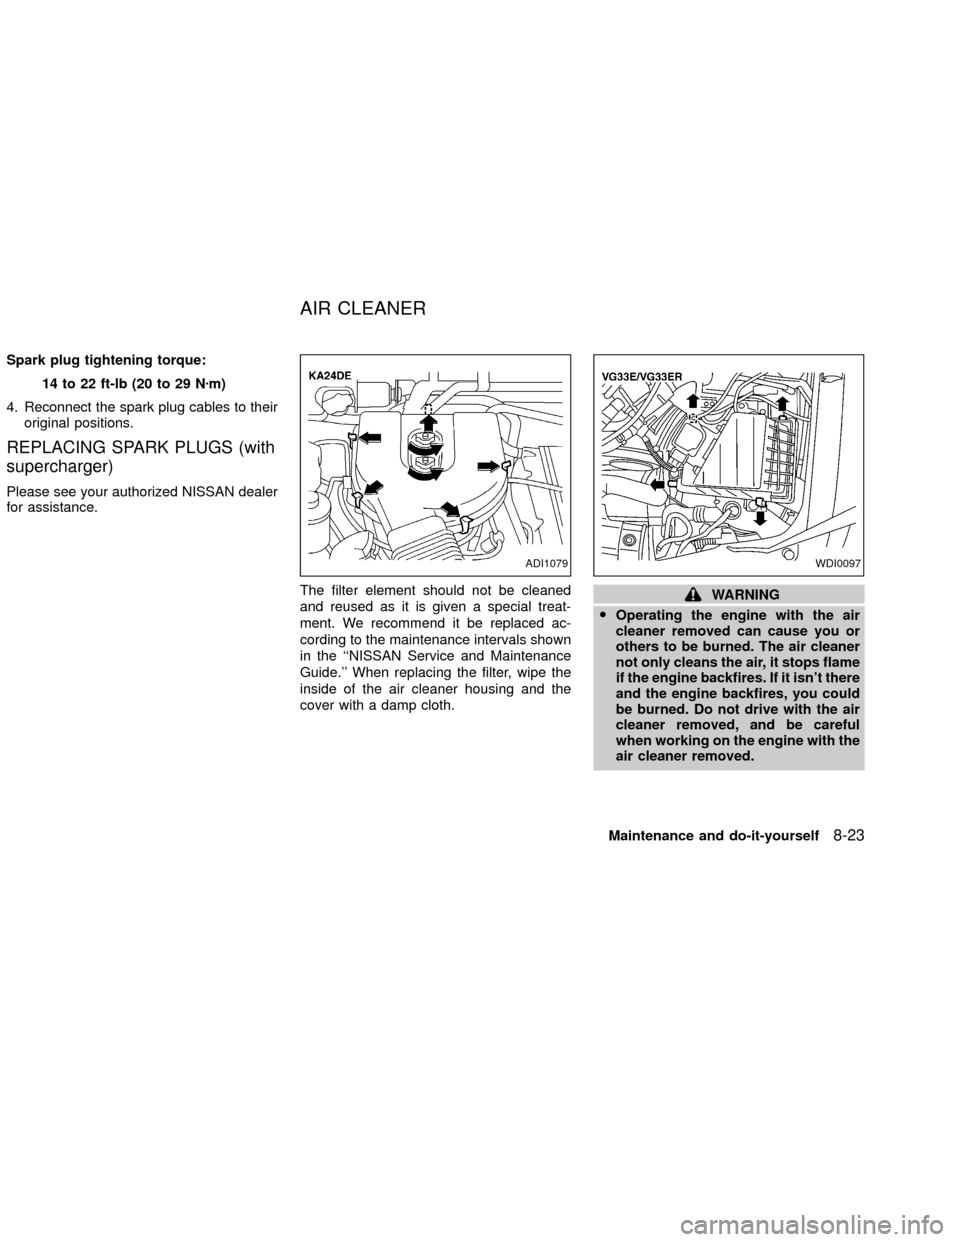
The filter element should not be cleaned
and reused as it is given a special treat-
ment. We recommend it be replaced ac-
cording to the maintenance intervals shown
in the ``NISSAN Service and Maintenance
Guide.'' When replacing the filter, wipe the
inside of the air cleaner housing and the
cover with a damp cloth.
WARNING
OOperating the engine with the air
cleaner removed can cause you or
others to be burned. The air cleaner
not only cleans the air, it stops flame
if the engine backfires. If it isn't there
and the engine backfires, you could
be burned. Do not drive with the air
cleaner removed, and be careful
when working on the engine with the
air cleaner removed.
ADI1079WDI0097
AIR CLEANER
Maintenance and do-it-yourself8-23
ZX
Page 217 of 263

1. Unclip the two metal clips on the side of
the fog light.
2. Pull out and support the fog light assem-
bly.
3. Disconnect the fog light bulb connector.
4. Lift the spring retainer.
5. Remove the fog light bulb.
OThe fog light bulb can not be separated
from the wire and is serviced as an
assembly.
6. Install the new bulb in the reverse order
of removal. DO NOT TOUCH THE BULB.EXTERIOR AND INTERIOR LIGHTS
Item Wattage (W) Bulb No.*1
Headlight 65/55 9007
Turn signal light 28/8 3457AK
*2
Parking light 5 168*2
Side Marker 5 168
Rear combination light:
Turn signal 27 3157Ak
Stop/Tail 27/7 3057k
Back-up 16 921
License plate light 3.8 168
Fog light 55 H3
Dome light 8 82
Map light without compass 8 82
Map light with compass 3.8 168
High-mounted stop light 12.8 912
*1: Always check with the Parts Department at an authorized NISSAN dealer for the latest parts
information.
*2The bulb is not serviceable in-vehicle. See an authorize NISSAN dealer for assistance.
8-34Maintenance and do-it-yourself
ZX
Page 220 of 263
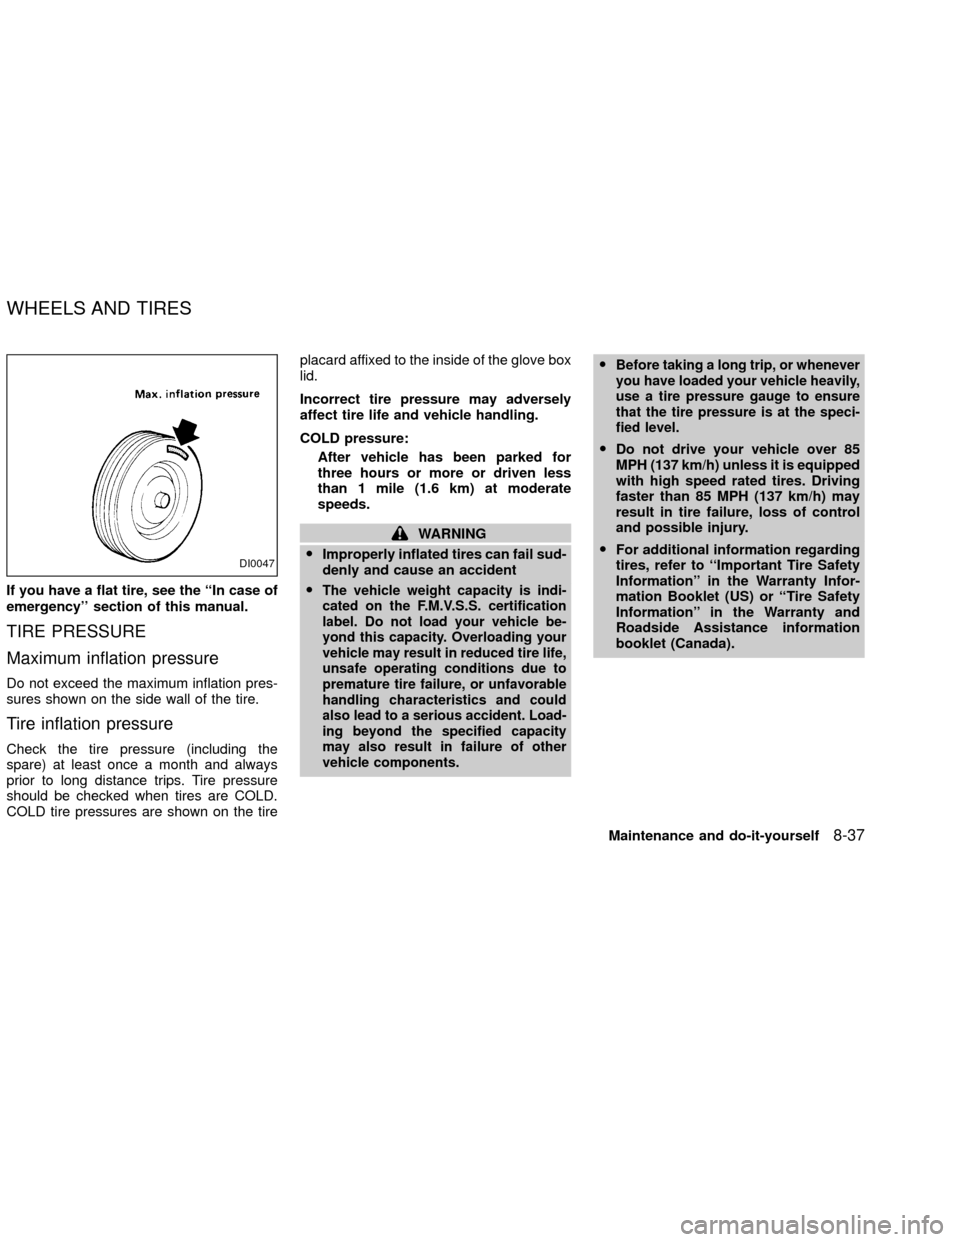
If you have a flat tire, see the ``In case of
emergency'' section of this manual.
TIRE PRESSURE
Maximum inflation pressure
Do not exceed the maximum inflation pres-
sures shown on the side wall of the tire.
Tire inflation pressure
Check the tire pressure (including the
spare) at least once a month and always
prior to long distance trips. Tire pressure
should be checked when tires are COLD.
COLD tire pressures are shown on the tireplacard affixed to the inside of the glove box
lid.
Incorrect tire pressure may adversely
affect tire life and vehicle handling.
COLD pressure:
After vehicle has been parked for
three hours or more or driven less
than 1 mile (1.6 km) at moderate
speeds.
WARNING
OImproperly inflated tires can fail sud-
denly and cause an accident
O
The vehicle weight capacity is indi-
cated on the F.M.V.S.S. certification
label. Do not load your vehicle be-
yond this capacity. Overloading your
vehicle may result in reduced tire life,
unsafe operating conditions due to
premature tire failure, or unfavorable
handling characteristics and could
also lead to a serious accident. Load-
ing beyond the specified capacity
may also result in failure of other
vehicle components.OBefore taking a long trip, or whenever
you have loaded your vehicle heavily,
use a tire pressure gauge to ensure
that the tire pressure is at the speci-
fied level.
ODo not drive your vehicle over 85
MPH (137 km/h) unless it is equipped
with high speed rated tires. Driving
faster than 85 MPH (137 km/h) may
result in tire failure, loss of control
and possible injury.
OFor additional information regarding
tires, refer to ``Important Tire Safety
Information'' in the Warranty Infor-
mation Booklet (US) or ``Tire Safety
Information'' in the Warranty and
Roadside Assistance information
booklet (Canada).
DI0047
WHEELS AND TIRES
Maintenance and do-it-yourself8-37
ZX
Page 249 of 263
4) Connect the tow harness connector
(SAE J1239) to your trailer.
5) Confirm proper vehicle and trailer
stop/turn lamp operation.
6) When towing is completed, disconnect
the tow harness from the trailer and the
vehicle. Store the tow harness in the
glove box. Reinstall the connector cap to
the vehicle harness.
If you need further assistance in wiring
a trailer to your NISSAN, contact an autho-
rized NISSAN dealer.
Always confirm proper vehicle and
trailer stop/turn lamp operation every
time the trailer light circuits are con-
nected for use.
Trailer brakes
If your trailer is equipped with a braking
system, make sure it conforms to Federal
and/or local regulations and that it is prop-
erly installed.
WARNING
Never connect a trailer brake system
directly to the vehicle brake system.
Pre-towing tips
OBe certain your vehicle maintains a level
position when a loaded and/or unloaded
trailer is hitched. Do not drive the vehicle
if it has an abnormal nose-up or nose-
down condition; check for improper
tongue load, overload, worn suspension
or other possible causes of either condi-
tion.
OAlways secure items in the trailer to
prevent load shift while driving.
OBe certain your outside mirrors conform
to all federal, state or local regulations. If
not, install any mirrors required for towing
before driving the vehicle.
Trailer towing tips
In order to gain skill and an understanding
of the vehicle's behavior, you should prac-
tice turning, stopping and backing up in an
area which is free from traffic. Steering,
stability and braking performance will be
somewhat different than under normal driv-
ing conditions.
OAlways secure items in the trailer to
prevent load shift while driving.
O
Avoid abrupt starts, acceleration or stops.
OAvoid sharp turns or lane changes.
OAlways drive your vehicle at a moderate
speed.
OAlways block the wheels on both vehicle
and trailer when parking. Parking on a
slope is not recommended; however, if
you must do so, and if your vehicle is
equipped with automatic transmission,
first block the wheels and apply the park-
ing brake, and then move the transmis-
sion shift selector lever into the P (Park)
position. If you move the shift lever to the
P (Park) position before blocking the
wheels and applying the parking brake,
transmission damage could occur.
OWhen going down a hill, shift into a lower
gear and use the engine braking effect.
When ascending a long grade, downshift
the transmission to a lower gear and
reduce speed to reduce chances of en-
gine overloading and/or overheating.
However, for long steep grades, do not
stay in 1st or 2nd gear when driving
above 35 MPH (56 km/h).
OIf the engine coolant rises to an ex-
tremely high temperature when the air
conditioning system is on, turn off the air
conditioner. Coolant heat can be addi-
9-24Technical and consumer information
ZX