Page 26 of 263
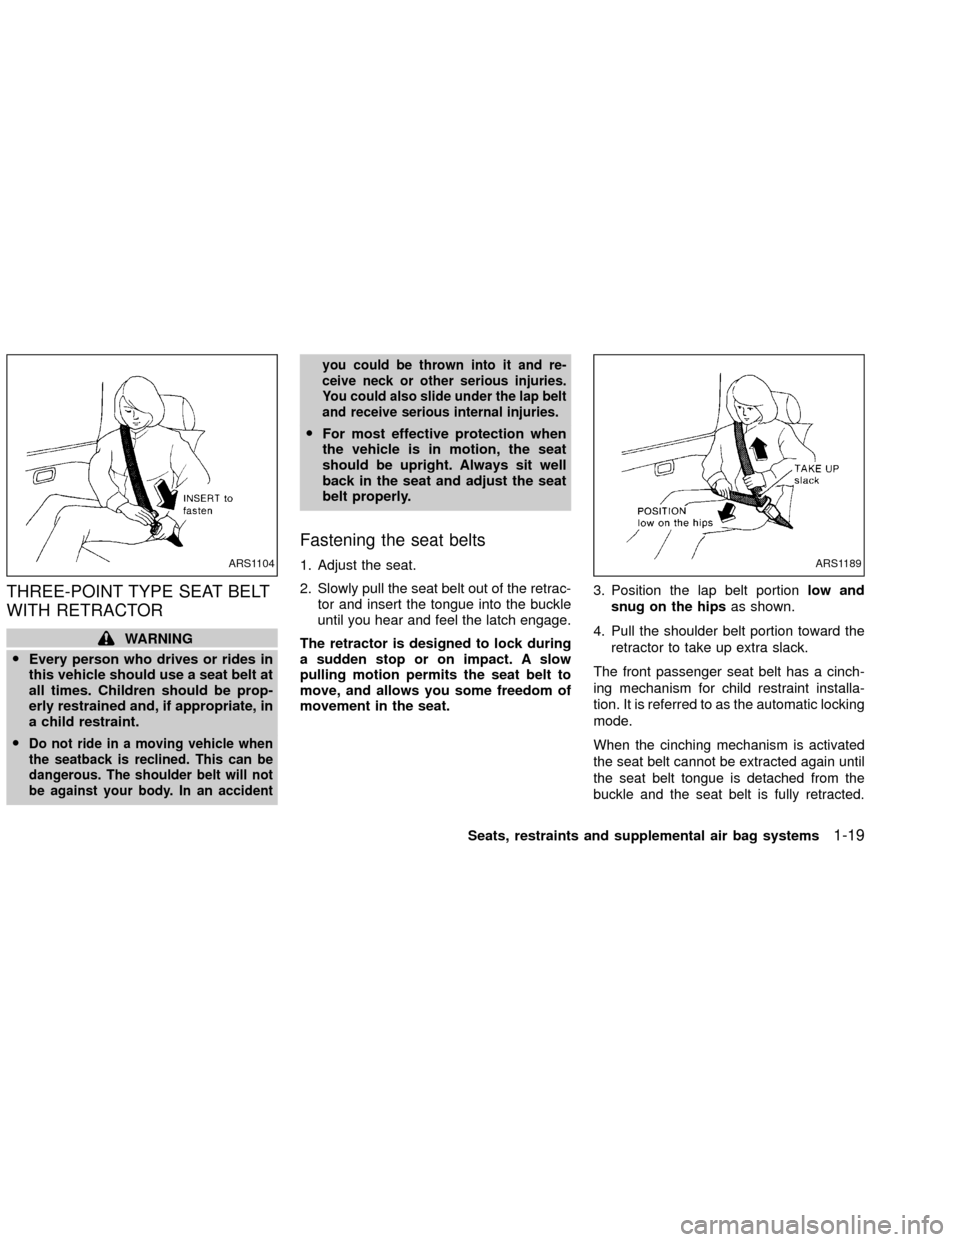
THREE-POINT TYPE SEAT BELT
WITH RETRACTOR
WARNING
OEvery person who drives or rides in
this vehicle should use a seat belt at
all times. Children should be prop-
erly restrained and, if appropriate, in
a child restraint.
O
Do not ride in a moving vehicle when
the seatback is reclined. This can be
dangerous. The shoulder belt will not
be against your body. In an accidentyou could be thrown into it and re-
ceive neck or other serious injuries.
You could also slide under the lap belt
and receive serious internal injuries.
OFor most effective protection when
the vehicle is in motion, the seat
should be upright. Always sit well
back in the seat and adjust the seat
belt properly.
Fastening the seat belts
1. Adjust the seat.
2. Slowly pull the seat belt out of the retrac-
tor and insert the tongue into the buckle
until you hear and feel the latch engage.
The retractor is designed to lock during
a sudden stop or on impact. A slow
pulling motion permits the seat belt to
move, and allows you some freedom of
movement in the seat.3. Position the lap belt portionlow and
snug on the hipsas shown.
4. Pull the shoulder belt portion toward the
retractor to take up extra slack.
The front passenger seat belt has a cinch-
ing mechanism for child restraint installa-
tion. It is referred to as the automatic locking
mode.
When the cinching mechanism is activated
the seat belt cannot be extracted again until
the seat belt tongue is detached from the
buckle and the seat belt is fully retracted.
ARS1104ARS1189
Seats, restraints and supplemental air bag systems1-19
ZX
Page 27 of 263
See ``Child restraints '' later in this section for
more information.
The automatic locking mode should be
used only for child restraint installation.
During normal seat belt use by a passen-
ger, the locking mode should not be
activated. If it is activated it may cause
uncomfortable seat belt tension.
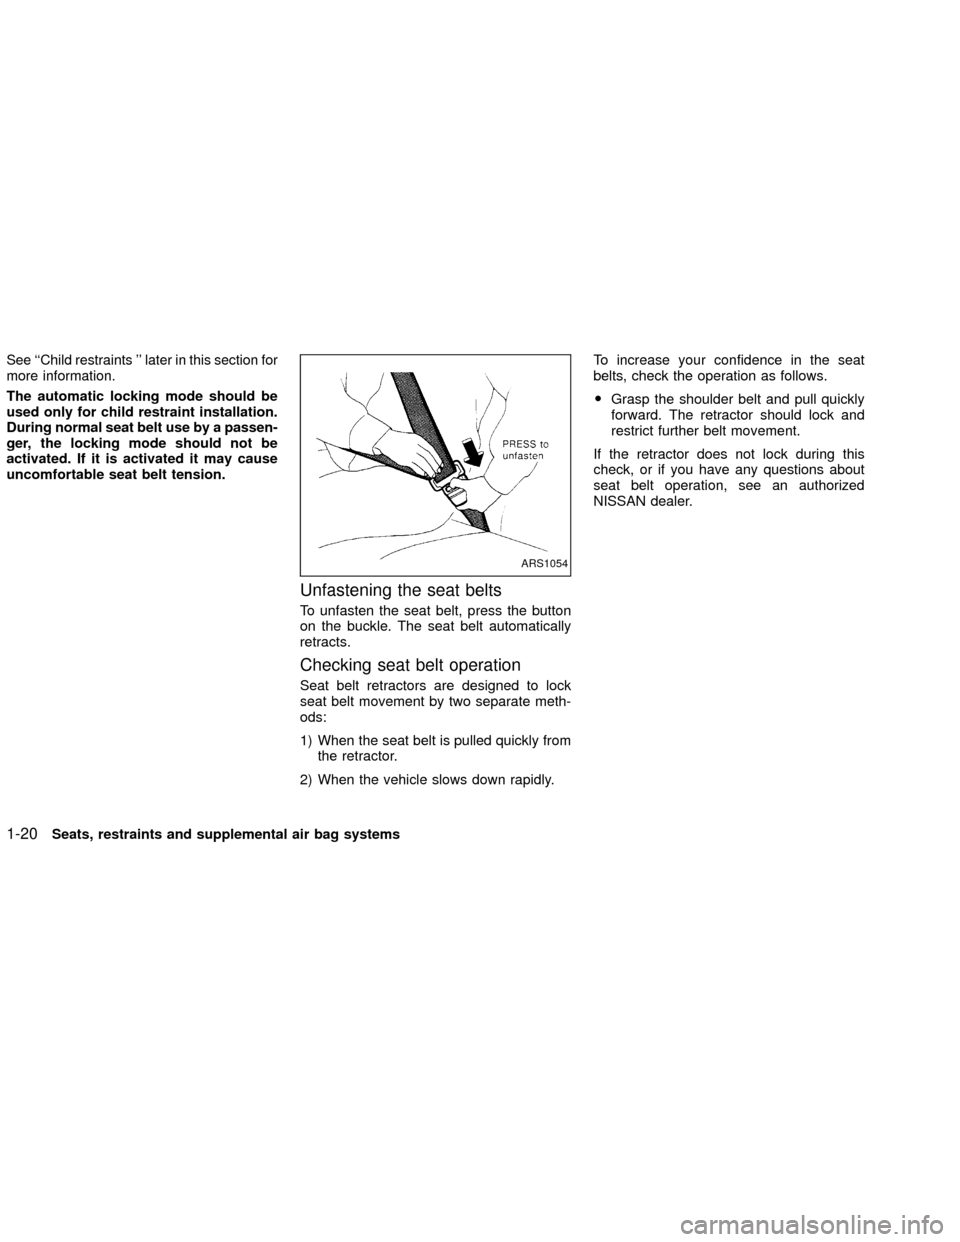
Unfastening the seat belts
To unfasten the seat belt, press the button
on the buckle. The seat belt automatically
retracts.
Checking seat belt operation
Seat belt retractors are designed to lock
seat belt movement by two separate meth-
ods:
1) When the seat belt is pulled quickly from
the retractor.
2) When the vehicle slows down rapidly.To increase your confidence in the seat
belts, check the operation as follows.
OGrasp the shoulder belt and pull quickly
forward. The retractor should lock and
restrict further belt movement.
If the retractor does not lock during this
check, or if you have any questions about
seat belt operation, see an authorized
NISSAN dealer.
ARS1054
1-20Seats, restraints and supplemental air bag systems
ZX
Page 33 of 263
CAUTION
ORemember that a child restraint left
in a closed vehicle can become very
hot. Check the seating surface and
buckles before placing your child in
the child restraint.
OThe three-point belt in your vehicle
is equipped with an automatic lock-
ing mode retractor which must be
used when installing a child re-
straint.
OFailure to use the retractor's locking
mode will result in the child restraint
not being properly secured. The re-
straint could tip over or otherwise be
unsecured and cause injury to the
child in a sudden stop or collision.
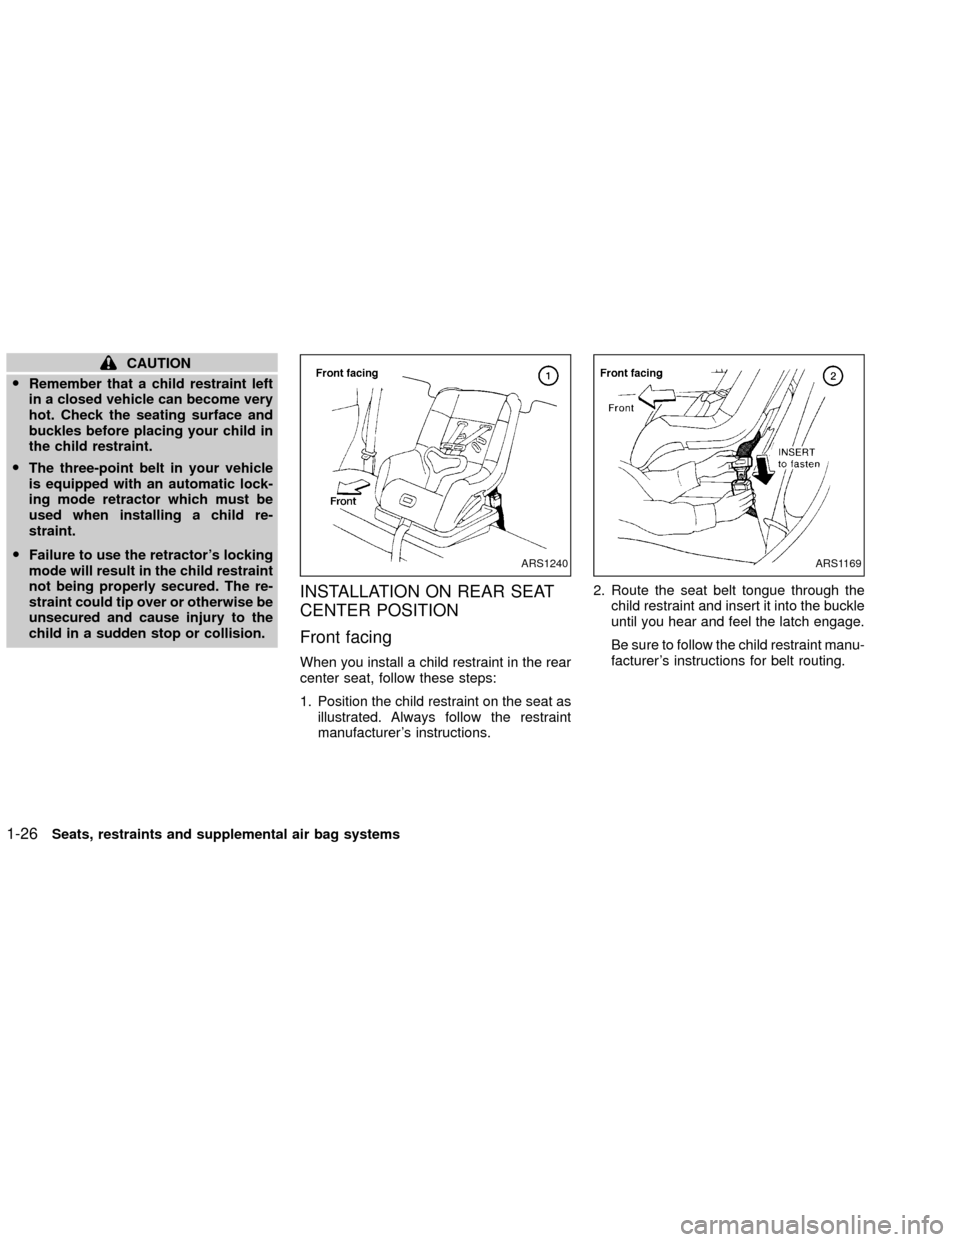
INSTALLATION ON REAR SEAT
CENTER POSITION
Front facing
When you install a child restraint in the rear
center seat, follow these steps:
1. Position the child restraint on the seat as
illustrated. Always follow the restraint
manufacturer's instructions.2. Route the seat belt tongue through the
child restraint and insert it into the buckle
until you hear and feel the latch engage.
Be sure to follow the child restraint manu-
facturer's instructions for belt routing.
ARS1240ARS1169
1-26Seats, restraints and supplemental air bag systems
ZX
Page 36 of 263
INSTALLATION ON REAR SEAT
OUTBOARD POSITIONS
Front facing
WARNING
OThe three-point belt in your vehicle
is equipped with an automatic lock-
ing mode retractor which must be
used when installing a child re-
straint.
OFailure to use the retractor's locking
mode will result in the child restraint
not being properly secured. The seat
could tip over or otherwise be unse-
cured and cause injury to the child in
a sudden stop or collision.When you install a child restraint in a rear
outboard seat, follow these steps:
1. Position the child restraint on the seat.
Always follow the restraint manufactur-
er's instructions.2. Route the seat belt tongue through the
child restraint and insert it into the buckle
until you hear and feel the latch engage.
Be sure to follow the child restraint manu-
facturer's instructions for belt routing.
ARS1176ARS1177
Seats, restraints and supplemental air bag systems1-29
ZX
Page 37 of 263
3. Pull on the shoulder belt until all of the
belt is fully extended. At this time, the belt
retractor is in the automatic locking mode
(child restraint mode). It reverts back to
emergency locking mode when the belt is
fully retracted.4. Allow the belt to retract. Pull up on the
shoulder belt to remove any slack in the
belt.5. Before placing the child in the child re-
straint, use force to tilt the child restraint
from side to side, and tug it forward to
make sure it is securely held in place.
6. Check that the retractor is in the auto-
matic locking mode by trying to pull more
belt out of the retractor. If you cannot pull
any more belt webbing out of the retrac-
tor, the retractor is in the automatic lock-
ing mode.
7.
Check to make sure the child restraint is
properly secured prior to each use.
If the seat belt is not locked, repeat
steps 3 through 6.
ARS1178ARS1179ARS1180
1-30Seats, restraints and supplemental air bag systems
ZX
Page 38 of 263
After the child restraint is removed and the
seat belt is fully retracted, the automatic
locking mode (child restraint mode) is can-
celed.
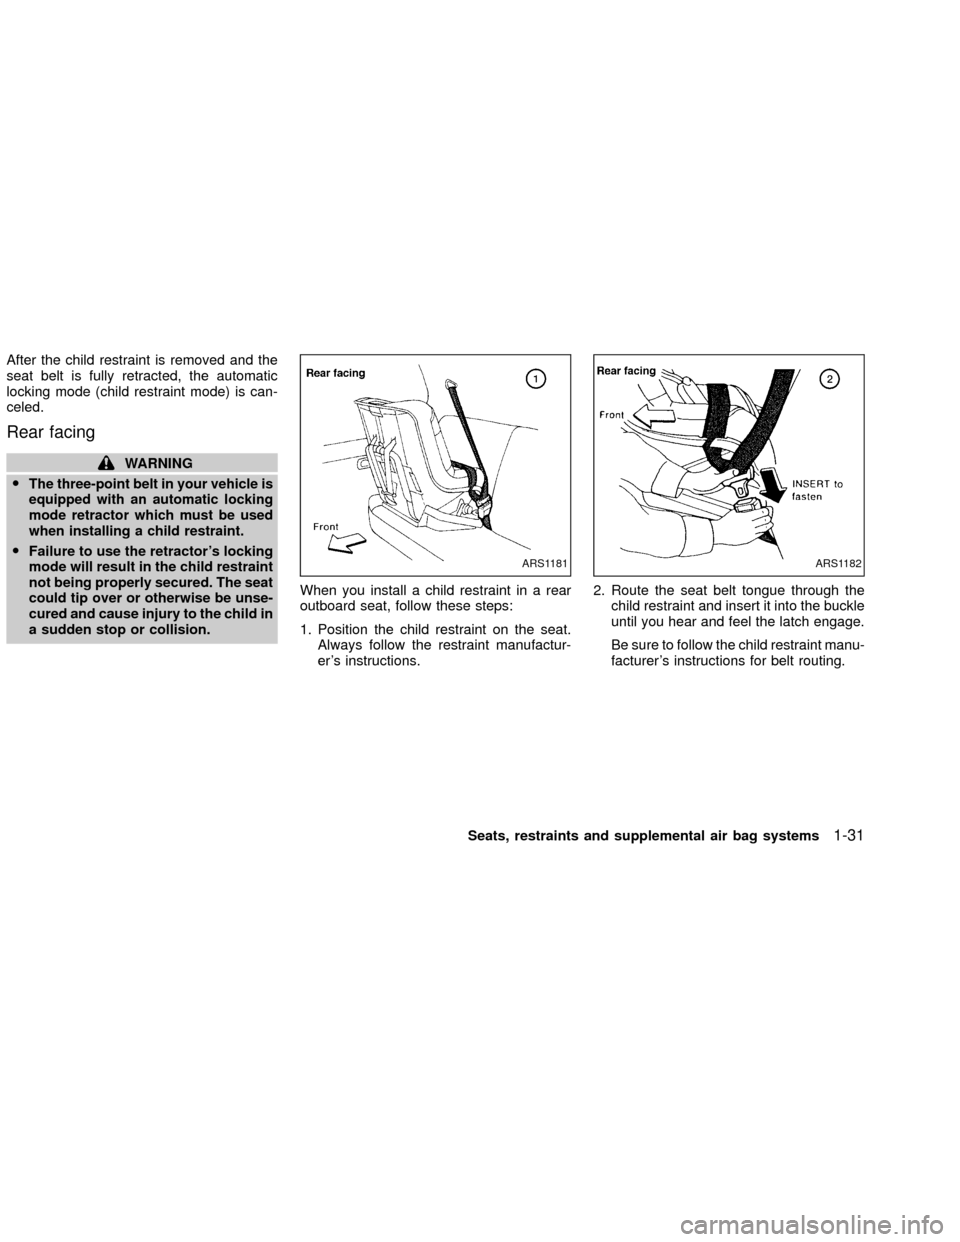
Rear facing
WARNING
O
The three-point belt in your vehicle is
equipped with an automatic locking
mode retractor which must be used
when installing a child restraint.
OFailure to use the retractor's locking
mode will result in the child restraint
not being properly secured. The seat
could tip over or otherwise be unse-
cured and cause injury to the child in
a sudden stop or collision.When you install a child restraint in a rear
outboard seat, follow these steps:
1. Position the child restraint on the seat.
Always follow the restraint manufactur-
er's instructions.2. Route the seat belt tongue through the
child restraint and insert it into the buckle
until you hear and feel the latch engage.
Be sure to follow the child restraint manu-
facturer's instructions for belt routing.ARS1181ARS1182
Seats, restraints and supplemental air bag systems1-31
ZX
Page 39 of 263
3. Pull on the shoulder belt until all of the
belt is fully extended. At this time, the belt
retractor is in the automatic locking mode
(child restraint mode). It reverts back to
emergency locking mode when the belt is
fully retracted.4. Allow the belt to retract. Pull up on the
shoulder belt to remove any slack in the
belt.5. Before placing the child in the child re-
straint, use force to tilt the child restraint
from side to side, and tug it forward to
make sure it is securely held in place.
6. Check that the retractor is in the auto-
matic locking mode by trying to pull more
belt out of the retractor. If you cannot pull
any more belt webbing out of the retrac-
tor, the retractor is in the automatic lock-
ing mode.
7.
Check to make sure the child restraint is
properly secured prior to each use.
If the seat belt is not locked, repeat
steps 3 through 6.
ARS1183ARS1184ARS1185
1-32Seats, restraints and supplemental air bag systems
ZX
Page 40 of 263
After the child restraint is removed and the
seat belt is fully retracted, the automatic
locking mode (child restraint mode) is can-
celed.
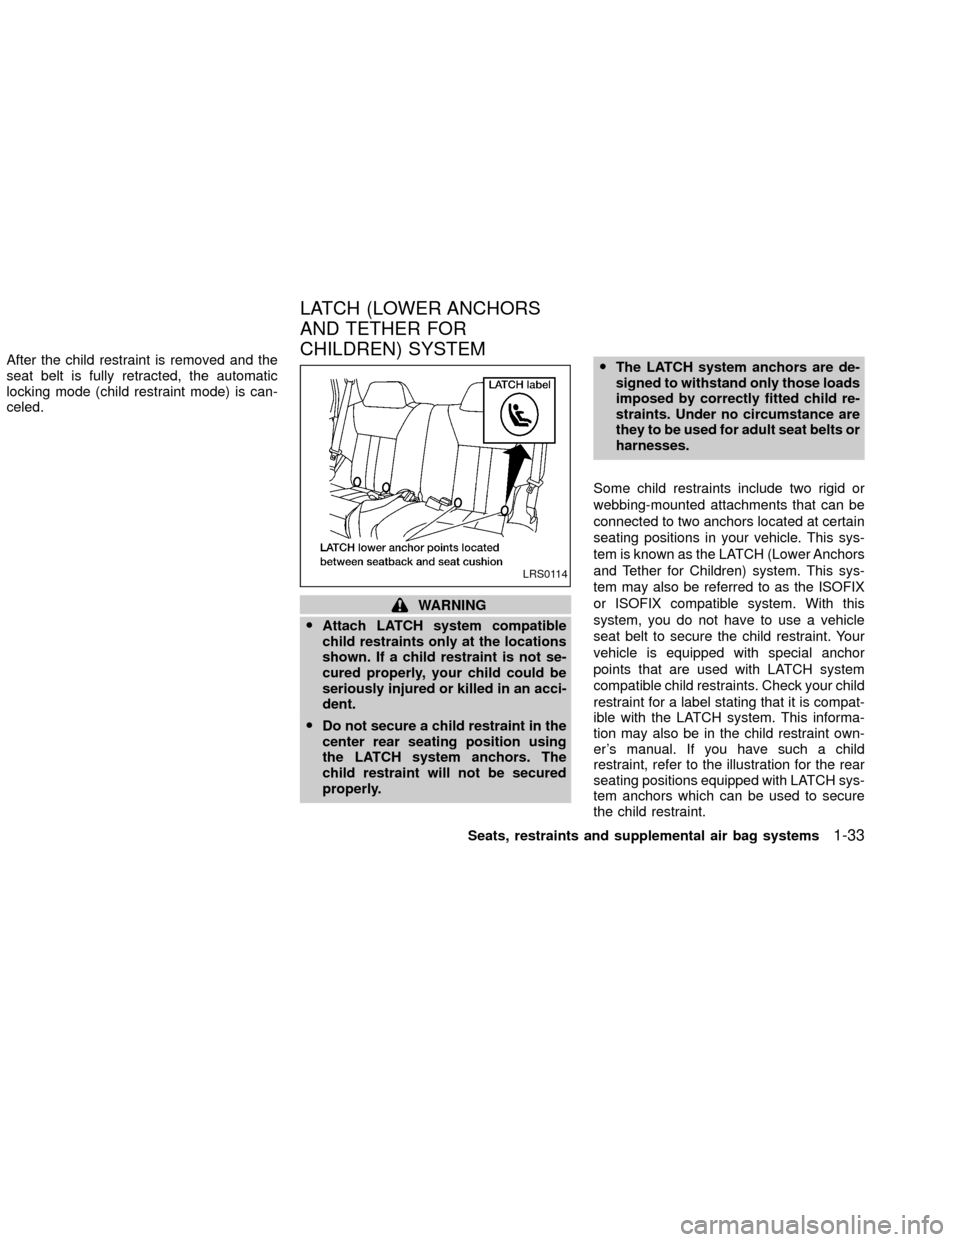
WARNING
OAttach LATCH system compatible
child restraints only at the locations
shown. If a child restraint is not se-
cured properly, your child could be
seriously injured or killed in an acci-
dent.
ODo not secure a child restraint in the
center rear seating position using
the LATCH system anchors. The
child restraint will not be secured
properly.OThe LATCH system anchors are de-
signed to withstand only those loads
imposed by correctly fitted child re-
straints. Under no circumstance are
they to be used for adult seat belts or
harnesses.
Some child restraints include two rigid or
webbing-mounted attachments that can be
connected to two anchors located at certain
seating positions in your vehicle. This sys-
tem is known as the LATCH (Lower Anchors
and Tether for Children) system. This sys-
tem may also be referred to as the ISOFIX
or ISOFIX compatible system. With this
system, you do not have to use a vehicle
seat belt to secure the child restraint. Your
vehicle is equipped with special anchor
points that are used with LATCH system
compatible child restraints. Check your child
restraint for a label stating that it is compat-
ible with the LATCH system. This informa-
tion may also be in the child restraint own-
er's manual. If you have such a child
restraint, refer to the illustration for the rear
seating positions equipped with LATCH sys-
tem anchors which can be used to secure
the child restraint.
LRS0114
LATCH (LOWER ANCHORS
AND TETHER FOR
CHILDREN) SYSTEM
Seats, restraints and supplemental air bag systems1-33
ZX