2002 NISSAN XTERRA change time
[x] Cancel search: change timePage 124 of 263
CD Loading
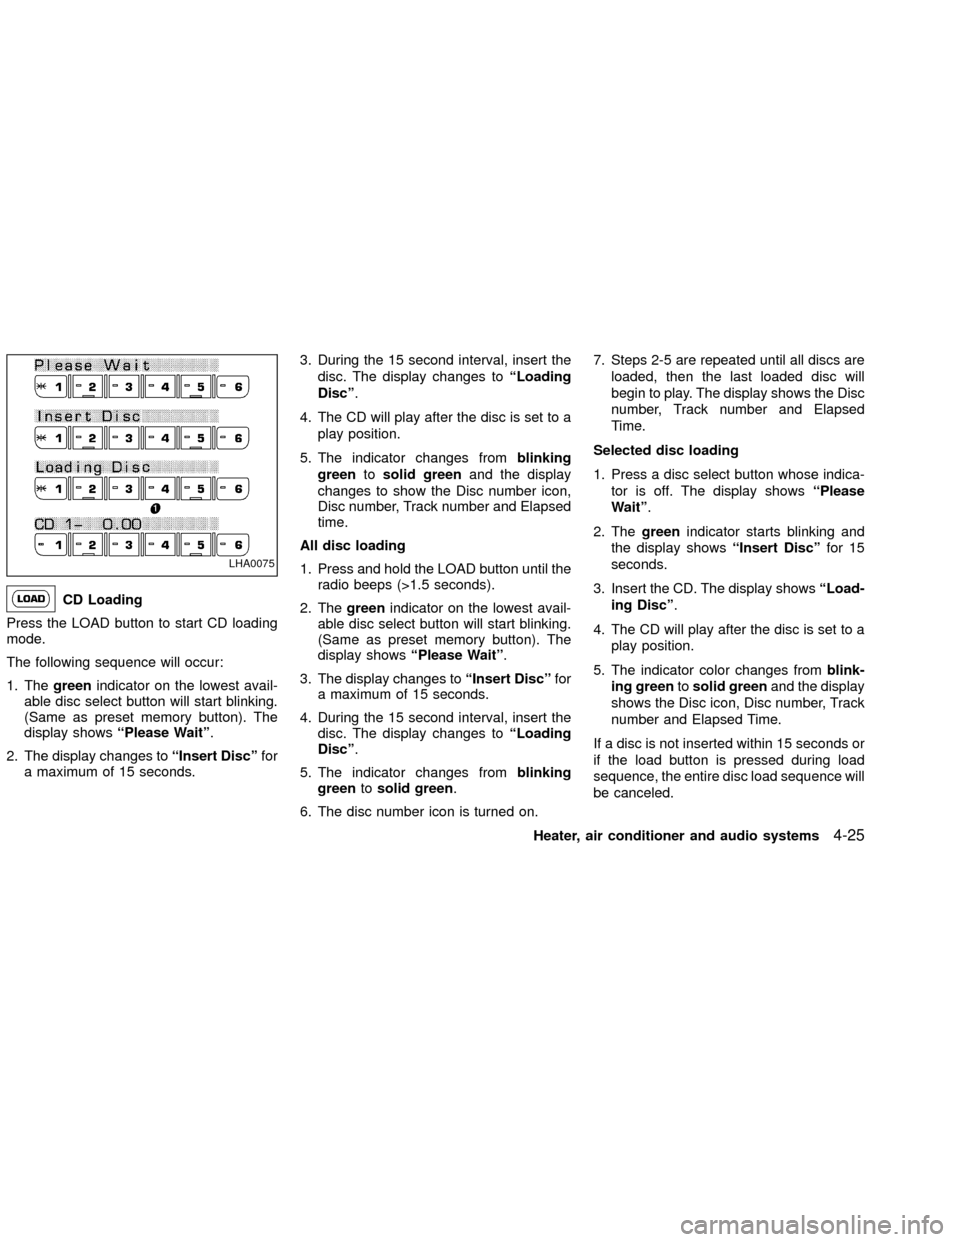
Press the LOAD button to start CD loading
mode.
The following sequence will occur:
1. Thegreenindicator on the lowest avail-
able disc select button will start blinking.
(Same as preset memory button). The
display showsªPlease Waitº.
2. The display changes toªInsert Discºfor
a maximum of 15 seconds.3. During the 15 second interval, insert the
disc. The display changes toªLoading
Discº.
4. The CD will play after the disc is set to a
play position.
5. The indicator changes fromblinking
greentosolid greenand the display
changes to show the Disc number icon,
Disc number, Track number and Elapsed
time.
All disc loading
1. Press and hold the LOAD button until the
radio beeps (>1.5 seconds).
2. Thegreenindicator on the lowest avail-
able disc select button will start blinking.
(Same as preset memory button). The
display showsªPlease Waitº.
3. The display changes toªInsert Discºfor
a maximum of 15 seconds.
4. During the 15 second interval, insert the
disc. The display changes toªLoading
Discº.
5. The indicator changes fromblinking
greentosolid green.
6. The disc number icon is turned on.7. Steps 2-5 are repeated until all discs are
loaded, then the last loaded disc will
begin to play. The display shows the Disc
number, Track number and Elapsed
Time.
Selected disc loading
1. Press a disc select button whose indica-
tor is off. The display showsªPlease
Waitº.
2. Thegreenindicator starts blinking and
the display showsªInsert Discºfor 15
seconds.
3. Insert the CD. The display showsªLoad-
ing Discº.
4. The CD will play after the disc is set to a
play position.
5. The indicator color changes fromblink-
ing greentosolid greenand the display
shows the Disc icon, Disc number, Track
number and Elapsed Time.
If a disc is not inserted within 15 seconds or
if the load button is pressed during load
sequence, the entire disc load sequence will
be canceled.
LHA0075
Heater, air conditioner and audio systems4-25
ZX
Page 125 of 263
Disc Play
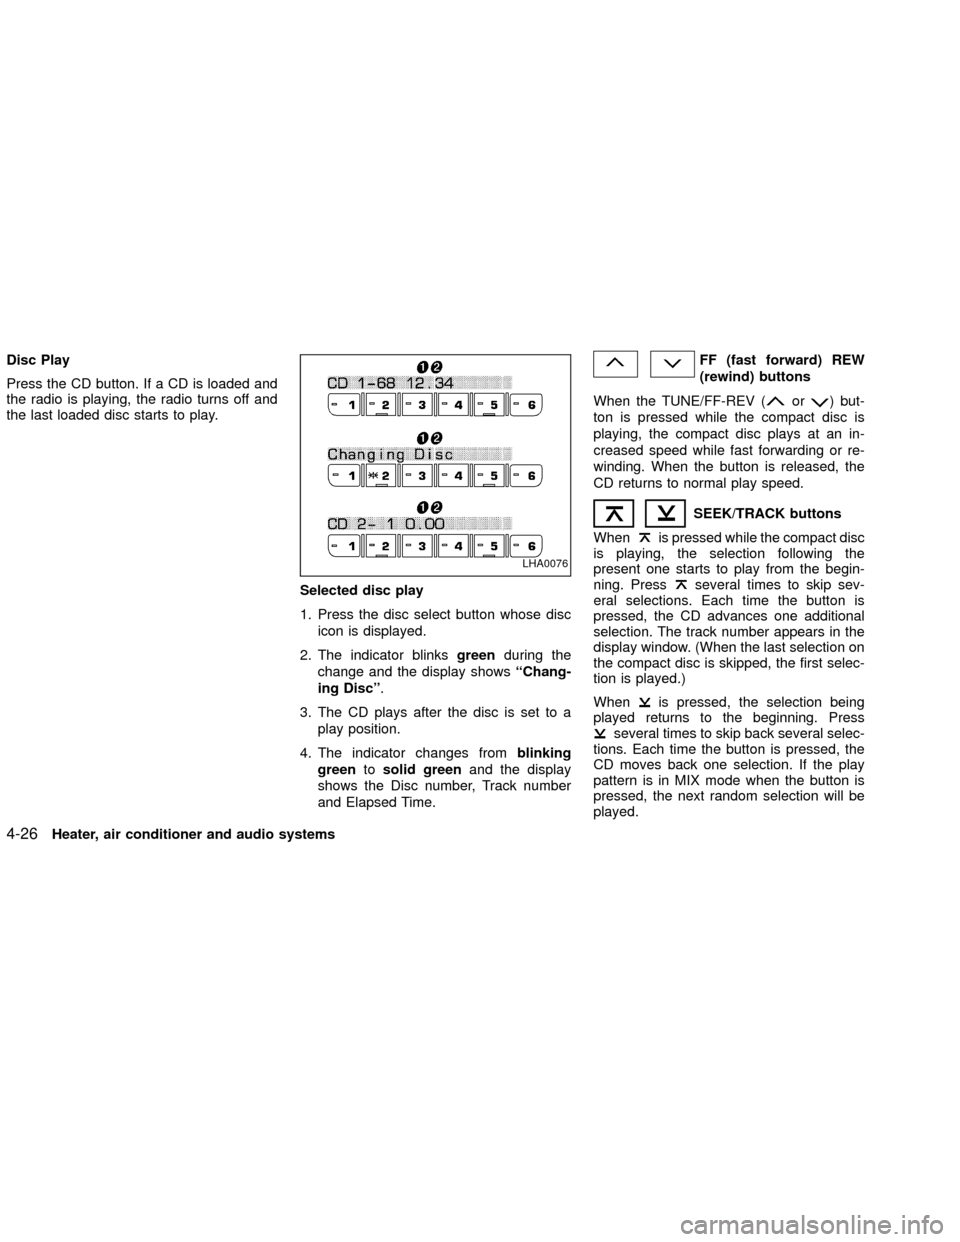
Press the CD button. If a CD is loaded and
the radio is playing, the radio turns off and
the last loaded disc starts to play.
Selected disc play
1. Press the disc select button whose disc
icon is displayed.
2. The indicator blinksgreenduring the
change and the display showsªChang-
ing Discº.
3. The CD plays after the disc is set to a
play position.
4. The indicator changes fromblinking
greentosolid greenand the display
shows the Disc number, Track number
and Elapsed Time.FF (fast forward) REW
(rewind) buttons
When the TUNE/FF-REV (
or) but-
ton is pressed while the compact disc is
playing, the compact disc plays at an in-
creased speed while fast forwarding or re-
winding. When the button is released, the
CD returns to normal play speed.
SEEK/TRACK buttons
When
is pressed while the compact disc
is playing, the selection following the
present one starts to play from the begin-
ning. Press
several times to skip sev-
eral selections. Each time the button is
pressed, the CD advances one additional
selection. The track number appears in the
display window. (When the last selection on
the compact disc is skipped, the first selec-
tion is played.)
When
is pressed, the selection being
played returns to the beginning. Press
several times to skip back several selec-
tions. Each time the button is pressed, the
CD moves back one selection. If the play
pattern is in MIX mode when the button is
pressed, the next random selection will be
played.
LHA0076
4-26Heater, air conditioner and audio systems
ZX
Page 126 of 263
Repeat/Mix
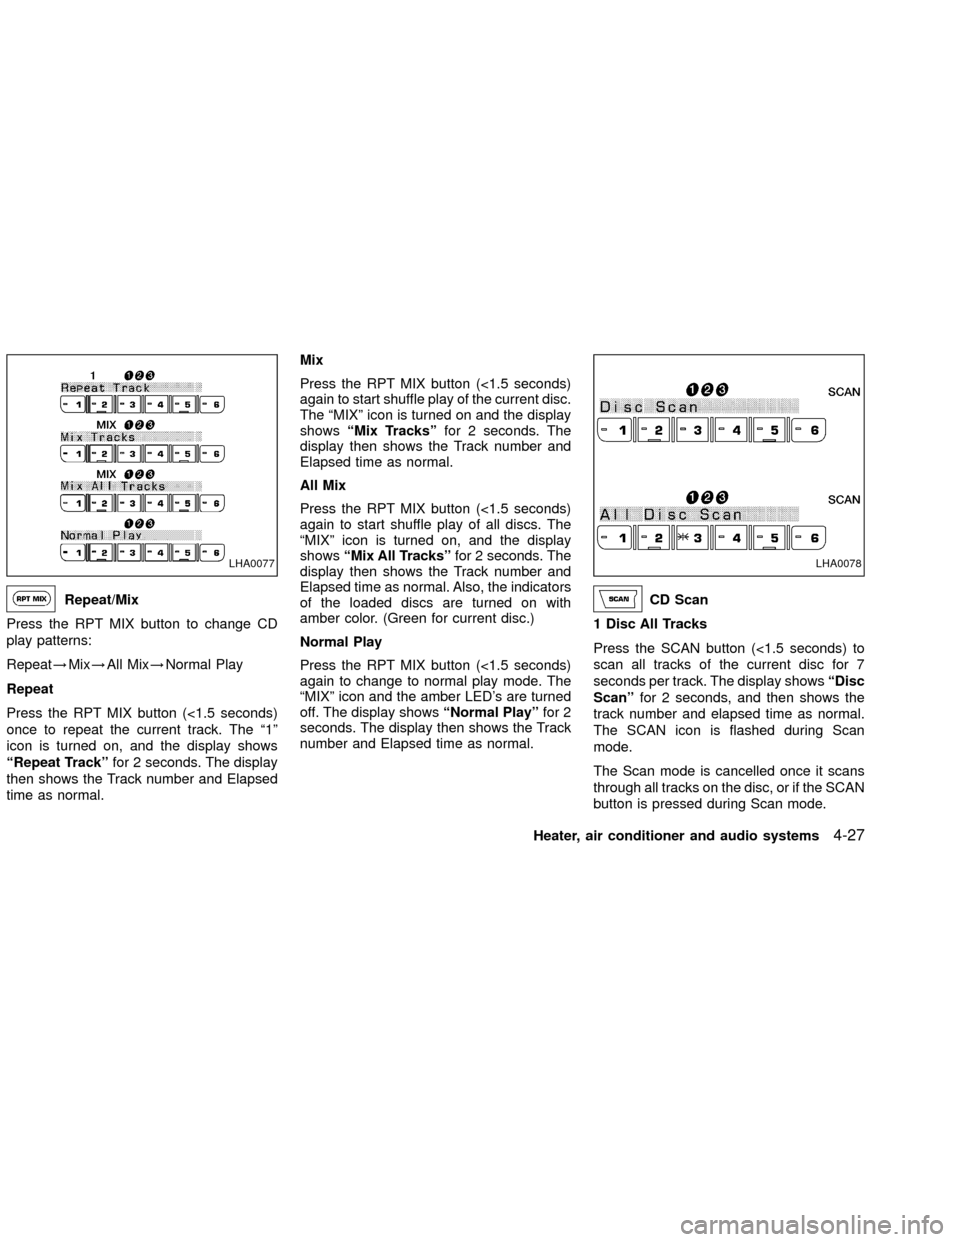
Press the RPT MIX button to change CD
play patterns:
Repeat!Mix!All Mix!Normal Play
Repeat
Press the RPT MIX button (<1.5 seconds)
once to repeat the current track. The ª1º
icon is turned on, and the display shows
ªRepeat Trackºfor 2 seconds. The display
then shows the Track number and Elapsed
time as normal.Mix
Press the RPT MIX button (<1.5 seconds)
again to start shuffle play of the current disc.
The ªMIXº icon is turned on and the display
showsªMix Tracksºfor 2 seconds. The
display then shows the Track number and
Elapsed time as normal.
All Mix
Press the RPT MIX button (<1.5 seconds)
again to start shuffle play of all discs. The
ªMIXº icon is turned on, and the display
showsªMix All Tracksºfor 2 seconds. The
display then shows the Track number and
Elapsed time as normal. Also, the indicators
of the loaded discs are turned on with
amber color. (Green for current disc.)
Normal Play
Press the RPT MIX button (<1.5 seconds)
again to change to normal play mode. The
ªMIXº icon and the amber LED's are turned
off. The display showsªNormal Playºfor 2
seconds. The display then shows the Track
number and Elapsed time as normal.CD Scan
1 Disc All Tracks
Press the SCAN button (<1.5 seconds) to
scan all tracks of the current disc for 7
seconds per track. The display showsªDisc
Scanºfor 2 seconds, and then shows the
track number and elapsed time as normal.
The SCAN icon is flashed during Scan
mode.
The Scan mode is cancelled once it scans
through all tracks on the disc, or if the SCAN
button is pressed during Scan mode.
LHA0077LHA0078
Heater, air conditioner and audio systems4-27
ZX
Page 127 of 263
All Discs, 1 Track
Press and hold the SCAN button (>1.5
seconds) to scan the first track of all the
loaded discs for 7 seconds per track. The
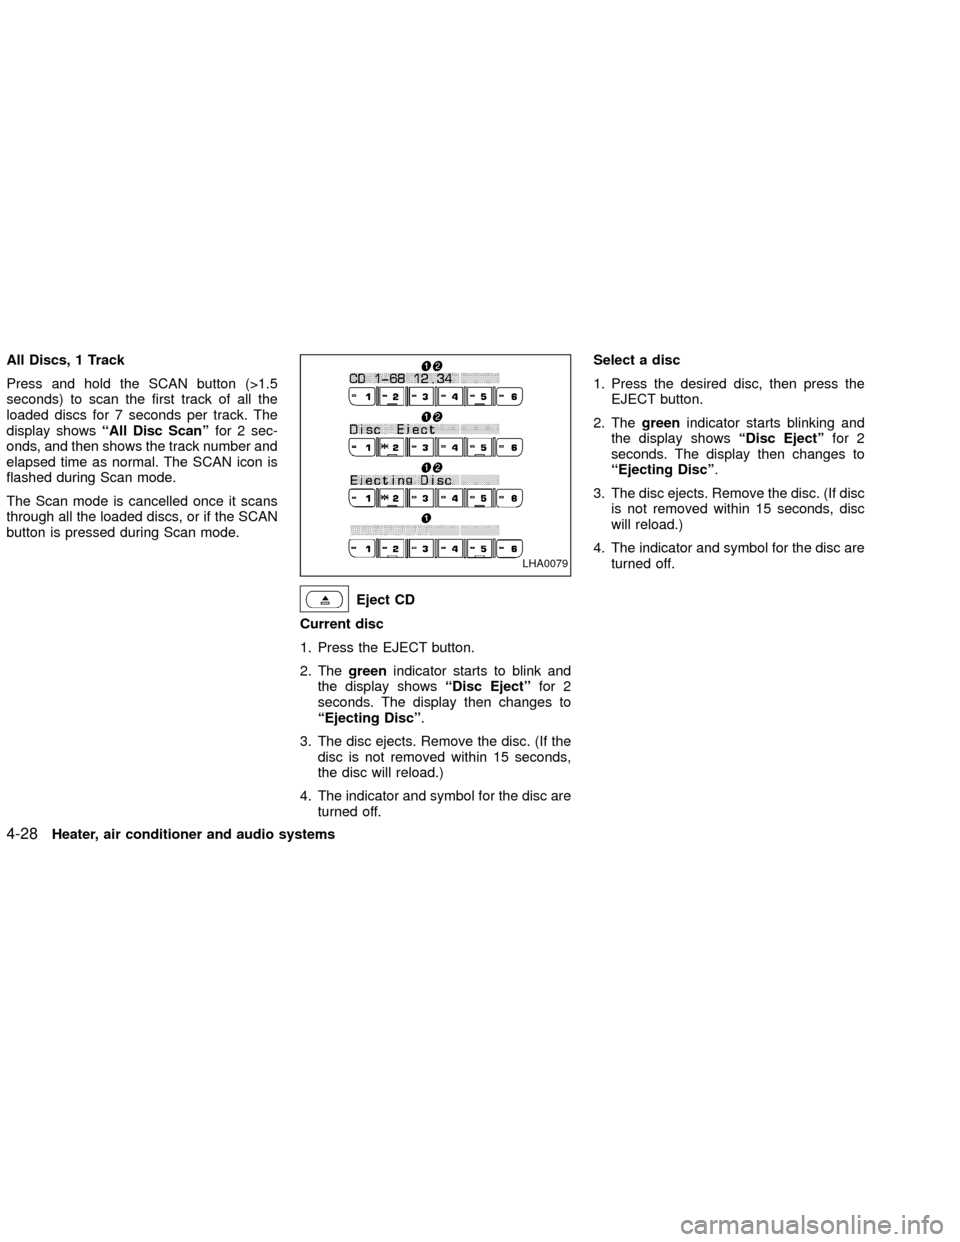
display showsªAll Disc Scanºfor 2 sec-
onds, and then shows the track number and
elapsed time as normal. The SCAN icon is
flashed during Scan mode.
The Scan mode is cancelled once it scans
through all the loaded discs, or if the SCAN
button is pressed during Scan mode.
Eject CD
Current disc
1. Press the EJECT button.
2. Thegreenindicator starts to blink and
the display showsªDisc Ejectºfor 2
seconds. The display then changes to
ªEjecting Discº.
3. The disc ejects. Remove the disc. (If the
disc is not removed within 15 seconds,
the disc will reload.)
4. The indicator and symbol for the disc are
turned off.Select a disc
1. Press the desired disc, then press the
EJECT button.
2. Thegreenindicator starts blinking and
the display showsªDisc Ejectºfor 2
seconds. The display then changes to
ªEjecting Discº.
3. The disc ejects. Remove the disc. (If disc
is not removed within 15 seconds, disc
will reload.)
4. The indicator and symbol for the disc are
turned off.
LHA0079
4-28Heater, air conditioner and audio systems
ZX
Page 133 of 263
WARNING
ODo not leave children, unreliable
adults, or pets alone in your vehicle.
They could accidentally injure them-
selves or others through inadvertent
operation of the vehicle. Also, on
hot, sunny days, temperatures in a
closed vehicle could quickly become
high enough to cause severe or pos-
sibly fatal injuries to people or ani-
mals.
OProperly secure all cargo to help
prevent it from sliding or shifting. Do
not place cargo higher than the seat-
backs. In a sudden stop or collision,
unsecured cargo could cause per-
sonal injury.
EXHAUST GAS (carbon monoxide)
WARNING
ODo not breathe exhaust gases; they
contain colorless and odorless car-
bon monoxide. Carbon monoxide is
a dangerous. It can cause uncon-
sciousness or death.OIf you suspect that exhaust fumes
are entering the vehicle, drive with
all windows fully open, and have the
vehicle inspected immediately.
ODo not run the engine in closed
spaces such as a garage.
ODo not park the vehicle with the
engine running for any extended
length of time.
OKeep the back door and rear win-
dows closed while driving, other-
wise exhaust gases could be drawn
into the passenger compartment. If
you must drive with the back door or
rear windows open, follow these pre-
cautions:
1. Open all the windows.
2. Set the air recirculation switch
OFF and the fan control at 4 (high)
to circulate the air.
OIf electrical wiring or other cable
connections must pass to a trailer
through the seal on the back door or
the body, follow the manufacturer's
recommendation to prevent carbon
monoxide entry into the vehicle.O
If a special body, camper, or other
equipment is added for recreational
or other usage, follow the manufac-
turer's recommendation to prevent
carbon monoxide entry into the ve-
hicle. Do not occupy these areas
while the engine is running even if the
vehicle is parked. Some recreational
vehicle appliances such as stoves,
refrigerators, heaters, etc. may also
generate carbon monoxide.
OThe exhaust system and body
should be inspected by a qualified
mechanic whenever:
a. The vehicle is raised for service.
b. You suspect that exhaust fumes
are entering into the passenger
compartment.
c. You notice a change in the sound
of the exhaust system.
d.
You have had an accident involv-
ing damage to the exhaust system,
underbody, or rear of the vehicle.
PRECAUTIONS WHEN
STARTING AND DRIVING
5-2Starting and driving
ZX
Page 144 of 263
When cruising at a low speed or
climbing a gentle slope, you may feel
uncomfortable shift shocks as the
transmission shifts between third gear
and overdrive repeatedly. In this case,
depress the OVERDRIVE switch to
turn the OVERDRIVE off. The O/D
OFF indicator light in the instrument
panel comes on at this time.
When driving conditions change, depress
the overdrive switch to turn the OVER-
DRIVE on.
Remember not to drive at high speeds for
extended periods of time with the OVER-
DRIVE off. This reduces fuel economy.
MANUAL TRANSMISSION
WARNING
ODo not downshift abruptly on slip-
pery roads. This may cause a loss of
control.
ODo not over-rev the engine when
shifting to a lower gear. This may
cause a loss of control or engine
damage.
CAUTION
ODo not rest your foot on the clutch
pedal while driving. This may cause
clutch damage.
OStop your vehicle completely before
shifting into R (Reverse).
OWhen the vehicle is stopped with the
engine running (for example at a
stop light), shift to N (Neutral) and
release the clutch pedal with the foot
brake applied.
Shifting
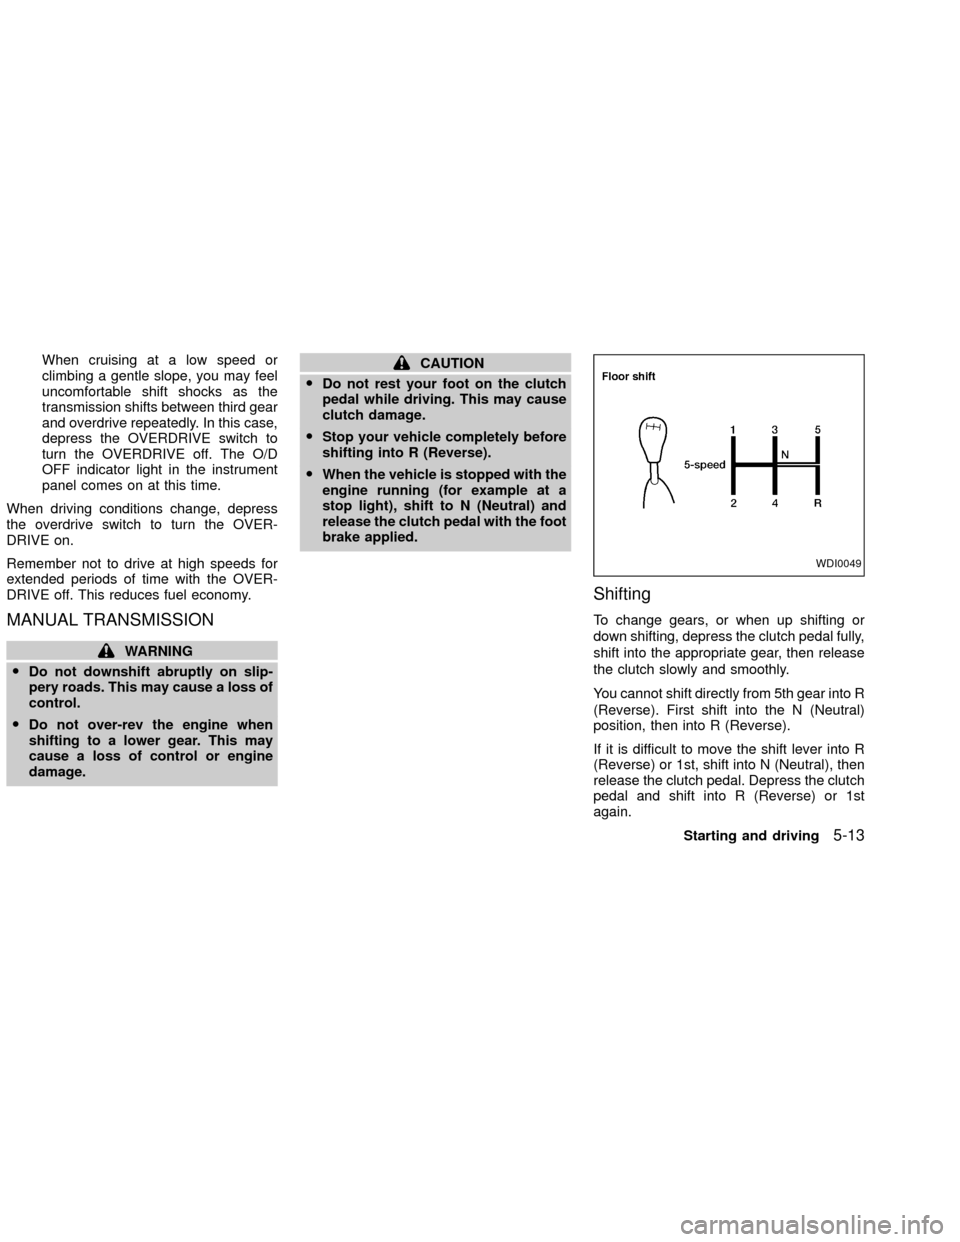
To change gears, or when up shifting or
down shifting, depress the clutch pedal fully,
shift into the appropriate gear, then release
the clutch slowly and smoothly.
You cannot shift directly from 5th gear into R
(Reverse). First shift into the N (Neutral)
position, then into R (Reverse).
If it is difficult to move the shift lever into R
(Reverse) or 1st, shift into N (Neutral), then
release the clutch pedal. Depress the clutch
pedal and shift into R (Reverse) or 1st
again.
WDI0049
Starting and driving5-13
ZX
Page 187 of 263

Additional information on the following
items with an ``*'' is found later in this
section.
Warning lights and chimesMake sure all
warning lights and chimes are operating
properly.
Windshield wiper and washer*Check that
the wipers and washer operate properly and
that the wipers do not streak.
Windshield defrosterCheck that the air
comes out of the defroster outlets properly
and in sufficient quantity when operating the
heater or air conditioner.
Steering wheelCheck for changes in the
steering conditions, such as excessive free-
play, hard steering or strange noises.
SeatsCheck seat position controls such as
seat adjusters, seatback recliner, etc. to
ensure they operate smoothly and all
latches lock securely in every position.
Check that the head restraints move up and
down smoothly and the locks (if so
equipped) hold securely in all latched posi-
tions.
Seat beltsCheck that all parts of the seat
belt system (e.g., buckles, anchors, adjust-ers and retractors) operate properly and
smoothly, and are installed securely. Check
the belt webbing for cuts, fraying, wear or
damage.
Accelerator pedalCheck the pedal for
smooth operation and make sure the pedal
does not catch or require uneven effort.
Keep the floor mat away from the pedal.
Clutch pedal*Make sure the pedal oper-
ates smoothly and check that it has the
proper free travel.
BrakesCheck that the brakes do not pull
the vehicle to one side when applied.
Brake pedal and booster*Check the pedal
for smooth operation and make sure it has
the proper distance under it when de-
pressed fully. Check the brake booster func-
tion. Be certain to keep the floor mat away
from the pedal.
Parking brake*Check that the lever has
the proper travel and confirm that your
vehicle is held securely on a fairly steep hill
with only the parking brake applied.
Automatic transmission P (Park) posi-
tion mechanismCheck that the lock re-
lease button on the selector lever operatesproperly and smoothly. On a fairly steep hill
check that your vehicle is held securely with
the selector lever in the P position without
applying any brakes.
Under the hood and vehicle
The maintenance items listed here should
be checked periodically (e.g., each time you
check the engine oil or refuel).
Additional information on the following
items with an ``*'' is found later in this
section.
Windshield washer fluid*Check that there
is adequate fluid in the reservoir.
Engine oil level*Check the level after
parking the vehicle on a level surface with
the engine off. Wait a few minutes for the oil
to drain back into the oil pan.
Brake and clutch fluid levels*Make sure
that the brake and clutch fluid level is be-
tween the MIN and MAX lines on the reser-
voir.
Power steering fluid level* and lines
Check the level when the fluid is cold, with
the engine off. Check the lines for proper
attachment, leaks, cracks, etc.
8-4Maintenance and do-it-yourself
ZX
Page 196 of 263
CHANGING ENGINE OIL
1. Park the vehicle on a level surface and
apply the parking brake.
2. Start the engine and let idle until it
reaches operating temperature, and then
turn it off.
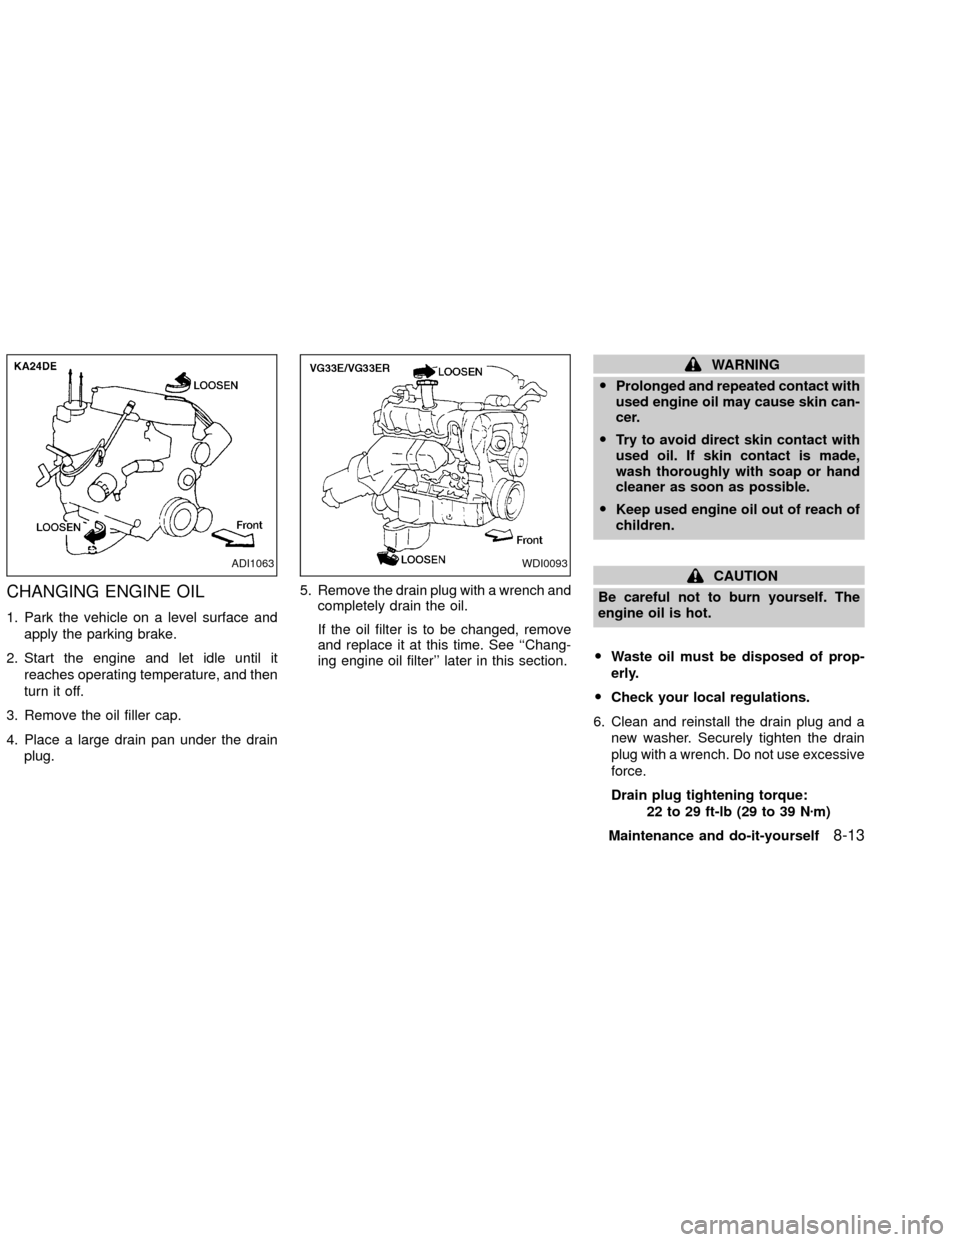
3. Remove the oil filler cap.
4. Place a large drain pan under the drain
plug.5. Remove the drain plug with a wrench and
completely drain the oil.
If the oil filter is to be changed, remove
and replace it at this time. See ``Chang-
ing engine oil filter'' later in this section.
WARNING
OProlonged and repeated contact with
used engine oil may cause skin can-
cer.
OTry to avoid direct skin contact with
used oil. If skin contact is made,
wash thoroughly with soap or hand
cleaner as soon as possible.
OKeep used engine oil out of reach of
children.
CAUTION
Be careful not to burn yourself. The
engine oil is hot.
OWaste oil must be disposed of prop-
erly.
OCheck your local regulations.
6. Clean and reinstall the drain plug and a
new washer. Securely tighten the drain
plug with a wrench. Do not use excessive
force.
Drain plug tightening torque:
22 to 29 ft-lb (29 to 39 Nzm)ADI1063WDI0093
Maintenance and do-it-yourself8-13
ZX