2002 NISSAN XTERRA change time
[x] Cancel search: change timePage 2 of 263

MODIFICATION OF YOUR VEHICLE
This vehicle should not be modified.
Modification could affect its perfor-
mance, safety or durability, and may
even violate governmental regulations.
In addition, damage or performance
problems resulting from modification
may not be covered under NISSAN war-
ranties.
All information, specifications and illustra-
tions in this manual are those in effect at the
time of printing. NISSAN reserves the right to
change specifications or design without no-
tice and without obligation.
You will see various symbols in this manual.
They are used in the following ways:
WARNING
This is used to indicate the presence of
a hazard that could cause death or
serious personal injury. To avoid or
reduce the risk, the procedures must
be followed precisely.
CAUTION
This is used to indicate the presence of
a hazard that could cause minor or
moderate personal injury or damage to
your vehicle. To avoid or reduce the
risk, the procedures must be followed
carefully.If you see this symbol, it means ``Do not do
this'' or ``Do not let this happen.''
CALIFORNIA PROPOSITION 65
WARNING
WARNING
Engine Exhaust, some of its constitu-
ents, and certain vehicle components
contain or emit chemicals known to
State of California to cause cancer and
birth defects or reproductive harm.
The inside pages of this manual contain
a minimum of 50% recycled fibers,
including 10% post-consumer fibers.
APD1005
IMPORTANT INFORMATION
ABOUT THIS MANUAL
ZX
Page 54 of 263

OUTSIDE TEMPERATURE DIS-
PLAY
Push the MODE switch when the ignition
key is in the ACC or ON position. The
outside temperature will be displayed in ÉF.
OPush the MODE switch to change from
ÉF to ÉC.
OWhen the outside temperature is be-
tween 130ÉF (55ÉC) and 158ÉF (70ÉC),
the display shows 130ÉF (55ÉC).
OWhen the outside temperature is
lower than -40ÉF (-40ÉC) or higherthan 158ÉF (70ÉC), the display shows
onlyÐÐÐthough it is operating.
This is not a malfunction.
OThe outside temperature sensor is
located in front of the radiator. The
sensor may be affected by road or
engine heat, wind direction and other
driving conditions. The display may
differ from the actual outside tem-
perature or the temperature dis-
played on various signs or bill-
boards.
OTemperature display will not update
unless the vehicle is moving faster
than 12 mph (20 km/h), or the ignition
switch has been OFF for 4 hours.COMPASS DISPLAY
Push the MODE switch when the ignition
key is in the ACC or ON position. The
direction will be displayed.
Zone variation change procedure
The difference between magnetic north and
geographical north is known as variance. In
some areas, this difference can sometimes
be great enough to cause false compass
readings. Follow these instructions to setthe variance for your particular location if
this happens:
1. Establish your location on the zone map.
Refer to the illustration. Record your
zone number.
2. Push the MODE switch in for five sec-
onds until the current zone entry number
is displayed.
3. Press the MODE switch repeatedly until
the new zone entry number is displayed.
Once the desired zone number is displayed,
stop pressing the MODE switch and the
display will show compass direction within a
few seconds.
LIC0115
Instruments and controls2-7
ZX
Page 68 of 263

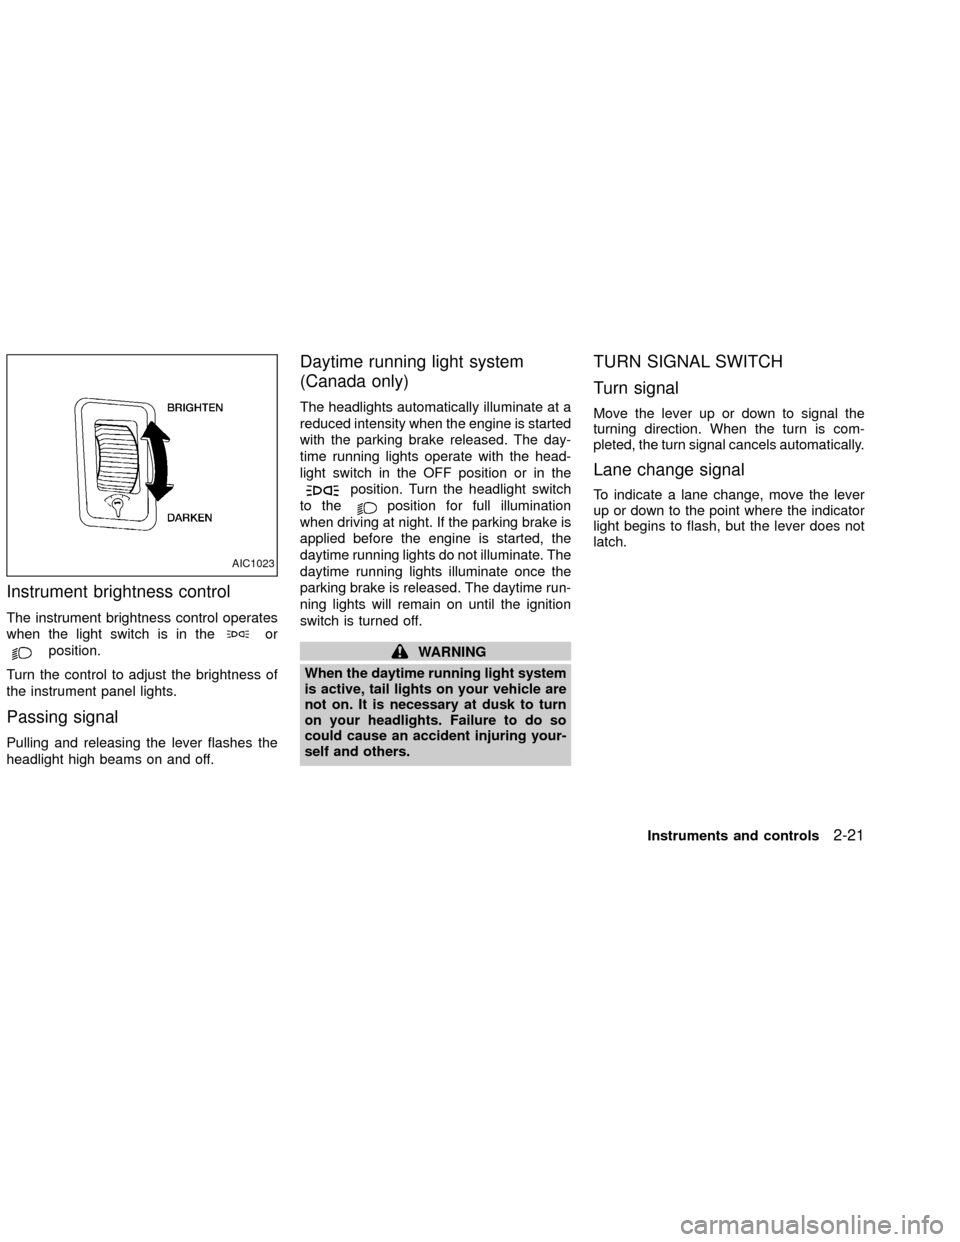
Instrument brightness control
The instrument brightness control operates
when the light switch is in the
or
position.
Turn the control to adjust the brightness of
the instrument panel lights.
Passing signal
Pulling and releasing the lever flashes the
headlight high beams on and off.
Daytime running light system
(Canada only)
The headlights automatically illuminate at a
reduced intensity when the engine is started
with the parking brake released. The day-
time running lights operate with the head-
light switch in the OFF position or in the
position. Turn the headlight switch
to the
position for full illumination
when driving at night. If the parking brake is
applied before the engine is started, the
daytime running lights do not illuminate. The
daytime running lights illuminate once the
parking brake is released. The daytime run-
ning lights will remain on until the ignition
switch is turned off.
WARNING
When the daytime running light system
is active, tail lights on your vehicle are
not on. It is necessary at dusk to turn
on your headlights. Failure to do so
could cause an accident injuring your-
self and others.
TURN SIGNAL SWITCH
Turn signal
Move the lever up or down to signal the
turning direction. When the turn is com-
pleted, the turn signal cancels automatically.
Lane change signal
To indicate a lane change, move the lever
up or down to the point where the indicator
light begins to flash, but the lever does not
latch.
AIC1023
Instruments and controls2-21
ZX
Page 90 of 263

BATTERY REPLACEMENT
Replace the battery in the keyfob as follows:
1. Open the lid using a coin.
2. Replace the battery with a new one.Recommended battery: Toshiba CR2025
or equivalent.3. Close the lid securely.
4. Press the LOCK button, then the UNLOCKbutton two or three times to check the
keyfob operation.
If the battery is removed for any reason
other than replacement, perform step 4
above.
OAn improperly disposed battery can
hurt the environment. Always confirm
local regulations for battery disposal.
OThe keyfob is water-resistant; how-
ever, if it does get wet, immediately
wipe completely dry.
OThe operational range of the keyfob
extends to approximately 33 ft (10 m)
from the vehicle. This range may vary
with conditions.
FCC Notice:
Changes or modifications not expressly
approved by the manufacturer for com-
pliance could void the user's authority to
operate the equipment.
This device complies with part 15 of the
FCC Rules and RSS-210 of Industry
Canada.
Operation is subject to the following two
conditions: (1) This device may not
cause harmful interference, and (2) this
LPD0081
Pre-driving checks and adjustments3-7
ZX
Page 109 of 263

RADIO
Turn the ignition key to ACC or ON and
press the power on switch to turn on the
radio. If you listen to the radio with the
engine not running, the key should be
turned to the ACC position.
Radio reception is affected by station signal
strength, distance from radio transmitter,
buildings, bridges, mountains and other ex-
ternal influences. Intermittent changes in
reception quality normally are caused by
these external influences.
Using a cellular phone in or near the
vehicle may influence radio reception
quality.
Radio reception
Your NISSAN radio system is equipped with
state-of-the-art electronic circuits to en-
hance radio reception. These circuits are
designed to extend reception range, and to
enhance the quality of that reception.
However there are some general character-
istics of both FM and AM radio signals that
can affect radio reception quality in a mov-
ing vehicle, even when the finest equipment
is used. These characteristics are com-pletely normal in a given reception area,
and do not indicate any malfunction in your
NISSAN radio system.
Reception conditions will constantly change
because of vehicle movement. Buildings,
terrain, signal distance and interference
from other vehicles can work against ideal
reception. Described below are some of the
factors that can affect your radio reception.
FM RADIO RECEPTION
Range: FM range is normally limited to 25 to
30 miles (40 to 48 km), with monaural
(single channel) FM having slightly more
range than stereo FM. External influences
may sometimes interfere with FM station
reception even if the FM station is within 25
miles (40 km). The strength of the FM signal
is directly related to the distance between
the transmitter and receiver. FM signals
follow a line-of-sight path, exhibiting many
of the same characteristics as light. For
example they will reflect off objects.
Fade and drift: As your vehicle moves away
from a station transmitter, the signals will
tend to fade and/or drift.
Static and flutter: During signal interference
from buildings, large hills or due to antennaposition, usually in conjunction with in-
creased distance from the station transmit-
ter, static or flutter can be heard. This can be
reduced by adjusting the treble control
counterclockwise to reduce treble re-
sponse.
Multipath reception: Because of the reflec-
tive characteristics of FM signals, direct and
reflected signals reach the receiver at the
same time. The signals may cancel each
other, resulting in momentary flutter or loss
of sound.
AM RADIO RECEPTION
AM signals, because of their low frequency,
can bend around objects and skip along the
ground. In addition, the signals can be
bounced off the ionosphere and bent back
to earth. Because of these characteristics.
AM signals are also subject to interference
as they travel from transmitter to receiver.
Fading: Occurs while the vehicle is passing
through freeway underpasses or in areas
with many tall buildings. It can also occur for
several seconds during ionospheric turbu-
lence even in areas where no obstacles
exist.
Static: Caused by thunderstorms, electrical
AUDIO SYSTEM
4-10Heater, air conditioner and audio systems
ZX
Page 112 of 263

FM-AM RADIO WITH COMPACT
DISC (CD) PLAYER (if so
equipped)
Audio main operation
Radio reception is affected by station signal
strength, distance from radio transmitter,
buildings, bridges, mountains, and other
external influences. Intermittent changes in
reception quality normally are caused by
these external influences.
Using a cellular phone in or near the
vehicle may influence radio reception
quality.
PWR/VOL control
Turn the ignition key to the ACC or ON
position, then push the PWR/VOL control
knob button. If you listen to the radio with
the engine not running, turn the key to the
ACC position. The mode (radio or CD)
which was playing immediately before the
system was turned off resumes playing.
When no CD is loaded, the radio comes on.
Push the PWR/VOL control knob button
again turns the system off.Turn the PWR/VOL control knob to the right
to increase volume or to the left to decrease
volume.
Adjusting tone quality and speaker bal-
ance
To adjust the audio levels for bass, treble,
fader, and balance, push the AUDIO button
and adjust the level with the SEEK/TRACK
button. Press the AUDIO button once for
BAS (bass), twice for TRE (treble), three
times for FAD (fader) and four times for BAL
(balance). Once the audio level is set the
display will return back to radio or CD
display mode after 7 seconds or the AUDIO
button can be pressed again within 7 sec-
onds to set the next audio level. Pressing
the AUDIO button a fifth time will return the
display back to radio or CD display mode.
Fader adjusts the sound level between the
front and rear speakers, balance adjusts the
sound level between the right and left
speakers.
Clock set
Press and hold the MENU button for more
than 2 seconds the radio beeps and the
hours flash, use the SEEK/TRACK button to
set the hour, press the MENU button again
until the radio beeps and the minutes flash,
LHA0118
Heater, air conditioner and audio systems4-13
ZX
Page 114 of 263

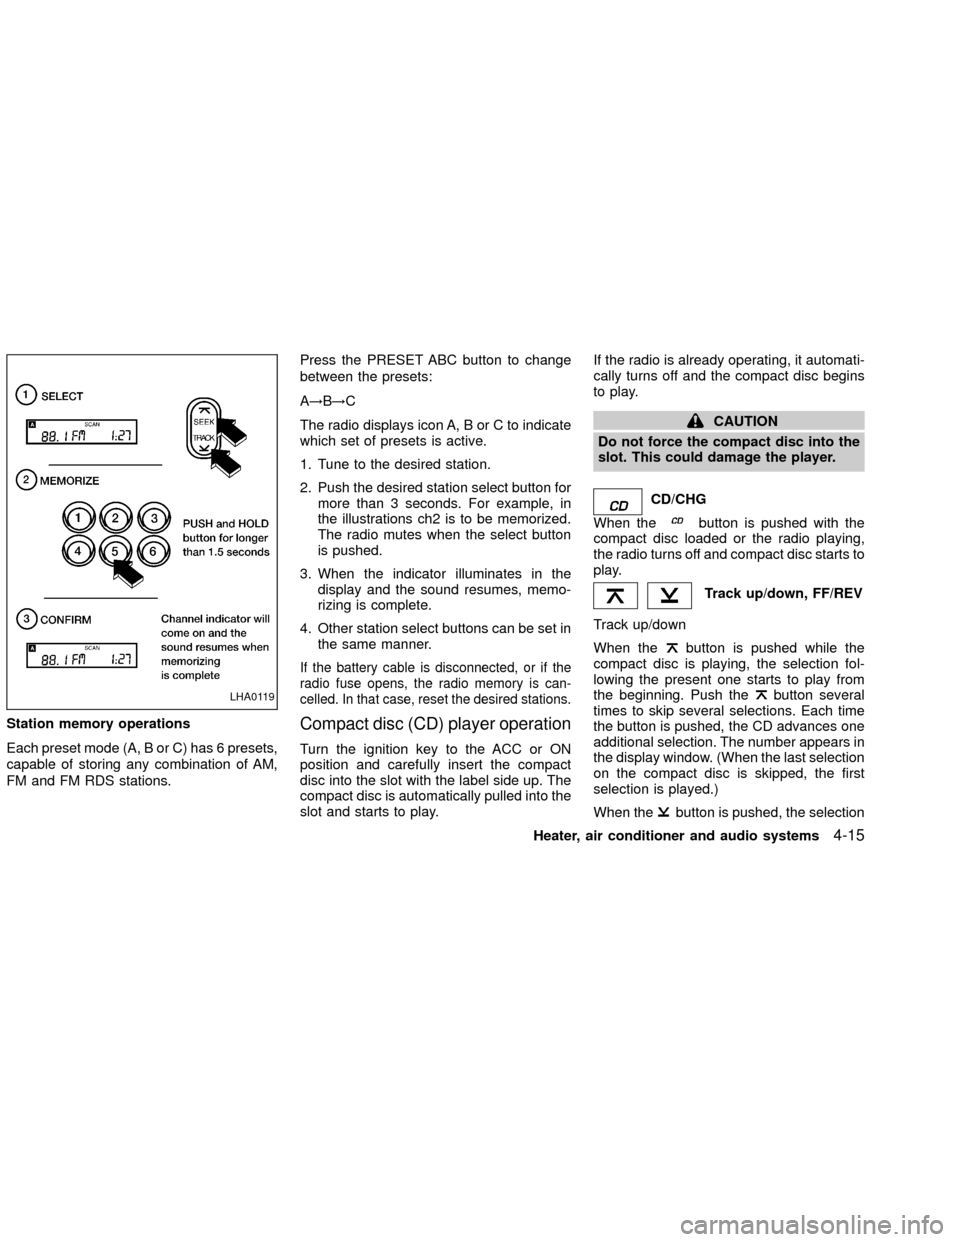
Station memory operations
Each preset mode (A, B or C) has 6 presets,
capable of storing any combination of AM,
FM and FM RDS stations.Press the PRESET ABC button to change
between the presets:
A!B!C
The radio displays icon A, B or C to indicate
which set of presets is active.
1. Tune to the desired station.
2. Push the desired station select button for
more than 3 seconds. For example, in
the illustrations ch2 is to be memorized.
The radio mutes when the select button
is pushed.
3. When the indicator illuminates in the
display and the sound resumes, memo-
rizing is complete.
4. Other station select buttons can be set in
the same manner.
If the battery cable is disconnected, or if the
radio fuse opens, the radio memory is can-
celled. In that case, reset the desired stations.
Compact disc (CD) player operation
Turn the ignition key to the ACC or ON
position and carefully insert the compact
disc into the slot with the label side up. The
compact disc is automatically pulled into the
slot and starts to play.If the radio is already operating, it automati-
cally turns off and the compact disc begins
to play.
CAUTION
Do not force the compact disc into the
slot. This could damage the player.
CD/CHG
When the
button is pushed with the
compact disc loaded or the radio playing,
the radio turns off and compact disc starts to
play.
Track up/down, FF/REV
Track up/down
When the
button is pushed while the
compact disc is playing, the selection fol-
lowing the present one starts to play from
the beginning. Push the
button several
times to skip several selections. Each time
the button is pushed, the CD advances one
additional selection. The number appears in
the display window. (When the last selection
on the compact disc is skipped, the first
selection is played.)
When the
button is pushed, the selection
LHA0119
Heater, air conditioner and audio systems4-15
ZX
Page 115 of 263

being played returns to the beginning. Push
thebutton several times to skip back
several selections. Each time the button is
pushed, the CD moves back one selection.
If the play pattern is in MIX mode when the
orbuttons are pushed the next selec-
tion will be chosen at random.
FF (Fast Forward)/REV (Reverse)
When the
orbutton is pushed while
the compact disc is playing, the compact
disc plays at an increased speed while fast
forwarding or rewinding. When the button is
released, the compact disc returns to nor-
mal play speed.
MENU
When the
button is pushed while the
compact disc is playing, the play pattern
changes as follows.
RPT:The current selection is repeated.
MIX:Selections are played at random, not
following the sequence on the compact
disc. The same program may be repeated
twice. If the
button is pushed in the MIX
mode, selections will be chosen at random.Blank(no symbol): All selections are played
repeatedly in sequence.
When a new compact disc is inserted,
the play pattern automatically changes
to ALL.
CD EJECT
When the
button is pushed with a com-
pact disc loaded, the compact disc ejects.
When the
button is pushed while the
compact disc is playing, the compact disc
ejects and the system turns off.
If the compact disc ejects and is not
removed within 10 seconds, it is pulled
back into the slot.
DISC indicator light
This light comes on
when a compact
disc is loaded into the player.
4-16Heater, air conditioner and audio systems
ZX