2002 NISSAN XTERRA warning
[x] Cancel search: warningPage 222 of 263
erwise, your vehicle may be damaged
and/or vehicle handling and performance
may be adversely affected.
Never install tire chains on a TEMPORARY
USE ONLY spare tire.
Tire chains must be installed only on the
rear wheels and not on the front wheels.
Do not use tire chains on dry roads. Driving
with chains in such conditions can cause
damage to the various mechanisms of the
vehicle due to some overstress. When driv-
ing on clear paved roads, be sure to change
to 2WD.
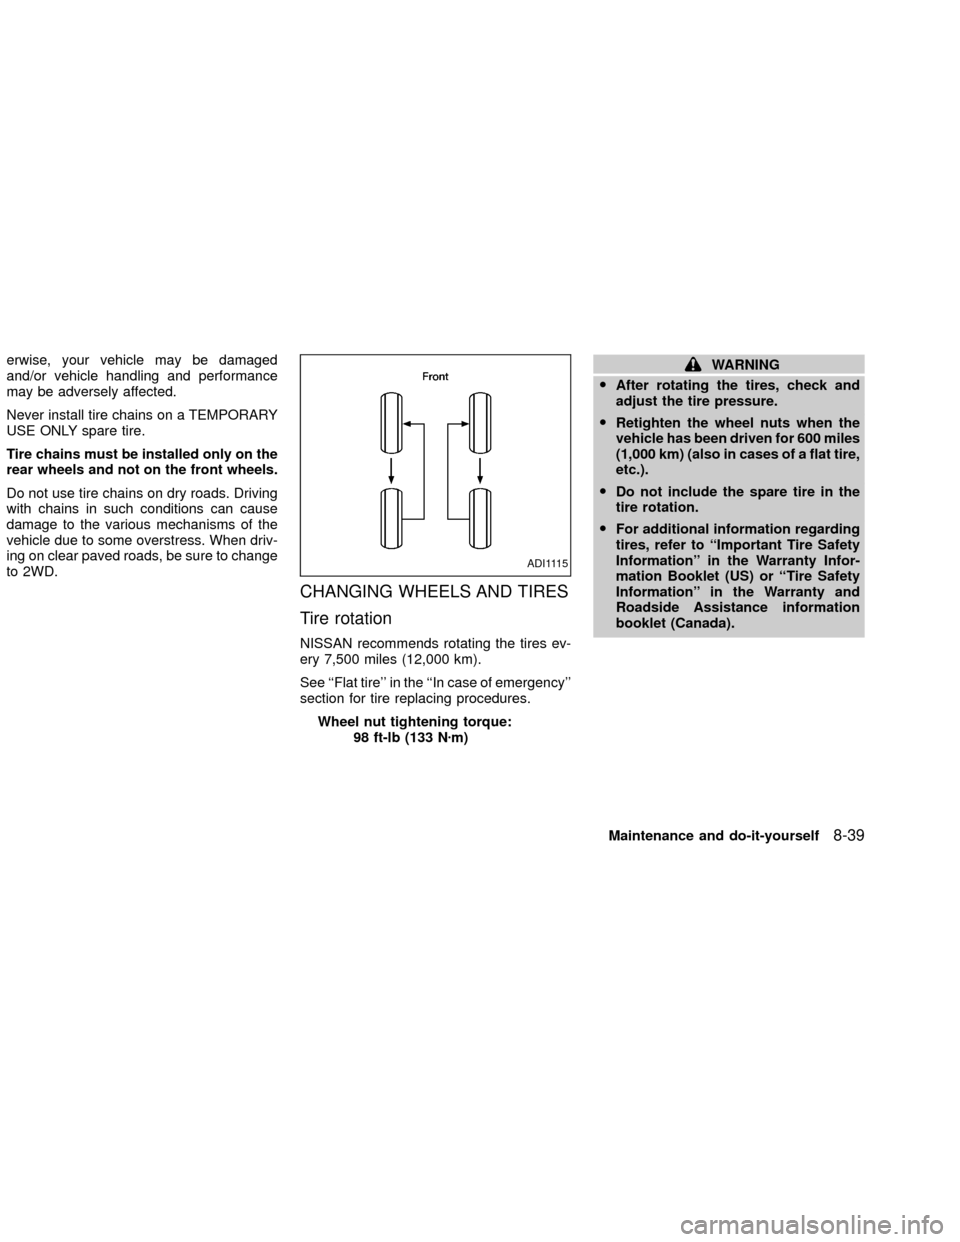
CHANGING WHEELS AND TIRES
Tire rotation
NISSAN recommends rotating the tires ev-
ery 7,500 miles (12,000 km).
See ``Flat tire'' in the ``In case of emergency''
section for tire replacing procedures.
Wheel nut tightening torque:
98 ft-lb (133 Nzm)
WARNING
OAfter rotating the tires, check and
adjust the tire pressure.
ORetighten the wheel nuts when the
vehicle has been driven for 600 miles
(1,000 km) (also in cases of a flat tire,
etc.).
ODo not include the spare tire in the
tire rotation.
OFor additional information regarding
tires, refer to ``Important Tire Safety
Information'' in the Warranty Infor-
mation Booklet (US) or ``Tire Safety
Information'' in the Warranty and
Roadside Assistance information
booklet (Canada).
ADI1115
Maintenance and do-it-yourself8-39
ZX
Page 223 of 263
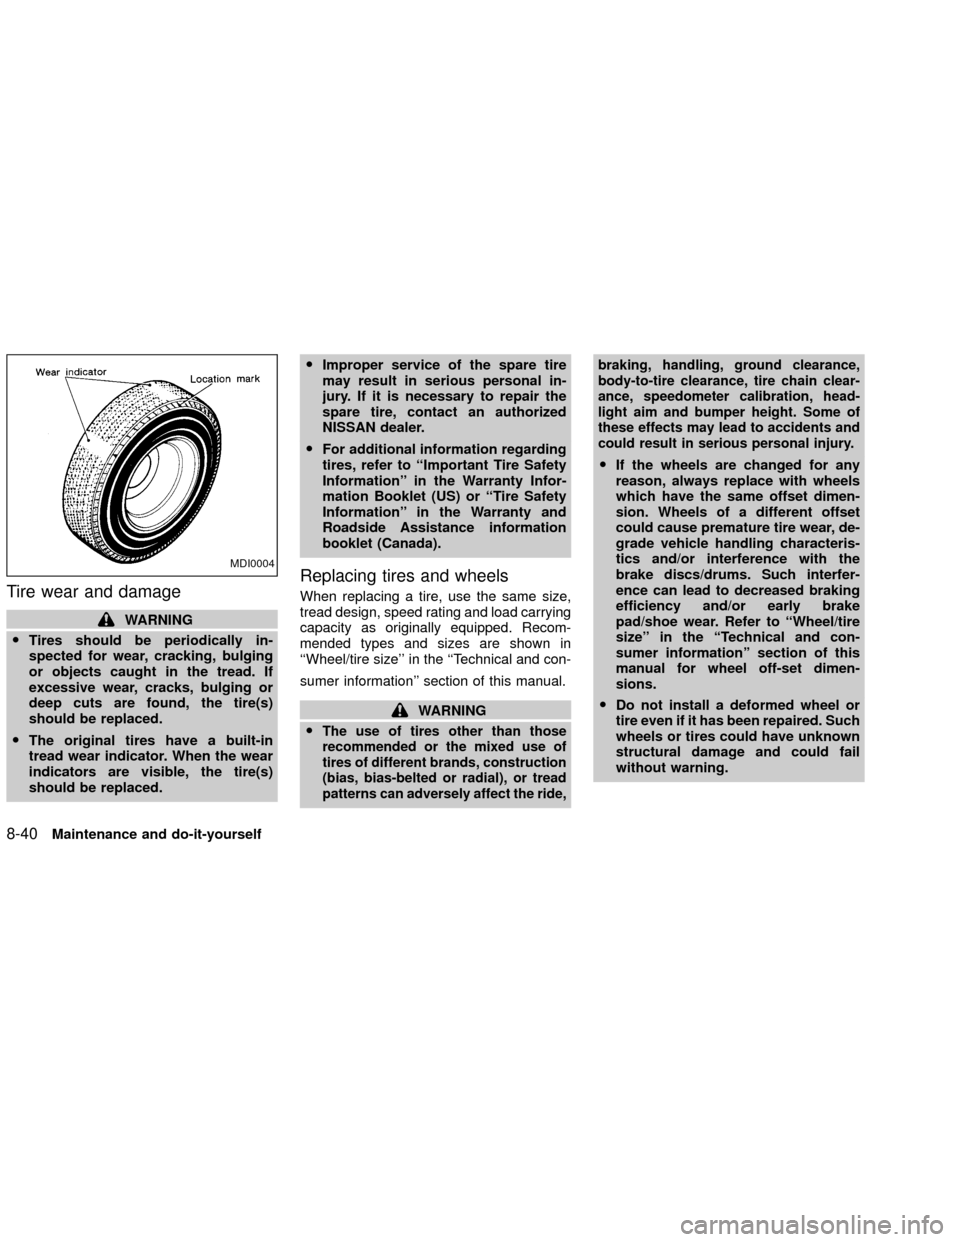
Tire wear and damage
WARNING
OTires should be periodically in-
spected for wear, cracking, bulging
or objects caught in the tread. If
excessive wear, cracks, bulging or
deep cuts are found, the tire(s)
should be replaced.
OThe original tires have a built-in
tread wear indicator. When the wear
indicators are visible, the tire(s)
should be replaced.OImproper service of the spare tire
may result in serious personal in-
jury. If it is necessary to repair the
spare tire, contact an authorized
NISSAN dealer.
OFor additional information regarding
tires, refer to ``Important Tire Safety
Information'' in the Warranty Infor-
mation Booklet (US) or ``Tire Safety
Information'' in the Warranty and
Roadside Assistance information
booklet (Canada).
Replacing tires and wheels
When replacing a tire, use the same size,
tread design, speed rating and load carrying
capacity as originally equipped. Recom-
mended types and sizes are shown in
``Wheel/tire size'' in the ``Technical and con-
sumer information'' section of this manual.
WARNING
O
The use of tires other than those
recommended or the mixed use of
tires of different brands, construction
(bias, bias-belted or radial), or tread
patterns can adversely affect the ride,braking, handling, ground clearance,
body-to-tire clearance, tire chain clear-
ance, speedometer calibration, head-
light aim and bumper height. Some of
these effects may lead to accidents and
could result in serious personal injury.
OIf the wheels are changed for any
reason, always replace with wheels
which have the same offset dimen-
sion. Wheels of a different offset
could cause premature tire wear, de-
grade vehicle handling characteris-
tics and/or interference with the
brake discs/drums. Such interfer-
ence can lead to decreased braking
efficiency and/or early brake
pad/shoe wear. Refer to ªWheel/tire
sizeº in the ªTechnical and con-
sumer informationº section of this
manual for wheel off-set dimen-
sions.
ODo not install a deformed wheel or
tire even if it has been repaired. Such
wheels or tires could have unknown
structural damage and could fail
without warning.
MDI0004
8-40Maintenance and do-it-yourself
ZX
Page 240 of 263
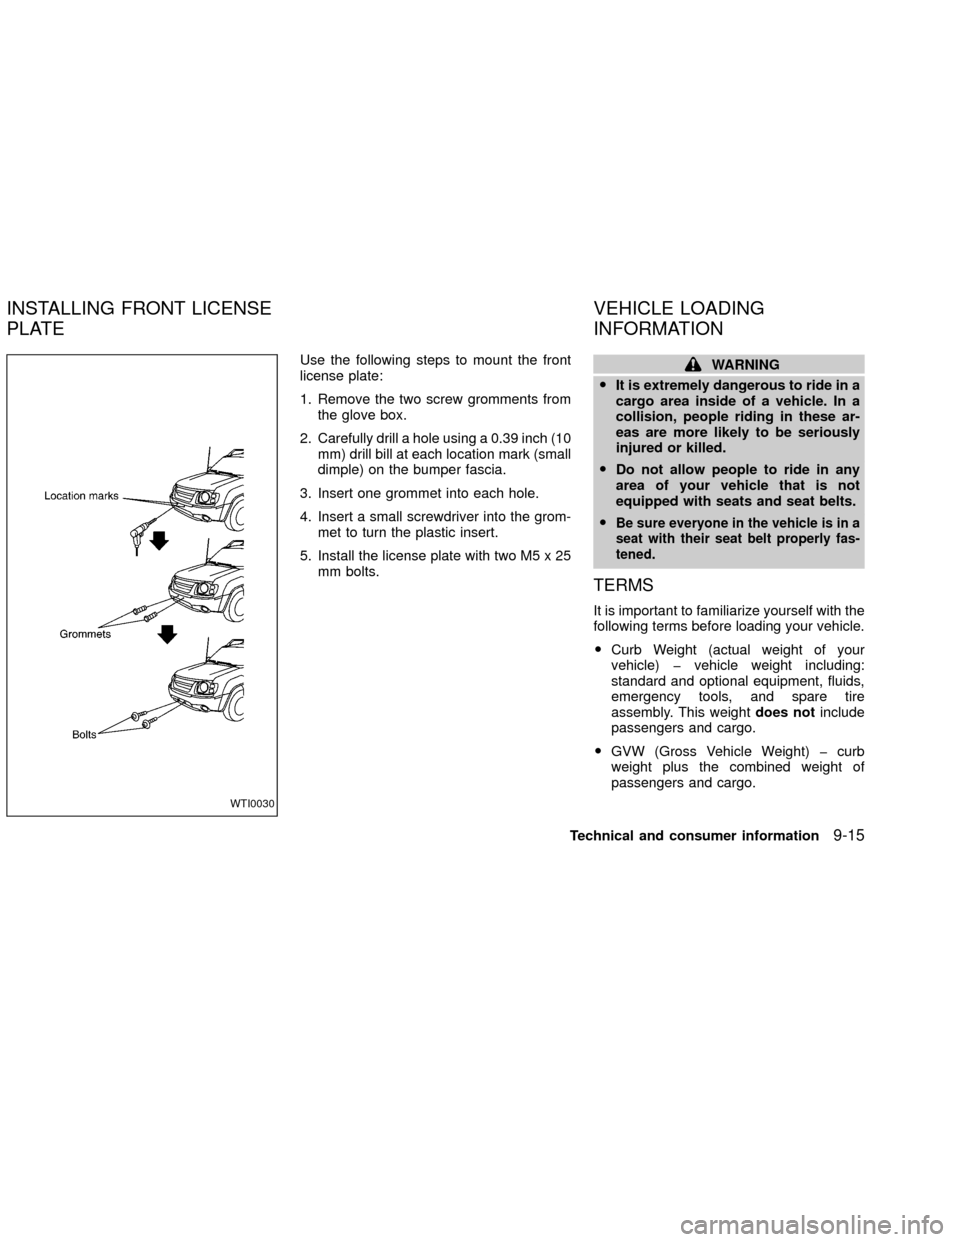
Use the following steps to mount the front
license plate:
1. Remove the two screw gromments from
the glove box.
2. Carefully drill a hole using a 0.39 inch (10
mm) drill bill at each location mark (small
dimple) on the bumper fascia.
3. Insert one grommet into each hole.
4. Insert a small screwdriver into the grom-
met to turn the plastic insert.
5. Install the license plate with two M5 x 25
mm bolts.WARNING
OIt is extremely dangerous to ride in a
cargo area inside of a vehicle. In a
collision, people riding in these ar-
eas are more likely to be seriously
injured or killed.
ODo not allow people to ride in any
area of your vehicle that is not
equipped with seats and seat belts.
O
Be sure everyone in the vehicle is in a
seat with their seat belt properly fas-
tened.
TERMS
It is important to familiarize yourself with the
following terms before loading your vehicle.
OCurb Weight (actual weight of your
vehicle) þ vehicle weight including:
standard and optional equipment, fluids,
emergency tools, and spare tire
assembly. This weightdoes notinclude
passengers and cargo.
OGVW (Gross Vehicle Weight) þ curb
weight plus the combined weight of
passengers and cargo.
WTI0030
INSTALLING FRONT LICENSE
PLATEVEHICLE LOADING
INFORMATION
Technical and consumer information9-15
ZX
Page 242 of 263
WARNING
OProperly secure all cargo with ropes
or straps to help prevent it from
sliding or shifting. Do not place
cargo higher than the seat backs. In
a sudden stop or collision, unse-
cured cargo could cause personal
injury.
ODo not load your vehicle any heavier
than the GVWR or the maximum
front and rear GAWR's. If you do,
parts on your vehicle can break tire
damage could occur, or it can
change the way your vehicle
handles. This could result in loss of
control and cause personal injury.
LOADING TIPS
OThe GVW must not exceed GVWR or
GAWR as specified on the FMVSS Cer-
tification Label located on the driver's
door jamb pillar.
ODo not load the front and rear axle to the
GAWR. Doing so will exceed the
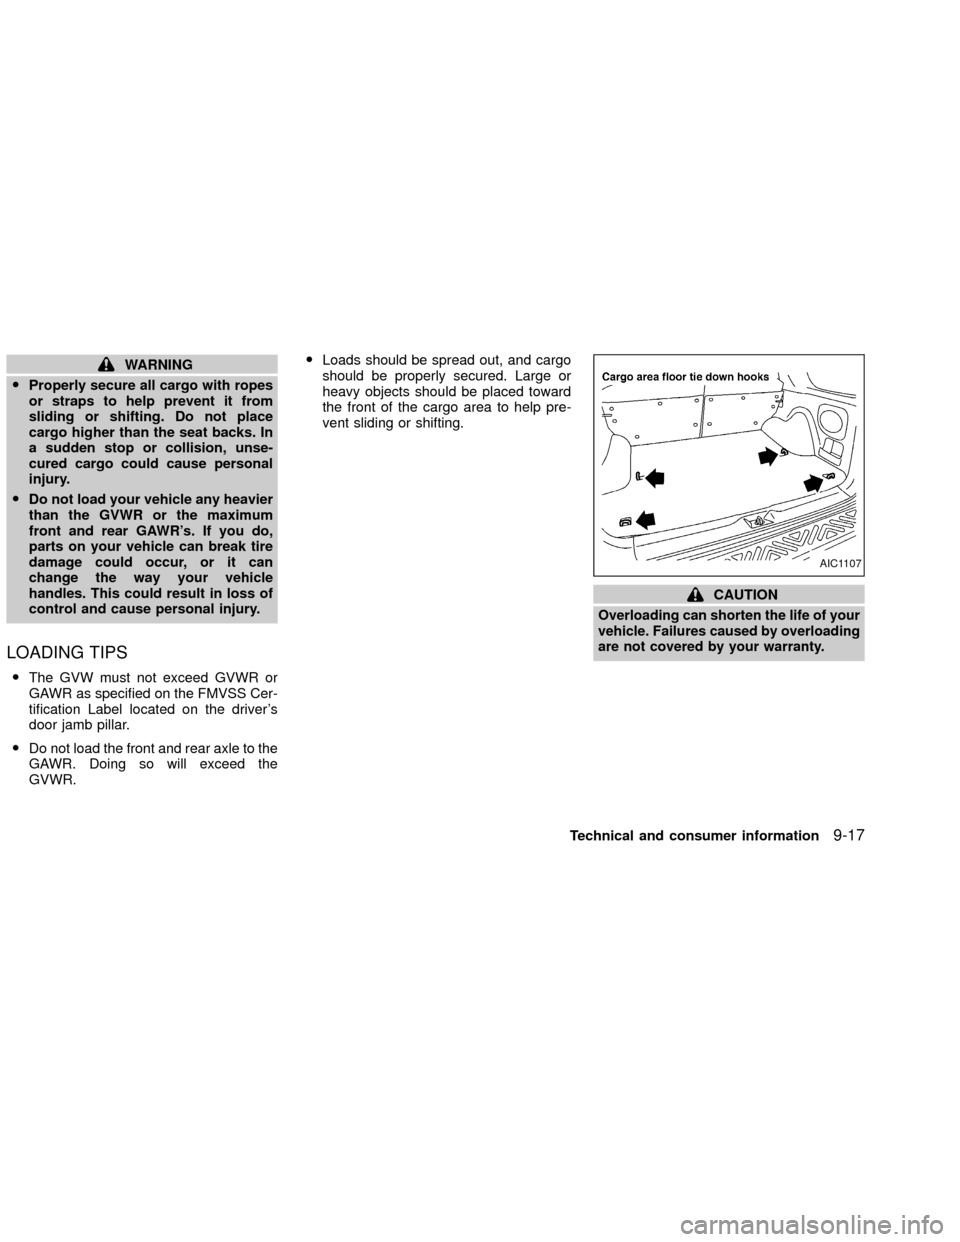
GVWR.OLoads should be spread out, and cargo
should be properly secured. Large or
heavy objects should be placed toward
the front of the cargo area to help pre-
vent sliding or shifting.
CAUTION
Overloading can shorten the life of your
vehicle. Failures caused by overloading
are not covered by your warranty.
AIC1107
Technical and consumer information9-17
ZX
Page 245 of 263
WARNING
Vehicle damage and/or personal injury
resulting from improper towing proce-
dures are not covered by NISSAN war-
ranties. A Nissan Trailer Towing Guide
(U.S. only) containing information on
trailer towing ability and the special
equipment required may be obtained
from an authorized NISSAN dealer.
Tongue load
Keep the tongue load between 9 to 11
percent of the total trailer load within the
maximum tongue load limits shown in the
following Towing Load/Specification Chart.
If the tongue load becomes excessive, re-
arrange cargo to allow for proper tongue
load.
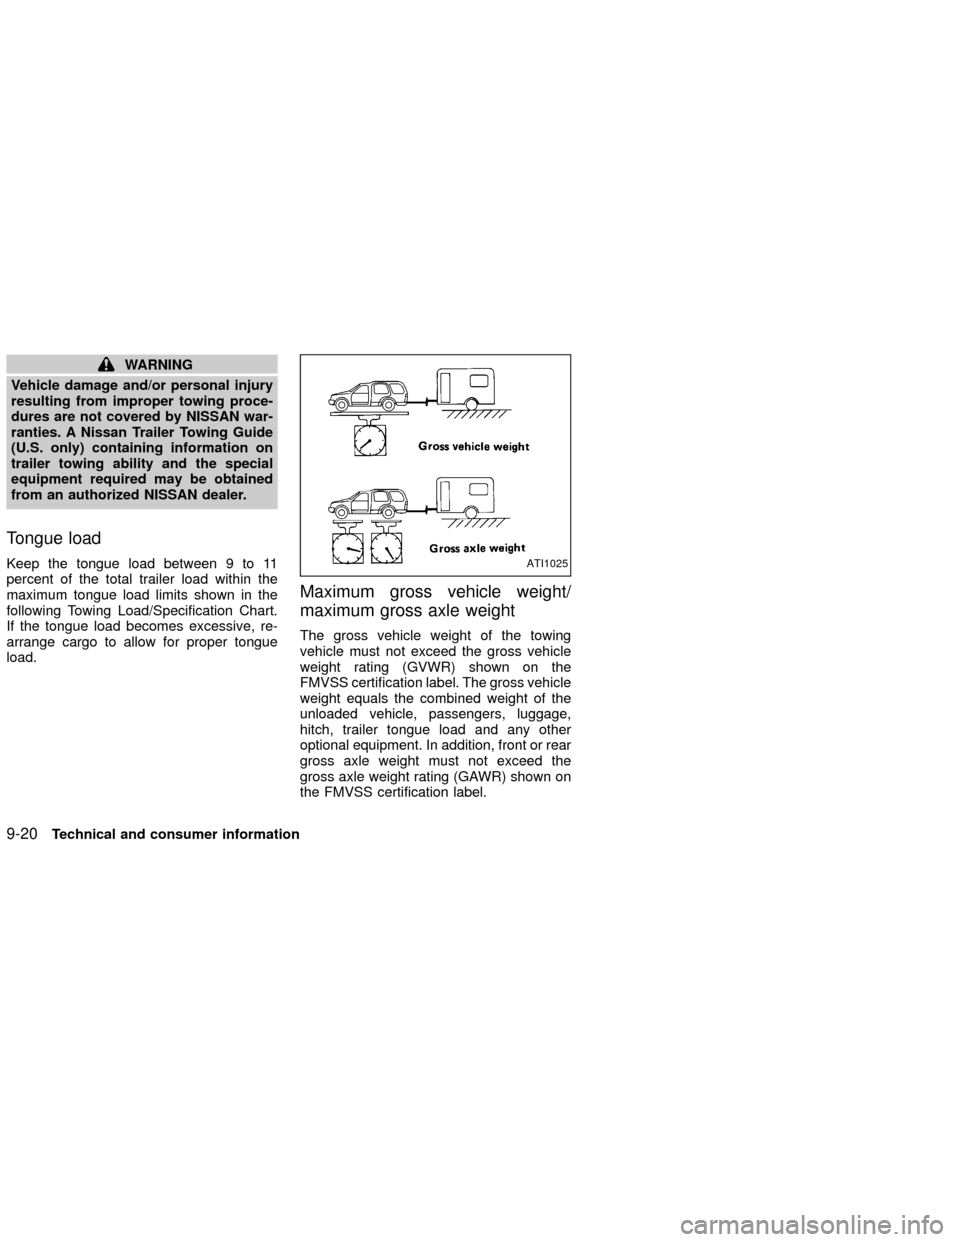
Maximum gross vehicle weight/
maximum gross axle weight
The gross vehicle weight of the towing
vehicle must not exceed the gross vehicle
weight rating (GVWR) shown on the
FMVSS certification label. The gross vehicle
weight equals the combined weight of the
unloaded vehicle, passengers, luggage,
hitch, trailer tongue load and any other
optional equipment. In addition, front or rear
gross axle weight must not exceed the
gross axle weight rating (GAWR) shown on
the FMVSS certification label.
ATI1025
9-20Technical and consumer information
ZX
Page 249 of 263
4) Connect the tow harness connector
(SAE J1239) to your trailer.
5) Confirm proper vehicle and trailer
stop/turn lamp operation.
6) When towing is completed, disconnect
the tow harness from the trailer and the
vehicle. Store the tow harness in the
glove box. Reinstall the connector cap to
the vehicle harness.
If you need further assistance in wiring
a trailer to your NISSAN, contact an autho-
rized NISSAN dealer.
Always confirm proper vehicle and
trailer stop/turn lamp operation every
time the trailer light circuits are con-
nected for use.
Trailer brakes
If your trailer is equipped with a braking
system, make sure it conforms to Federal
and/or local regulations and that it is prop-
erly installed.
WARNING
Never connect a trailer brake system
directly to the vehicle brake system.
Pre-towing tips
OBe certain your vehicle maintains a level
position when a loaded and/or unloaded
trailer is hitched. Do not drive the vehicle
if it has an abnormal nose-up or nose-
down condition; check for improper
tongue load, overload, worn suspension
or other possible causes of either condi-
tion.
OAlways secure items in the trailer to
prevent load shift while driving.
OBe certain your outside mirrors conform
to all federal, state or local regulations. If
not, install any mirrors required for towing
before driving the vehicle.
Trailer towing tips
In order to gain skill and an understanding
of the vehicle's behavior, you should prac-
tice turning, stopping and backing up in an
area which is free from traffic. Steering,
stability and braking performance will be
somewhat different than under normal driv-
ing conditions.
OAlways secure items in the trailer to
prevent load shift while driving.
O
Avoid abrupt starts, acceleration or stops.
OAvoid sharp turns or lane changes.
OAlways drive your vehicle at a moderate
speed.
OAlways block the wheels on both vehicle
and trailer when parking. Parking on a
slope is not recommended; however, if
you must do so, and if your vehicle is
equipped with automatic transmission,
first block the wheels and apply the park-
ing brake, and then move the transmis-
sion shift selector lever into the P (Park)
position. If you move the shift lever to the
P (Park) position before blocking the
wheels and applying the parking brake,
transmission damage could occur.
OWhen going down a hill, shift into a lower
gear and use the engine braking effect.
When ascending a long grade, downshift
the transmission to a lower gear and
reduce speed to reduce chances of en-
gine overloading and/or overheating.
However, for long steep grades, do not
stay in 1st or 2nd gear when driving
above 35 MPH (56 km/h).
OIf the engine coolant rises to an ex-
tremely high temperature when the air
conditioning system is on, turn off the air
conditioner. Coolant heat can be addi-
9-24Technical and consumer information
ZX
Page 251 of 263
ment as measured under controlled condi-
tions on specified government test surfaces
of asphalt and concrete. A tire marked C
may have poor traction performance.
WARNING
The traction grade assigned to your ve-
hicle tires is based on straight-ahead
braking traction tests, and does not in-
clude acceleration, cornering, hydro-
planing, or peak traction characteristics.
Temperature A, B and C
Temperature grades are A (the highest), B,
and C. They represent a tire's resistance to
heat build-up, and its ability to dissipate heat
when tested under controlled conditions on
a specified indoor laboratory test wheel.
Sustained high temperature can cause tire
material to degenerate, reducing tire life.
Excessive temperatures can lead to sudden
tire failure. Grade C corresponds to a per-
formance level which all passenger car tires
must meet under the Federal Motor Vehicle
Safety Standard No. 109. Grades A and B
represent higher levels of performance on
laboratory test wheels than the minimum
required by law.
WARNING
The temperature grade for this tire is
established for a tire that is properly
inflated and not overloaded. Excessive
speed, under inflation, or excessive
loading, either separately or in combi-
nation, can cause heat build-up and
possible tire failure.Your NISSAN is covered by the following
emission warranties.
For US
1) Emission Defects Warranty
2) Emission Performance Warranty
Emission Control System Warranty
Details of these warranties may be found
with other vehicle warranties in your War-
ranty Information Booklet which comes with
your NISSAN. If you did not receive a
Warranty Information Booklet, or it becomes
lost, you may obtain a replacement by writ-
ing to:
ONissan North America, Inc.
Consumer Affairs Department
P.O. Box 191
Gardena, CA 90248-0191
EMISSION CONTROL
SYSTEM WARRANTY
9-26Technical and consumer information
ZX
Page 252 of 263
For Canada
Emission Control System Warranty
Details of these warranties may be found
with other vehicle warranties in your War-
ranty and Roadside Assistance Information
Booklet which comes with your NISSAN. If
you did not receive a Warranty and Road-
side Assistance Information Booklet, or it
becomes lost, you may obtain a replace-
ment by writing to:
ONissan Canada Inc.
5290 Orbitor Drive
Mississauga, Ontario L4W 4Z5If you believe that your vehicle has a defect
which could cause a crash or could cause
injury or death, you should immediately
inform the National Highway Traffic Safety
Administration
(NHTSA)in addition to no-
tifying NISSAN.
If
NHTSAreceives similar complaints, it
may open an investigation, and if it finds
that a safety defect exists in a group of
vehicles, it may order a recall and remedy
campaign. However,
NHTSAcannot be-
come involved in individual problems be-
tween you, your dealer, or NISSAN.
To contact
NHTSA, you may either call the
Auto Safety Hotline toll-free at (888) 327-
4236. If you reside in Hawaii, please call
(808) 836-0888. You may also write to:
NHTSA, U.S. Department of Transporta-
tion, Washington, D.C. 20590. You can also
obtain other information about motor vehicle
safety from the Hotline.
You may notify NISSAN by contacting our
Consumer Affairs Department, toll-free, at
1-800-NISSAN-1.
In Hawaii call (808) 836-0888.Due to legal requirements in some states
and Canadian provinces, your vehicle may
be required to be in the ready condition for
an Inspection/Maintenance (I/M) test of the
emission control system.
The vehicle is set to the ready condition when
it is driven through certain driving patterns.
Usually, the ready condition can be obtained
by ordinary usage of the vehicle.
If a powertrain system component is re-
paired or the battery is disconnected, the
vehicle may be reset to a not ready condi-
tion. Before taking the I/M test, drive the
vehicle through the following pattern to set
the vehicle to the ready condition.
WARNING
Always drive the vehicle in a safe and
prudent manner according to traffic
conditions and obey all traffic laws.
1. Start the engine when the engine coolant
temperature gauge needle points to C.
Allow the engine to idle until the gauge
needle points between the C and H (nor-
mal operating temperature).
REPORTING SAFETY
DEFECTS (US only)READINESS FOR
INSPECTION/MAINTENANCE
(I/M) TEST (US only)
Technical and consumer information9-27
ZX