2002 NISSAN SENTRA Engine
[x] Cancel search: EnginePage 87 of 235

WARNING
c
Gasoline is extremely flammable and
highly explosive under certain condi-
tions. You could be burned or seriously
injured if it is misused or mishandled.
Always stop the engine and do not
smoke or allow open flames or sparks
near the vehicle when refueling.
cFuel may be under pressure. Turn the
cap one-half turn and wait for any ``hiss-
ing'' sound to stop to prevent fuel from
spraying out and possibly causing per-
sonal injury. Then remove the cap.
cDo not attempt to top off the fuel
tank after the fuel pump nozzle shuts
off automatically. Continued refuel-
ing may cause fuel overflow, result-
ing in fuel spray and possibly fire.
cUse only an original equipment type
fuel filler cap as a replacement. It has
a built-in safety valve needed for
proper operation of the fuel system
and emission control system. An in-
correct cap can result in a serious
malfunction and possible injury. It
could also cause the malfunction
indicator lamp to come on.Do not fill a portable fuel container in
the vehicle or trailer. Static electric-
ity can cause an explosion of flam-
mable liquid, vapor or gas in any
vehicle or trailer. To reduce the risk
of serious injury or death when fill-
ing portable fuel containers:
Ð Always place the container on
the ground when filling.
Ð Do not use electronic devices
while filling.
Ð Keep the pump nozzle in contact
with the container while you are
filling it.
Ð Use only approved portable fuel
containers for flammable liquid.
cNever pour fuel into the throttle body
to attempt to start your vehicle.
CAUTION
cIf fuel is spilled on the vehicle body,
flush it away with water to avoid
paint damage.cTighten until the fuel filler cap clicks.
Failure to tighten the fuel filler cap
properly may cause the
mal-
function indicator lamp (MIL) to illu-
minate. If the
lamp illuminates
because the fuel filler cap is loose or
missing, tighten or install the cap
and continue to drive the vehicle.
The
lamp should turn off after a
few driving trips. If thelamp
does not turn off after a few driving
trips, have the vehicle inspected by
an authorized NISSAN dealer.
cFor additional information, see the
``Malfunction indicator lamp (MIL)''
in the ``Instruments and controls''
section earlier in this manual.
3-14Pre-driving checks and adjustments
ZX
Page 94 of 235

WARNING
cThe air conditioner cooling function
operates only when the engine is
running.
cDo not leave children, impaired
adults, or pets alone in your vehicle.
On hot, sunny days, temperatures in
a closed vehicle could quickly be-
come high enough to cause severe
or possibly fatal injuries to people or
animals.
cDo not use the recirculation mode
for long periods as it may cause the
interior air to become stale and the
windows to fog up.
cPositioning of the heater and air con-
ditioner controls should not be done
while driving so full attention may be
given to vehicle operation.
CONTROLS
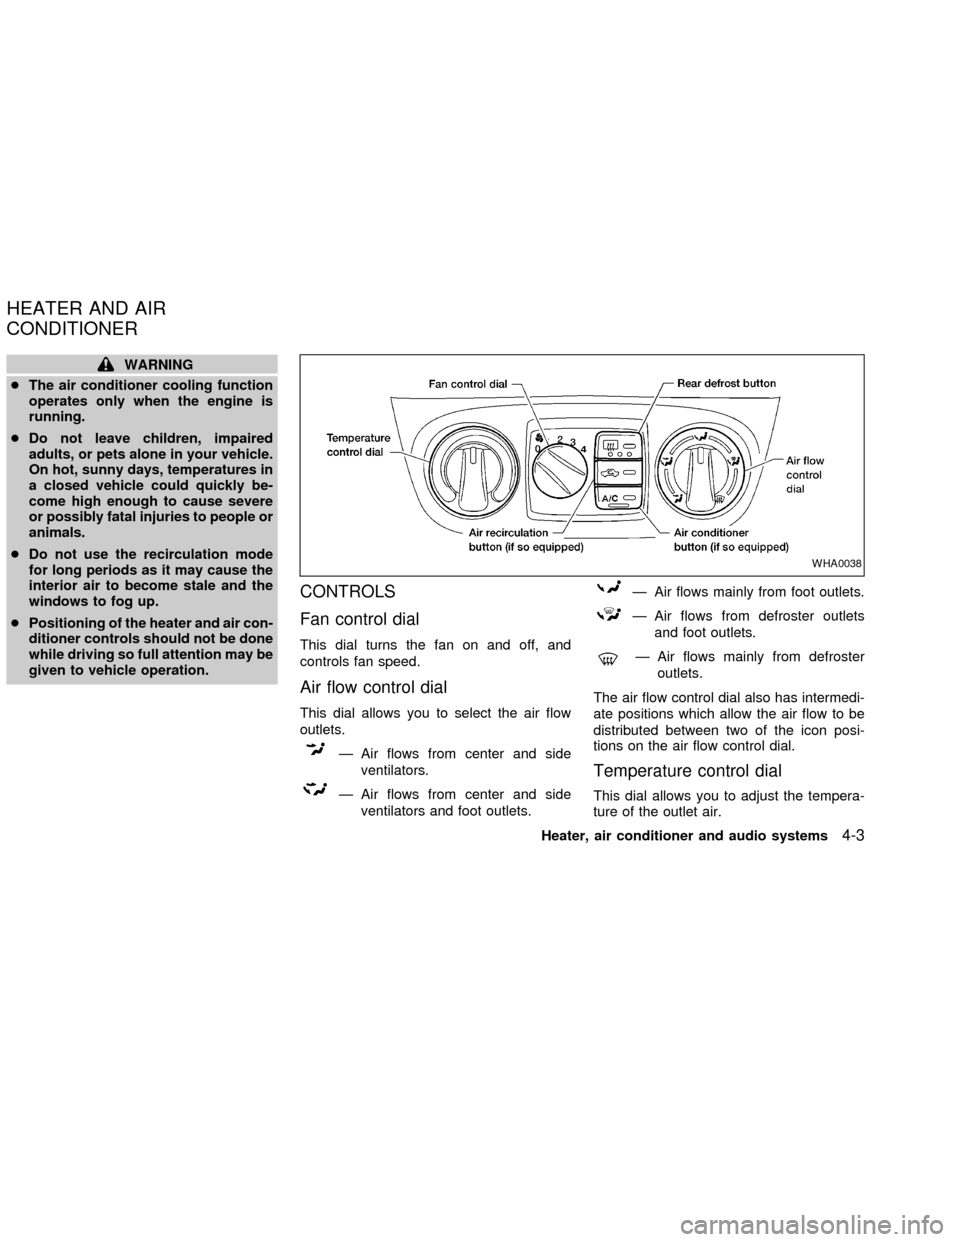
Fan control dial
This dial turns the fan on and off, and
controls fan speed.
Air flow control dial
This dial allows you to select the air flow
outlets.
Ð Air flows from center and side
ventilators.
Ð Air flows from center and side
ventilators and foot outlets.
Ð Air flows mainly from foot outlets.
Ð Air flows from defroster outlets
and foot outlets.
Ð Air flows mainly from defroster
outlets.
The air flow control dial also has intermedi-
ate positions which allow the air flow to be
distributed between two of the icon posi-
tions on the air flow control dial.
Temperature control dial
This dial allows you to adjust the tempera-
ture of the outlet air.
WHA0038
HEATER AND AIR
CONDITIONER
Heater, air conditioner and audio systems4-3
ZX
Page 95 of 235

Air recirculation button
(if so equipped)
NOTE:
The air recirculation feature is available
only on those vehicles equipped with air
conditioning.
OFF position (indicator light off):
Outside air is drawn into the passenger
compartment and distributed through the
selected outlets.
Use the OFF position for normal heater or
air conditioner operation.
ON position (indicator light on):
Interior air is recirculated inside the vehicle.
Push the
button to the on position
when:
cdriving on a dusty road.
cto avoid traffic fumes.
cfor maximum cooling when using the air
conditioner.
Air conditioner button
(if so equipped)
Start the engine, turn the fan control dial to
the desired (one to four) position, and push
the
button to turn on the air condi-
tioner. The indicator light comes on when
the air conditioner is operating. To turn off
the air conditioner, push the
button
again.
The air conditioner cooling function op-
erates only when the engine is running.
HEATER OPERATION
Heating
This mode is used to direct hot air mainly
from the foot outlets. A small amount of air
also flows from the defrost outlets.
1. Push the
button (if so equipped) to
the off position for normal heating.
2. Move the air flow control dial to the
position.
3. Move the fan control dial to the desired
position.
4. Move the temperature control dial to thedesired position between the middle and
the hot position.
Ventilation
This mode directs outside air from the side
and center vents.
1. Push the
button (if so equipped) to
the off position.
2. Move the air flow control dial to the
position.
3. Move the fan control dial to the desired
position.
4. Move the temperature control dial to the
desired position.
Defrosting or defogging
This mode is used to defrost/defog the
windows.
1. Move the air flow control dial to the
position.
2. Move the fan control dial to the desired
position.
3. Move the temperature control dial to the
desired position between the middle and
the hot position.
4-4Heater, air conditioner and audio systems
ZX
Page 96 of 235

cTo quickly remove ice or fog from the
windows, turn on the fan control dial to 4
and the temperature control lever to the
full HOT position.
cWhen the
position is selected, the
air conditioner automatically turns on
(however, the indicator light will not illu-
minate). This dehumidifies the air which
helps defog the windshield.
Bi-level heating
This mode directs cooler air from the side
and center vents and warmer air from the
floor outlets. When the temperature control
dial is moved to the full hot or full cool
position, the air between the vents and the
floor outlets is the same temperature.
1. Push the
button (if so equipped) to
the off position.
2. Move the air flow control dial to the
position.
3. Move the fan control dial to the desired
position.
4. Move the temperature control dial to the
the desired position.
Heating and defogging
This mode heats the interior and defogs the
windshield.
1. Move the air flow control dial to the
position.
cWhen the
position is selected the
function automatically cancels.
Outside air is drawn into the passenger
compartment to improve the defogging
performance.
2. Move the fan control dial to the desired
position.
3. Move the temperature control dial to the
desired position between the middle and
the hot position.
cWhen the
position is selected, the
air conditioner automatically turns on
(however, the indicator light will not illu-
minate). This dehumidifies the air which
helps defog the windshield.
Operating tips
Clear snow and ice from the wiper
blades and air inlet in front of the wind-
shield. This improves heater operation.
AIR CONDITIONER OPERATION
(if so equipped)
Start the engine, move the fan control dial to
the desired (one to four) position, and push
in the
button to activate the air condi-
tioner. When the air conditioner is on, cool-
ing and dehumidifying functions are added
to the heater operation.
The air conditioner cooling function op-
erates only when the engine is running.
Cooling
This mode is used to cool and dehumidify
the air.
1. Push the
button to the off position.
2. Move the air flow control dial to the
position.
3. Move the fan control dial to the desired
position.
4. Push the
button. The indicator light
comes on.
5. Move the temperature control dial to the
desired position.
For quick cooling when the outside tem-
perature is high, push the
button to
Heater, air conditioner and audio systems
4-5
ZX
Page 97 of 235

the on position. Be sure to return theto the off position for normal cooling.
Dehumidified heating
This mode is used to heat and dehumidify
the air.
1. Push the
button to the off position.
2. Move the air flow control dial to the
position.
3. Move the fan control dial to the desired
position.
4. Push the
button. The indicator light
comes on.
5. Move the temperature control dial to the
desired position.
Dehumidified defogging
This mode is used to defog the windows
and dehumidify the air.
1. Move the air flow control dial to the
position.
cWhen the
position is selected thefunction automatically cancels.
Outside air is drawn into the passenger
compartment to improve the defogging
performance.cWhen the
position is selected, the
air conditioner automatically turns on
(however, the indicator light will not illu-
minate). This dehumidifies the air which
helps defog the windshield.
2. Move the fan control dial to the desired
position.
3. Move the temperature control dial to the
desired position.
Operating tips
cKeep windows and sunroof closed while
the air conditioner is in operation.
cAfter parking in the sun, drive for two or
three minutes with the windows open to
vent hot air from the passenger compart-
ment. Then, close the windows. This
allows the air conditioner to cool the
interior more quickly.
cThe air conditioning system should be
operated for approximately ten min-
utes at least once a month. This helps
prevent damage to the system due to
lack of lubrication.
cIf the engine coolant temperature
gauge indicates engine coolant tem-
perature over the normal range, turnthe air conditioner off. See ``If your
vehicle overheats'' in the ``In case of
emergency'' section of this manual.
AIR FLOW CHARTS
The following charts show the button and
dial positions forMAXIMUM AND QUICK
heating, cooling or defrosting.The air recir-
culation button should always be in the
OFF position for heating and defrosting.
4-6Heater, air conditioner and audio systems
ZX
Page 101 of 235

RADIO
Turn the ignition key to ACC or ON and
press the power on switch to turn on the
radio. If you listen to the radio with the
engine not running, the key should be
turned to the ACC position.
Radio reception is affected by station signal
strength, distance from radio transmitter,
buildings, bridges, mountains and other ex-
ternal influences. Intermittent changes in
reception quality normally are caused by
these external influences.
Using a cellular phone in or near the
vehicle may influence radio reception
quality.
Radio reception
Your NISSAN radio system is equipped with
state-of-the-art electronic circuits to en-
hance radio reception. These circuits are
designed to extend reception range, and to
enhance the quality of that reception.
However there are some general character-
istics of both FM and AM radio signals that
can affect radio reception quality in a mov-
ing vehicle, even when the finest equipment
is used. These characteristics are com-pletely normal in a given reception area,
and do not indicate any malfunction in your
NISSAN radio system.
Reception conditions will constantly change
because of vehicle movement. Buildings,
terrain, signal distance and interference
from other vehicles can work against ideal
reception. Described below are some of the
factors that can affect your radio reception.
FM RADIO RECEPTION
Range: FM range is normally limited to 25 to
30 miles (40 to 48 km), with monaural
(single channel) FM having slightly more
range than stereo FM. External influences
may sometimes interfere with FM station
reception even if the FM station is within 25
miles (40 km). The strength of the FM signal
is directly related to the distance between
the transmitter and receiver. FM signals
follow a line-of-sight path, exhibiting many
of the same characteristics as light. For
example they will reflect off objects.
Fade and drift: As your vehicle moves away
from a station transmitter, the signals will
tend to fade and/or drift.
Static and flutter: During signal interference
from buildings, large hills or due to antennaposition, usually in conjunction with in-
creased distance from the station transmit-
ter, static or flutter can be heard. This can
be reduced by adjusting the treble control
counterclockwise to reduce treble re-
sponse.
Multipath reception: Because of the reflec-
tive characteristics of FM signals, direct and
reflected signals reach the receiver at the
same time. The signals may cancel each
other, resulting in momentary flutter or loss
of sound.
AM RADIO RECEPTION
AM signals, because of their low frequency,
can bend around objects and skip along the
ground. In addition, the signals can be
bounced off the ionosphere and bent back
to earth. Because of these characteristics.
AM signals are also subject to interference
as they travel from transmitter to receiver.
Fading: Occurs while the vehicle is passing
through freeway underpasses or in areas
with many tall buildings. It can also occur for
several seconds during ionospheric turbu-
AUDIO SYSTEM
4-10Heater, air conditioner and audio systems
ZX
Page 103 of 235

FM-AM RADIO WITH COMPACT
DISC PLAYER
Audio Main Operation
To turn the radio on, turn the ignition key to
ACC or ON. If you listen to the radio with theengine not running, turn the key to the ACC
position.
Radio reception is affected by station signal
strength, distance from radio transmitter,
buildings, bridges, mountains, and other
external influences. Intermittent changes inreception quality normally are caused by
these external influences.
Using a cellular phone in or near the
vehicle may influence radio reception
quality.
ONzOFF/VOL control knob
Turn the ignition key to ACC or ON, then push
the ONzOFF/VOL control knob. The mode
(radio or CD) which was playing immediately
before the system was turned off resumes
playing. When no CD is loaded, the radio
comes on. Pushing the ONzOFF/VOL button
again turns the system off.
Turn the ONzOFF/VOL control knob to the
right to increase volume or to the left to
decrease volume.
Adjusting tone quality and speaker bal-
ance
To adjust BAS/TRE or FAD/BAL
(Bass/Treble or Fader/Balance), press the
AUDIO button until the desired mode (BAS,
TRE, FAD, or BAL) appears in the display.
Press the
orbutton to adjust Bass
(BAS) and Treble (TRE) to the desired level.
Use the
orbutton also to adjust
Fader (FAD) or Balance (BAL) modes.
LHA0032
4-12Heater, air conditioner and audio systems
ZX
Page 111 of 235

When installing a CB ham radio or a car
phone in your NISSAN, be sure to observe
the following cautions, otherwise the new
equipment may adversely affect the Multi-
port Fuel Injection (MFI) system and other
electronic parts.
WARNING
cA cellular telephone should not be
used while driving so full attention
may be given to vehicle operation.
Some jurisdictions prohibit the use
of cellular telephones while driving.
cIf you must make a call while your
vehicle is in motion, the hands free
cellular phone operational mode (if
so equipped) is highly recom-
mended. Exercise extreme caution
at all times so full attention may be
given to vehicle operation.
cIf a conversation in a moving vehicle
requires you to take notes, pull off
the road to a safe location and stop
your vehicle before doing so.
CAUTION
cKeep the antenna as far away as
possible from the Engine Control
Module (ECM).
c
Keep the antenna wire more than 8 in.
(20 cm) away from the Multiport Fuel
Injection harness. Do not route the
antenna wire next to any harness.
cAdjust the antenna standing-wave
ratio as recommended by the manu-
facturer.
cConnect the ground wire from the
CB radio chassis to the body.
cFor details, consult an authorized
NISSAN dealer.
CAR PHONE OR CB RADIO
4-20Heater, air conditioner and audio systems
ZX