2002 NISSAN QUEST remove seats
[x] Cancel search: remove seatsPage 67 of 294

2. Route the seat belt tongue through the
child restraint and insert it into the buckle
until you hear and feel the latch engage.
Be sure to follow the child restraint manu-
facturer's instructions for belt routing.3. Pull on the shoulder belt until all of the
belt is fully extended. At this time, the
seat belt retractor is in the automatic
locking mode (child restraint mode). It
reverts back to emergency locking mode
when the seat belt is fully retracted.4. Allow the seat belt to retract. Pull up on
the shoulder belt to remove any slack in
the belt.
ARS1177ARS1178ARS1179
1-60Seats, restraints and supplemental air bag systems
ZX
Page 68 of 294

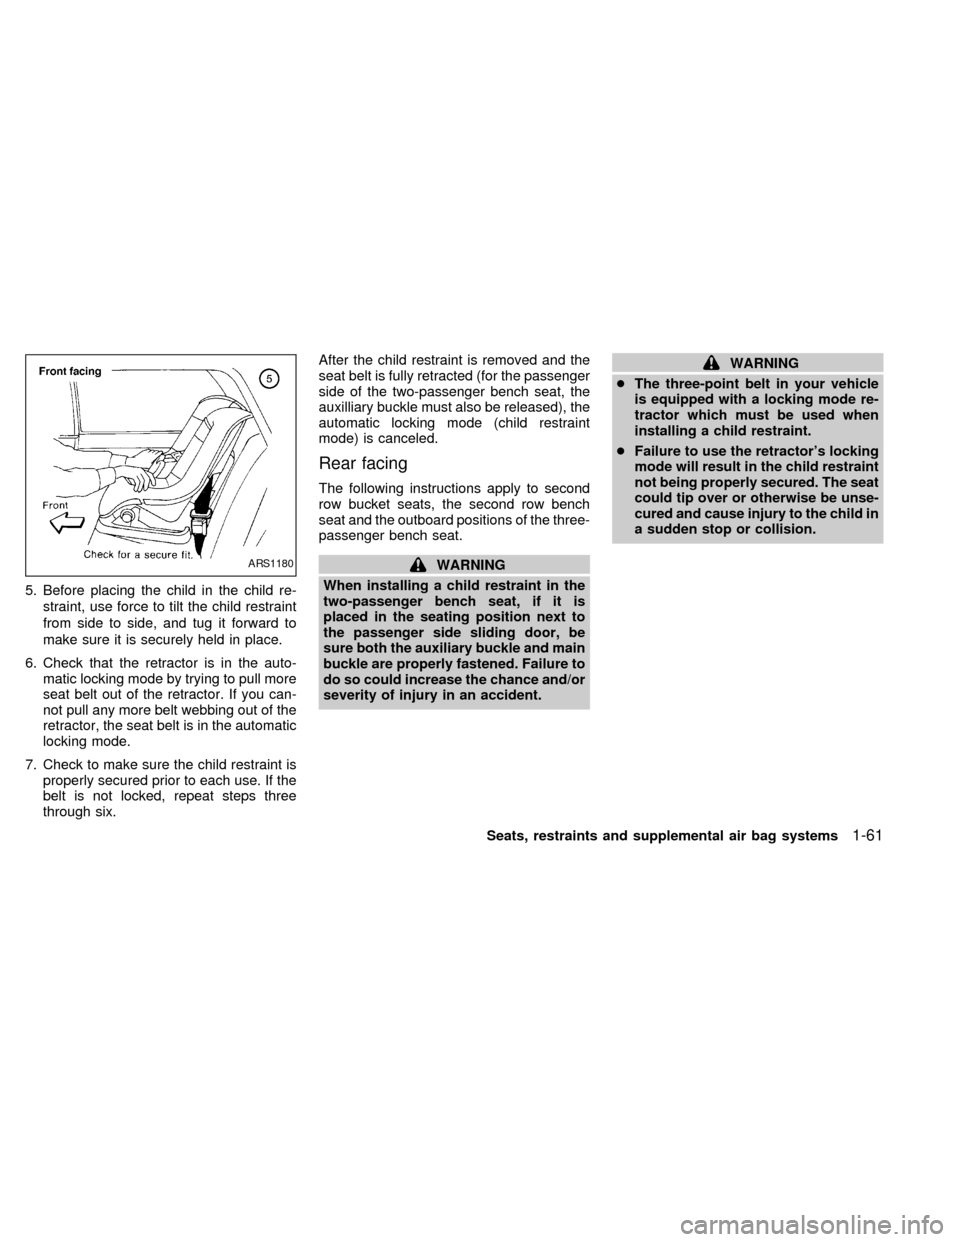
5. Before placing the child in the child re-
straint, use force to tilt the child restraint
from side to side, and tug it forward to
make sure it is securely held in place.
6. Check that the retractor is in the auto-
matic locking mode by trying to pull more
seat belt out of the retractor. If you can-
not pull any more belt webbing out of the
retractor, the seat belt is in the automatic
locking mode.
7. Check to make sure the child restraint is
properly secured prior to each use. If the
belt is not locked, repeat steps three
through six.After the child restraint is removed and the
seat belt is fully retracted (for the passenger
side of the two-passenger bench seat, the
auxilliary buckle must also be released), the
automatic locking mode (child restraint
mode) is canceled.
Rear facing
The following instructions apply to second
row bucket seats, the second row bench
seat and the outboard positions of the three-
passenger bench seat.
WARNING
When installing a child restraint in the
two-passenger bench seat, if it is
placed in the seating position next to
the passenger side sliding door, be
sure both the auxiliary buckle and main
buckle are properly fastened. Failure to
do so could increase the chance and/or
severity of injury in an accident.
WARNING
cThe three-point belt in your vehicle
is equipped with a locking mode re-
tractor which must be used when
installing a child restraint.
cFailure to use the retractor's locking
mode will result in the child restraint
not being properly secured. The seat
could tip over or otherwise be unse-
cured and cause injury to the child in
a sudden stop or collision.
ARS1180
Seats, restraints and supplemental air bag systems1-61
ZX
Page 70 of 294

4. Allow the seat belt to retract. Pull up on
the shoulder belt to remove any slack in
the belt.5. Before placing the child in the child re-
straint, use force to tilt the child restraint
from side to side, and tug it forward to
make sure it is securely held in place.
6. Check that the retractor is in the auto-
matic locking mode by trying to pull more
seat belt out of the retractor. If you can-
not pull any more belt webbing out of the
retractor, the seat belt is in the automatic
locking mode.
7. Check to make sure the child restraint is
properly secured prior to each use. If the
belt is not locked, repeat steps three
through six.After the child restraint is removed and the
seat belt is fully retracted (for the passenger
side of the two-passenger bench seat, the
auxilliary buckle must also be released), the
automatic locking mode (child restraint
mode) is canceled.
ARS1184ARS1185
Seats, restraints and supplemental air bag systems1-63
ZX
Page 73 of 294

4.Allow the seat belt to retract. Pull up on
the belt to remove any slack in the belt.5. Before placing the child in the child re-
straint, use force to tilt the child restraint
from side to side, and tug it forward to
make sure it is securely held in place.
6.
Check that the retractor is in the automatic
locking mode by trying to pull more seat
belt out of the retractor. If you cannot pull
any more belt webbing out of the retractor,
the seat belt is in the automatic locking
mode.
7. Check to make sure the child restraint is
properly secured prior to each use. If the
lap belt is not locked, repeat steps three
through six.
After the child restraint is removed and the
seat belt is fully retracted, the automatic
locking mode (child restraint mode) is can-
celed.
ARS1166ARS1167
1-66Seats, restraints and supplemental air bag systems
ZX
Page 78 of 294

3. Tighten the tether strap to remove any
slack.
4. Before placing the child in the child re-
straint, use force to tilt the child restraint
from side to side, and tug it forward to
make sure it is securely held in place.
5. Check to make sure the child restraint is
properly secured prior to each use. If not
secure, repeat steps two through four.
ARS1193ARS1199ARS1192
Seats, restraints and supplemental air bag systems1-71
ZX
Page 80 of 294

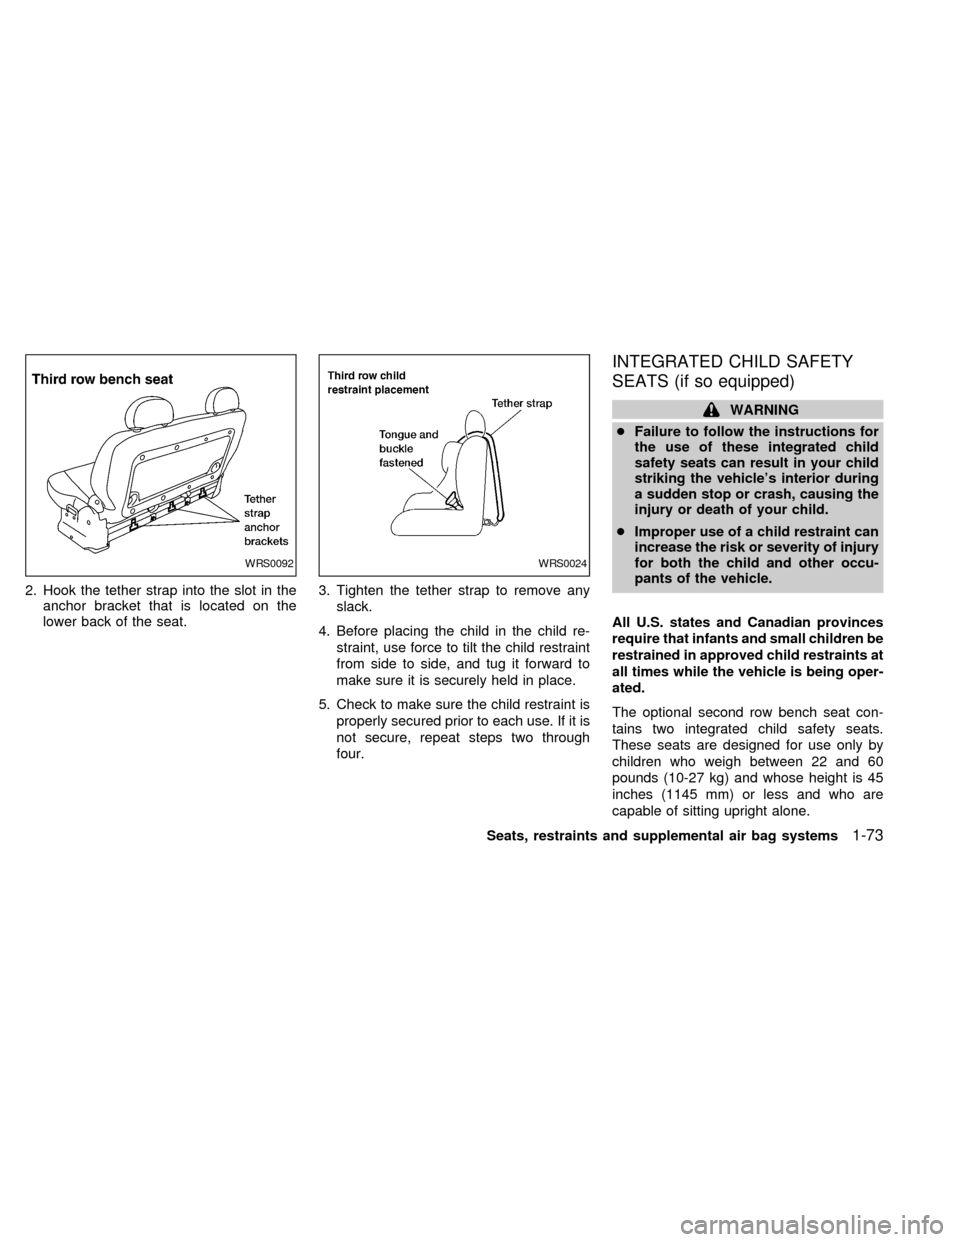
2. Hook the tether strap into the slot in the
anchor bracket that is located on the
lower back of the seat.3. Tighten the tether strap to remove any
slack.
4. Before placing the child in the child re-
straint, use force to tilt the child restraint
from side to side, and tug it forward to
make sure it is securely held in place.
5. Check to make sure the child restraint is
properly secured prior to each use. If it is
not secure, repeat steps two through
four.
INTEGRATED CHILD SAFETY
SEATS (if so equipped)
WARNING
cFailure to follow the instructions for
the use of these integrated child
safety seats can result in your child
striking the vehicle's interior during
a sudden stop or crash, causing the
injury or death of your child.
cImproper use of a child restraint can
increase the risk or severity of injury
for both the child and other occu-
pants of the vehicle.
All U.S. states and Canadian provinces
require that infants and small children be
restrained in approved child restraints at
all times while the vehicle is being oper-
ated.
The optional second row bench seat con-
tains two integrated child safety seats.
These seats are designed for use only by
children who weigh between 22 and 60
pounds (10-27 kg) and whose height is 45
inches (1145 mm) or less and who are
capable of sitting upright alone.
WRS0092WRS0024
Seats, restraints and supplemental air bag systems1-73
ZX
Page 224 of 294

you in choosing the proper product.
cWax your vehicle only after a thorough
washing. Follow the instructions supplied
with the wax.
cDo not use a wax containing any abra-
sives, cutting compounds or cleaners
that may damage the vehicle finish.
cIf the surface does not polish easily, use
a ``road tar'' remover and wax again.
Machine compounding or aggressive pol-
ishing on a base coat/clear coat paint finish
may dull the finish or leave swirl marks.
REMOVING SPOTS
Remove tar and oil spots, industrial dust,
insects, and tree sap as quickly as possible
from the surface of the paint to avoid lasting
damage or staining. Special cleaning prod-
ucts are available at an authorized NISSAN
dealer or any automotive accessory store.
UNDERBODY
In areas where road salt is used in winter,
the underbody must be cleaned regularly.
This prevents dirt and salt from building up
and causing the acceleration of underbody
and suspension corrosion.
GLASS
Use glass cleaner to remove smoke and
dust film from the glass surfaces. It is nor-
mal for glass to become coated with a film
after the vehicle is parked in the hot sun.
Glass cleaner and a soft cloth easily remove
this film.
CAUTION
When cleaning the inside of the win-
dows, do not use sharp-edged tools,
abrasive cleaners or chlorine-based
disinfectant cleaners. They could dam-
age the electrical conductors, radio an-
tenna elements or rear window defog-
ger elements.
ALUMINUM ALLOY WHEELS
Wash regularly, especially during winter
months in areas where road salt is used.
Salt could discolor the wheel if not removed.
CHROME PARTS
Clean all chrome parts regularly with a
non-abrasive chrome polish to maintain the
finish.Occasionally remove loose dust from the
interior trim, plastic parts and seats using a
vacuum cleaner or soft brush. Wipe the
vinyl and leather surfaces with a clean, soft
cloth dampened in mild soap solution, then
wipe clean with a dry, soft cloth. Before
using any fabric protector, read the manu-
facturer's recommendations. Some fabric
protectors contain chemicals that may stain
or bleach the seat material. Use a cloth
dampened only with water, to clean the
meter and gauge lens.
CAUTION
cNever use benzine, thinner, or any
similar material.
cLeather seats should be regularly
coated with a leather wax like saddle
soap. Never use car wax.
cNever use fabric protectors unless
recommended by the manufacturer.
cDo not use glass or plastic cleaner
on meter or gauge lens covers. It
may damage the lens cover.
CLEANING INTERIOR
Appearance and care7-3
ZX
Page 276 of 294

WARNING
cIt is extremely dangerous to ride in a
cargo area inside the vehicle. In a
collision, people riding in these ar-
eas are more likely to be seriously
injured or killed.
cDo not allow people to ride in any
area of your vehicle that is not
equipped with seats and seat belts.
c
Be sure everyone in the vehicle is in a
seat with their seat belt properly fas-
tened.
TERMS
It is important to familiarize yourself with the
following terms before loading your vehicle:
c
Curb Weight (actual weight of your ve-
hicle) - vehicle weight including: standard
and optional equipment, fluids, emergency
tools, and spare tire assembly. This weight
does notinclude passengers and cargo.
cGVW (Gross Vehicle Weight) - curb
weight plus the combined weight of pas-
sengers and cargo.
cGVWR (Gross Vehicle Weight Rating) -maximum total weight (load) limit speci-
fied for the vehicle.
cGAWR (Gross Axle Weight Rating) -
maximum weight (load) limit specified for
the front or rear axle.
cGross combined weight - GVW plus the
total weight of the trailer and all its cargo.
DETERMINING VEHICLE LOAD
CAPACITY
The load capacity of this vehicle is deter-
mined by weight, not by available cargo
space. For example, a luggage rack, bike
carrier, cartop carrier or similar equipment
does not increase load carrying capacity of
your vehicle.
To determine vehicle load capacity:
Vehicle weight can be determined by using
a commercial-grade scale, found at places
such as a truck stop, gravel quarry, grain
elevator, or a scrap metal recycling facility.
1)
Determine the curb weight of your vehicle.
2) Compare the curb weight amount to the
GVWR specified for your vehicle to de-
termine how much more weight your
vehicle can carry.3) After loading (cargo & passengers), re-
weigh your vehicle to determine if either
GVWR or GAWR for your vehicle is
exceeded. If GVWR is exceeded, re-
move cargo as necessary. If either the
front or rear GAWR is exceeded, shift
the load or remove cargo as necessary.
LOADING TIPS
cThe GVW must not exceed GVWR or
GAWR specified on the F.M.V.S.S. Cer-
tification Label.
cDo not load the front and rear axle to the
GAWR. Doing so will exceed the GVWR.
WARNING
c
Properly secure all cargo to help pre-
vent it from sliding or shifting. Do not
place cargo higher than the seat-
backs. In a sudden stop or collision,
unsecured cargo could cause per-
sonal injury.
VEHICLE LOADING
INFORMATION
Technical and consumer information9-13
ZX