2002 NISSAN QUEST maintenance
[x] Cancel search: maintenancePage 99 of 294

applied, stop the vehicle and perform the
following:
1.
Check the brake fluid level. Add brake fluid
as necessary. See ``Brake fluid'' in the
``Maintenance and do-it-yourself'' section
of this manual.
2. If the brake fluid level is correct, have the
warning system checked by an autho-
rized NISSAN dealer.
WARNING
cYour brake system may not be work-
ing properly if the warning light is
on. Driving could be dangerous. If
you judge it to be safe, drive care-
fully to the nearest service station
for repairs. Otherwise, have your ve-
hicle towed because driving it could
be dangerous.
cPressing the brake pedal with the
engine stopped and/or low brake
fluid level may increase your stop-
ping distance and braking will re-
quire greater pedal effort as well as
pedal travel.cIf the brake fluid level is below the
MINIMUM or MIN mark on the brake-
fluid reservoir, do not drive until the
brake system has been checked at a
NISSAN dealer.
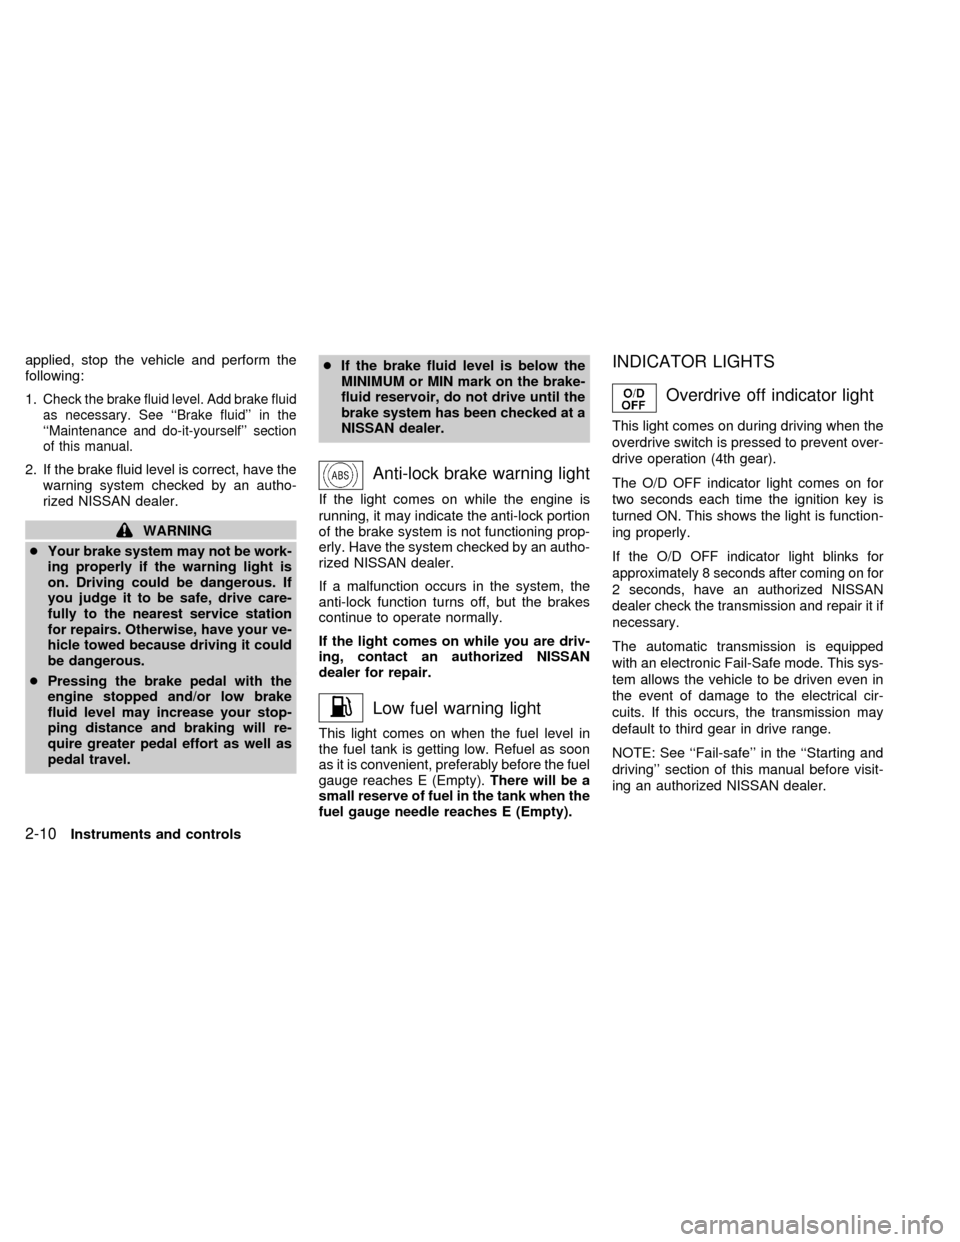
Anti-lock brake warning light
If the light comes on while the engine is
running, it may indicate the anti-lock portion
of the brake system is not functioning prop-
erly. Have the system checked by an autho-
rized NISSAN dealer.
If a malfunction occurs in the system, the
anti-lock function turns off, but the brakes
continue to operate normally.
If the light comes on while you are driv-
ing, contact an authorized NISSAN
dealer for repair.
Low fuel warning light
This light comes on when the fuel level in
the fuel tank is getting low. Refuel as soon
as it is convenient, preferably before the fuel
gauge reaches E (Empty).There will be a
small reserve of fuel in the tank when the
fuel gauge needle reaches E (Empty).
INDICATOR LIGHTS
Overdrive off indicator light
This light comes on during driving when the
overdrive switch is pressed to prevent over-
drive operation (4th gear).
The O/D OFF indicator light comes on for
two seconds each time the ignition key is
turned ON. This shows the light is function-
ing properly.
If the O/D OFF indicator light blinks for
approximately 8 seconds after coming on for
2 seconds, have an authorized NISSAN
dealer check the transmission and repair it if
necessary.
The automatic transmission is equipped
with an electronic Fail-Safe mode. This sys-
tem allows the vehicle to be driven even in
the event of damage to the electrical cir-
cuits. If this occurs, the transmission may
default to third gear in drive range.
NOTE: See ``Fail-safe'' in the ``Starting and
driving'' section of this manual before visit-
ing an authorized NISSAN dealer.
2-10Instruments and controls
ZX
Page 144 of 294

4Heater, air conditioner and audio systems
Ventilators ..............................................................4-2
Center ventilators ..............................................4-2
Side ventilators ..................................................4-2
Heater and air conditioner (manual) ......................4-3
Controls .............................................................4-3
Heater operation ................................................4-4
Air conditioner operation ...................................4-5
Air flow charts ....................................................4-7
Heater and air conditioner (automatic)
(if so equipped) ....................................................4-11
Automatic operation ........................................4-12
Rear seat air conditioner (if so equipped) ...........4-14
Controls ...........................................................4-14
Servicing air conditioning .....................................4-15
Audio system ........................................................4-16
Radio ...............................................................4-16
FM radio reception ..........................................4-16
AM radio reception ..........................................4-16
Audio operation precautions ...........................4-17FM-AM radio with cassette player...................4-20
FM-AM radio with cassette player and
compact disc (CD) player ................................4-26
Compact disc (CD) player (if so
equipped) .........................................................4-32
CD care and cleaning......................................4-33
Steering wheel switch for audio controls
(if so equipped)................................................4-34
Rear audio controls (if so equipped) ...............4-35
Antenna ...........................................................4-37
AutovisionTfamily entertainment system
(FES) (if so equipped) ..........................................4-37
Rear seat entertainment module
(RSEM) (if so equipped)..................................4-41
Care and maintenance ....................................4-43
Troubleshooting ...............................................4-44
Specifications ..................................................4-45
Car phone or CB radio .........................................4-46
ZX
Page 186 of 294

also be connected to the auxiliary jacks.
The auxiliary jacks are color coded for iden-
tification purposes.
cYellow - video input
cWhite - left channel audio input
cRed - right channel audio input
DUAL PLAY mode
Dual Play Mode allows the rear seat pas-
sengers to listen to one media source while
the front seat passengers listen to another.
To activate, press the speaker control but-
ton and plug a headphone into the head-
phone jack. With the headphones ON, the
rear speaker will not operate. Select the
desired media and adjust as necessary.
Press the speaker control button again to
operate the rear speakers and disengage
Dual Play Mode.
IN-HOME use
Your AutovisionTFamily Entertainment
System is UL registered for in-home use.
To use the FES system in your home, you
will need:c12V DC power converter rated for 1.5
amps/minute
cPatch cords with RCA style connectors
CARE AND MAINTENANCE
Use a lightly dampened, lint free cloth to
clean the surfaces of your Family Entertain-
ment System. (VCP face, monitor screen,
remote control, etc.)
CAUTION
cDo not use any solvents or cleaning
solutions when cleaning the video
system.
cDo not use excessive force on the
monitor screen.
cAvoid touching or scratching the
monitor screen as it may become
dirty or damaged.
Your Family Entertainment System is com-
patible with any cassette tape bearing the
VHS mark. We recommend storing your
video cassettes in a moisture free, dust free
container.
CAUTION
cDo not attempt to operate the system
in extreme temperature conditions
(below 30É and above 113É Fahren-
heit).
cDo not attempt to operate the system
in extreme humidity conditions (less
than 10% or more than 75%).
Tape head cleaning
Normally the VCP will not require frequent
head cleaning. However, after long periods
of usage dirt can collect on the video heads,
causing the picture to become blurred or
interrupted. In this case, head cleaning may
be required.
To clean the video heads, obtain a head
cleaning tape from your local video store.
Be sure to completely follow the instructions
included with the cleaning tape. Excessive
cleaning can shorten video head life.
Heater, air conditioner and audio systems
4-43
ZX
Page 194 of 294

ACC (Accessories)
This position activates electrical accesso-
ries such as the radio when the engine is
not running.
ON (Normal operating position)
This position turns on the ignition system
and the electrical accessories.
START
This position activates the starter motor,
which starts the engine.cMake sure the area around the vehicle is
clear.
cMaintenance items listed here should be
checked periodically (for example, each
time you check engine oil).
cCheck that all windows and lights are
clean.
cVisually inspect tires for their appearance
and condition. Also check tires for proper
inflation.
cLock all doors.
cPosition seat and adjust head restraints.
cAdjust inside and outside mirrors.
cFasten seat belts and ask all passengers
to do likewise.
cCheck the operation of warning lights
when key is turned to the ON position.
See ``Warning/Indicator lights and audible
reminders'' in the ``Instrument and con-
trols'' section.
1. Apply the parking brake.
2. Move the selector lever to P (Park) or N
(Neutral) (P is recommended).
The shift selector lever cannot be
moved out of P and into any of the
other gear positions under the follow-
ing conditions:
cThe ignition key is turned to the
LOCK position.
cThe ignition key is turned to the ON
position without depressing the
foot brake pedal.
The starter will not operate if the shift
selector lever is in one of the driving
positions.
3. Crank the enginewith your foot off the
accelerator pedalby turning the ignition
key to START. Release the key when the
engine starts. If the engine starts, but
fails to run, repeat the above procedure.
Ð If the engine is very hard to start in
extremely cold or hot weather, de-
press the accelerator pedal to the
floor and hold it to help start the
engine.
BEFORE STARTING THE
ENGINESTARTING THE ENGINE
Starting and driving5-5
ZX
Page 205 of 294

cWhen installing a spare tire, make
sure it is the proper size and type as
specified on the tire placard. For tire
placard location information, refer to
``Tire placard'' in the ªTechnical and
consumer informationº section of
this manual.
cFor additional information, refer to
``Wheels and tires'' in the ``Do-it-
yourself'' section of this manual.FREEING A FROZEN DOOR
LOCK
To prevent a door lock from freezing, apply
de-icer or glycerin through the key hole. If
the lock becomes frozen, heat the key be-
fore inserting it in the key hole.
ANTI-FREEZE
In the winter, when it is anticipated that the
temperature will drop below 32ÉF (0ÉC),
check the anti-freeze (ethylene glycol base)
to assure proper winter protection. For de-
tails, see ``Engine cooling system'' in the
``Do-it-yourself'' section of this manual.
BATTERY
If the battery is not fully charged during
extremely cold weather conditions, the bat-
tery fluid may freeze and damage the bat-
tery. To maintain maximum efficiency, the
battery should be checked regularly. For
details, see ``Battery'' in the ``Maintenance
and do-it-yourself'' section of this manual.
DRAINING OF COOLANT WATER
If the vehicle is to be left outside without
anti-freeze, drain the cooling system by
opening the drain valves located under theradiator and on the engine block. Refill
before operating the vehicle. See ``Chang-
ing engine coolant'' in the ``Maintenance
and do-it-yourself'' section of this manual.
TIRE EQUIPMENT
1. SUMMER tires are of a tread design to
provide superior performance on dry
pavement. However, the performance of
these tires is substantially reduced in
snowy and icy conditions. If you operate
your vehicle on snowy or icy roads, NIS-
SAN recommends using MUD & SNOW
or ALL SEASON tires on all four wheels.
Please consult your NISSAN dealer for
the tire type, size, speed rating and avail-
ability information.
2.
For additional traction on icy roads, stud-
ded tires may be used. However, some
Canadian provinces and U.S. states pro-
hibit their use. Check local, state and pro-
vincial laws before installing studded tires.
Skid and traction capabilities of studded
snow tires, on wet or dry surfaces, may
be poorer than that of non-studded snow
tires.
3. Tire chains may be used. Make sure they
are of proper size for the tires on your
COLD WEATHER DRIVING
5-16Starting and driving
ZX
Page 215 of 294

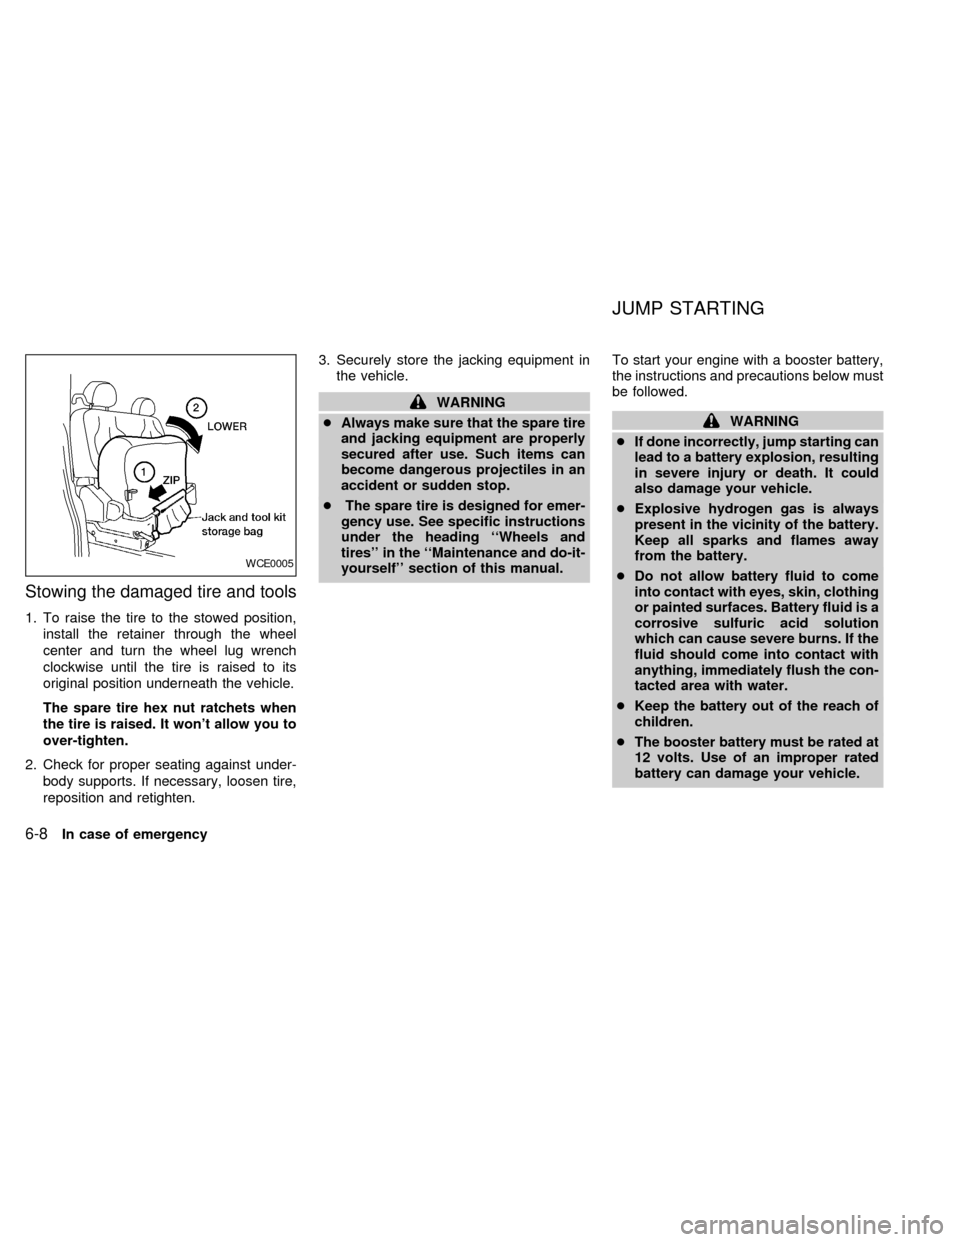
Stowing the damaged tire and tools
1. To raise the tire to the stowed position,
install the retainer through the wheel
center and turn the wheel lug wrench
clockwise until the tire is raised to its
original position underneath the vehicle.
The spare tire hex nut ratchets when
the tire is raised. It won't allow you to
over-tighten.
2. Check for proper seating against under-
body supports. If necessary, loosen tire,
reposition and retighten.3. Securely store the jacking equipment in
the vehicle.
WARNING
cAlways make sure that the spare tire
and jacking equipment are properly
secured after use. Such items can
become dangerous projectiles in an
accident or sudden stop.
cThe spare tire is designed for emer-
gency use. See specific instructions
under the heading ``Wheels and
tires'' in the ``Maintenance and do-it-
yourself'' section of this manual.To start your engine with a booster battery,
the instructions and precautions below must
be followed.
WARNING
cIf done incorrectly, jump starting can
lead to a battery explosion, resulting
in severe injury or death. It could
also damage your vehicle.
cExplosive hydrogen gas is always
present in the vicinity of the battery.
Keep all sparks and flames away
from the battery.
cDo not allow battery fluid to come
into contact with eyes, skin, clothing
or painted surfaces. Battery fluid is a
corrosive sulfuric acid solution
which can cause severe burns. If the
fluid should come into contact with
anything, immediately flush the con-
tacted area with water.
cKeep the battery out of the reach of
children.
cThe booster battery must be rated at
12 volts. Use of an improper rated
battery can damage your vehicle.
WCE0005
JUMP STARTING
6-8In case of emergency
ZX
Page 228 of 294

8 Maintenance and do-it-yourself
Maintenance requirements .....................................8-2
General maintenance .............................................8-3
Explanation of general maintenance
items ..................................................................8-3
Maintenance precautions .......................................8-5
Engine compartment check locations ....................8-7
Engine cooling system ...........................................8-8
Checking engine coolant level ..........................8-8
Changing engine coolant ..................................8-9
Engine oil ...............................................................8-9
Checking engine oil level ..................................8-9
Changing engine oil ........................................8-10
Changing engine oil filter.................................8-11
Automatic transmission fluid ................................8-12
Temperature conditions for checking ..............8-12
Power steering fluid..............................................8-13
Brake fluid ............................................................8-13
Window washer fluid ............................................8-14
Battery ..................................................................8-14
Jump starting ...................................................8-15
Drive belts ............................................................8-16
Spark plugs ..........................................................8-16Replacing spark plugs .....................................8-16
Air cleaner ............................................................8-17
Windshield wiper blades ......................................8-19
Cleaning ..........................................................8-19
Replacing .........................................................8-19
Parking brake and brake pedal ............................8-21
Checking parking brake...................................8-21
Checking brake pedal .....................................8-21
Brake booster ..................................................8-22
Fuses ....................................................................8-22
Engine compartment .......................................8-22
Passenger compartment .................................8-23
Keyfob battery replacement .................................8-24
Lights ....................................................................8-25
Headlights ........................................................8-25
Fog lights .........................................................8-26
Exterior and interior lights ...............................8-27
Wheels and tires ..................................................8-31
Tire pressure ...................................................8-31
Types of tires ...................................................8-32
Tire chains .......................................................8-33
Changing tires and wheels ..............................8-33
ZX
Page 229 of 294

Your new NISSAN has been designed to
have minimum maintenance requirements
with longer service intervals to save you
both time and money. However, some day-
to-day and regular maintenance is essential
to maintain your NISSAN's good mechani-
cal condition, as well as its emission and
engine performance.
It is the owner's responsibility to make sure
the scheduled maintenance, as well as gen-
eral maintenance, is performed.
As the vehicle owner, you are the only one
who can ensure that your vehicle receives
proper maintenance. You are a vital link in
the maintenance chain.
Scheduled maintenance
For your convenience, both required and
optional scheduled maintenance items are
described and listed in your ``Nissan Service
and Maintenance Guide.'' You must refer to
that guide to ensure that necessary mainte-
nance is performed on your Nissan at regu-
lar intervals.
General maintenance
General maintenance includes those items
which should be checked during normalday-to-day operation of the vehicle. They
are essential if your vehicle is to continue to
operate properly. It is your responsibility to
perform these maintenance procedures
regularly as prescribed.
Performing general maintenance checks re-
quire minimal mechanical skill and only a
few general automotive tools.
These checks or inspections can be done
by yourself, a qualified technician or, if you
prefer, an authorized NISSAN dealer.
Where to go for service
If maintenance service is required or your
vehicle appears to malfunction, have the
systems checked and tuned by an autho-
rized NISSAN dealer.
NISSAN technicians are well-trained spe-
cialists who are kept up-to-date with the
latest service information through technical
bulletins, service tips, and in-dealership
training programs. They are completely
qualified to work on NISSAN vehiclesbe-
forethey begin work on your vehicle, rather
than after they have worked on it.
You can be confident that an authorized
NISSAN dealer's service department per-forms the best job to meet the maintenance
requirements on your vehicle Ð in a reliable
and economic way.
MAINTENANCE
REQUIREMENTS
8-2Maintenance and do-it-yourself
ZX