2002 NISSAN PATHFINDER warning light
[x] Cancel search: warning lightPage 180 of 288
Part time 4WD models:
IIf the ATP light is ON, this indicates
that the automatic transmission P
(park) position will not function and
the transfer shift lever is in the N
position. Failure to engage the trans-
fer shift lever in H or 4L could result
in the vehicle moving unexpectedly,
resulting in serious personal injury or
property damage.
All-mode 4WD models:
IIf the ATP light is ON, this indicates
that the automatic transmission P
(park) position will not function and
the transfer case is in neutral. Make
sure that the 4WD shift indicator light
(and transfer 4LO position indicator)
light remains illuminated before stop-
ping the engine. Otherwise, the ve-
hicle could unexpectedly move even
if the automatic transmission is in the
P (park) position.
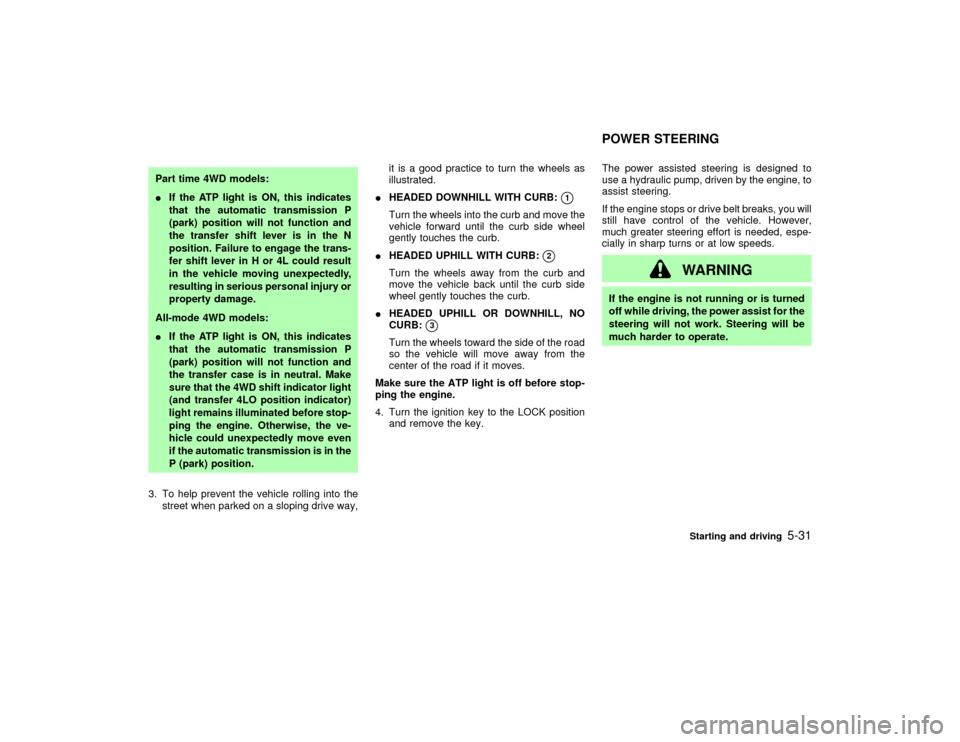
3. To help prevent the vehicle rolling into the
street when parked on a sloping drive way,it is a good practice to turn the wheels as
illustrated.
IHEADED DOWNHILL WITH CURB:
q1
Turn the wheels into the curb and move the
vehicle forward until the curb side wheel
gently touches the curb.
IHEADED UPHILL WITH CURB:
q2
Turn the wheels away from the curb and
move the vehicle back until the curb side
wheel gently touches the curb.
IHEADED UPHILL OR DOWNHILL, NO
CURB:
q3
Turn the wheels toward the side of the road
so the vehicle will move away from the
center of the road if it moves.
Make sure the ATP light is off before stop-
ping the engine.
4. Turn the ignition key to the LOCK position
and remove the key.The power assisted steering is designed to
use a hydraulic pump, driven by the engine, to
assist steering.
If the engine stops or drive belt breaks, you will
still have control of the vehicle. However,
much greater steering effort is needed, espe-
cially in sharp turns or at low speeds.
WARNING
If the engine is not running or is turned
off while driving, the power assist for the
steering will not work. Steering will be
much harder to operate.POWER STEERING
Starting and driving
5-31
Z
01.9.21/R50-D/V5
X
Page 181 of 288
BRAKING PRECAUTIONSThe brake system has two separate hydraulic
circuits. If one circuit malfunctions, you will still
have braking at two wheels.Vacuum assisted brakeThe brake booster aids braking by using en-
gine vacuum. If the engine stops, you can stop
the vehicle by depressing the brake pedal.
However, greater foot pressure on the brake
pedal will be required to stop the vehicle and
the stopping distance will be longer.Using the brakesAvoid resting your foot on the brake pedal
while driving. This will overheat the brakes,
wear out the brake linings and pads faster and
reduce gas mileage.
To help save the brakes and to prevent the
brakes from overheating, before going down a
slope or long grade, reduce speed and down-
shift to a lower gear.Wet brakesWhen the vehicle is washed or driven through
water, the brakes may get wet. As a result,
your braking distance will be longer and the
vehicle may pull to one side during braking.To dry brakes, drive the vehicle at a safe
speed while lightly pressing the brake pedal to
heat-up the brakes. Do this until the brakes
return to normal. Avoid driving the vehicle at
high speeds until the brakes function correctly.
WARNING
IWhile driving on a slippery surface,
be careful when braking, accelerating
or downshifting. Abrupt braking or
accelerating could cause the wheels
to skid and result in an accident.
IIf the engine is not running or is
turned off while driving, the power
assist for the brakes will not work.
Braking will be harder.ANTI-LOCK BRAKE SYSTEM (ABS)The anti-lock brake system controls the brakes
at each wheel so the wheels will not lock when
braking abruptly or when braking on slippery
surfaces. The system detects the rotation
speed at each wheel and varies the brake fluid
pressure to prevent each wheel from locking
and sliding. By preventing wheel lockup, the
system helps the driver maintain steering con-trol and helps to minimize swerving and spin-
ning on slippery surfaces.
Using the systemDepress the brake pedal and hold it down.
WARNING
Do not pump the brake pedal. Doing so
may result in increased stopping dis-
tances.Normal operationThe anti-lock brake system will not operate at
speeds below 3 to 6 MPH (5 to 10 km/h) to
completely stop the vehicle. (The speeds will
vary according to road conditions.) When the
anti-lock system senses that one or more
wheels are close to locking up, the actuator
(under the hood) rapidly applies and releases
hydraulic pressure (like pumping the brakes
very quickly). While the actuator is working,
you may feel a pulsation in the brake pedal
and hear a noise or vibration from the actuator
under the hood. This is normal and indicates
that the anti-lock system is working properly.
However, the pulsation may indicate that road
BRAKE SYSTEM5-32
Starting and driving
Z
01.9.21/R50-D/V5
X
Page 182 of 288
conditions are hazardous and extra care is
required while driving.
If a tire slips on rough roads for more than
10 seconds, the ABS brake warning light
may come on. Turn OFF the ignition key,
restart the engine and drive the vehicle at
speeds above 20 MPH (30 km/h). If the
warning light does not go out, have the
vehicle checked at a NISSAN dealer.Self-test featureThe anti-lock brake system consists of elec-
tronic sensors, electric pumps, and hydraulic
solenoids controlled by a computer. The com-
puter has a built-in diagnostic feature that tests
the system each time you start the engine and
move the vehicle at a low speed in forward or
reverse. When the self-test occurs, you may
hear a clunk noise and/or feel a pulsation in
the brake pedal. This is normal and is not an
indication of any malfunction. If the computer
senses any malfunction, it switches the anti-
lock brake system OFF and turns on the ABS
brake warning light in the dashboard. The
brake system will then behave normally, but
without anti-lock assistance.
If the light comes on during the self check, or
while you are driving, you should take your
vehicle to your NISSAN dealer for repair at
your earliest convenience.
WARNING
The anti-lock brake system is a sophis-
ticated device, but it cannot prevent ac-
cidents resulting from careless or dan-
gerous driving techniques. It can help
maintain vehicle control during braking
on slippery surfaces, but remember that
the stopping distance on slippery sur-
faces will be longer than on normal
surfaces, even with the anti-lock sys-
tem. Stopping distances may also be
longer on rough, gravel or snow covered
roads, or if you are using tire chains.
Always maintain a safe distance from
the vehicle in front of you. Ultimately,
the responsibility for safety of self and
others rests in the hands of the driver.
Tire type and condition of tires may also
affect braking effectiveness.
IWhen replacing tires, install the
specified size of tires on all four
wheels.
IWhen installing a spare tire, make
sure it is the proper size and type asspecified on the tire placard. See
ªTire placardº in the ª9. Technical
and consumer informationº section
for tire placard location information.
Starting and driving
5-33
Z
01.9.21/R50-D/V5
X
Page 187 of 288
CHANGING A FLAT TIREIf you have a flat tire, follow the instructions
below.Stopping the vehicle1. Safely move the vehicle off the road away
from traffic.
2. Turn on the hazard warning flasher.
3. Park on a level surface and apply the
parking brake. Shift the manual transmis-
sion into reverse (automatic transmission in
P).
WARNING
I
The transfer control lever
must be in the 2H, 4H or 4L position.
INever place the transfer control lever
in the N position. Otherwise, the ve-
hicle could roll unexpectedly even if
the manual transmission is in gear or
the automatic transmission is in the P
position. This could result in serious
personal injury or property damage.All-mode 4WD models:
IMake sure the 4WD shift indicator
and/or transfer 4LO position indicator
light remains illuminated before stop-
ping the engine.
IMake sure the ATP light is off before
stopping the engine. Otherwise, the
vehicle could roll unexpectedly even
if the automatic transmission is in the
P position. This could result in seri-
ous personal injury or property dam-
age.
4. Turn off the engine.
WARNING
IMake sure that the parking brake is
securely applied and the manual
transmission is shifted into R (re-
verse), on the automatic transmis-
sion in P (Park).
INever change tires when the vehicle
is on a slope, ice or a slippery area.This is hazardous.
INever change tires if oncoming traffic
is close to your vehicle. Wait for pro-
fessional road assistance.
5. Raise the hood to warn other traffic and to
signal professional road assistance person-
nel that you need help.
6. Have all passengers get out of the vehicle
and stand in a safe place away from traffic
and clear of the vehicle.
FLAT TIRE6-2
In case of emergency
Z
01.9.21/R50-D/V5
X
Page 212 of 288

Wheel nuts*:
When checking the tires, make sure no nuts
are missing, and check for any loose nuts.
Tighten if necessary.
Tire rotation*:
Tires should be rotated every 7,500 miles
(12,000 km). However, the timing for tire rota-
tion may vary according to your driving habits
and road surface conditions.
Wheel alignment and balance:
If the vehicle should pull to either side while
driving on a straight and level road, or if you
detect uneven or abnormal tire wear, there
may be a need for wheel alignment.
If the steering wheel or seat vibrates at normal
highway speeds, wheel balancing may be
needed.
For additional information regarding tires, refer
to ªImportant Tire Safety Informationº in the
Warranty Information Booklet (US) or ªTire
Safety Informationº in the Warranty Informa-
tion booklet (Canada).
Windshield:Clean the windshield on a regu-
lar basis. Check the windshield at least every
six months for cracks or other damage. Have a
damaged windshield repaired by a qualified
repair facility.Windshield wiper blades*:
Check for cracks or wear if they do not wipe
properly.
Doors and engine hood:
Check that all doors and the engine hood,
operate properly. Also ensure that all latches
lock securely. Lubricate hinges, latches, rollers
and links if necessary. Make sure that the
secondary latch keeps the hood from opening
when the primary latch is released.
When driving in areas using road salt or other
corrosive materials, check lubrication fre-
quently.
Inside the vehicleLights*:
Clean the headlights on a regular basis. Make
sure that the headlights, stop lights, tail lights,
turn signal lights, and other lights are all oper-
ating properly and installed securely. Also
check headlight aim.INTERIOR MAINTENANCEThe maintenance items listed here should be
checked on a regular basis, such as when
performing periodic maintenance, cleaning the
vehicle, etc.Warning lights and chimes:
Make sure that all warning lights and chimes
are operating properly.
Windshield wiper and washer*:
Check that the wipers and washer operate
properly and that the wipers do not streak.
Windshield defroster:
Check that the air comes out of the defroster
outlets properly and in sufficient quantity when
operating the heater or air conditioner.
Steering wheel:
Check for changes in the steering conditions,
such as excessive freeplay, hard steering or
strange noises.
Seats:
Check seat position controls such as seat
adjusters, seatback recliner, etc. to ensure
they operate smoothly and that all latches lock
securely in every position. Check that the head
restraints move up and down smoothly and
that the locks (if so equipped) hold securely in
all latched positions.
Seat belts:
Check that all parts of the seat belt system
(e.g. buckles, anchors, adjusters and retrac-
Maintenance and do-it-yourself
8-3
Z
01.9.21/R50-D/V5
X
Page 225 of 288
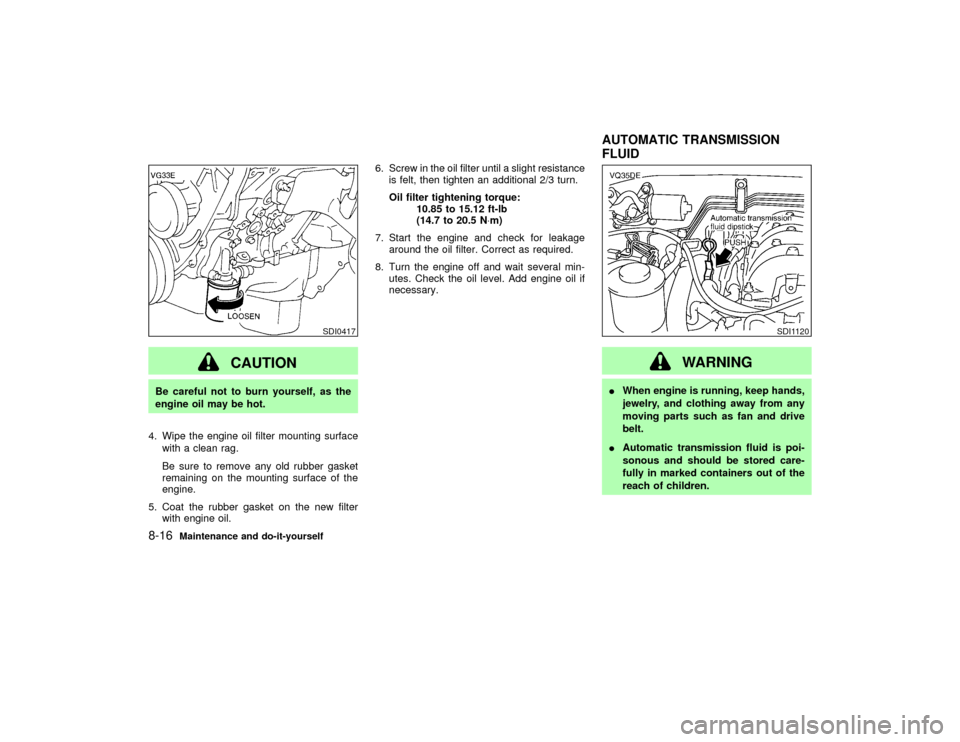
CAUTION
Be careful not to burn yourself, as the
engine oil may be hot.
4. Wipe the engine oil filter mounting surface
with a clean rag.
Be sure to remove any old rubber gasket
remaining on the mounting surface of the
engine.
5. Coat the rubber gasket on the new filter
with engine oil.6. Screw in the oil filter until a slight resistance
is felt, then tighten an additional 2/3 turn.
Oil filter tightening torque:
10.85 to 15.12 ft-lb
(14.7 to 20.5 N×m)
7. Start the engine and check for leakage
around the oil filter. Correct as required.
8. Turn the engine off and wait several min-
utes. Check the oil level. Add engine oil if
necessary.
WARNING
IWhen engine is running, keep hands,
jewelry, and clothing away from any
moving parts such as fan and drive
belt.
IAutomatic transmission fluid is poi-
sonous and should be stored care-
fully in marked containers out of the
reach of children.
SDI0417
SDI1120
AUTOMATIC TRANSMISSION
FLUID
8-16
Maintenance and do-it-yourself
Z
01.9.21/R50-D/V5
X
Page 227 of 288
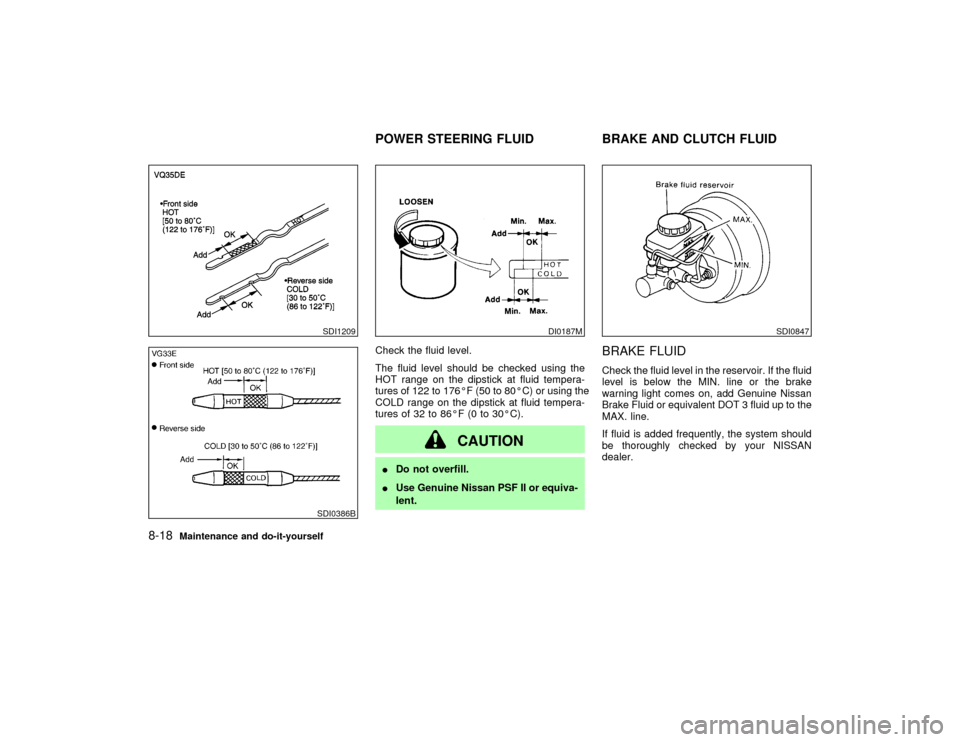
Check the fluid level.
The fluid level should be checked using the
HOT range on the dipstick at fluid tempera-
tures of 122 to 176ÉF (50 to 80ÉC) or using the
COLD range on the dipstick at fluid tempera-
tures of 32 to 86ÉF (0 to 30ÉC).
CAUTION
IDo not overfill.
IUse Genuine Nissan PSF II or equiva-
lent.
BRAKE FLUIDCheck the fluid level in the reservoir. If the fluid
level is below the MIN. line or the brake
warning light comes on, add Genuine Nissan
Brake Fluid or equivalent DOT 3 fluid up to the
MAX. line.
If fluid is added frequently, the system should
be thoroughly checked by your NISSAN
dealer.
SDI1209SDI0386B
DI0187M
SDI0847
POWER STEERING FLUID BRAKE AND CLUTCH FLUID
8-18
Maintenance and do-it-yourself
Z
01.9.21/R50-D/V5
X
Page 228 of 288
WARNING
Use only new fluid from a sealed con-
tainer. Old, inferior or contaminated fluid
may damage the brake and clutch sys-
tems. The use of improper fluids can
affect the vehicle's stopping ability.
CAUTION
Do not spill the fluid on painted sur-
faces. This will damage the paint. If fluid
is spilled, wash the surface with water.
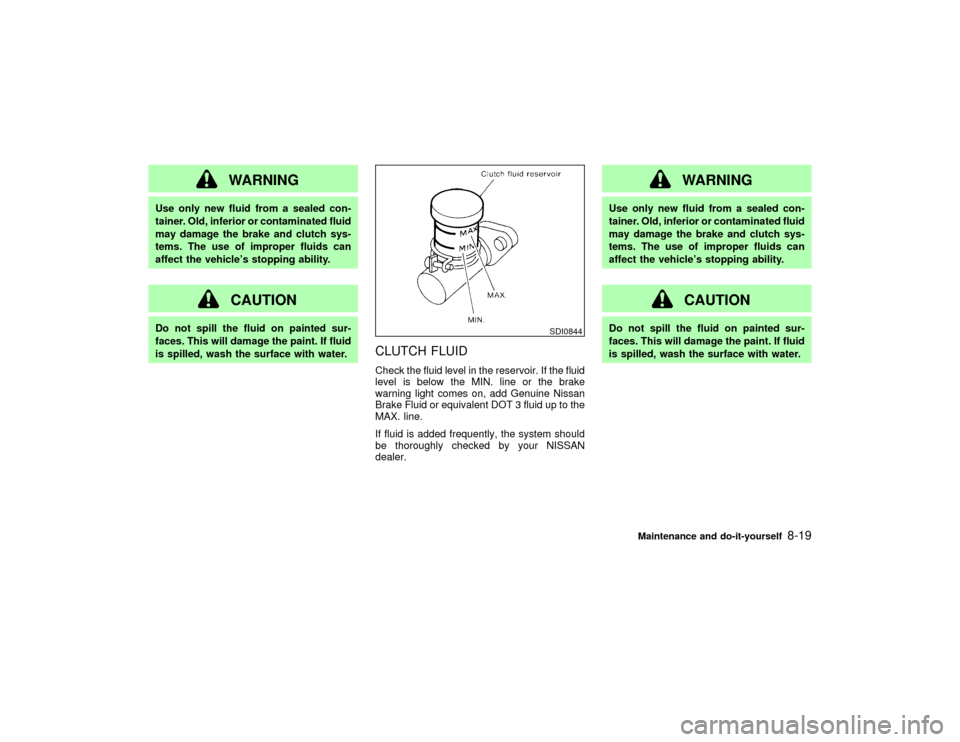
CLUTCH FLUIDCheck the fluid level in the reservoir. If the fluid
level is below the MIN. line or the brake
warning light comes on, add Genuine Nissan
Brake Fluid or equivalent DOT 3 fluid up to the
MAX. line.
If fluid is added frequently, the system should
be thoroughly checked by your NISSAN
dealer.
WARNING
Use only new fluid from a sealed con-
tainer. Old, inferior or contaminated fluid
may damage the brake and clutch sys-
tems. The use of improper fluids can
affect the vehicle's stopping ability.
CAUTION
Do not spill the fluid on painted sur-
faces. This will damage the paint. If fluid
is spilled, wash the surface with water.
SDI0844
Maintenance and do-it-yourself
8-19
Z
01.9.21/R50-D/V5
X