Page 75 of 288
WARNING
When the daytime running light system
is active, tail lights on your vehicle are
not on. It is necessary at dusk to turn on
your headlights. Failure to do so could
cause an accident injuring yourself and
others.
TURN SIGNAL SWITCH
Turn signalMove the lever up or down to signal to the
turning direction. When the turn is completed,
the turn signals cancel automatically.Lane change signalTo indicate a lane change, move the lever up
or down to the point where lights begin flash-
ing.
SIC1446
2-22
Instruments and controls
Z
01.9.21/R50-D/V5
X
Page 76 of 288
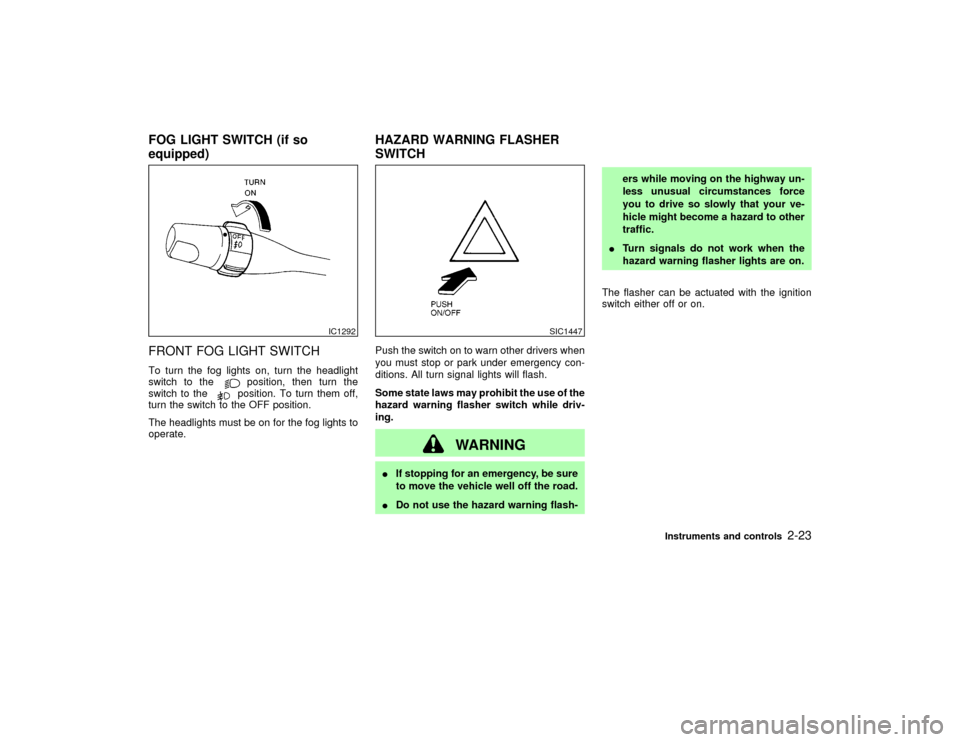
FRONT FOG LIGHT SWITCHTo turn the fog lights on, turn the headlight
switch to the
position, then turn the
switch to theposition. To turn them off,
turn the switch to the OFF position.
The headlights must be on for the fog lights to
operate.Push the switch on to warn other drivers when
you must stop or park under emergency con-
ditions. All turn signal lights will flash.
Some state laws may prohibit the use of the
hazard warning flasher switch while driv-
ing.
WARNING
IIf stopping for an emergency, be sure
to move the vehicle well off the road.
IDo not use the hazard warning flash-ers while moving on the highway un-
less unusual circumstances force
you to drive so slowly that your ve-
hicle might become a hazard to other
traffic.
ITurn signals do not work when the
hazard warning flasher lights are on.
The flasher can be actuated with the ignition
switch either off or on.
IC1292
SIC1447
FOG LIGHT SWITCH (if so
equipped)HAZARD WARNING FLASHER
SWITCH
Instruments and controls
2-23
Z
01.9.21/R50-D/V5
X
Page 77 of 288
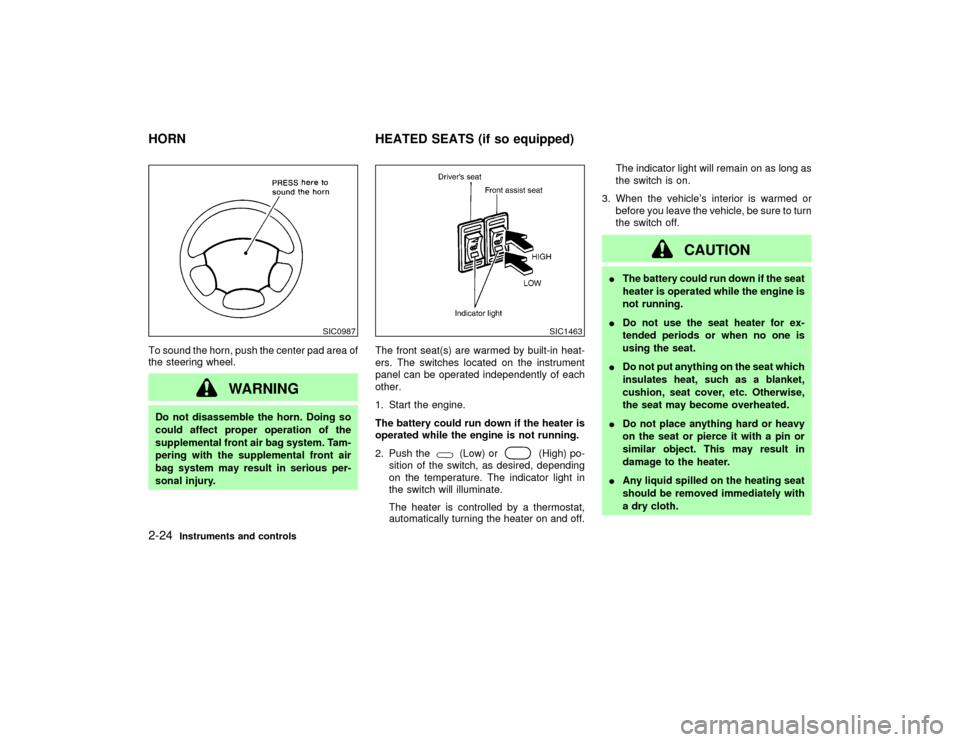
To sound the horn, push the center pad area of
the steering wheel.
WARNING
Do not disassemble the horn. Doing so
could affect proper operation of the
supplemental front air bag system. Tam-
pering with the supplemental front air
bag system may result in serious per-
sonal injury.The front seat(s) are warmed by built-in heat-
ers. The switches located on the instrument
panel can be operated independently of each
other.
1. Start the engine.
The battery could run down if the heater is
operated while the engine is not running.
2. Push the
(Low) or
(High) po-
sition of the switch, as desired, depending
on the temperature. The indicator light in
the switch will illuminate.
The heater is controlled by a thermostat,
automatically turning the heater on and off.The indicator light will remain on as long as
the switch is on.
3. When the vehicle's interior is warmed or
before you leave the vehicle, be sure to turn
the switch off.
CAUTION
IThe battery could run down if the seat
heater is operated while the engine is
not running.
IDo not use the seat heater for ex-
tended periods or when no one is
using the seat.
IDo not put anything on the seat which
insulates heat, such as a blanket,
cushion, seat cover, etc. Otherwise,
the seat may become overheated.
IDo not place anything hard or heavy
on the seat or pierce it with a pin or
similar object. This may result in
damage to the heater.
IAny liquid spilled on the heating seat
should be removed immediately with
a dry cloth.
SIC0987
SIC1463
HORN HEATED SEATS (if so equipped)2-24
Instruments and controls
Z
01.9.21/R50-D/V5
X
Page 80 of 288
The cigarette lighter element is an accessory.
A genuine NISSAN cigarette lighter unit can be
purchased from your local NISSAN dealer.
The cigarette lighter operates when the igni-
tion switch is in ACC or ON.
Push the lighter in all the way. When the lighter
is heated, it will spring out.
Return the lighter to its original position after
use.
WARNING
The cigarette lighter should not be used
while driving so full attention may be
given to vehicle operation.
CAUTION
The cigarette lighter socket is a power
source for the cigarette lighter element
only. The use of the cigarette lighter
socket as a power source for any other
accessory is not recommended.
TRAY
WARNING
The storage tray should not be used
while driving so full attention may be
given to vehicle operation.
Do not place valuable items in the tray.
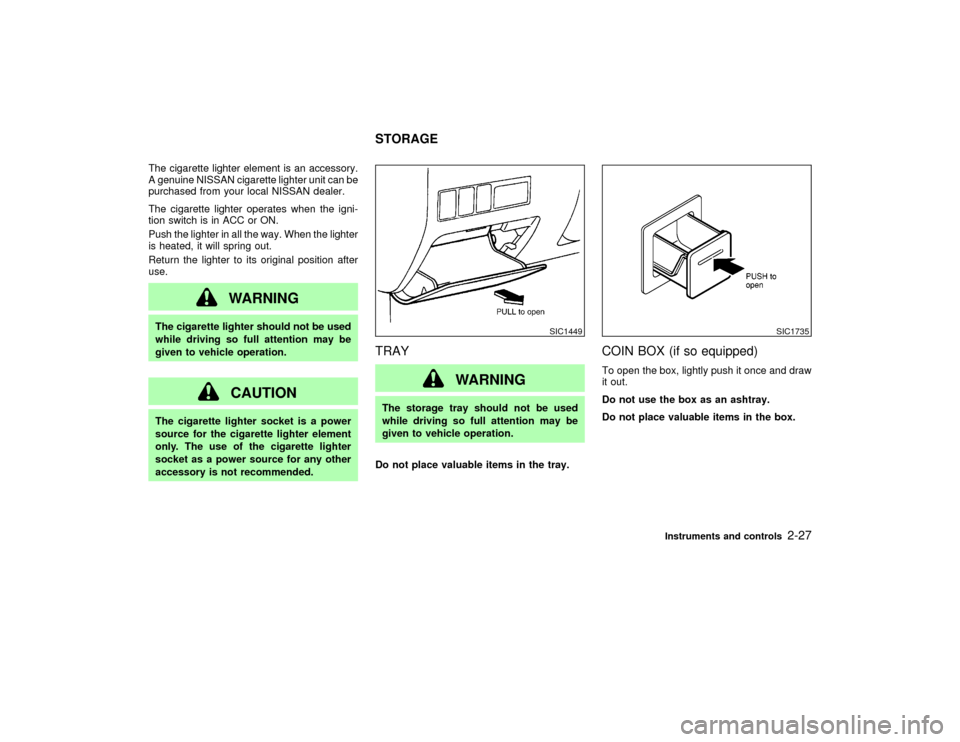
COIN BOX (if so equipped)To open the box, lightly push it once and draw
it out.
Do not use the box as an ashtray.
Do not place valuable items in the box.
SIC1449
SIC1735
STORAGE
Instruments and controls
2-27
Z
01.9.21/R50-D/V5
X
Page 81 of 288
GLASSES CASEThe glasses case can be opened by pushing
the button.
WARNING
The glasses case should not be used
while driving so full attention may be
given to vehicle operation.
CAUTION
IDo not use for anything other than
glasses.
IDo not leave glasses in the glasses
case while parking in direct sunlight.
The heat may damage the glasses.
CUP HOLDERS
WARNING
The cup holders should not be used
while driving so full attention may be
given to vehicle operation.
CAUTION
IAvoid abrupt starting and braking
SIC0557
SIC0553A
2-28
Instruments and controls
Z
01.9.21/R50-D/V5
X
Page 89 of 288
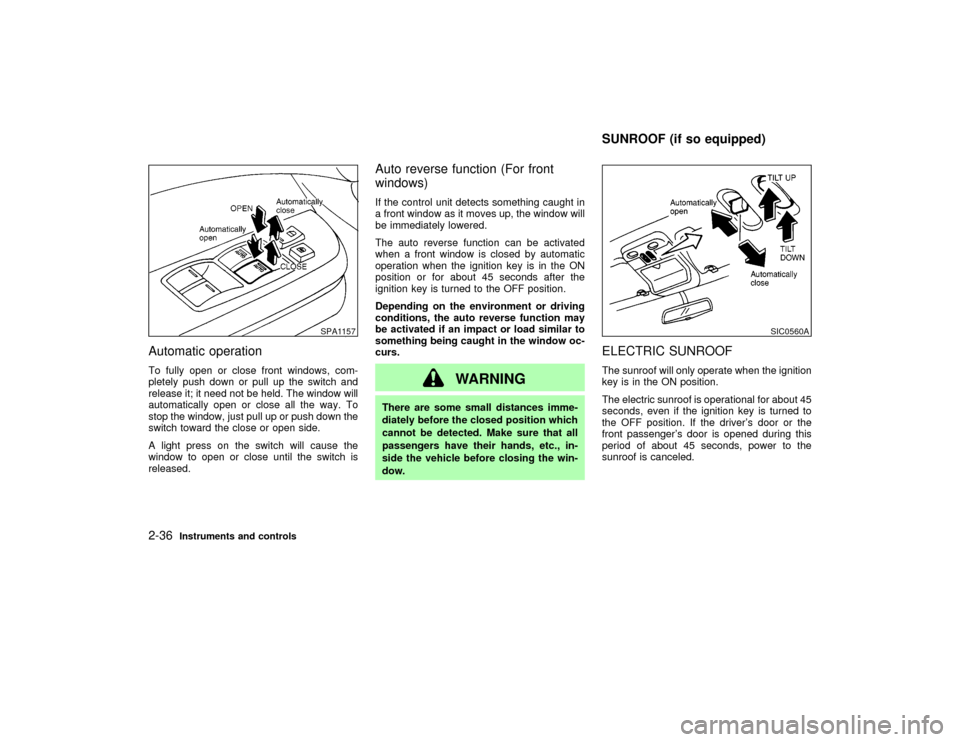
Automatic operationTo fully open or close front windows, com-
pletely push down or pull up the switch and
release it; it need not be held. The window will
automatically open or close all the way. To
stop the window, just pull up or push down the
switch toward the close or open side.
A light press on the switch will cause the
window to open or close until the switch is
released.
Auto reverse function (For front
windows)If the control unit detects something caught in
a front window as it moves up, the window will
be immediately lowered.
The auto reverse function can be activated
when a front window is closed by automatic
operation when the ignition key is in the ON
position or for about 45 seconds after the
ignition key is turned to the OFF position.
Depending on the environment or driving
conditions, the auto reverse function may
be activated if an impact or load similar to
something being caught in the window oc-
curs.
WARNING
There are some small distances imme-
diately before the closed position which
cannot be detected. Make sure that all
passengers have their hands, etc., in-
side the vehicle before closing the win-
dow.
ELECTRIC SUNROOFThe sunroof will only operate when the ignition
key is in the ON position.
The electric sunroof is operational for about 45
seconds, even if the ignition key is turned to
the OFF position. If the driver's door or the
front passenger's door is opened during this
period of about 45 seconds, power to the
sunroof is canceled.
SPA1157
SIC0560A
SUNROOF (if so equipped)
2-36
Instruments and controls
Z
01.9.21/R50-D/V5
X
Page 91 of 288
The shade will open automatically when the
sunroof is opened. However, it must be closed
manually.
WARNING
IIn an accident you could be thrown
from the vehicle through an open
sunroof. Always use seat belts and
child restraints.
IDo not allow anyone to stand up or
extend any portion of their body out
of the opening while the vehicle is in
motion or while the sunroof is clos-
ing.
CAUTION
IRemove water drops, snow, ice or
sand from the sunroof before open-
ing.
IDo not place any heavy object on the
sunroof or surrounding area.
If the sunroof does not closeHave your NISSAN dealer check and repair
the sunroof.
The lights have a three-position switch.
When the switch is in the centerqposition, the
lights will illuminate when a door or the back
door is opened.
SIC0564A
INTERIOR LIGHTS (if so
equipped)
2-38
Instruments and controls
Z
01.9.21/R50-D/V5
X
Page 94 of 288
WARNING
IDo not use the HomeLink
Universal
Transceiver with any garage door
opener that lacks safety stop and
reverse features as required by fed-
eral safety standards. (These stan-
dards became effective for opener
models manufactured after April 1,
1982.) A garage door opener which
cannot detect an object in the path of
a closing garage door and then auto-
matically stop and reverse, does not
meet current federal safety stan-
dards. Using a garage door opener
without these features increases the
risk of serious injury or death.
IDuring programming, your garage
door or gate may open or close. Make
sure that people and objects are clear
of the garage door or gate that you
are programming.
IYour vehicle's engine should be
turned off while programming the
HomeLink
Universal Transceiver.
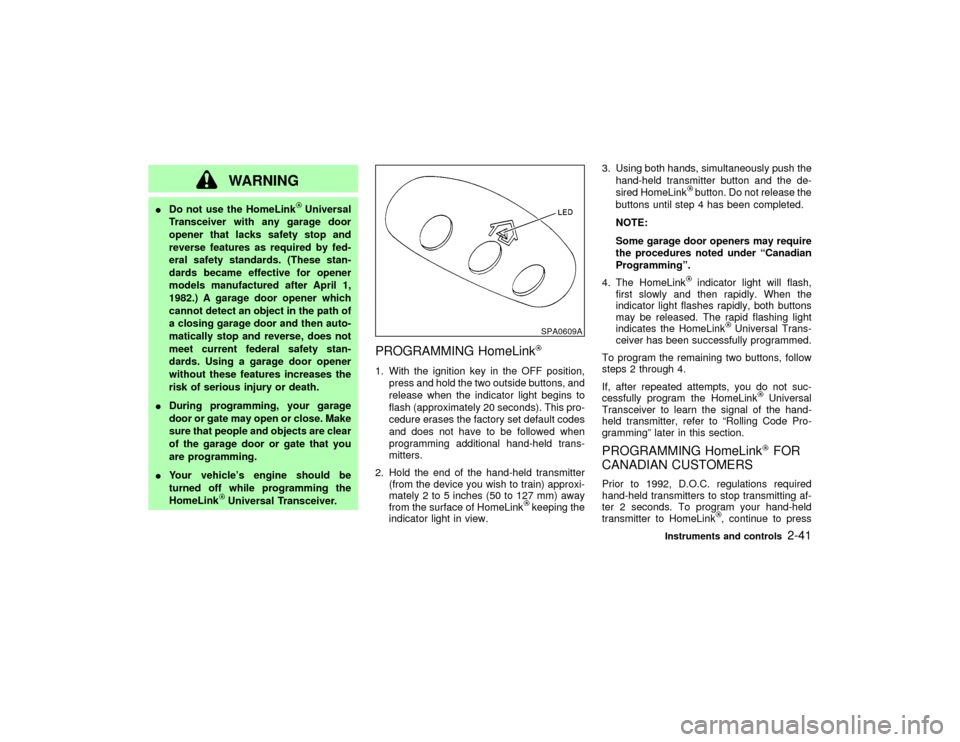
PROGRAMMING HomeLink1. With the ignition key in the OFF position,
press and hold the two outside buttons, and
release when the indicator light begins to
flash (approximately 20 seconds). This pro-
cedure erases the factory set default codes
and does not have to be followed when
programming additional hand-held trans-
mitters.
2. Hold the end of the hand-held transmitter
(from the device you wish to train) approxi-
mately 2 to 5 inches (50 to 127 mm) away
from the surface of HomeLink
keeping the
indicator light in view.3. Using both hands, simultaneously push the
hand-held transmitter button and the de-
sired HomeLink
button. Do not release the
buttons until step 4 has been completed.
NOTE:
Some garage door openers may require
the procedures noted under ªCanadian
Programmingº.
4. The HomeLinkindicator light will flash,
first slowly and then rapidly. When the
indicator light flashes rapidly, both buttons
may be released. The rapid flashing light
indicates the HomeLink
Universal Trans-
ceiver has been successfully programmed.
To program the remaining two buttons, follow
steps 2 through 4.
If, after repeated attempts, you do not suc-
cessfully program the HomeLink
Universal
Transceiver to learn the signal of the hand-
held transmitter, refer to ªRolling Code Pro-
grammingº later in this section.
PROGRAMMING HomeLink
FOR
CANADIAN CUSTOMERS
Prior to 1992, D.O.C. regulations required
hand-held transmitters to stop transmitting af-
ter 2 seconds. To program your hand-held
transmitter to HomeLink
, continue to press
SPA0609A
Instruments and controls
2-41
Z
01.9.21/R50-D/V5
X