2002 NISSAN PATHFINDER hood open
[x] Cancel search: hood openPage 69 of 288

Security indicator lightThis light blinks whenever the ignition switch is
in the LOCK, OFF or ACC position. This
function indicates the security systems
equipped on the vehicle are operational.How to activate the vehicle security
system1. Close all windows.
The system can be activated even if the
windows are open.
2. Remove the key from the ignition switch.3. Close and lock all doors, hood, back door
and glass hatch. All doors can be locked
either with the keyfob, a key, the door lock
knob or the lock-unlock switch. See ªDoorsº
in the ª3. Pre-driving checks and adjust-
mentsº section for locking all doors simul-
taneously.
4. Confirm that the SECURITY indicator light
comes on. The SECURITY light glows for
about 30 seconds and then begins to flash.
The system is now activated. If, during this
30 second time period, the door is unlocked
by the key or keyfob, or the ignition key is
turned to ACC or ON, the system will not
activate.
IIf the key is turned slowly toward the
front of the vehicle when locking the
door, the system may not activate. If the
key is returned beyond the vertical po-
sition toward the rear of the vehicle to
remove the key, the system may be
deactivated. When the indicator light
fails to glow for 30 seconds, unlock the
door once and lock it again.
IEven when the driver and/or passengers
are in the vehicle, the system will acti-
vate with all doors, hood, back door and
back door glass hatch locked and igni-
tion key off. Turn the ignition key to ACCto turn the system off.
Vehicle security system operationThe vehicle security system will give the fol-
lowing alarm:
IThe headlights blink and the horn sounds
intermittently.
IThe alarm automatically turns off after 1
minute, however, the alarm will reactivate if
the vehicle is tampered with again.
The alarm is activated by:
IUnlocking the door, back door or back door
glass hatch without using the key or keyfob.
(Even if the door is opened by releasing the
door inside lock knob, the alarm is acti-
vated.)
IOpening the hood. (Even if the hood is
opened by the hood release handle, the
alarm is activated.)
IOpening the back door glass hatch.
IConnecting the battery connector after it
has been disconnected from the battery for
more than 1 second.How to stop alarmThe alarm will stop only by unlocking a door,
the back door or the back door glass hatch
SIC1442
2-16
Instruments and controls
Z
01.9.21/R50-D/V5
X
Page 100 of 288

3 Pre-driving checks and adjustmentsKeys .......................................................................... 3-2
Doors ......................................................................... 3-2
Locking with key ................................................... 3-3
Front window open/close with key ....................... 3-3
Locking with inside lock knob............................... 3-3
Locking with power door lock switch (if so
equipped).............................................................. 3-4
Child safety rear door lock ................................... 3-4
Remote keyless entry system ................................... 3-5
How to use remote keyless entry system ............ 3-5
Battery replacement ............................................. 3-8
Hood .......................................................................... 3-9
Rear door ................................................................ 3-10
Key operation ..................................................... 3-10
Spare tire carrier (if so equipped) ........................... 3-10Glass hatch ............................................................. 3-11
Key operation ..................................................... 3-11
Fuel filler lid ............................................................. 3-12
Opener operation ............................................... 3-12
Fuel filler cap ...................................................... 3-12
Steering wheel ........................................................ 3-14
Tilt operation....................................................... 3-14
Sun visors ............................................................... 3-14
Using the sun visors ........................................... 3-14
Mirrors ..................................................................... 3-15
Inside mirror ....................................................... 3-15
Outside mirrors ................................................... 3-15
Automatic seat positioner (if so equipped) ............. 3-16
Automatic seat positioner operation ................... 3-16
Cancel switch ..................................................... 3-18
Z
01.9.21/R50-D/V5
X
Page 108 of 288

could void the user's authority to operate
the equipment.
This device complies with Part 15 of the
FCC Rules and RSS-210 of Industry
Canada.
Operation is subject to the following two
conditions: (1) This device may not cause
harmful interference, and (2) this device
must accept any interference received, in-
cluding interference that may cause undes-
ired operation of the device.
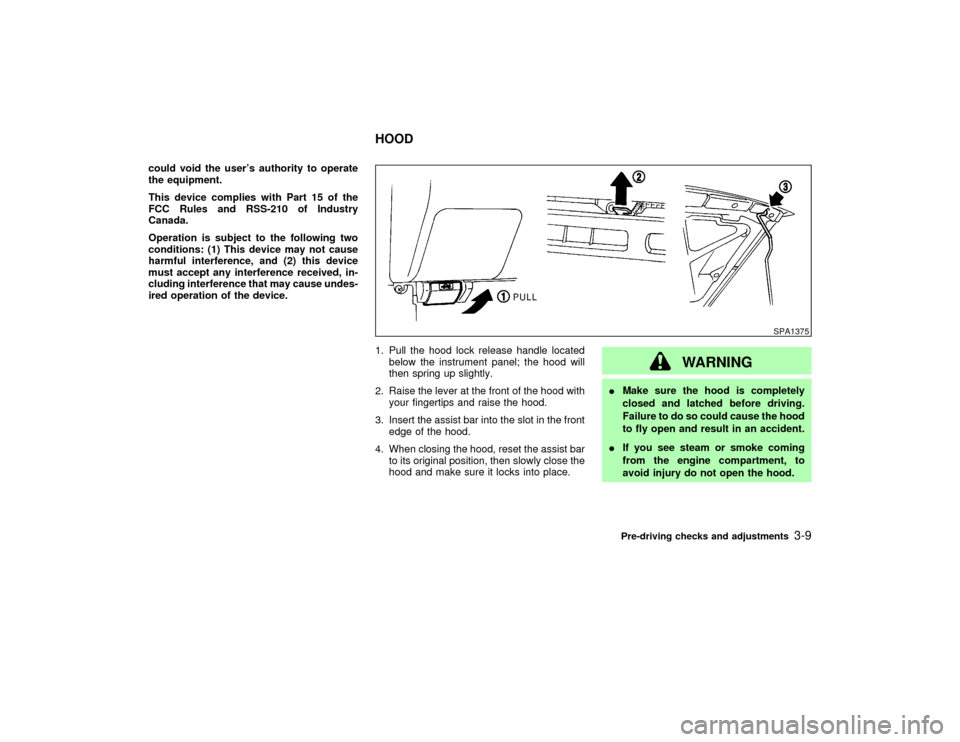
1. Pull the hood lock release handle located
below the instrument panel; the hood will
then spring up slightly.
2. Raise the lever at the front of the hood with
your fingertips and raise the hood.
3. Insert the assist bar into the slot in the front
edge of the hood.
4. When closing the hood, reset the assist bar
to its original position, then slowly close the
hood and make sure it locks into place.
WARNING
IMake sure the hood is completely
closed and latched before driving.
Failure to do so could cause the hood
to fly open and result in an accident.
IIf you see steam or smoke coming
from the engine compartment, to
avoid injury do not open the hood.
SPA1375
HOOD
Pre-driving checks and adjustments
3-9
Z
01.9.21/R50-D/V5
X
Page 196 of 288

If your vehicle is overheating indicated by an
extremely high temperature gauge reading, or
if you feel a lack of engine power, detect
abnormal noise, etc., take the following steps:
WARNING
IDo not continue to drive if your ve-
hicle overheats. Doing so could
cause a vehicle fire.
ITo avoid the danger of being scalded,
never remove the radiator cap while
the engine is still hot. When the radia-
tor cap is removed, pressurized hot
water will spurt out, possibly causing
serious injury.
IDo not open the hood if steam is
coming out.
1. Move the vehicle safely off the road, apply
the parking brake and move the gearshift
lever to the neutral position (automatic
transmission to P (Park)).
Do not stop the engine.
2. Turn off the air conditioner switch. Open all
the windows, move the heater or air condi-tioner temperature control to maximum hot
and fan control to high speed.
3. If engine overheating is caused by climbing
a long hill on a hot day, run the engine at a
fast idle (approximately 1,500 rpm) until the
temperature gauge indication returns to
normal.
4. Get out of the vehicle. Look and listen for
steam or coolant escaping from the radiator
before opening the hood. Wait until no
steam or coolant can be seen before pro-
ceeding.
5. Open the engine hood.
WARNING
If steam or water is coming from the
engine, stand clear to prevent getting
burned.
6. Visually check drive belts for damage or
looseness. Also check if the cooling fan is
running. The radiator hoses and radiator
should not leak water. If coolant is leaking,
the cooling fan belt is missing or loose or
the cooling fan does not run, stop the
engine.
WARNING
IBe careful not to allow your hands,
hair, jewelry or clothing to come into
contact with, or to get caught in, the
cooling fan, or drive belt.
IThe engine cooling fan can start at
any time when the coolant tempera-
ture is high.
7. After the engine cools down, check the
coolant level in the reservoir tank with the
engine running. Add coolant to the reservoir
tank if necessary. Have your vehicle re-
paired at the nearest NISSAN dealer.
IF YOUR VEHICLE OVERHEATS
In case of emergency
6-11
Z
01.9.21/R50-D/V5
X
Page 205 of 288

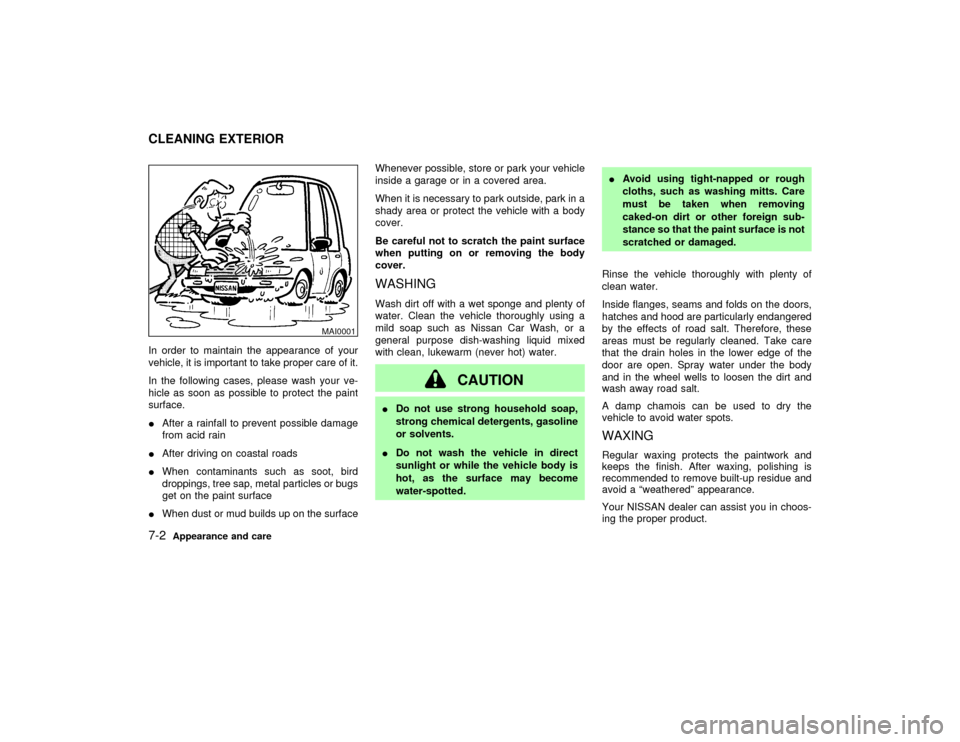
In order to maintain the appearance of your
vehicle, it is important to take proper care of it.
In the following cases, please wash your ve-
hicle as soon as possible to protect the paint
surface.
IAfter a rainfall to prevent possible damage
from acid rain
IAfter driving on coastal roads
IWhen contaminants such as soot, bird
droppings, tree sap, metal particles or bugs
get on the paint surface
IWhen dust or mud builds up on the surfaceWhenever possible, store or park your vehicle
inside a garage or in a covered area.
When it is necessary to park outside, park in a
shady area or protect the vehicle with a body
cover.
Be careful not to scratch the paint surface
when putting on or removing the body
cover.
WASHINGWash dirt off with a wet sponge and plenty of
water. Clean the vehicle thoroughly using a
mild soap such as Nissan Car Wash, or a
general purpose dish-washing liquid mixed
with clean, lukewarm (never hot) water.
CAUTION
IDo not use strong household soap,
strong chemical detergents, gasoline
or solvents.
IDo not wash the vehicle in direct
sunlight or while the vehicle body is
hot, as the surface may become
water-spotted.IAvoid using tight-napped or rough
cloths, such as washing mitts. Care
must be taken when removing
caked-on dirt or other foreign sub-
stance so that the paint surface is not
scratched or damaged.
Rinse the vehicle thoroughly with plenty of
clean water.
Inside flanges, seams and folds on the doors,
hatches and hood are particularly endangered
by the effects of road salt. Therefore, these
areas must be regularly cleaned. Take care
that the drain holes in the lower edge of the
door are open. Spray water under the body
and in the wheel wells to loosen the dirt and
wash away road salt.
A damp chamois can be used to dry the
vehicle to avoid water spots.
WAXINGRegular waxing protects the paintwork and
keeps the finish. After waxing, polishing is
recommended to remove built-up residue and
avoid a ªweatheredº appearance.
Your NISSAN dealer can assist you in choos-
ing the proper product.
MAI0001
CLEANING EXTERIOR7-2
Appearance and care
Z
01.9.21/R50-D/V5
X
Page 212 of 288

Wheel nuts*:
When checking the tires, make sure no nuts
are missing, and check for any loose nuts.
Tighten if necessary.
Tire rotation*:
Tires should be rotated every 7,500 miles
(12,000 km). However, the timing for tire rota-
tion may vary according to your driving habits
and road surface conditions.
Wheel alignment and balance:
If the vehicle should pull to either side while
driving on a straight and level road, or if you
detect uneven or abnormal tire wear, there
may be a need for wheel alignment.
If the steering wheel or seat vibrates at normal
highway speeds, wheel balancing may be
needed.
For additional information regarding tires, refer
to ªImportant Tire Safety Informationº in the
Warranty Information Booklet (US) or ªTire
Safety Informationº in the Warranty Informa-
tion booklet (Canada).
Windshield:Clean the windshield on a regu-
lar basis. Check the windshield at least every
six months for cracks or other damage. Have a
damaged windshield repaired by a qualified
repair facility.Windshield wiper blades*:
Check for cracks or wear if they do not wipe
properly.
Doors and engine hood:
Check that all doors and the engine hood,
operate properly. Also ensure that all latches
lock securely. Lubricate hinges, latches, rollers
and links if necessary. Make sure that the
secondary latch keeps the hood from opening
when the primary latch is released.
When driving in areas using road salt or other
corrosive materials, check lubrication fre-
quently.
Inside the vehicleLights*:
Clean the headlights on a regular basis. Make
sure that the headlights, stop lights, tail lights,
turn signal lights, and other lights are all oper-
ating properly and installed securely. Also
check headlight aim.INTERIOR MAINTENANCEThe maintenance items listed here should be
checked on a regular basis, such as when
performing periodic maintenance, cleaning the
vehicle, etc.Warning lights and chimes:
Make sure that all warning lights and chimes
are operating properly.
Windshield wiper and washer*:
Check that the wipers and washer operate
properly and that the wipers do not streak.
Windshield defroster:
Check that the air comes out of the defroster
outlets properly and in sufficient quantity when
operating the heater or air conditioner.
Steering wheel:
Check for changes in the steering conditions,
such as excessive freeplay, hard steering or
strange noises.
Seats:
Check seat position controls such as seat
adjusters, seatback recliner, etc. to ensure
they operate smoothly and that all latches lock
securely in every position. Check that the head
restraints move up and down smoothly and
that the locks (if so equipped) hold securely in
all latched positions.
Seat belts:
Check that all parts of the seat belt system
(e.g. buckles, anchors, adjusters and retrac-
Maintenance and do-it-yourself
8-3
Z
01.9.21/R50-D/V5
X
Page 234 of 288

CAUTION
After wiper blade replacement, return
the wiper arm to its original position;
otherwise it may be damaged when the
hood is opened.
Make sure the wiper blade contacts the
glass, otherwise the arm may be dam-
aged from wind pressure.
Worn windshield wiper blades can dam-
age the windshield and impair driver
vision.
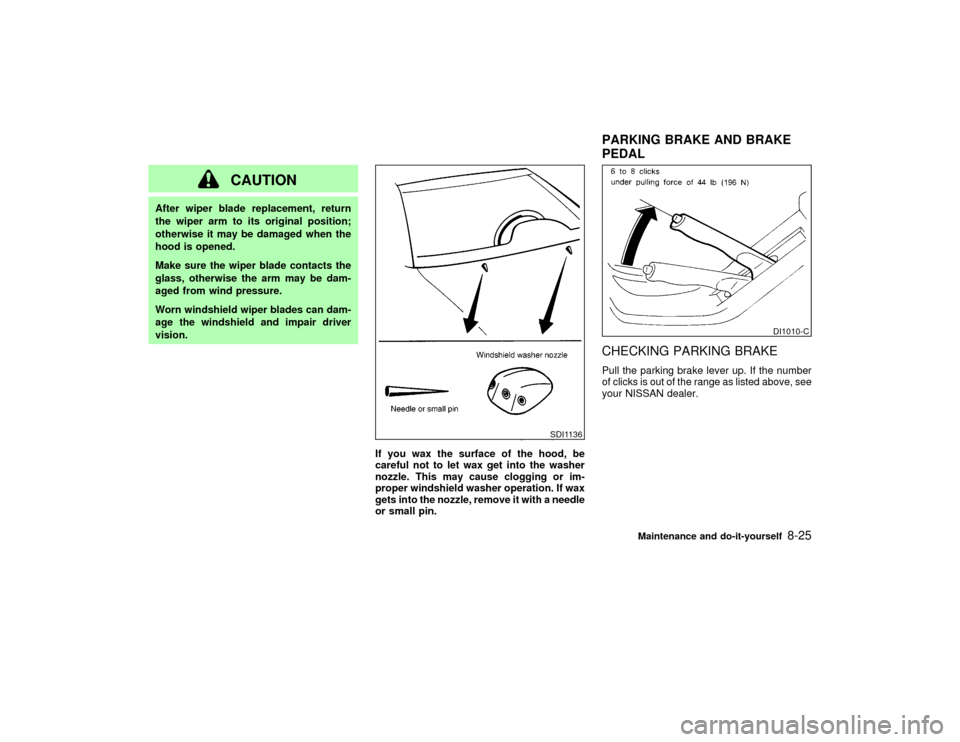
If you wax the surface of the hood, be
careful not to let wax get into the washer
nozzle. This may cause clogging or im-
proper windshield washer operation. If wax
gets into the nozzle, remove it with a needle
or small pin.
CHECKING PARKING BRAKEPull the parking brake lever up. If the number
of clicks is out of the range as listed above, see
your NISSAN dealer.
SDI1136
DI1010-C
PARKING BRAKE AND BRAKE
PEDAL
Maintenance and do-it-yourself
8-25
Z
01.9.21/R50-D/V5
X
Page 237 of 288

2. Open the engine hood.
3. Remove the fuse box cover.
4. Remove the fuse with the fuse puller.
5. If the fuse is open, replace it with a new
fuse.
6. If a new fuse opens again, have the elec-
trical system checked and repaired by your
NISSAN dealer.Fusible linksIf any electrical equipment does not operate
and fuses are in good condition, check the
fusible links. If any of these fusible links are
melted, replace only with genuine NISSAN
parts.
PASSENGER COMPARTMENTIf any electrical equipment does not operate,
check for an open fuse.
1. Be sure the ignition key and the headlight
switch are OFF.
2. Pull to open the fuse box cover/coin tray.
3. Pull down the fuse box cover/coin tray to
remove it.
4. Remove the fuse with the fuse puller.
5. If the fuse is open, replace it with a new
fuse.6. If a new fuse opens again, have the elec-
trical system checked and repaired by your
NISSAN dealer.
SDI1169
8-28
Maintenance and do-it-yourself
Z
01.9.21/R50-D/V5
X