Page 8 of 247
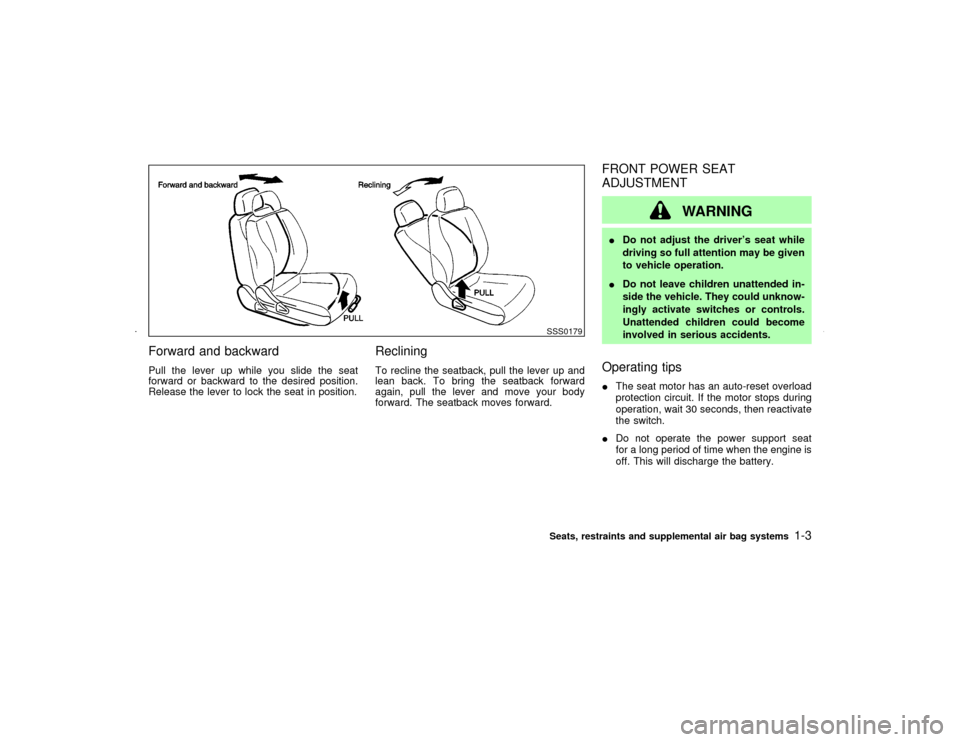
Forward and backwardPull the lever up while you slide the seat
forward or backward to the desired position.
Release the lever to lock the seat in position.
RecliningTo recline the seatback, pull the lever up and
lean back. To bring the seatback forward
again, pull the lever and move your body
forward. The seatback moves forward.
FRONT POWER SEAT
ADJUSTMENT
WARNING
IDo not adjust the driver's seat while
driving so full attention may be given
to vehicle operation.
IDo not leave children unattended in-
side the vehicle. They could unknow-
ingly activate switches or controls.
Unattended children could become
involved in serious accidents.Operating tipsIThe seat motor has an auto-reset overload
protection circuit. If the motor stops during
operation, wait 30 seconds, then reactivate
the switch.
IDo not operate the power support seat
for a long period of time when the engine is
off. This will discharge the battery.
SSS0179Seats, restraints and supplemental air bag systems
1-3
Z
01.9.21/A33-D/V5.0
X
Page 11 of 247
IClosely supervise children when they
are around cars to prevent them from
playing and becoming locked in the
trunk where they could be seriously
injured. Keep the car locked with the
rear seatback securely latched when
not in use, and prevent children's
access to car keys.
HEAD RESTRAINT ADJUSTMENTTo raise the head restraint, just pull it up. To
lower, push the lock knob and push the head
restraint down.
WARNING
Head restraints should be adjusted
properly as they may provide significant
protection against injury in an accident.
Do not remove them. Check the adjust-ment after someone else uses the seat.
SSS0125
1-6
Seats, restraints and supplemental air bag systems
Z
01.9.21/A33-D/V5.0
X
Page 29 of 247
you could be thrown into it and re-
ceive neck or other serious injuries.
You could also slide under the lap
belt and receive serious internal inju-
ries.
IFor most effective protection when
the vehicle is in motion, the seat
should be upright. Always sit well
back in the seat and adjust the seat
belt properly.
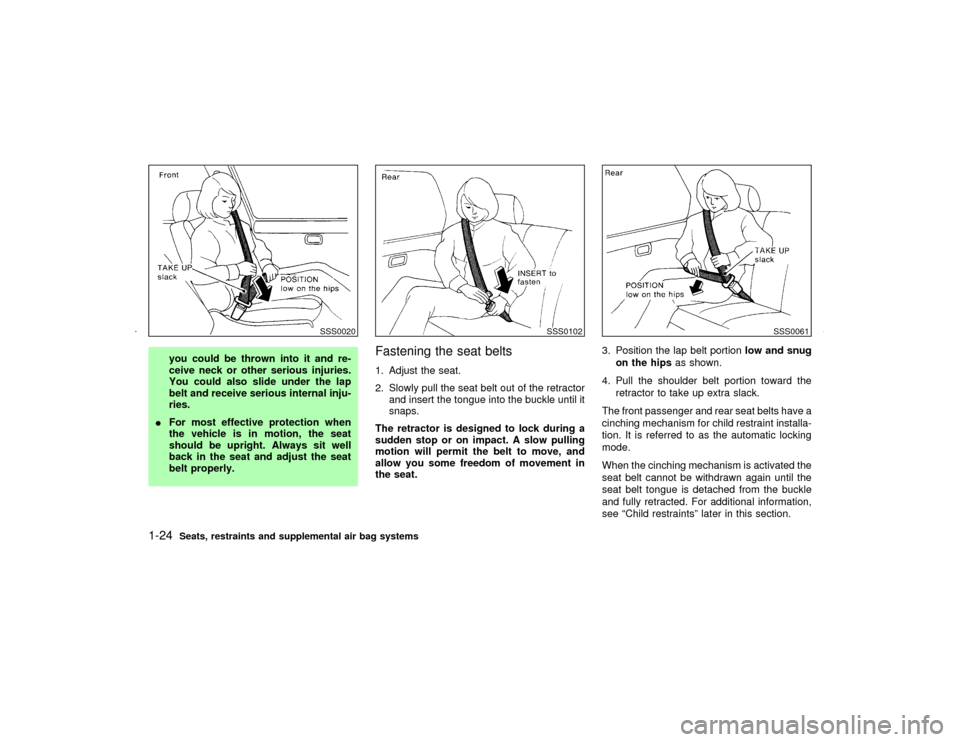
Fastening the seat belts1. Adjust the seat.
2. Slowly pull the seat belt out of the retractor
and insert the tongue into the buckle until it
snaps.
The retractor is designed to lock during a
sudden stop or on impact. A slow pulling
motion will permit the belt to move, and
allow you some freedom of movement in
the seat.3. Position the lap belt portionlow and snug
on the hipsas shown.
4. Pull the shoulder belt portion toward the
retractor to take up extra slack.
The front passenger and rear seat belts have a
cinching mechanism for child restraint installa-
tion. It is referred to as the automatic locking
mode.
When the cinching mechanism is activated the
seat belt cannot be withdrawn again until the
seat belt tongue is detached from the buckle
and fully retracted. For additional information,
see ªChild restraintsº later in this section.
SSS0020
SSS0102
SSS0061
1-24
Seats, restraints and supplemental air bag systems
Z
01.9.21/A33-D/V5.0
X
Page 30 of 247
The automatic locking mode should be
used only for child restraint installation.
During normal seat belt use by a passen-
ger, the locking mode should not be acti-
vated. If it is activated it may cause uncom-
fortable seat belt tension.
WARNING
When fastening the seat belts, be certain
that seatbacks are completely secured
in the latched position. If they are not
completely secured in the right position,
passengers may be injured in an acci-
dent or sudden stop.
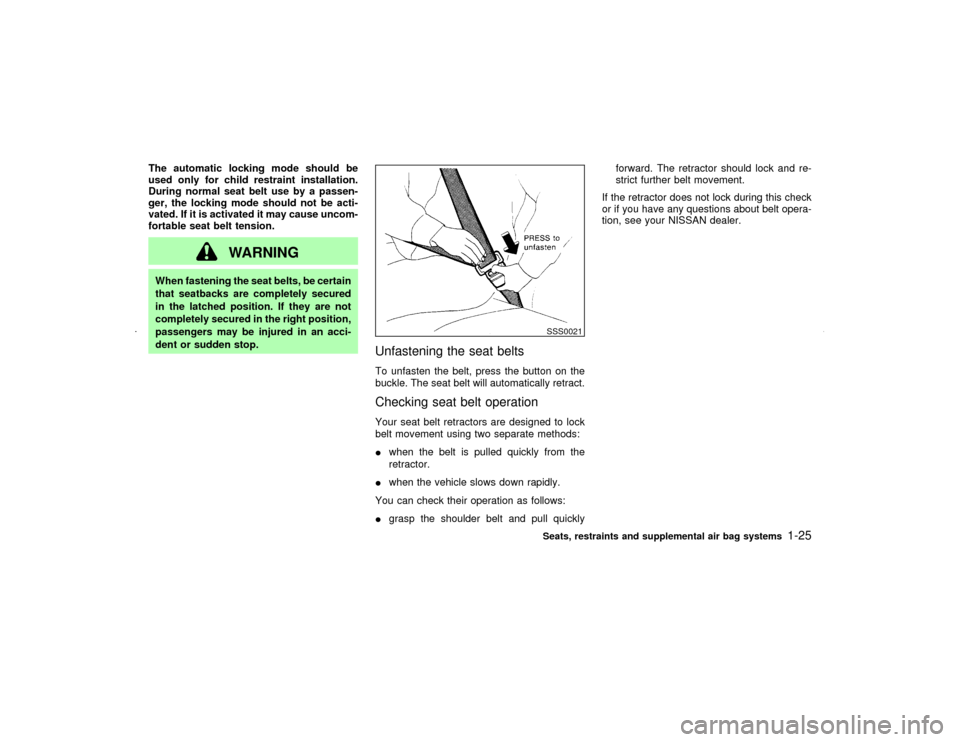
Unfastening the seat beltsTo unfasten the belt, press the button on the
buckle. The seat belt will automatically retract.Checking seat belt operationYour seat belt retractors are designed to lock
belt movement using two separate methods:
Iwhen the belt is pulled quickly from the
retractor.
Iwhen the vehicle slows down rapidly.
You can check their operation as follows:
Igrasp the shoulder belt and pull quicklyforward. The retractor should lock and re-
strict further belt movement.
If the retractor does not lock during this check
or if you have any questions about belt opera-
tion, see your NISSAN dealer.
SSS0021Seats, restraints and supplemental air bag systems
1-25
Z
01.9.21/A33-D/V5.0
X
Page 31 of 247
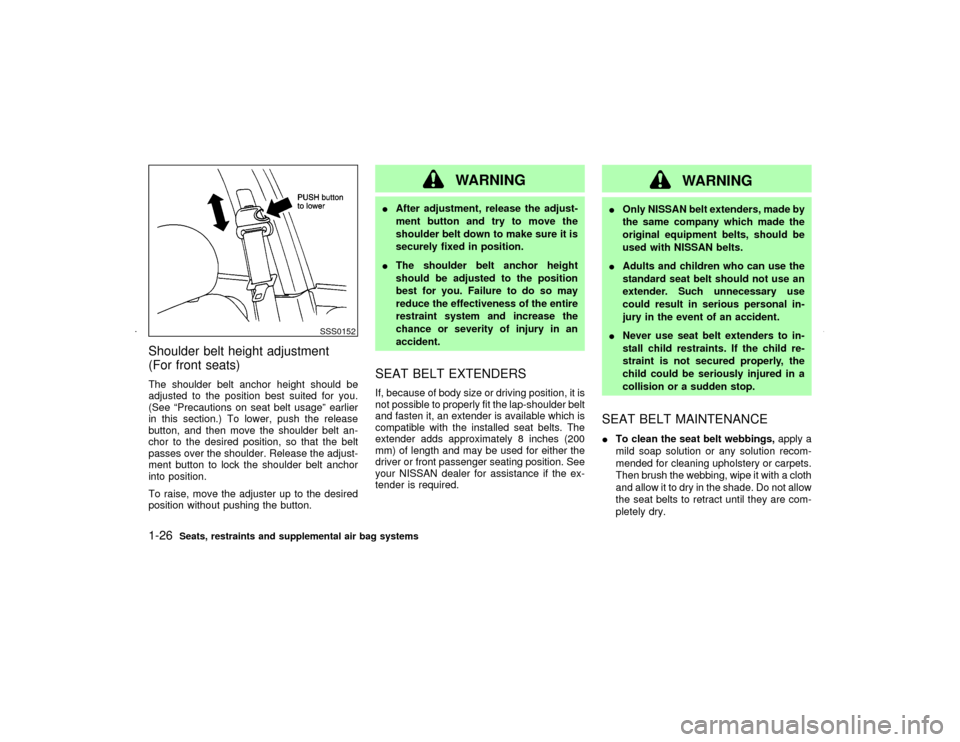
Shoulder belt height adjustment
(For front seats)The shoulder belt anchor height should be
adjusted to the position best suited for you.
(See ªPrecautions on seat belt usageº earlier
in this section.) To lower, push the release
button, and then move the shoulder belt an-
chor to the desired position, so that the belt
passes over the shoulder. Release the adjust-
ment button to lock the shoulder belt anchor
into position.
To raise, move the adjuster up to the desired
position without pushing the button.
WARNING
IAfter adjustment, release the adjust-
ment button and try to move the
shoulder belt down to make sure it is
securely fixed in position.
IThe shoulder belt anchor height
should be adjusted to the position
best for you. Failure to do so may
reduce the effectiveness of the entire
restraint system and increase the
chance or severity of injury in an
accident.SEAT BELT EXTENDERSIf, because of body size or driving position, it is
not possible to properly fit the lap-shoulder belt
and fasten it, an extender is available which is
compatible with the installed seat belts. The
extender adds approximately 8 inches (200
mm) of length and may be used for either the
driver or front passenger seating position. See
your NISSAN dealer for assistance if the ex-
tender is required.
WARNING
IOnly NISSAN belt extenders, made by
the same company which made the
original equipment belts, should be
used with NISSAN belts.
IAdults and children who can use the
standard seat belt should not use an
extender. Such unnecessary use
could result in serious personal in-
jury in the event of an accident.
INever use seat belt extenders to in-
stall child restraints. If the child re-
straint is not secured properly, the
child could be seriously injured in a
collision or a sudden stop.SEAT BELT MAINTENANCEITo clean the seat belt webbings,apply a
mild soap solution or any solution recom-
mended for cleaning upholstery or carpets.
Then brush the webbing, wipe it with a cloth
and allow it to dry in the shade. Do not allow
the seat belts to retract until they are com-
pletely dry.
SSS0152
1-26
Seats, restraints and supplemental air bag systems
Z
01.9.21/A33-D/V5.0
X
Page 34 of 247
INSTALLATION ON REAR SEAT
OUTBOARD OR CENTER
POSITIONS
WARNING
IThe three-point belt on your vehicle is
equipped with a locking mode retrac-
tor which must be used when install-
ing a child restraint.
IFailure to do so will result in the child
restraint not being properly secured.
It could tip over or otherwise be un-
secured and cause injury to the child
in a sudden stop or collision.
Front facingWhen you install a child restraint in a rear
outboard or center seat, follow these steps:
1. Position the child restraint on the seat. It
can be placed in a front facing direction,
depending on the size of the child. Always
follow the restraint manufacturer's instruc-
tions.
SSS0153
SSS0154
Seats, restraints and supplemental air bag systems
1-29
Z
01.9.21/A33-D/V5.0
X
Page 35 of 247
2. Route the seat belt tongue through the child
restraint and insert it into the buckle until
you hear and feel the latch engage.
Be sure to follow the child restraint manu-
facturer's instructions for belt routing.3. Pull on the shoulder belt until all of the belt
is fully extended. At this time, the belt
retractor is in the automatic locking mode
(child restraint mode). It reverts back to
emergency locking mode when the belt is
fully retracted.4. Allow the belt to retract. Pull up on the belt
to remove any slack in the belt.
SSS0043
SSS0107
SSS0062
1-30
Seats, restraints and supplemental air bag systems
Z
01.9.21/A33-D/V5.0
X
Page 36 of 247
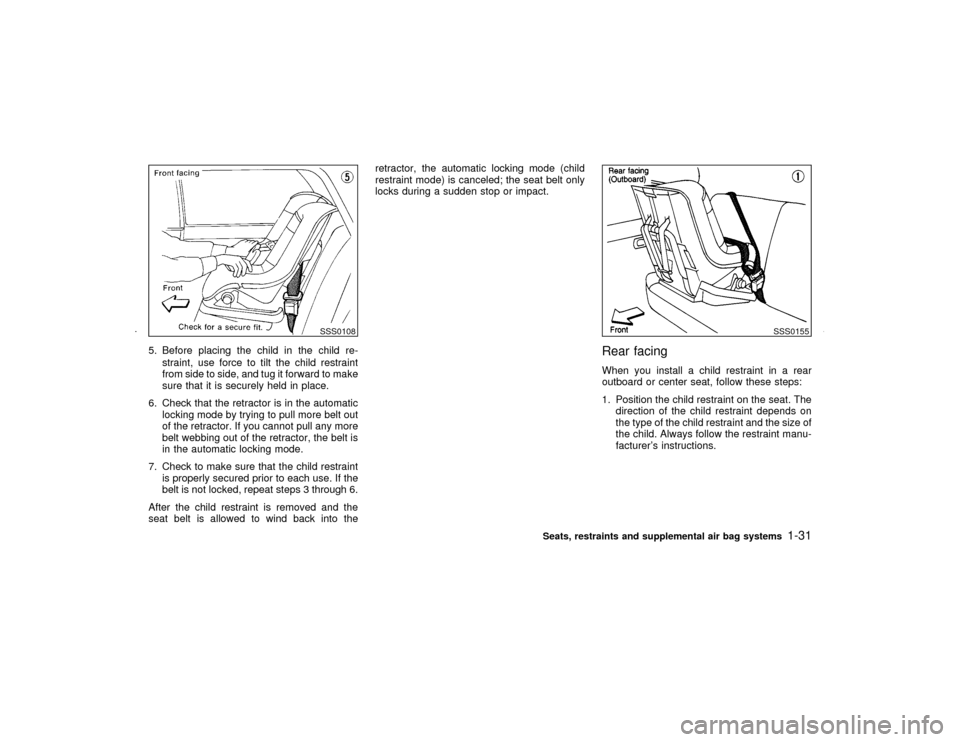
5. Before placing the child in the child re-
straint, use force to tilt the child restraint
from side to side, and tug it forward to make
sure that it is securely held in place.
6. Check that the retractor is in the automatic
locking mode by trying to pull more belt out
of the retractor. If you cannot pull any more
belt webbing out of the retractor, the belt is
in the automatic locking mode.
7. Check to make sure that the child restraint
is properly secured prior to each use. If the
belt is not locked, repeat steps 3 through 6.
After the child restraint is removed and the
seat belt is allowed to wind back into theretractor, the automatic locking mode (child
restraint mode) is canceled; the seat belt only
locks during a sudden stop or impact.
Rear facingWhen you install a child restraint in a rear
outboard or center seat, follow these steps:
1. Position the child restraint on the seat. The
direction of the child restraint depends on
the type of the child restraint and the size of
the child. Always follow the restraint manu-
facturer's instructions.
SSS0108
SSS0155
Seats, restraints and supplemental air bag systems
1-31
Z
01.9.21/A33-D/V5.0
X