2002 NISSAN MAXIMA start stop button
[x] Cancel search: start stop buttonPage 131 of 247

FF (fast forward), REW
(rewind):
Push either the FF or REW button for the
desired direction.
The FF or REW symbol illuminates in the
display.
To stop the FF or REW function, press the FF
or REW button again, or the TAPE/CD button.APS (automatic program
search) FF, APS REW:
Push either the APS FF or APS REW button
while the cassette tape is playing. The tape
runs quickly, stops, then plays the next selec-
tion. Either the FF or REW symbol flashes in
the display while searching for the selection.
This system searches at the blank intervals
between selections. If there is a blank interval
within one selection or there is no interval
between selections, the system may not stop
in the desired or expected location.
PROG (program):
Push the PROG button. The moving digital
squares illuminate on either the right or left
side of the display window to indicate the side
of program play.
If the PROG button is pushed during either theFF or REW function the tape enters the normal
play mode.
Dolby NR (Noise Reduction):
Push the Dolby NR
button for Dolby NR
encoded tapes to reduce high frequency tape
noise. The
indicator light comes on.
Dolby NR is manufactured under license from
Dolby Laboratories Licensing Corporation.
DOLBY NR and the double-D symbol
are trademarks of Dolby Laboratories
Licensing Corporation.
Metal or chrome tape usage:
The cassette player is automatically set to high
performance play when playing a metal or
chrome cassette tape.TAPE EJECT:
Push the EJECT button. The cassette tape
automatically comes out.
Compact disc (CD) player/changer
operationTurn the ignition key to the ACC or ON posi-
tion.
To play the CD, push the TAPE/CD button
after loading the disc.
If the disc loaded, the number of discs andtracks will appear on the display.
If the radio or tape is already operating, it will
automatically turn off and the CD will play.
CAUTION
Do not force the CD into the slot. This
could damage the player.
If the system has been turned off while the CD
was playing, pushing the ON×OFF/VOL control
knob will start the CD.
8 cm diameter CD can also be used without an
adapter.
PLAY:
IWhen the TAPE/CD button is pushed with
the CD loaded in the player or CD au-
tochanger (if so equipped):
a) If the TAPE player (if cassette tape is
inserted) is turn on, the mode (CD
player or CD autochanger) will turn on.
b) If the CD player turns on, the CD player
will automatically be turned off and the
CD autochanger will turn on.
c) If the CD autochanger turns on, the CD
autochanger will automatically be turned
4-26
Heater, air conditioner and audio systems
Z
01.9.21/A33-D/V5.0
X
Page 145 of 247

3 (Third gear):
For driving up or down long slopes where
engine braking would be advantageous.
2 (Second gear):
Use for hill climbing or engine braking on
downhill grades.
Do not exceed 68 MPH (110 km/h) in the 2
(Second gear) position.
1 (Low gear):
Use this position when climbing steep hills
slowly or driving slowly through deep snow,
sand or mud, or for maximum engine braking
on steep downhill grades.
Do not exceed 37 MPH (60 km/h) in the 1 (Low
gear) position.
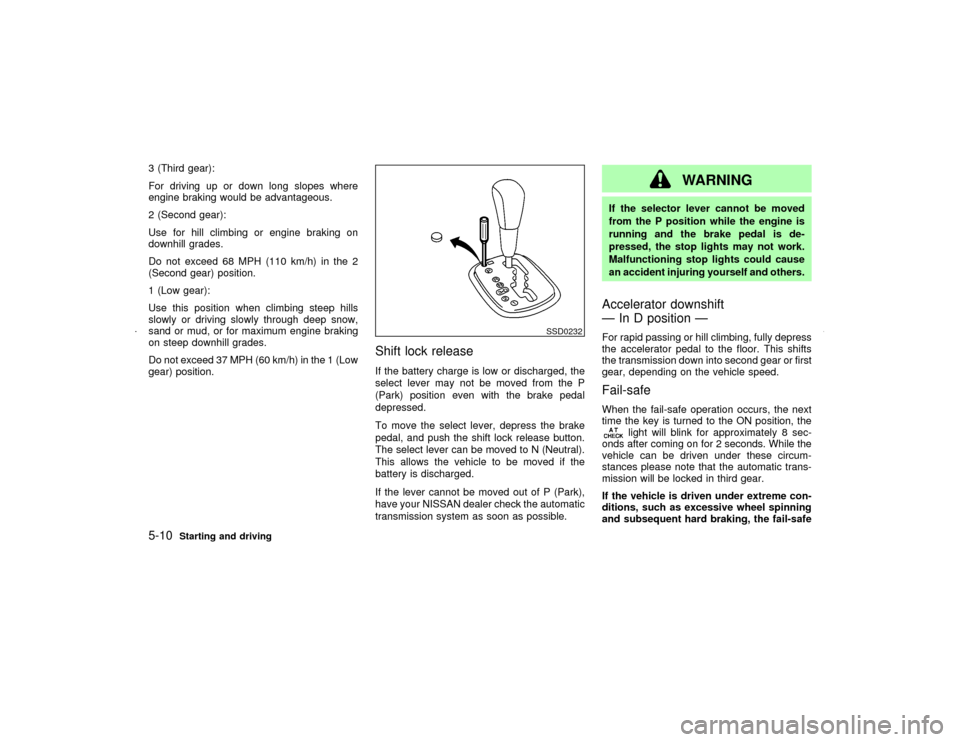
Shift lock releaseIf the battery charge is low or discharged, the
select lever may not be moved from the P
(Park) position even with the brake pedal
depressed.
To move the select lever, depress the brake
pedal, and push the shift lock release button.
The select lever can be moved to N (Neutral).
This allows the vehicle to be moved if the
battery is discharged.
If the lever cannot be moved out of P (Park),
have your NISSAN dealer check the automatic
transmission system as soon as possible.
WARNING
If the selector lever cannot be moved
from the P position while the engine is
running and the brake pedal is de-
pressed, the stop lights may not work.
Malfunctioning stop lights could cause
an accident injuring yourself and others.Accelerator downshift
Ð In D position ÐFor rapid passing or hill climbing, fully depress
the accelerator pedal to the floor. This shifts
the transmission down into second gear or first
gear, depending on the vehicle speed.Fail-safeWhen the fail-safe operation occurs, the next
time the key is turned to the ON position, the
light will blink for approximately 8 sec-
onds after coming on for 2 seconds. While the
vehicle can be driven under these circum-
stances please note that the automatic trans-
mission will be locked in third gear.
If the vehicle is driven under extreme con-
ditions, such as excessive wheel spinning
and subsequent hard braking, the fail-safe
SSD0232
5-10
Starting and driving
Z
01.9.21/A33-D/V5.0
X
Page 147 of 247

IWhen the vehicle is stopped for a
period of time, for example at a stop
light, shift to N (Neutral) and release
the clutch pedal with the foot brake
applied.Suggested up-shift speedsShown below are suggested vehicle speeds
for shifting into a higher gear. These sugges-
tions relate to fuel economy and vehicle per-
formance. Actual up-shift speeds will vary ac-
cording to road conditions, the weather and
individual driving habits.
For normal acceleration in low altitude areas
[less than 4,000 ft (1,219 m)]:
Gear changeACCEL shift
point
MPH (km/h)CRUISE shift
point
MPH (km/h)
1st to 2nd 13 (21) 13 (21)
2nd to 3rd 23 (37) 16 (26)
3rd to 4th 33 (53) 27 (43)
4th to 5th 39 (63) 36 (58)
5th to 6th 50 (80) 50 (80)
For quick acceleration when the engine is cold
or in high altitude areas [over 4,000 ft (1,219
m)]:Gear change MPH (km/h)
1st to 2nd 15 (24)
2nd to 3rd 25 (40)
3rd to 4th 40 (64)
4th to 5th 45 (72)
5th to 6th 50 (80)
Suggested maximum speed in each
gearDownshift to a lower gear if the engine is not
running smoothly, or if you need to accelerate.
Do not exceed the maximum suggested speed
(shown below) in any gear. For level road
driving, use the highest gear suggested for
that speed. Always observe posted speed
limits, and drive according to the road condi-
tions, which will ensure safe operation. Do not
over-rev the engine when shifting to a lower
gear as it may cause engine damage or loss of
vehicle control.
Gear MPH (km/h)
1st 30 (48)
2nd 55 (88)
3rd 80 (128)
4th Ð
5th Ð
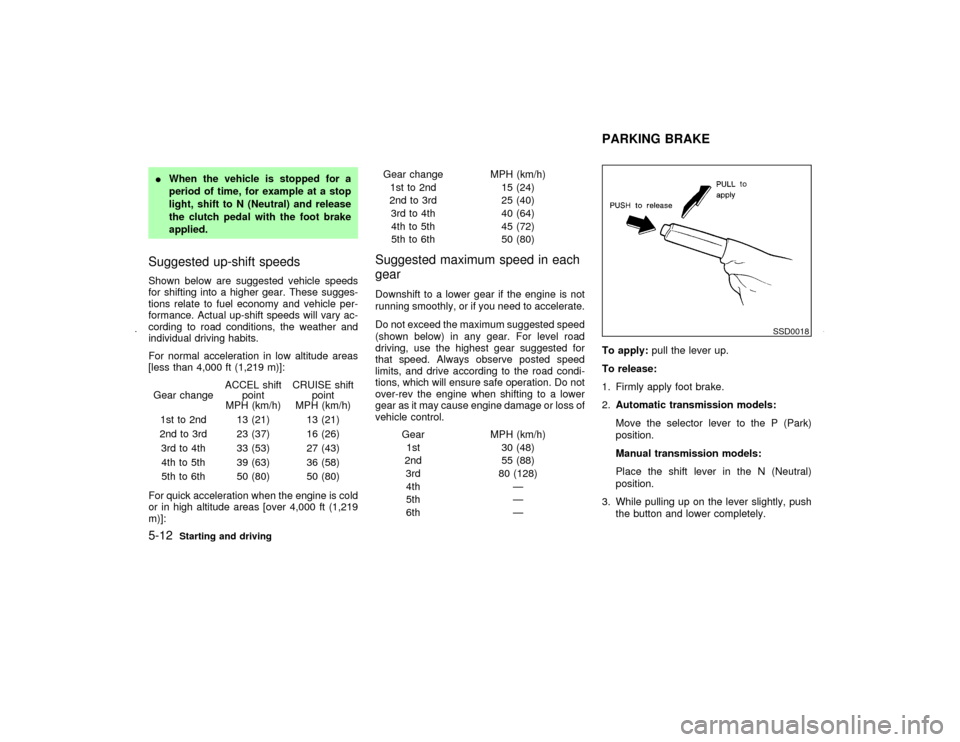
6th ÐTo apply:pull the lever up.
To release:
1. Firmly apply foot brake.
2.Automatic transmission models:
Move the selector lever to the P (Park)
position.
Manual transmission models:
Place the shift lever in the N (Neutral)
position.
3. While pulling up on the lever slightly, push
the button and lower completely.
SSD0018
PARKING BRAKE
5-12
Starting and driving
Z
01.9.21/A33-D/V5.0
X
Page 152 of 247

WARNING
ISafe parking procedures require that
both the parking brake be set and the
transmission placed into P (Park) for
automatic transmission models or in
an appropriate gear for manual trans-
mission models. Failure to do so
could cause the vehicle to move un-
expectedly or roll away and result in
an accident.
IMake sure the automatic transmis-
sion selector lever has been pushed
as far forward as it can go and cannot
be moved without depressing the
button at the end of the lever.
3. To help prevent the vehicle from rolling into
the street when parked on a sloping drive
way, it is a good practice to turn the wheels
as illustrated.
IHEADED DOWNHILL WITH CURB:
q1
Turn the wheels into the curb and move the
vehicle forward until the curb side wheel
gently touches the curb.IHEADED UPHILL WITH CURB:
q2
Turn the wheels away from the curb and
move the vehicle back until the curb side
wheel gently touches the curb.
IHEADED UPHILL OR DOWNHILL, NO
CURB:
q3
Turn the wheels toward the side of the road
so the vehicle will move away from the
center of the road if it moves.
4. Turn the ignition key to the LOCK position
and remove the key.The power assisted steering is designed to
use a hydraulic pump, driven by the engine, to
assist steering.
If the engine stops or drive belt breaks, you will
still have control of the vehicle. However,
much greater steering effort is needed, espe-
cially in sharp turns or at low speeds.
WARNING
If the engine is not running or is turned
off while driving, the power assist for the
steering will not work. Steering will be
much harder to operate.POWER STEERING
Starting and driving
5-17
Z
01.9.21/A33-D/V5.0
X